Mantua, New Jersey
Original Site:
September 2004
E-mail: usav8or@yahoo.com
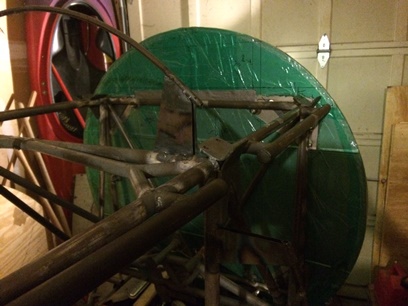
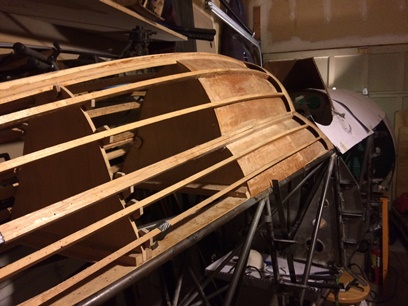
The Radical Radial Firewall.
August 4, 2016 Making circles ?
Going in circles... ???
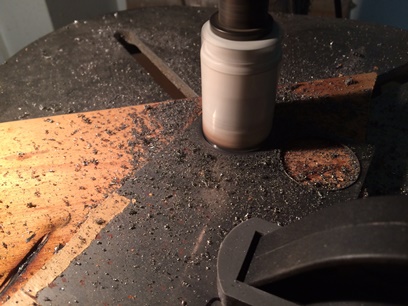
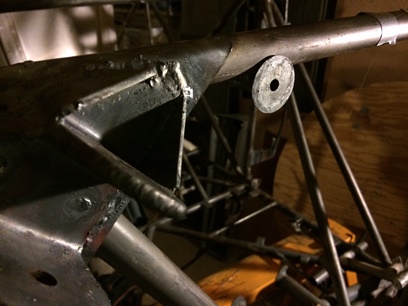
Custom made washers... yup, that's what I made today.
Do you need to make custom made washers ??? Not sure... haven't looked to see if I could buy them in plain steel. Plain steel 'cause you don't want to be messing with the fumes released from welding washers finished off with a coating. At least... I don't !
By the way... I just looked for washers on the Aircraft Spruce site and they do have plain steel washers for the motor mounts. They're between 9.00 and 12.00 each... and they're not the dims I need. So to answer my above question... I think that I did need to make these.
Made them out of .050; close to the thickness of the reamed out .375 x .o65 tubing for the 1/4inch bolts. Lucky for me the drill bit in the hole saw cutter is 1/4inch... beautiful ! After cutting the holes out of the 4130... needed to clean them up; filed the edges (make sure there is no flashing left to cut into the stainless steel firewall) then finish with a fine sandpaper.
August 5, 2016 Big hours...
little steps.
Little steps, Jerry... little steps.
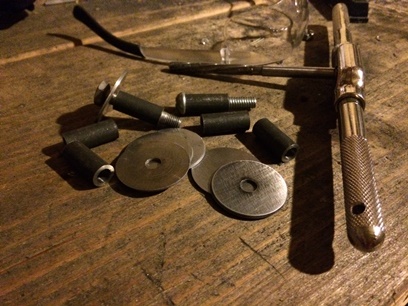
Lately, it seems like everything I do takes 1point5 hours to complete. Tonight it was welding the washers (1.9hrs) and the bushings (2.1hrs) together to create the firewall mounts; I stand corrected on the hours thingie. Five point five hours to make these mounts. WOW ! It's either make them or wait for hell to freeze over. Or I could have made something a little bit less substantial... but, there's going to be a whole lot of shakin' with the Jake... any radial for that matter. Thus, the substantial mounts.
Don't get me wrong, I'm not pissed about it taking 5.5hrs; I actually enjoy every minute, every step of the way. Maybe if I was doing the build for just the finished product... the biplane, I'd be really pissed, but the point of all this build is the build.
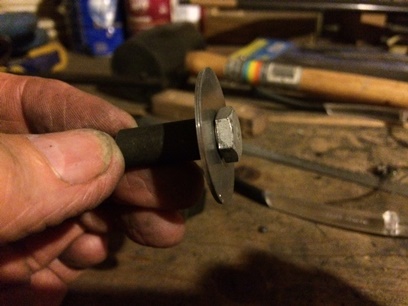
Mounts ready for mounting.
August 6, 2016 Tacked on...
a few hours.
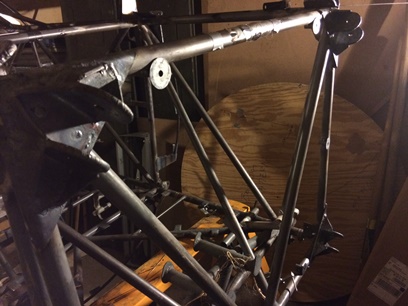
They're on... tacked welded the firewall mounts to the fuselage. Yes ! Two on the top and bottom tubes and one on each of the verticals...
Let them sit over night... look at them tomorrow with a test fit of the firewall... then finish weld. Then it's on to fitting up the forward, and only, sheet metal (other than the metal around the tops of the cockpits).
Bringing this full circle... I've appreciated every part of getting the firewall to this point; the search and making of the motor mount fittings, making the firewall mounts, making the firewall and all it's parts... and now it's close to the final step in this series of iterim steps. Every step a feel good feeling.
August 7, 2016 re-Tacked on...
a few hours.
As promised... a day later, I took a look at the firewall mounts and wasn't happy with the first one I had tacked on. So... needed to cut the tacks and re-weld into the correct positon (it was slightly skewed). Didn't have any cut-off discs for my Dremel so needed to push through the process using a grinding stone attachment for the Dremel. So... un-tacked, but while tapping the mount with a makesift chisel I hit the mount next to it with the hammer and it POPPED right off. So... needed to re-tack that one as well.
With everything where it needed to be I fitted up the firewall again. Same fit as before... great !
August 8, 2016 In a state of re-
dos.
Thought I was just going to double-check the location of the firewall and hesitantly drill those first few holes. NOT !
I was in a constant state of re-doing; re-tacking, re-reaming... Tomorrow night I'll go back and re-check all my re-do...
August 9, 2016 Still in a state of re-
dos.
Still there... haven't left.
The firewall looked fine, probably was fine. But... I wasn't fine with it. Not sure why or why not. Maybe some of that hesitation ??? Also, it's kind of Jerry-rigged; the horizontal piece of wood holding it at the right hieght is taped into place with duct tape. How good is that ???
Looked good, but I didn't have a good felling about it. Wanted to attach something that was more ridged to it; something that I could clamp onto it so it wouldn't move. Messed with it for over an hour; re-stricking the line, making sure the vertical line was centered, looking for something to clamp onto the piece. Didn't find anything... I'll ned to cut something tormorrow.
Also tried drilling a hole into a piece of stainless with a wood backing block. Not so pretty. Figured, I need to drill enough to make a good dented, center point to which I can then use the Unibit to drill the quarter inch holes. Glad I did a test... 'cause the hole was all gnarled up with my original thought...
August 10, 2016 Could this be the last re-
do
???
And... Still there... haven't left.
Took a closer look at the firewall. I wanted to shift it slightly to the Port side. So... needed to file two edges of the upper Port opening to allow for the shift. Filing the edge of very thin stainless isn't a fast process. So, I took it slow.
Sweating my ass off there in the garage workshop. It's over 90degrees outside and just a little bit cooler in the garage. Anyway, got the filing to where I thought it needed to be and tried it out on the front end of the biplane again. Nice fit !
Made sure things were centered; spanned the large boxed piece of tubing, I use for a straight-edge, on top of the beast and it was beautiful (at least on the top from the firewall back to the upper former in the rear cockpit. That's what I was looking for.
Again, I'm leaving it sit over night to make sure that I am happy with the alignment of things. Then... hopefully, I'll pull the trigger on the drill and start putting those 1/4inch holes in it.
August 11, 2016 The firewall;
it ain't movin'.
Take a look at the photo... you might think that it doesn't look like there's much difference between last night and today. But, you would be oh so wrong.
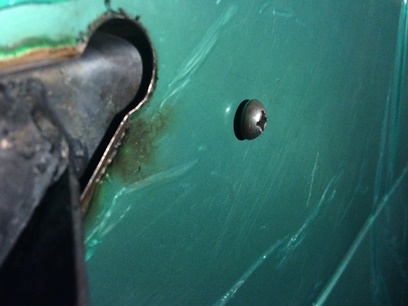
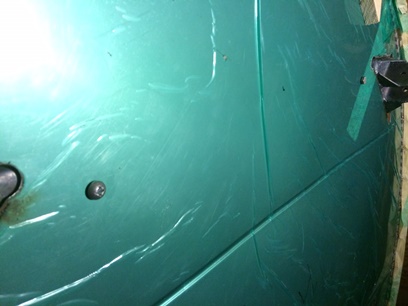
Yup, I did it. I marked the holes and drilled four of the six that needed to go through the firewall to hold it into place. Only four because I need to get a longer 1/4inch drill bit to drill the lower one (the truss for the gear is kind of in the way of the drill).
That's it... Good Night.
First bolt through. (temporary hardware)
Two bolts through.
August 12, 2016 A little work...
and a little playin'.
Made the holes for the final two bolts. Didn't need a longer drill bit. All I needed to do was mark the spots where the holes needed to go. Found a short length of threaded steel. Attached it to the back of the 1/4inch drill bit (so that's where that drill bit is... that I've been looking for) and tap the back of it until I made indents in the two areas. Took the firewall off the fuselage. Laid it on the make-sift table and drilled the holes; first with a centering bit then with the Unibit.
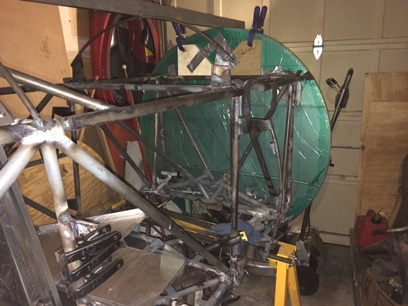
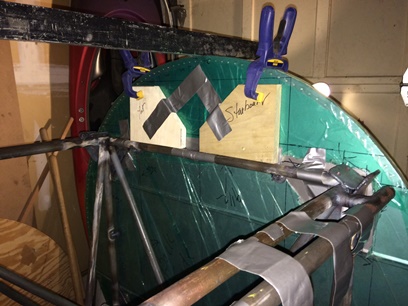
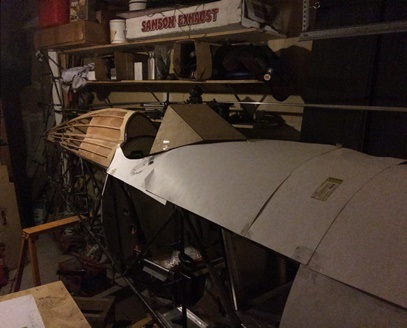
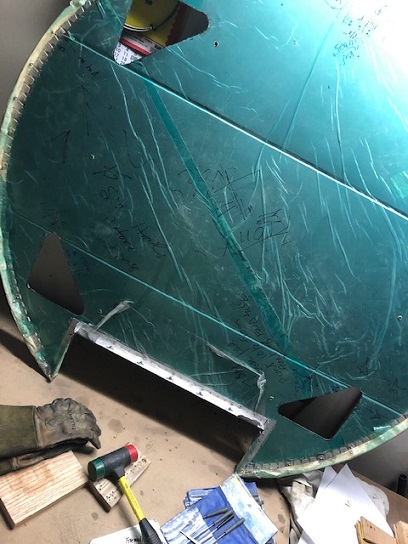
Test fit the firewall and all six bolts fit right in. NICE ! But then I couldn't stop there... had to play with it for a little bit. Found enough display board where I could actually cover the one side of the fuselage to give me a looksee to how it will look. Yeah, yeah... not advancing the project, but ya need moments like this to keep things moving forward.
These photos kind of give you the flavor of what it's going to look like, but there's another 44inches in front of the firewall that will be covered with a cowling. So... it's gonna have a nice long nose with just a single pit.
January 29, 2022 Back to zero...
Station Zero.
Station Zero is the firewall.
If you're been following the build, you know that I just finished making the engine mount. I had three of the four bolts bolting it up to the airframe when I remembered I wanted to finish cutting the adjusted holes for the new engine mounting brackets (being a homebuilt I didn't have them EXACTLY in the same place as the ones before.)
To cut the holes... I used the firewall pattern and the display board overlays to get the correct placement for the holes over the newly positioned brackets (see previous images, in
past posts of that "jig"). Marked and then cut those out. At this point the holes where slightly different in shape. Not happy with that, I traced all four shapes out on display board,
cut them out then stacked the four shapes to create a shape that would cover all of them. Cut out the new triangle pattern... traced that over each of the four existing holes then used snips to cut
off the excess stainless steel (not sure why I didn't use snips to begin with... I was always using a cut-off wheel which didn't leave perfect lines that needed tending too and left slag I had to file off).
The snips worked beautifully... All I needed to do was clean up the little ridges that the snips left from their blades. Easy enough.
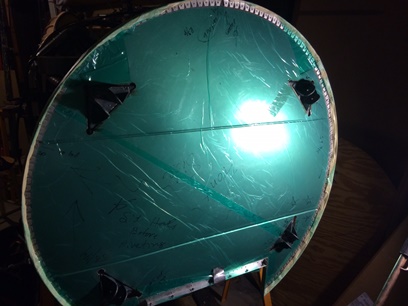
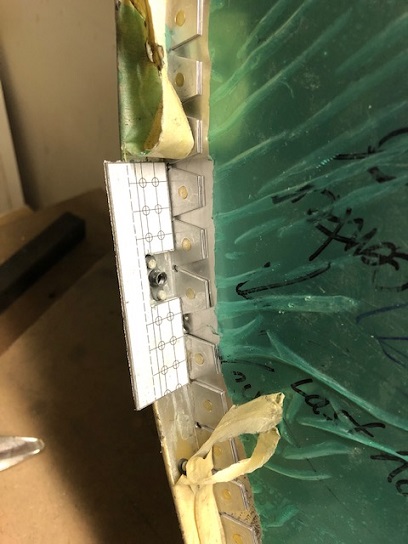
One last thing to do before attaching the firewall back onto station Zero. The circumfrence of the firewall, for its 44" diameter circle, is 276.46inches. Even with the opening in the bottom I needed to make the frame of the firewall in two pieces. Thus... I needed one area to join the two. I decided to have it at top dead center (me liking symetrical). I now need to create a reinforcing plate to join the two.
Decided to make the plate out of aluminum, just like the firewall frame. I'll glue it into position with T-88, then reinforce that with a line of 3/32nd flush rivets to give me piece of mind. As of right now, I have designed the reinforcing plate, and also cut it out. Now I need to do the glueing and riveting...
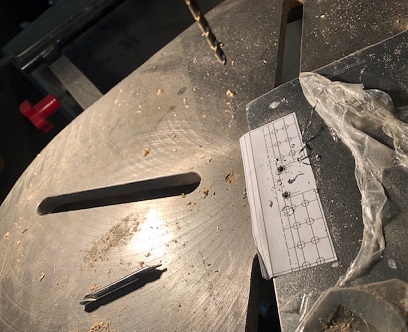
Four holes... all the same shape and size.
Drilling holes...
The overhang to give it extra metal to help in reinforcing the area.
With the engine mount completed (and just about hung), and with the next step of creating the cowling for the engine, I see the light. All these parts and pieces I've been making for all of these years are coming together in my head to make that biplane I've been working towards completing.
I'm not even at that 90 percent done, 90 percent to go point, but I'm feeling a completness not far down the road. After the cowling, and maybe at the same time, I will begin working on again and finishing up the upper wing center section and then onto the wings.
Looking at the last post I made in this section... back in 2016. Close to six years... and back on the firewall's finishing touches before hanging the Jake.