Mantua, New Jersey
Original Site:
September 2004
E-mail: usav8or@yahoo.com
The Radical Radial Firewall.
June 20, 2015 Working on...
the business end.
I'm not sure where I've been putting all of my thought about the firewall... maybe nowhere except pushing them to the back of my mind ???
I'm getting serious about making the firewall now. I NEED TO !!! There's a few ways you can go about making it.
First off... the material; stainless steel or galvanized steel. You hear about the weight difference and cost... but for the size piece you'll be putting on the biplane there ain't much different between the two. I went with the stainless. It's a lot more purty looking. Get a piece that is .017 - .019 thick. Actually... I got 26 gauge which is .0179 thick.
getting back to making it... You can make a wood form, leave about 1/2inch of metal overhanging and bang it around to form the flange. I hear that it's close to impossible to do a nice job by doing it this way and with the cost of stainless steel... I'm not doing it.
The second method (which I'm doing) is to use a piece of L-shaped aluminum angle to form the flange. There are two ways to form the bend in the flange; notch the aluminum angle or shrink/stretch the bend. Notching is the cheaper way to go 'cause you don't need to buy a shrinker/stretcher, but it's also the cleaner looking of the two ways.
Me... I think I'll bend it by hand like I did with the tubing for the stabs...
July 13, 2015 Stainless Steel...
more learning.
First step: cut sheet to a managable size, 48inch x 48inch.
The stainless steel bends VERY easily. NOT a good thing. I cut this with a pair of tin snips. I allowed enough extra material that the bending motion I was making will be cut off. I just may buy an electric shearer. I hear they work great cutting the stainless steel.
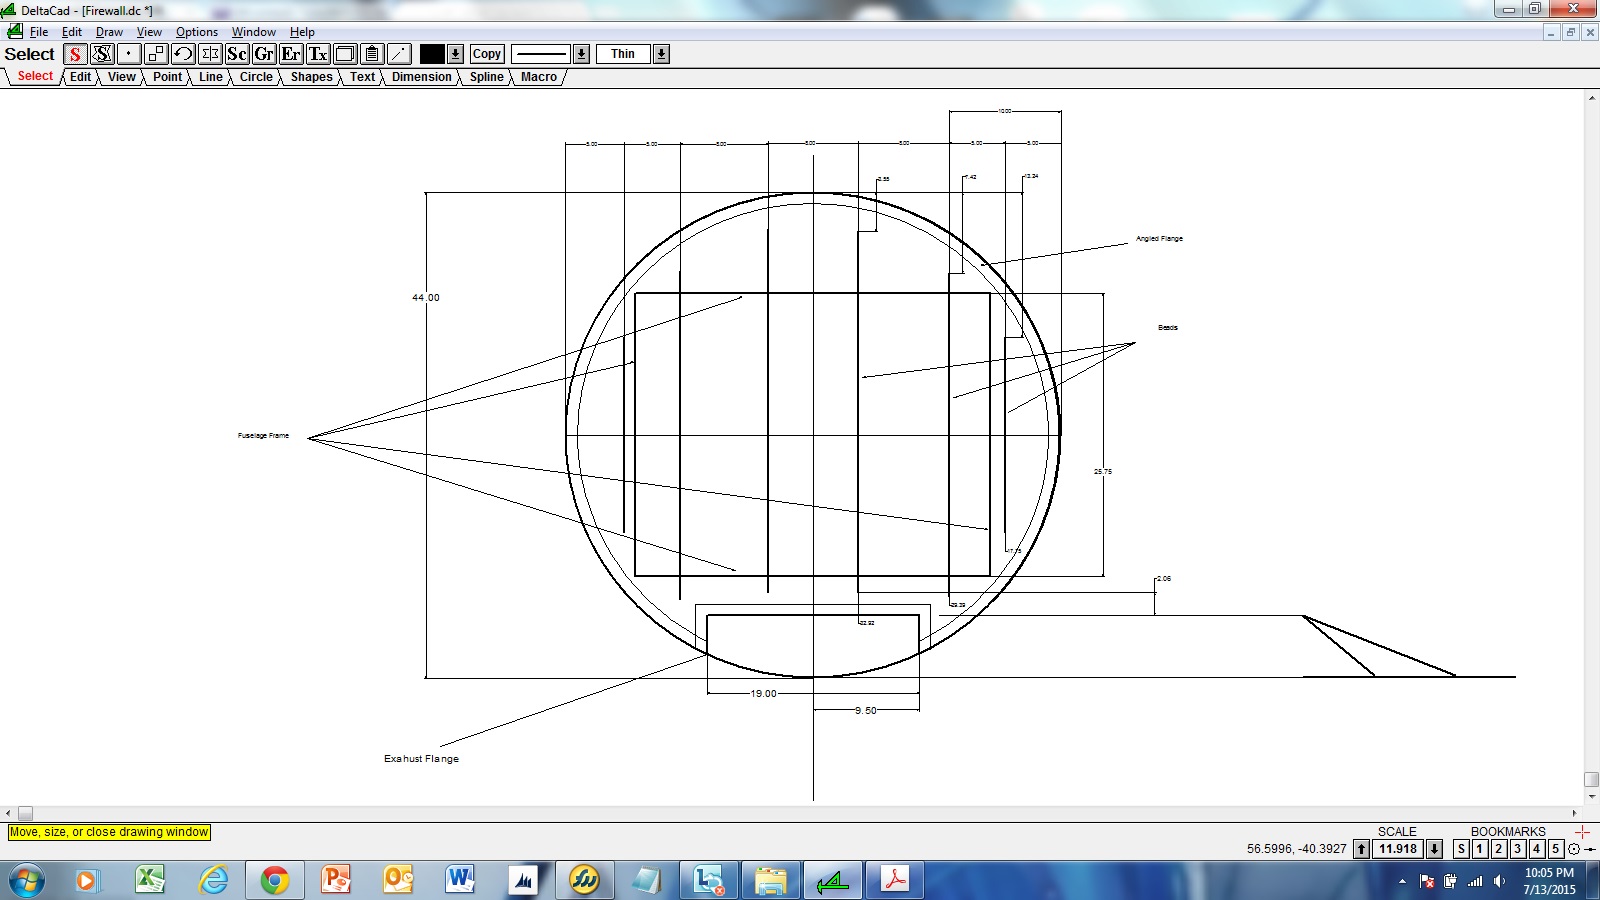
Needed to figure out where I wanted to put the beads I'll be rolling in the fires wall to help keep it from oil canning. Took a few measurements on the frame out in the garage workshop and then headed to the computer to draw it all up on the CAD.
Got it all down on paper... just need to do it now. AND... I still need to figure out this riveting stuff !
Click on image for larger view.
July 15, 2015 Stainless Steel is easy to...
but not easy to...
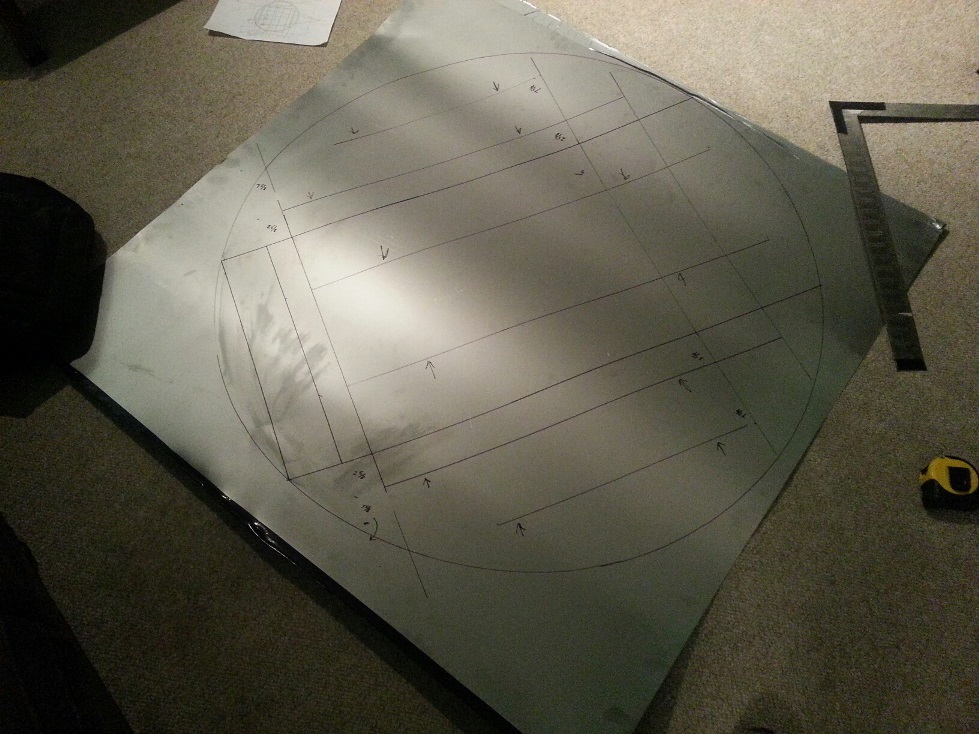
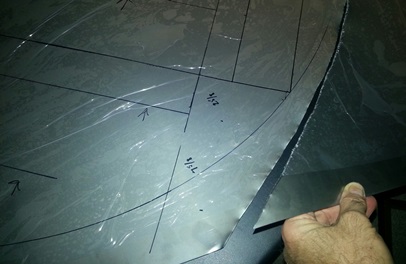
no hesitation... plowed right into laying out the firewall. Laid the Big ol' plywood firewall pattern on the stainless sheet and marked the circle... and made a few scratches. DAMN !
I heard that the stainless steel scratches easy but this ??? I sanded the one side of the ply to prevent this ! DAMN ! Dents easy. Bends easy. Scratches easy. BUT... I heard you can't drill it very easily... when it heat's up it hardens.
I just may need to intentionally scratch it by "fish scaling" it like some other builders have done. If so, all this laying out work has been for naught.
July 16, 2015 Cutting by hand...
cheaper, more precise, but also more time.
Posted my questions to the Biplane Forum: Can you sand out the scratches? and... Is there anything that you can put on it to prevent any additional scratches?
A few replies: "Probably can't match the finish on the metal that's on there now." "You won't see them with all the stuff you're mounting on the firewall." Then Larry wrote: "Do a search for carpet protector sheet."
Typed that into Google and found a few options on Amazon. Was just about ready to pull the trigger on buying a roll and thought I'd give one of the Big Box stores a search. The online search showed that they had it in stock in the store down the street from me. Picked up a roll for $11.50 and covered both side of the piece I was working on.
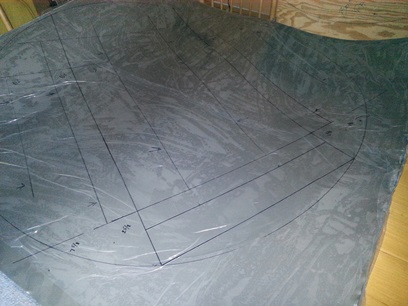
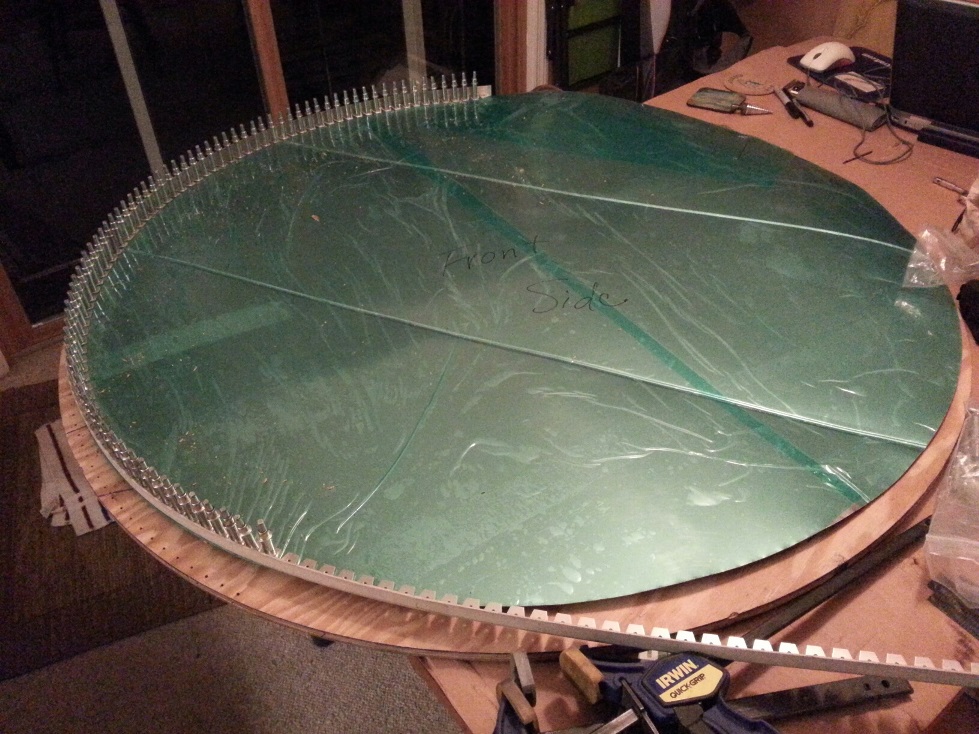
With the stainless steel sheet protected I could start working on cut that big ol' circle out... by hand. 123.25inches for rough cutting the shape out so that I could get a good cut on it without bending the metal too much, then 123.25inches to cut the circle to the line. Two hours... and it looks real nice.
I'll make the flange for it. Rivet it on then file to match the curve of the flange... to the 44" diameter circle.
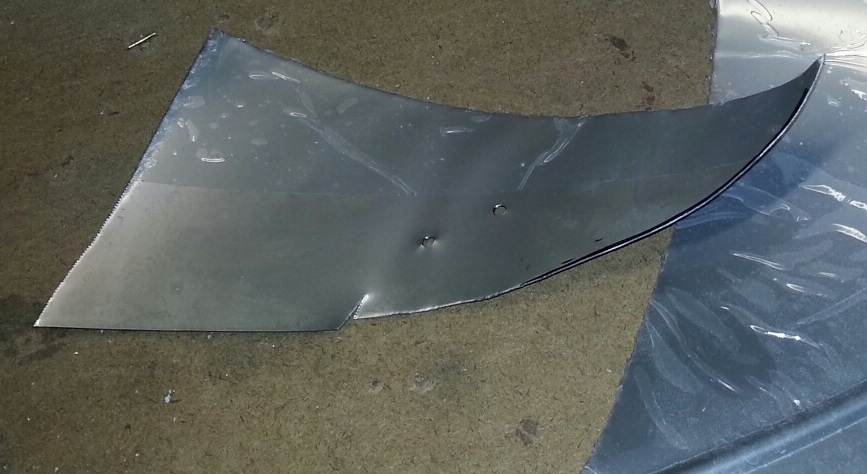
Film protection. Not pretty... but does the job.
Cut to the line. Ready for the flange.
Still needs exhaust port cut.
July 18 and 19, 2015 126 notches...
and 252 holes.
Decided to go with notching the flange for the firewall. Like the look of the notched flange (gives it that hand crafted look...) on the turtledeck deck door.
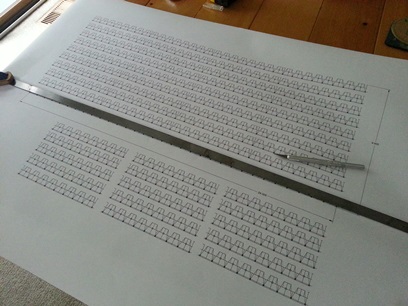
One helluva lot of holes to drill. 252... count them ! 252 holes... And that's not counting the process of me using the centering drill to start the holes for the #40 drill bit... for the rivets. add ANOTHER 126 pulls on the drill press lever. Took all of five hours to drill all those holes. 126 (or there abouts) stress relieving holes for the bend and 126 holes for the rivets.
I learned something (maybe again) today: take your time when drilling through aluminum. Allow the aluminum to spin up in a spiral. If you do this you won't have any, or much, slag to clean off/debur. Didn't discover this until I was 1/2way through drilling this flange. Good to know. Much cleaner deburring... for this novice.
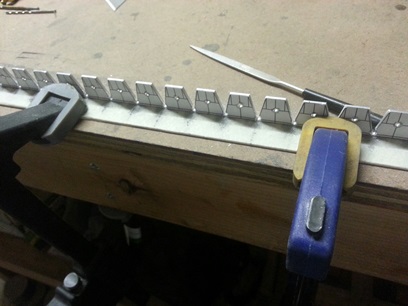
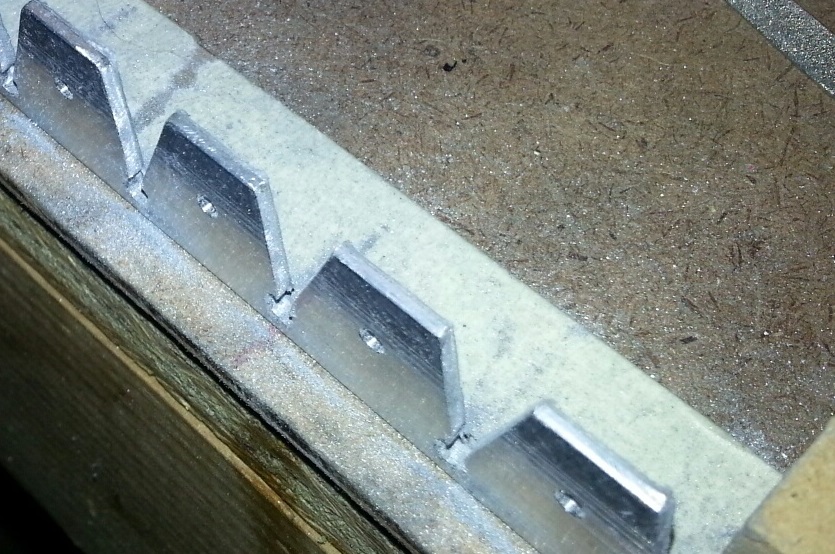
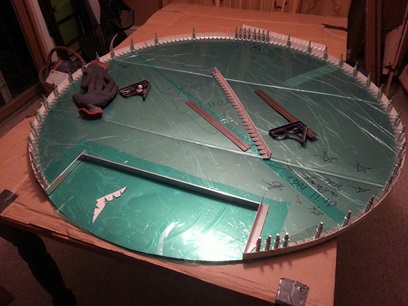
Fast forward to Sunday night. Had a little time to work on the project before Sunday turned into Monday. Put another 1.2hours on the biplane project. Cut the notches on this first firewall flange. Still need to file and sand the edges to a show winning smoothness :).
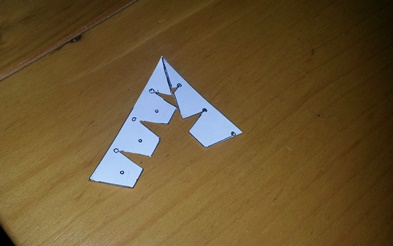
Paper pattern.
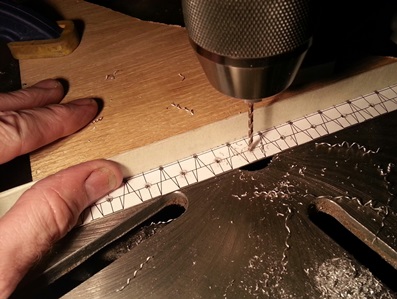
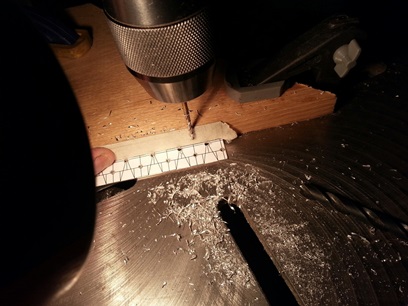
Jig for keeping distance from the upright the same on all holes.
July 20, 2015 Too much...
of a good thing ?
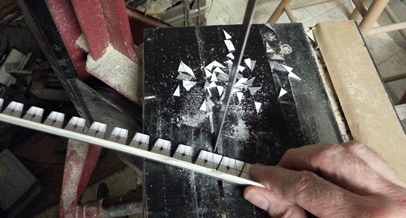
From cutting the notches on the bandsaw... there was nothing but rough edges around each of those 126 notches. Each notch had two sides !
okay... just do it. It won't take too long, will it ? ... ? I take one of the small diamond files (it's a good thing to have a lot of different size files... not that I know what to do with each type, but) and start filing.
and filing...
and filing... ...
and filing... ... ...
I've been filing for a while and decide to take a look at my progress. I'm about 1/3rd the way done. ONLY 1/3rd !
Thoughts start running through my head: "Do I really need to do this?" "Do I really need to do this good of a job on it?" "Maybe I'll just stop for tonight and finish it tomorrow..." "What is time ? Is it just distance traveled ?"
Whoa... back to the project until... just back to the project. "Do I really need to file the edges of these notches ?" Hell yeah... not just to look good but because it's the right way to do it. And I'll do a helluva good job doing it ! And I'm not stopping now. What... stop and watch some tv ? Seriously ? I can relax a little AFTER I finish filing the edges on these notches.
so... I grind through filing the edges of the notches. My mind wanders between "Do I really need to do this. and... trying to figure this Time thing out. I'm enjoying the process but it's just too much of one process for one person to enjoy in one sitting.
Close to three hours later and I have all the notches filed. Yeah... three hours. I still have another eight feet of firewall flange to do... what's that ? Another 9 hours of same ol' same ol'.
July 21, 2015 Still... too much of a good thing.
Moving on to something else for a respite ?
Three separte work sessions today/tonight; lunch, before Phillies game and after Phillies game.
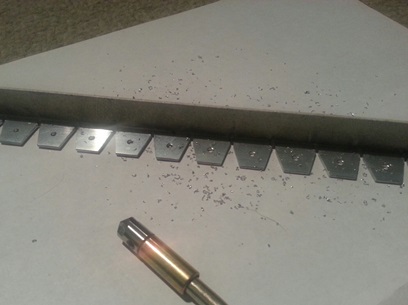
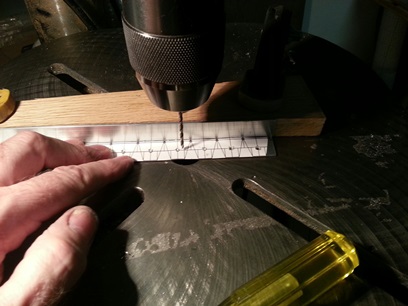
During lunch I worked on the first firewall flange; more filing of the edges and then started sanding edges. Ate up time instead of a sandwich for lunch. After work hours, after looking at what appeared to be no much forward progress, I said, "What the hell." and decided to work on the second firewall flange. So far I've put 2.4hrs on the second flange and I'm only finsihed with drilling the rivet holes: centering drill to mark the hole and keep the other bit from drifting then drill through with the #40 bit.
Let me tell you (again)... drilling with slow even pressure with the drill press makes some nice, almost burrless holes.
Still need to deburr these holes... just a little
Second firewall flange.
July 23, 2015 More holes.
I'm done with more holes.
Over the past few days I've drilled A LOT OF HOLES !!!
504 holes drilled... pulling the drillpress lever a total of 856 times. Deburred just as many holes.
I gotta tell ya... that simple little jig I made to hold the bit a certain distance from the edge of the vertical piece of the "L" worked like a charm. All I needed to do was center the bit left-to-right.
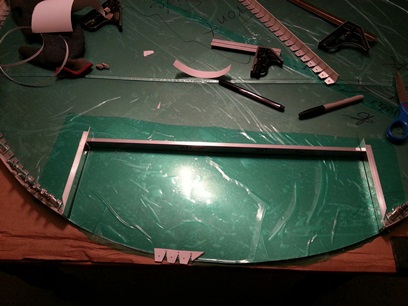
Ready for notch cutting.
July 25, 2015 More notches.
I'm done with more notches.
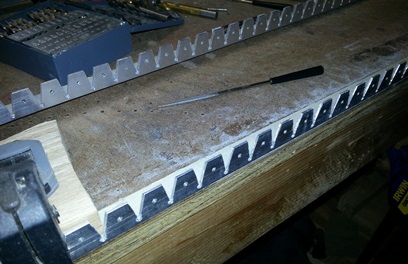
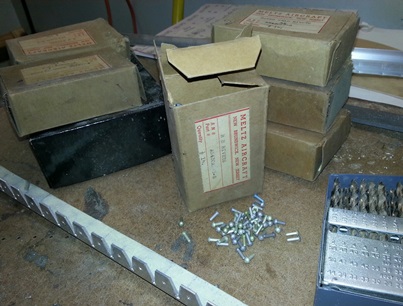
but, hey... I found some rivets !
More of that repetition... notching, and filing of 126 nothces. At times like these I think of the fact that I'm making a hand-crafted biplane. and... to that point, this is all a part of it.
I have the radio on, but most of the time I'm thinking of anything and everything. About 3/4 of the way through today's work session I thought of finding the rivets I got from Gus back in 2007. They're in a milk crate and I know just where it is. All I need to do is look through all those boxes to see if there are any 3/32nd rivets that are long enough to use.
Found a few boxes of 3/32nd rivets with the round head (yeah man !) and the length on them are plenty long. Just may need to trim them down with that rivet cutter I have still brand new in the box.
Close to 3 1/2 hours and it's ready to have the sides sanded smooth.
July 27, 2015 More sanding.
I'm so... done with more sanding.
But, I'm not down with it yet !
It'd be so easy to say... "Do I really need to do this; sanding what I've already fine-filed down ? Do I really need to sand it down too ??" Yeah... it's time consuming work with little to show for it but it's necessary to do. It's the right way to do it.
and so... I sand. A few hours tonight with 220 grit and tomorrow with 400. After that they'll be ready for fitting up to the stainless steel and riveted on.
220 grit... on to 400
August 4 and 5, 2015 Figuring out...
the Tatco rivet squeezer and...
waiting on more tools.
Ordered the deburring tools about a week ago... a few of them showed up yesterday and I had a chance to work on the flanges (for the turtledeck hatch and firewal flanges). Was able to deburr the holes (both sides) on all flanges. Nice working with this spinning Speedy Burr II. Makes quick work of deburring all those holes.
Speedy Deburr II and firewall flange.
The Speedy Deburr was only one of many metal working tools I bought recently; bought 100 additional 3/32nd clecos, #40 carbide drill bits, Tatco rivet squeezer and a few tips for the rivet squeezer. Heads up on the rivet squeezer... it doesn't come with the flat tip that hits the shaft of the rivet. Ya GOT TO BUY THAT TOO!!! It's one of the flush tips for squeezing flush rivets.
and... using that rivet squeezer... There's no instructions. Looks simple to use and it is. BUT, I wanted to be sure what I was thinking was what was the right way to use it. Looked all last night on the internet to find a set of instructions, a video or something that would show me how to use it. Nothin'. Right before going to bed I decided to look up the manufacture and send them an email to ask them if they had instructions.
Got an email back this morning. Asked me for a number that they could call to talk to me about it. Got a call from Rich... a nice guy that took the time to answer the few questions that I had. Nice ! Thank you Rich... the guy from Tatco.
Those tips you buy, that have a "C" clip on the shaft, DON't take it off. It helps lock the tip into the squeezer. Once it has been inserted you adjust the height of the set holder by inserting a small diameter rod into the 1/8th inch hole in the set holder... just like I thought. I used a small Allen wrench to try it out. Now all I need is the flush rivet tip and I can start practicing on a few rivets... then on to squeezing the multitude of rivets for the firewall and turtledeck hatch.
August 7 and 8, 2015 Figuring out...
the the rivet sets...
needing to buy MORE parts for it.
Spending time getting ready to rivet the flanges on both the turtledeck hatch and firewall. I had a lot more duburring and sanding to do before these could be riveted on...
Not having done much aluminum metal work before, there's a lot more deburring to be done than I had thought; both sides of the cuts and both sides of the holes. Bought an edge deburring tool and that didn't cut it for the flange notches. Had to do that all by hand with 400 grit sandpaper.
Started practicing riveting too. Got the other half of the rivet set that I needed but didn't know I needed 'cause there's nothing out there about it. HEADS Up: You need two, a top and a bottom, to have the "set" you need for squeezing a rivet. I THOUGHT that the tool came with the one flush set... Not so.
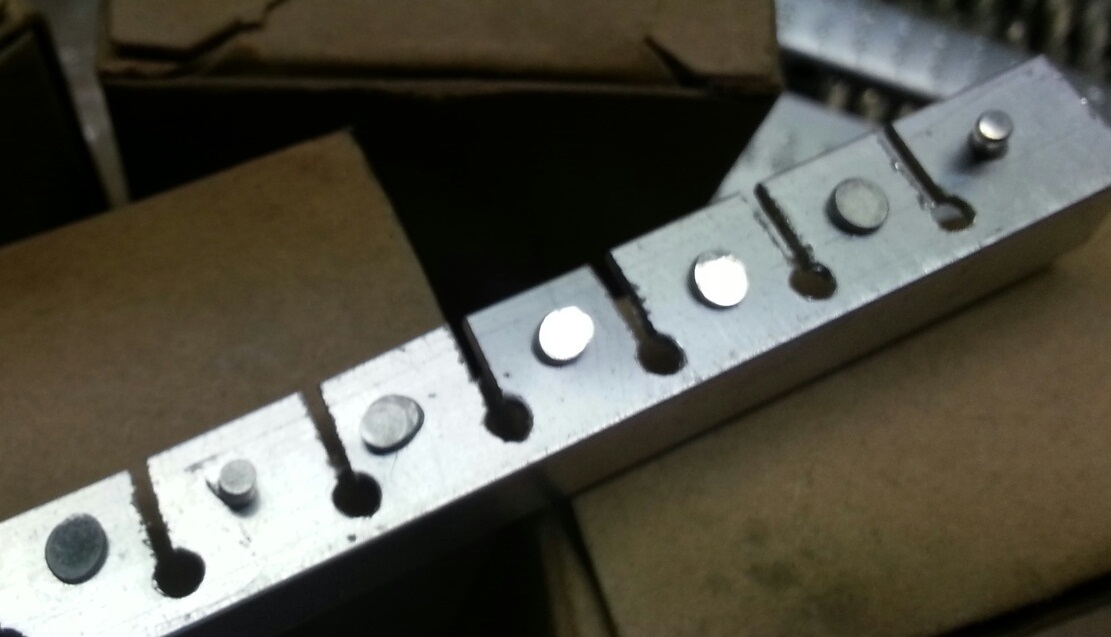
ok... so I order the flush side of the set (they came in various diameters but I figured the bigger the better). When I put the set (flush on one side and 3/32nd cup on the other) and started squeezing the rivets I discovered that the flush side was a little too large to use the rivet squeezer properly; it hit the side of the flange and kicked the cup side off center on the head of the rivet. This did two things... made the rivet head a little lop-sided and the part that I was flattening out was a little uneven. NOW I know why the flush set came in various diameter... AGAIN nothing that I could find said anything about this.
Click on images for larger images.
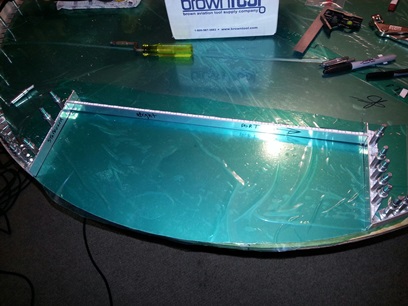
Vertical too close. Squeezer not properly aligned.
BAD rivet !
Better rivets. Enough room to squeeze rivet.
Still needs to be fine-tuned.
After a few tries I found it easy to squeeze the rivets and have a consistent flat head on the squishing side. If it weren't for the too large of a diameter flush side I'd be done the riveting on the hatch by now. But... I learn...
oh yeah... started fitting the flange on the turtledeck hatch; filing and sanding.
October 14, 2015 The myth...
of drilling stainless steel.
Grabbed the 44inch diameter piece of stainless steel (the firewall) to figure out what I needed to do with the beading on it.
Set up the Black and Decker Workmate (not even sure if they make these anymore) in the living room. Clamped the bead roller in it then set it up for running a few beads in the scrap stainless steel I had from cutting out the firewall. Easy enough to do with the small pieces of scrap. and... I was seriously thinking of beading the firewall but decided against fighting with that big piece of metal. I'll wait until I can get another pair of hands to hold it up and steady for me.
Since I was working on the firewall I thought I'd try drilling a few holes in a piece of scrap to test that "hard as hell" to drill theory. Dropped a spot of cooling oil on a piece. Chucked a number 30 bit and... drilled right through. Only problem was once it was through the sheet it pulled up on the metal and creased it slightly. I'll be drilling through the "L" flange which should keep it flat. Tried it a second time while clamping it tight on either side and it turned out a lot better.
soooo... it looks like I'm ready for drilling the rivet holes for the firewall once I have it beaded.
Click on image for close up of drilled stainless.
October 26, 2015 Close, but...
could be closer.
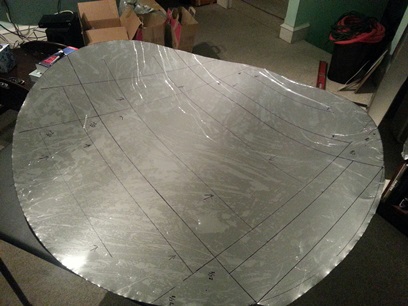
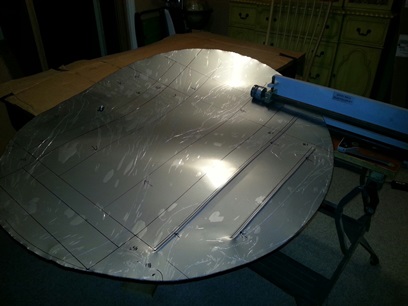
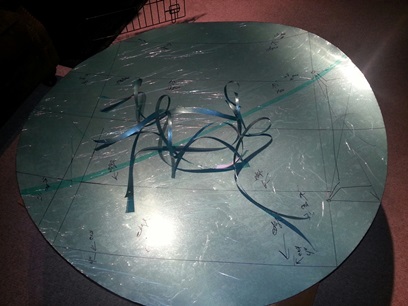
Ran beads on firewall. One or two were slightly wavy... not too bad AND you won't see it with all that stuff being hung on it. BUT... I have another piece of stainless steel, so... I'll be trying it again.
Learned one or two things from the first one I made; less beads are needed, longer beads ran closer to the edges of the firewall, enough but not too much pressure on the roller makes it easier to run the bead.
Running beads.
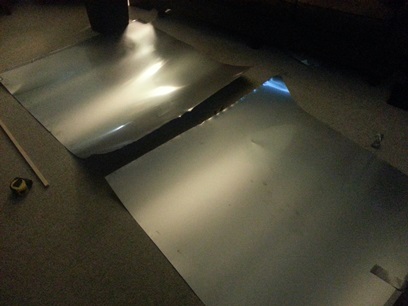
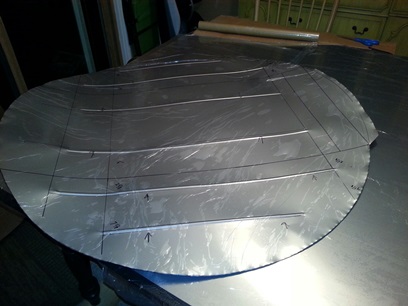
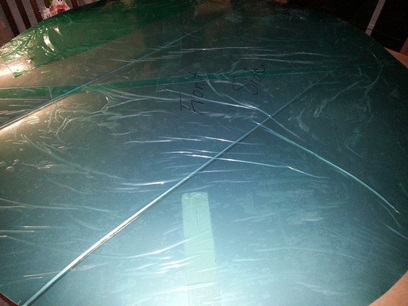
The re-make. Er... the completed one on top and
the new one underneath still to be made.
October 27, 2015 There's not many times you're happy with...
having a dent in the piece you bought.
Thank God for little blessings in disguise... The damage that I had on my firewall material kinda pissed me off when I first got it. There was a small dent in it on the one end. If I was going to use it for a second firewall (hint hint) I could easily work around it so that eased some of the pissiness (wurd?) I had at the time.
All last night I was a little puzzled... where was that dent that was in the stainless steel sheet when I originally recieved it? Looked for it several times as I'm layout the pattern for the cut and beading. Maybe it's the light that is making it hard to see it now ???
Fast forward to today. Picked up the sheet that I had drawn everything out on last night, getting ready to cut it, and... it didn't feel right. Wasn't quite as heavy (not even close) to the cut-out firewall I had just beaded. Didn't have that same look to it either (not as steel-gray looking). RED FLAG RED FLAG RED FLAG... !!!
I looked for that small imperfection (dent!) again and nuthin' ! Not right... I'm thinking. THEN it occurs to me that the sheet I had been working on was the .o32 6061 T-6 aluminum that I had been using for the seat backs. DAMN ! There are no markings on either the 6061 T-6 OR the stainless steel sheet. Glad that I was persistant in looking for that dent otherwise I'd have cut-out, drilled, and riveted on that "L" flange and THEN been REALLY pissed-off at myself.
Anywho... spent the next hour and a half marking up the cut-lines and bead-lines on the piece of stainless. Ready for cutting out...
October 28, 2015 Another circle... to cut.
Back to cutting another one of these stainless steel firewalls out...
Took my time to make a pretty damn-near-perfect circle. Now all I need to do is rivet on the flange, after drilling the holes and, oh yeah... I need to drill the holes for the anchor nuts on the outside-edge of the "L" flange; for attaching the leading edge of the sheet metal to.
Cutting stainless steel circle.
Finished circle with cut-offs.
October 29, 2015 "Working"... on the biplane.
Sometimes working on the project doesn't mean you're actually working that much on the project.
There are times when I need to sit back and think hard on what I want to do with a particular piece of the project... I went to the forum (Biplane) and asked about beading... specifically the depth of beading. And... I came back with a lot more questions answered than just the depth.
The #1 thing I came away with... When starting (and stopping) the bead inside of a sheet of material you'll have all kinds of distortion (doesn't happen when you start and stop outside of the piece).
I think I may just be going the way of attaching two pieces of "L" extrusion on there on the inside. But I'm waviering on having the "bump" of the bead on the back-side and having it go all the way through the piece. hmmmmm ???
oh yeah... spent some time figuring out how I was going to cut the "L" flange on the perimiter of the firewall... where the two meet; circle to exhaust port opening. Got it figured out.
Update: October 30, 2015 morning:
Tried beading a scrap piece of 304 stainless steel that I have. Ran a 1/8inch bead from one end to the other... only shrunk the sheet a little less than 1/16inch.
October 30, 2015 Back and forth...
make a decision, change a decision...
With such a minimum of shrinkage I decided to run two beads in the firewall material (so it looks like I finally decided to run the beads). I ran them horizontal. I'll position the raised beads on the back-side of the firewall to prevent from interfering with the "L" flange.
The purpose here isn't to stiffen the firewall up to hold anything... it's to keep it from "oil canning", aka flexing. From what I've heard/read I'll be adding a few metal supports at station 0.o for items that will be attached to the firewall which will help keep the firewall from moving also.
I also re-marked the exhaust port and drilled the two corner relief holes. Next up... marke the sides of the "L" flanges for the anchor nuts (evey 2inches) then match-drill the flange to the firewall for riveting.
October 31, 2015 Halfway there...
well, at least the firewall is.
Another one of those... thinkin' about hesitating but I've learned better moments. Was just a matter of figuring out how I was going to hold the flange to the stainless steel firewall and drill it at the same time.
Decided to use that plywood pattern that I used for the jig on the fuselage and to trace the pattern on the stainless. It went along pretty good... one or two spots where the drill bit didn't want to go through the first time. Went on to the next and then came back and it went right through. I was using a cobalt #40 bit that I bought from Aircraft Spruce. Whenever it gave me a problem I changed out to a bit I bought from Brown Tool. It was a #40 but about 1/2 the length and it was a solid carbide drill bit. When the cobalt bit didn't drill through the stainless... this bit from Brown Tool went right through it. After about sixty holes the cobalt bit from Aircraft Spruce actually started getting dull. Finished up with the bit from Brown Tool.
Not sure if it had anything to do with making it easier to drill holes into the stainless, but... I kept weting the tip of the bit with a cutting fluid. Something was working because it was a lot easier to drill these holes than I thought it was going to be.
With the right pressure and the right speed (seemed to work if I started off slow until getting the bite then varying the speed until you hear it go through then speeding it up until you go all the way through.
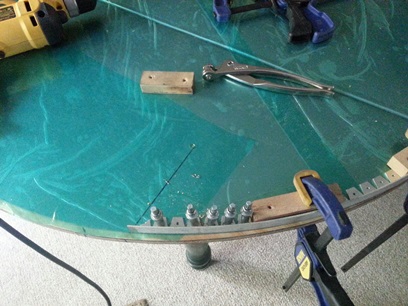
Half the holes match-drilled on the firewall.
Click on above image for close up.
November 1, 2015 Just about there...
still talkin' the firewall.
Worked on the other half of the firewall flange match-drilling. Went along without a hitch until I put a little too much pressure on the first solid carbide drill bit I simply pulled the second one from the red plastic sleeve that it came in and continued on working. AGAIN... this is one beautiful bit to use on stainless steel.
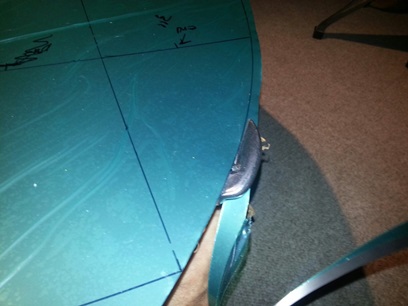
okay... after doing everything I did yesterday I had to "meld" the two where they meet at top-center. Trimmed them both to fit... but I still need to put a "mending" plate on the inside to lock the two lengths together.
I'm pretty damn happy... make that REAL damn happy with how it turned out. Still need to trim out the exhaust port with the flange pieces. Here's what I have so far.
Half the holes match-drilled on the firewall.
Click on above image for close up.
November 2, 2015 Wrong side of the straight-edge ???...
give me a break.
Moving right along with getting the firewall all flanged up. Cut and notched the three pieces that frame out the exhaust port. Took my time to make it nice... as always.
Had printed out some extra notching patterns from when I was doing the curved section of the firewall flange. Cut a few of those out, glued them on, and began to drill the holes for the rivets. but... Something wasn't looking right. The starting divets I made with the centering bit weren't following the lines on the pattern. Thought at first that I didn't put the pattern on straight... Flipped the piece over after making a few holes and saw a curved pattern to the line of the holes. Held the longer piece up to the straight-edge I had clamped onto the drill press to make sure that the angle was straight and that's when I saw that I used the back-side of the straight-edge; the curved portion of it. DAMN !
Back to cutting and fitting three new pieces. Got them close to the correct fit. They actually needed a little tweaking to get them right. I started thinking... "ahhhh, I'll fit these up and drill the holes and worry about the tweaking later on when I'm" WHAT ?!?! What the hell am I thinking ?!?! Why the hell am I thinking that? It's not right... it's time to put down the tools and call it a night... when you start thinking that way.
The time to get things right is NOW... not later. Do it "right", right now.
That kinda snapped me out of that bad bad thinking. Took a walk down to the basement workshop and made a few tweaks to the two shorter pieces. They look real good now. The long horizontal piece needs to be re-made again. It's a little too short for my liking. Re-thinking how I'll make the cut marks on it... after I rivet the two vertical pieces in place.
Lookin' good.
Wrong side of the straight-edge.
Second attempt !
November 3, 2015 Right side of the straight-edge...
yeah...
Final fitting of the flange pieces around the exhaust port. Tweaked the half-round, perimeter side pieces to fit better with the side pieces around the exhaust port.
Drilled rivet holes in all three flange pieces (double-check for correct edge.) Match-drilled the two vertical pieces... still need to match-drill the long horizontal piece. After that I'll need to drill the holes for the anchor nuts on the side walls of the perimeter flanges (used to connect the sheet metal sides/top to the firewall.
Horizontal flange still needs to be match-drilled.