I'm putting a lot of my time into building my Radial Skybolt... makes sense that I'll want to put a little of "myself" into it to make it "mine;" to set it apart from the rest. A lot of that "myself" is in the finishing touches.
If I'm not drawing up a few fittings on the CAD or reading up on the next step in the builder's manual at work, then I'm checking out builder's sites and looking at different biplanes to see what I may want to incorporate in the building of mine. (is that a run on sentence or what)
I've been doing this for some time now. Figured... why not post it onto the site. A lot of what I want to make look different on the plane, in my eyes, will make it look more like a classic or antique.
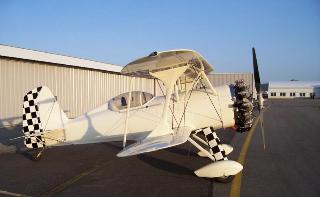
The Landing Gear: It'd be neat to have a set of large wheels for the gear but I'm not into re-engineering the landing gear at this point in time. I've been keeping my eyes peeled for something that would give it that old time look. I was on barnstormers about a month ago and saw the legs on a radial Starduster and said, "yeah... that would look sharp on my Radial Skybolt."
Here's an overall shot of the Starduster and a close-up of the leg fairings. Marl, from the biplane forum said he'd hunt up the drawing for how to make it happen; he's a Starduster owner/builder.
It's not that "big-wheel" look, but it gives the feel of being from another era, and it'll set the 'bolt apart from others. I like the look of that single enclosed cockpit too. Makes the fuselage look longer... a thirties race plane.
The Instrument Panel:
I'm still up in the air as to how I want this to look exactly. Minimum instruments are a must. The T-craft I had only had six instruments and three of those were for the engine.
Figure that front pit will have an airspeed indicator, altimiter and maybe a compass. The back pit... airspeed indicator, altimiter, compass and whatever radial engine gauges I'll need. They'll all be steam gauges.
I'm leaning towards the look of this one. I like the overall wood panel with the main instruments clustered on a metal background. The black instruments actually look pretty nice on it. This is in a Golden Eagle biplane.
For my Skybolt I would over lay the aluminum panel with a thin wood veneer/plywood and then mount the metal oval as a separate piece; maybe even shock mount it.
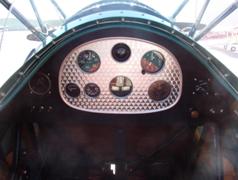
Here's another one... out of a Boeing 100. Kermit Weeks (I'd love to be able to amass a collection of aircraft like he has.) is having one restored for his Fantasy of Flight museum. I like the look of that gas tank too.
A few more different panels to look at. decisions... decisions...
Here's one from a (I'll need to get back to you on this one.)
One from a Travelair 4000:
February 23, 2009
NOS... old is "new."
Ahhhh... the challenges I put myself into. I just can't be happy with the "look" of old. Nope... gotta try and put the "old" into old. And so it is with the letters N O S (new old stock.)
I'm finding these rare gems on the internet, in fly markets and any other place I can think of. I'm looking at Pioneer and Kolesman, to mention just a few.
I've got a decent little collection to start with. I've picked up several engine instruments over the past few months and just picked up myself a fine/unusual looking Pioneer Airspeed Indicator. The numbers on it are actually upside-down on the left side of the dial. Kinda neat... kinda old looking. Actually not kinda old looking... it IS old. Never been used; still has the original tape on the back protecting the connection holes. This is really going to add to the special little touches of making this Radial Skybolt look like it's just flown out of the 1920's.
The biggest challenge I have with this NOS stuff is matching the two instruments I'll have in the front pit (airspeed and altimeter) with the ones in my pit. I've got some time to work on it. And if I don't have a matched set right away... it's something I can always work towards... being that it's a homebuilt, I can do any damn thing I want with it.
Now that I've started this collection... I hope I can get them to work.
February 26, 2012 On second... without even hitting the ball
Gotta go with your flow...
Beej... the mastermind behind www.biplaneforum.com is coming down the final stretch with his Skybolt build. He was was trying an old black gauge in the panel to test some clearance issues, he realized that black gauges now suit the interior better. He asked if I'd be interested in buying the white-faced instruments that he created. After checking my finances... I sent him over a email and said "YES!".
(a little background... both he and I were going to do our gauges in white. Beej found a printer/laminator which was a solution to doing this to existing instruments... I was going to follow his lead so I purchased the printer/laminator. Now... it looks like I'll only need to purchase the airspeed and altimeter for the front pit and make the decals for those. And, if I get the same instruments... Beej sent me the files for producing the new decals for them)
Anywho... I haven't even been thinking about instruments for awhile. Now, I'm getting closer to the point of me needing to start working on the cockpits... I'm already ahead of the game.
April 1, 2015 Refining the look of the biplane...
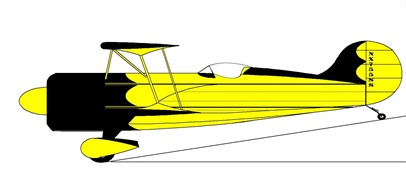
I've been playing with the shape of the fuselage; the lines. I've posted a few ideas throughout the blog but thought I'd put it in this section as well... since it is about making it look old. It's my twist of the P-47 look. Yeah... kind of gotten away from the Mystery Ship look... well sorta kinda.
I had what I was looking for and printed it and painted it up (bottom image) but the program stretched the biplane out a bit. I had added an additional 5inches to the depth of the bottom one thinking that I needed that extra depth for the -47 look. But when I took a rule to it, it wasn't making any sense... height compared to depth. The top line drawing is to scale without any stretching and without the additional 5inches.
January 6, 2020 The scoop...
a little less than a little stupid.
Wow! It's been a little bit of time since writing something about the shape of the biplane. NOT that I haven't been thinking about it allll that time...
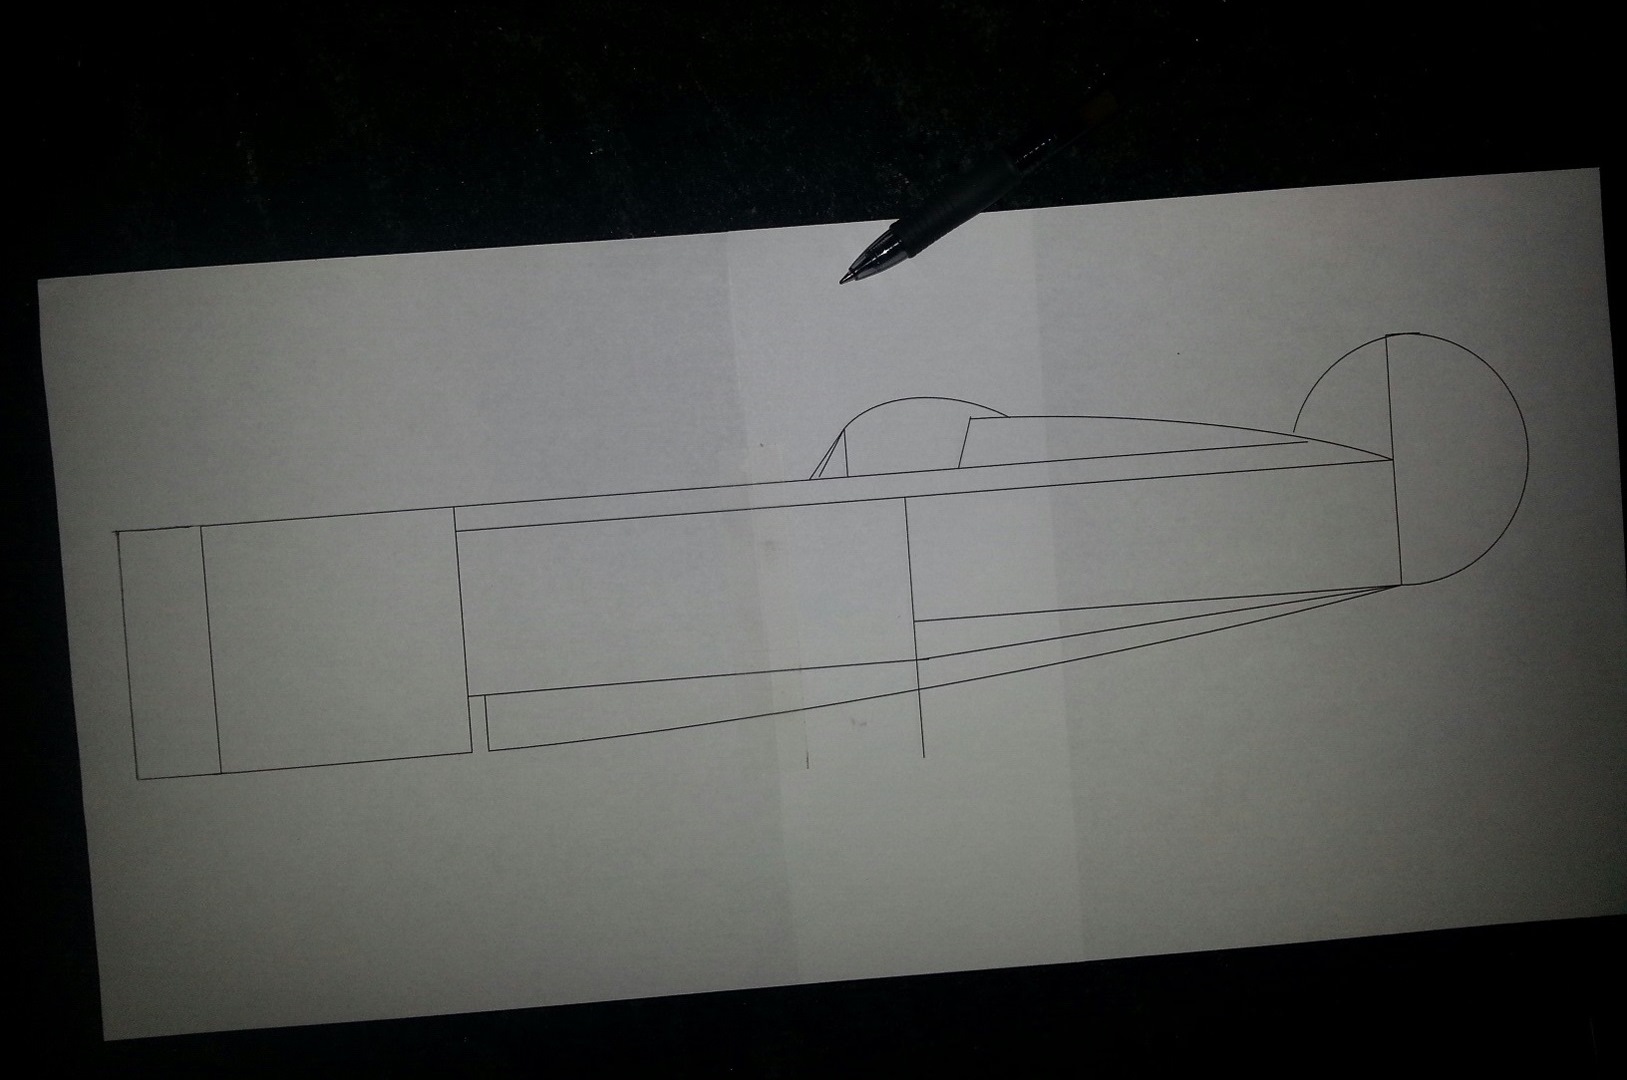
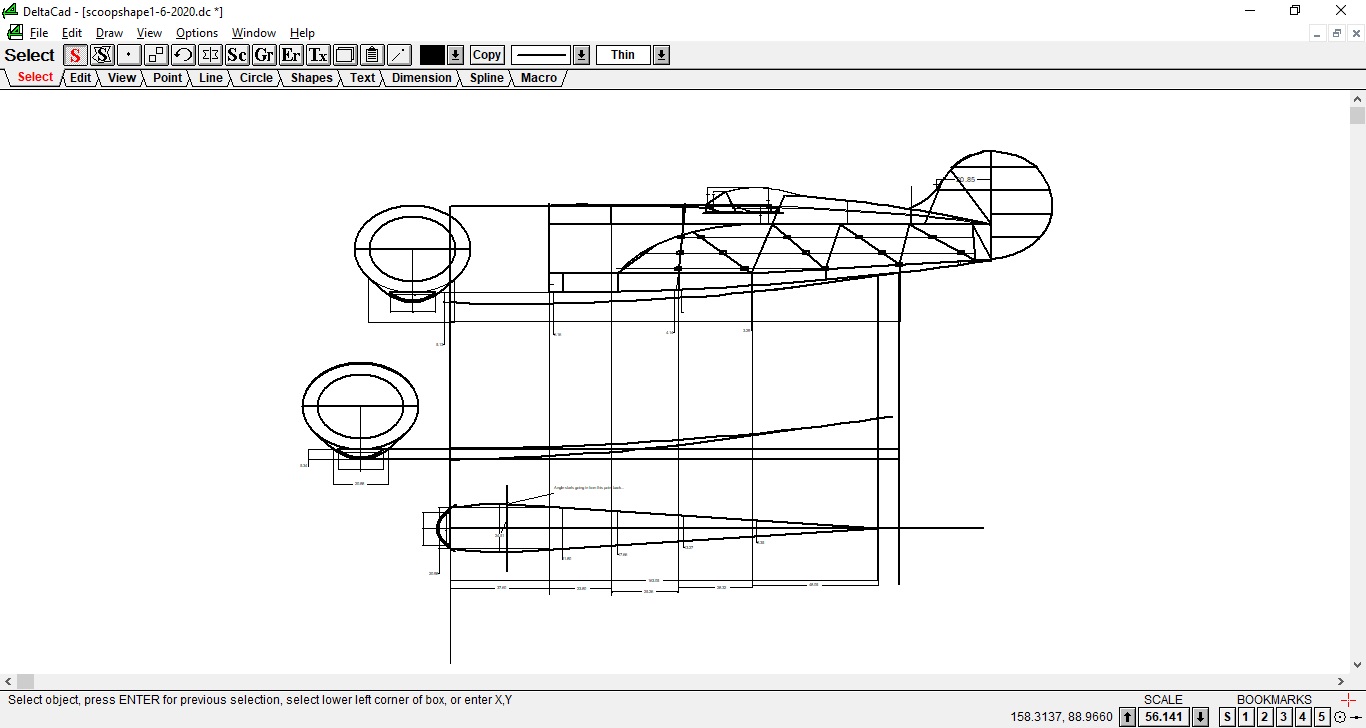
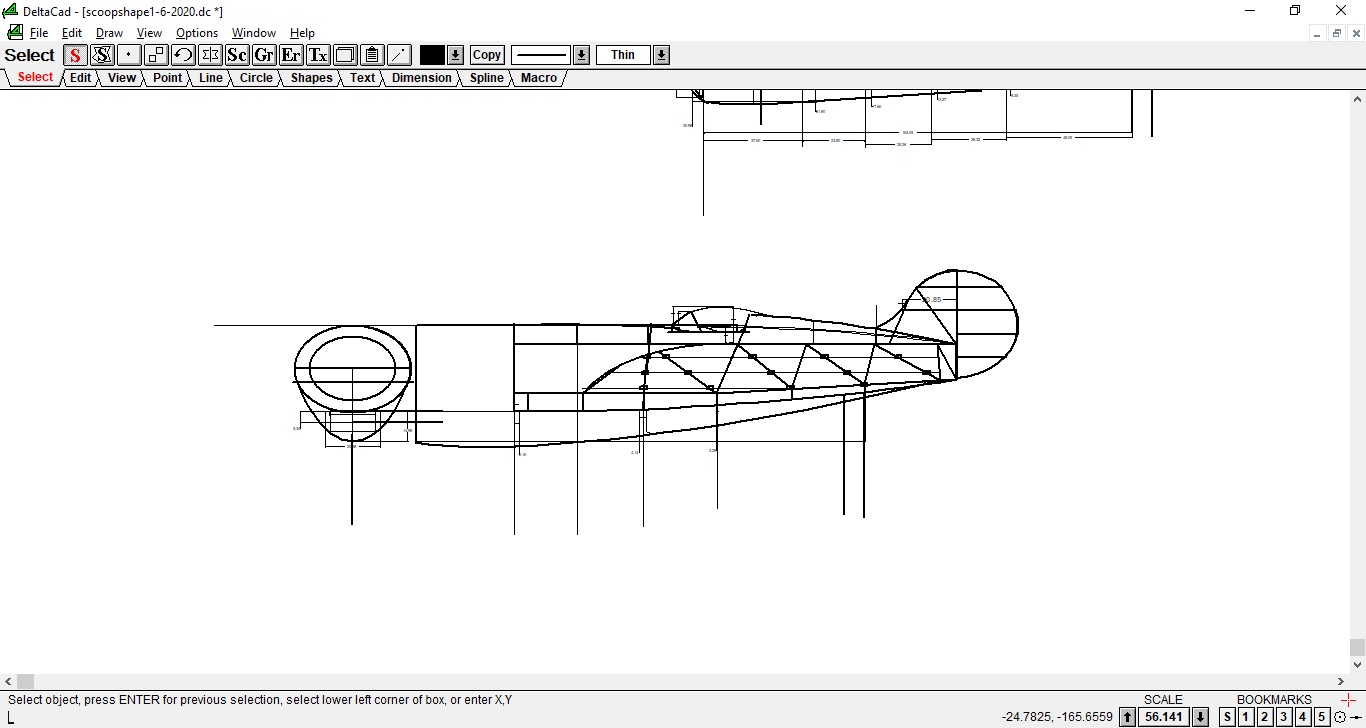
Putting a little action behind those thoughts... I sat down with the Delta CAD program for awhile the other night and started plotting the look of the scoop. AND, I did some additional thinking about how I'd go about making it.
As of right now... I would be shaping the forward part of the scoop from aluminum as far as the aluminum shin was on the belly of the beast. I'd then shape the rest of it using a few stringers covered with fabric. That's my plan... not sure if it will be what is finally crated. We'll see!
"P-47"ish style cowling.
Click image for larger photo.
Getting a little stupid with the size of the scoop.
Click image for larger photo.
by the way... the "stupid" sized scoop was just for fun... WAY too big for my size biplane. I'll just make the "a little stupid size" scoop...
Giving this soop.. its own page.


 It'd be neat to have a set of large wheels for the gear but I'm not into re-engineering the landing gear at this point in time. I've been keeping my eyes peeled for something that would give it that old time look. I was on barnstormers about a month ago and saw the legs on a radial Starduster and said, "yeah... that would look sharp on my Radial Skybolt."
 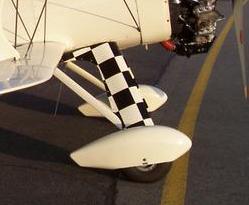 Here's an overall shot of the Starduster and a close-up of the leg fairings. Marl, from the biplane forum said he'd hunt up the drawing for how to make it happen; he's a Starduster owner/builder.
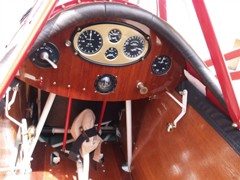 I'm leaning towards the look of this one. I like the overall wood panel with the main instruments clustered on a metal background. The black instruments actually look pretty nice on it. This is in a Golden Eagle biplane.
 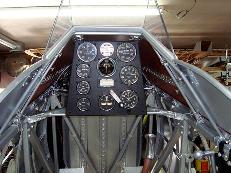 Here's another one... out of a Boeing 100. Kermit Weeks (I'd love to be able to amass a collection of aircraft like he has.) is having one restored for his
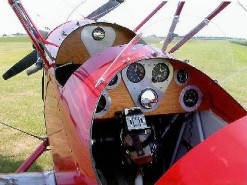
 I've got a decent little collection to start with. I've picked up several engine instruments over the past few months and just picked up myself a fine/unusual looking Pioneer Airspeed Indicator. The numbers on it are actually upside-down on the left side of the dial. Kinda neat... kinda old looking. Actually not kinda old looking... it IS old. Never been used; still has the original tape on the back protecting the connection holes. This is really going to add to the special little touches of making this Radial Skybolt look like it's just flown out of the 1920's.