Mantua, New Jersey
Original Site:
September 2004
E-mail: usav8or@yahoo.com
The Radical Radial Driver's seat.
April 30, 2015 Working out...
the feeting arrangements.
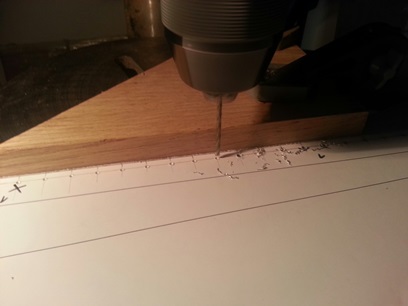
Not sure where I put all the other writings about the heel rails and flooring... must have just been a side thought on another page. I know I had spent time measuring these up for rough sizes... but can't find either the sheet I wrote them up on or the entry in my blog. Must have been a dream.(update: found that entry)
Well, I'm looking at the notes and drawing I did last night so... I'm on my way again to doing something on these parts. Actually, thinking about it, I bought the material for the rails and that included the L-shaped aluminum for the edges on them.
Based on this final design I have a few more flooring tabs to weld onto the frame. And thinking... I'll probably/maybe will do that fish scaling (turned metal). Just a thought ???
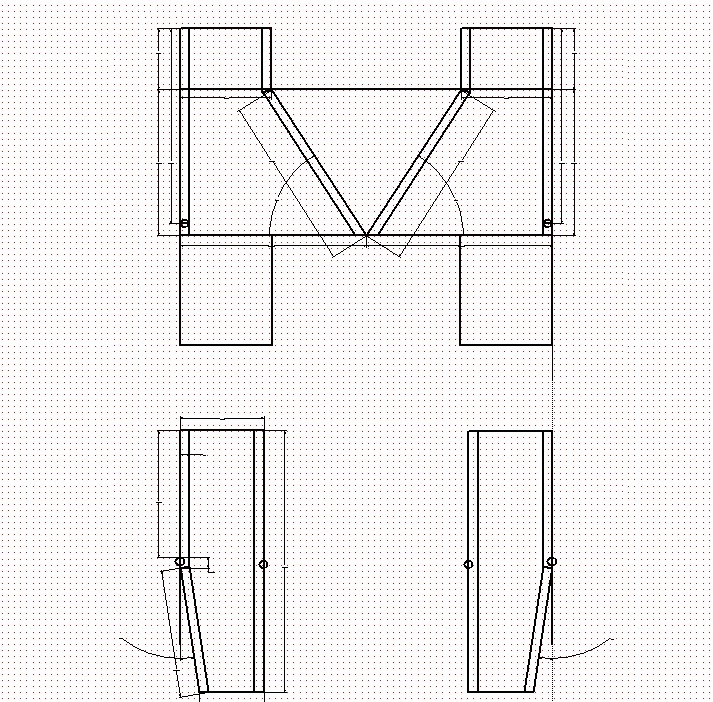
The "V" area in the forward pit will be uncovered.
May 6, 2015 Adjusting...
the feeting arrangements... and more
Test of the patterns tonight (which I cut out the other night). Close fit ! on both of them. Made rough cuts around the vertical tubing. Made a note where I need to weld in another small piece of tubing and a few tabs for the inside-back of both rear heel rails for support.
Front floor/heel rails needed a little modification for the "V" area... the point of the "V" extends in another 1/2inch on both of the half patterns and those notches will need to be custom fitted by creating separate patterns for each of the notched areas and then taping them in place. Should make for a nice, tight, good-looking fit.
Looked at a few other things... stared at the fuselage and tried figuring out how I wanted to run my cables for the trim/servo from the trim handle. Still have a few options running around my head. Once I get the tail cone in position I can see what routing options I have closer to the trim horn.
also... sat in the rear cockpit and stared at the instrument patterns trying to decide on what I like VS. what will work. It's still up in the air.
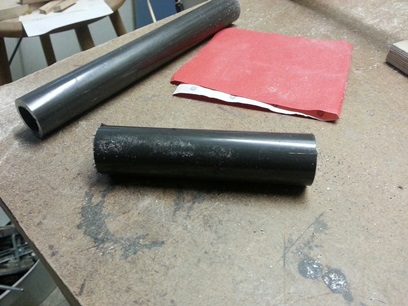
and, oh yeah... Cut down the 1inch x .120 tube for the rear joy stick grip. Started working the ends to make them square. Not quite sure what happened but it really did a number on my cutting tool. It may need to be taken to a larger lathe to be worked ?
Still to be worked...
May 9, 2015 Close to making...
the feeting arrangements.
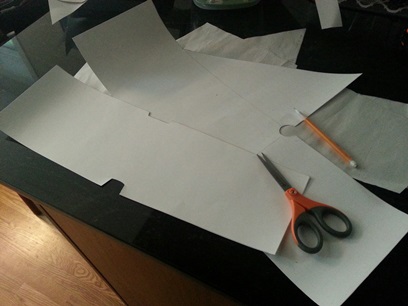
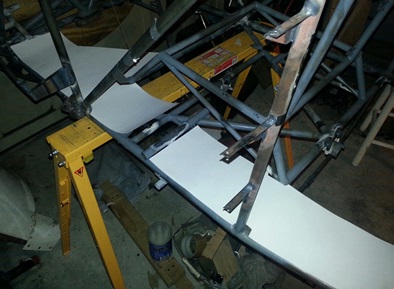
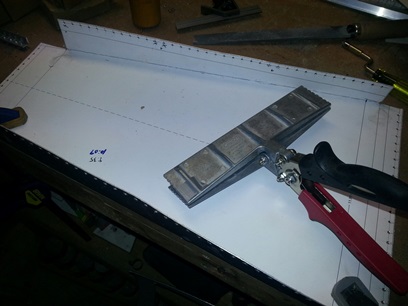
Before heading over to Woodstream Court today I copied and cut out the flooring and heel rails for test fitting.
Over at Woodstream... and with just a little bit of tweaking... the patterns looked good. Might need to make the front flooring in four pieces instead of two.
While waiting for the new metal bandsaw v-belts to be delivered (tomorrow... so I've been told) I finished up the small project of glueing on the tail-ends of the turtledeck stringers. Didn't take long so... needed to do something else.
I've been thinking about the seat-backs (as I have everything) and decided to begin tackling the design of both of them. Saw a post on the Biplane Forum by sizmo (aka Chris) of a seat back he came up with for the Wolf Pitts (he recently purchased Wold Pitts from Steve Wolf... nice guys) made of carbon fiber. Afer looking at the Wold Pitts page it looks like it was originally done in aluminum. The design... a pocket which either a parachute would nestle into or a cushioned seat back. Kinda neat since these biplanes are limited on the amout of space between you and the instrument panel. Every inch you can gain is money in the bank... so to say.
Anywho... I took quite a few measurements, drew up and cut out the initial pattern. Made a few adjustments checked it again and it's looking good. Cut out a few side pieces and wa-freakin-la... lookin sweet ! Now all I need to do is cut out the pieces and have someone TIG this up. And, with a few small changes to it, it'll work for the front too !
Looking good.
July 30, 2015 Back to filling...
a void.
While waiting for the tools for deburring and riveting the turtledeck hatch and firewall material I got back on the seating. Good way to fill that void !
Did quite a bit of searching to see what type/thickness material everyone is using to make these things. It's going to be either 2024T3 or 6061T6... thickness .o25. Not much of a price difference but one is better at corrosion resistance and the other is easier to work with ??? I think...
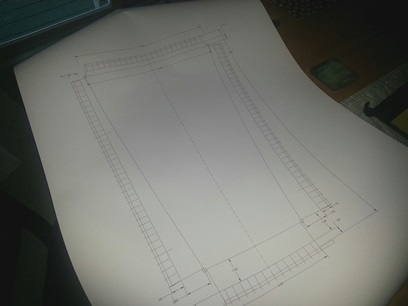
I wanted to make sure I figured out how I was going to do it... I drew it up on CAD. Helped me to figure out how much material to order too; (2) sheets 24" x 36" (comes in 24" x 48" sheets).
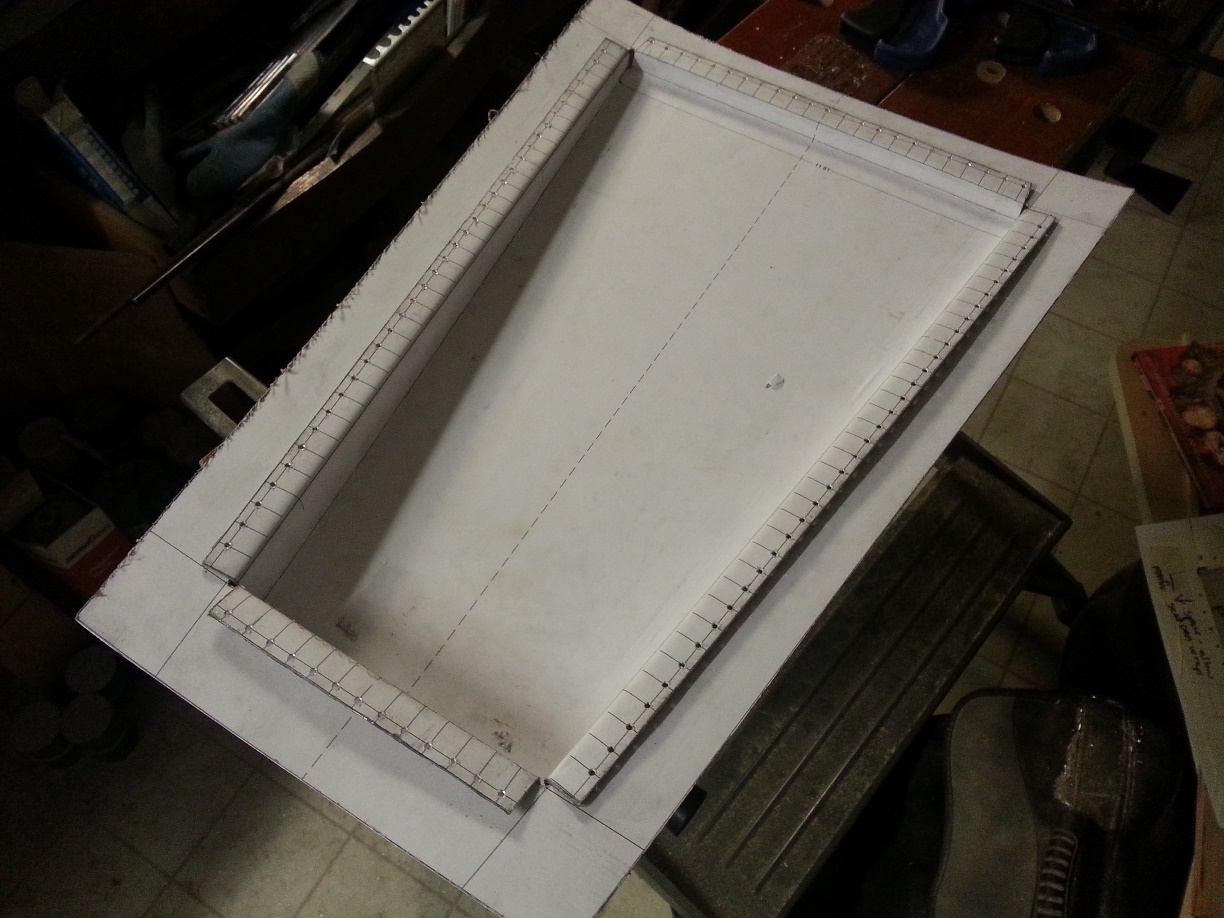
Left is outside blank. Right is the inside.
August 1, 2015 Aluminum: Half price sale...
Staying local...
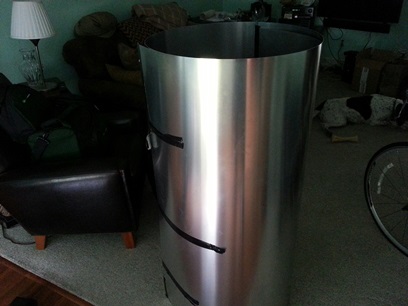
Fazzio's is a local hardware-metal-anything-you-need kinda construction kinda store. Took a look at the prices for aluminum. Aircraft spruce wanted $38.88 for a 1/2 sheet which is 4ft x 5ft, plus shipping. Fazzio's on the other hand wanted $39.96 for a full sheet which is 4ft x 10ft. Duuuuh... If I can roll that and fit it into my car I'm buying a sheet of it.
Stopped by there today on my way home from flying one of those 172 spam cans. (by the way... a beautiful day for flying). They had them right there on the floor where you could just put it in your "shopping cart" and pay for it at the front counter. They must have had about a six inch stack of it (waht's that... about 120 sheets). Took a sheet off the rack and rolled up... probably a 2ft diameter circle which fit nicely inside of my car (couldn't see out the right side... but fit nicely). Looks like Fazzio's is my go to place for maybe the skin for the radial biplane ?
No time to work on it today... got two other things lined up for this afternoon and tonight; Chip's annual gathering at his place in Vineland and the Phillies game tonight with Andrea.
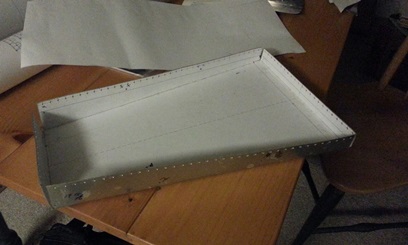
Seat pans and backs; just needs a little more work.
Swedesboro: flying today.
August 10, 2015 Seat pans and backs...
just a matter of time...
Unrolled the 4ft x 10ft sheet of aluminum... so begins the making of the seats for the biplane.
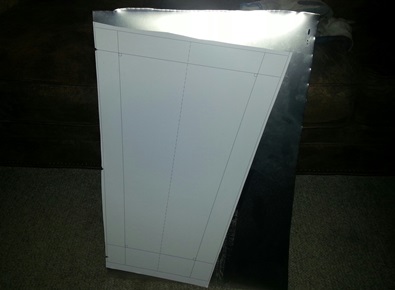
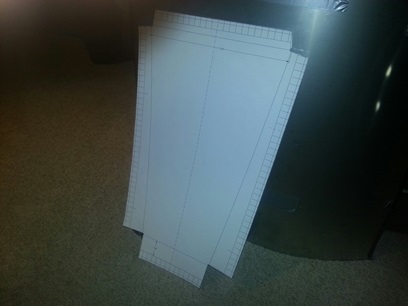
Andrea printed out two sets of the CAD drawings I drew up the other day; both the pan and the back. Just a matter of putting in time to cut them out by hand; 2.9hrs.
Cut out the blanks for the pilot's seat pan and back. I'll do a test fit of both the front and back before forging ahead cutting out the second set.
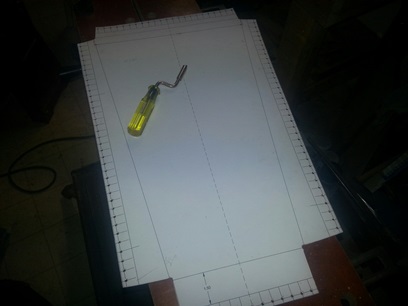
Glued up pattern.
Blanks
August 11, 2015 Seat pans and backs...
just a matter of more time...
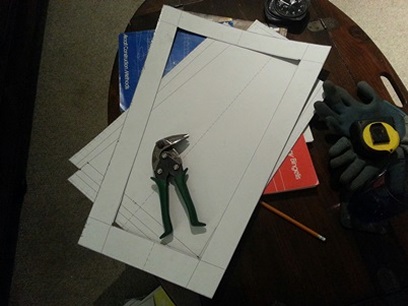
Deburring and filing the sides... not a problem. Cutting the metal out of the frame part of the seat back... PAIN IN THE ASS ! Actually... not too big of a pain, but took a while and needed to use a few different tin snips; straight, left and right. Glad I had them...
Spent time thinking of how to bend the insert for the seat back. Bending brake is out... for various reasons. Thinking of clamping a straight edge the length of each bend... that's out 'cause wacking the aluminum with a hammer can't be good; all that stretching and whatnot.
A thought came to mind... that tool I used for bending the fuel tank sides, er, mended the mess I made when bending it with that aluminum brake. Anyways... I bought that 12inch hand seamer and it worked like a charm with the fuel tank. It'll be perfect for this job!
oh yeah... marked the holes for the rivets; 3/32nd rives 3/16inch from the edge with 1/2inch spacing. Probably really not needed for the seats but hey, lets keep it up to aircraft standards.
Aug 12 update: Thinking this morning about the seat backs... I need to check where the tabs attach to make sure that the rivets don't interfer with the bolting on of the seat back to the fuselage.
August 13, 2015 Upon closer examination...
it's more like pretty good...
I hope this doesn't come back to bite me... but, this was all an exercise in practice.
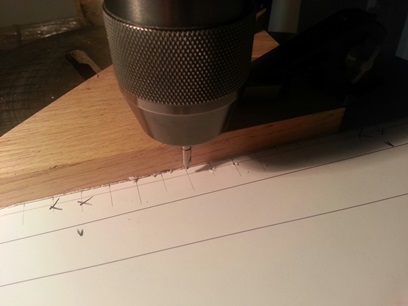
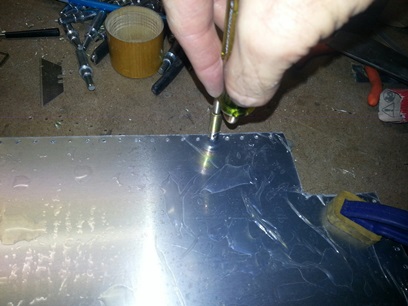
Took the insert for the one seat back and started drilling the rivet holes... the many rivet holes for it; starting with a centering bit then going back and drilling with a number 41 bit. Then... go back and deburr.
I don't have a bending brake so I get creative in bending. I use that hand seamer as I had mentioned above. Works out pretty nice. The bends are nice a straight... the only problem; some of them are radiused a little bit more than others so the line where I'll be bending for the rivet flange don't exactly meet up. Not a problem... I went back and tweaked them. Then I look at the bottom edge that gets bent into the rivet flange and it's 1/2inch instead of the 3/4inch (ahhhh... you won't see it... really... or, at least it won't be that noticeable). And then I look at the corners where I had drilled the relief holes; I cut where the line went into the hole instead of re-adjusting the line to fall as far back as possible on the hole, thus leaving a smooth edge instead of a pointed edge.
I have to admit, the piece looks pretty good. But pretty good and good enough can be flip-flopped. Maybe that bottom 1/2inch edges won't been seen. Those corners that meet at the relief hole won't be seen, BUT I'll know what they look like. Decision has been made. The gavel hits the table... this was a learning experience. And, I'm damn happy with that decision.
First thing I do after the work session was to turn on the computer and make the adjustments to the CAD drawing and send it over to Andrea to see if she will print it out for me.
The main sticking point are those corners so I make those changes. I also hand marked all the locations for those rivet holes so I took the time to mark them on the revised drawings I sent over to Andrea.
With all that being said, I hope that the next one is a lot better than this first one and that my thoughts in how to do it improve the quality of the piece.
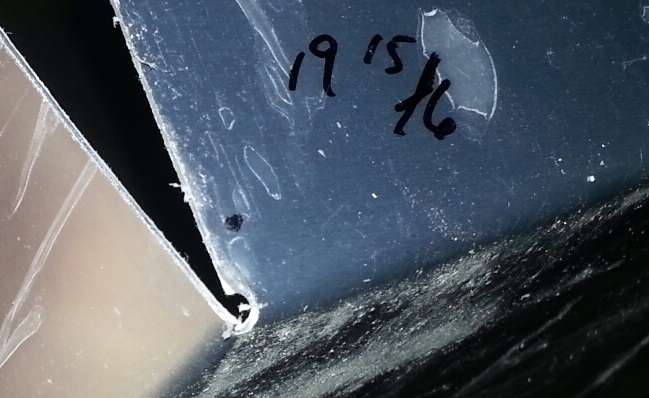
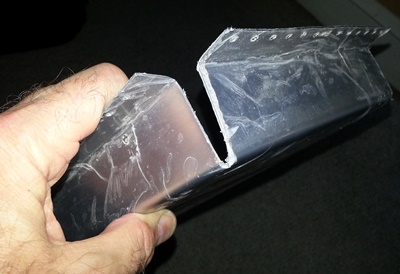
Flawed relief hole. Click on image for close up.
August 25, 2015 Seat back insert is ready...
for drilling ALL THOSE holes...
Thought of working on getting that flange on the firewall so that I could start working on the sheet metal work... but, I need to roll a few beads into it and I need the help of Andrea to hold the one side of the 44inch diameter circle while I do that. So... onto working on, um, the seat back insert.
I thought the small left-over end from the first line of cuttings off of the 4foot by 10foot sheet of aluminum was too small to do anything with but measuring it tonight I could use at least half of that left-over piece for the next pattern I needed to cut; the seat back insert.
Took one of the CAD drawings that Andrea printed off for me at her work and glued it onto the blank I cut out. Was just a matter of trimming this piece to the black line and then moving on to drilling ALL THOSE holes. Learned from the last cutting that there wasn't a need to cut close and then cut to the line. Using the right tin snips I could do it all in one fell swoop. Took 1/2hour to cut the entire blank to final trimmed size blank.
It's ready for drilling ALL THOSE holes...
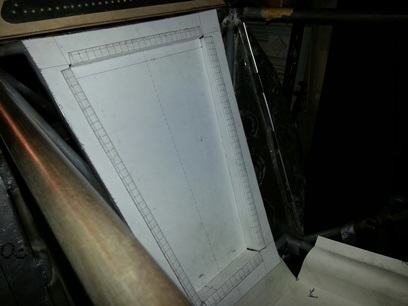
Paper pattern.
Ready for drilling ALL THOSE holes.
August 27, 2015 Seat back insert is ready...
for banging or bending ?
Filed and sanded the edges smooth on the insert before getting started on all those holes. Used the center bit to start the hole (did the entire perimiter of holes) then went back and drilled for the rivet.
Followed this up with deburring both the front and back sides of the piece. I can only imagine what an RV builder, or Midget Mustang, Thorp T-18 builder goes through with all those rivet holes.
On a roll so I set about starting the bending on the insert. Should I clamp it to a straight-edge and bang down the sides or should I use the hand seamer again ??? Decided on the hand seamer since it work on the bending last time. A pain in the ass again, but it worked. What you need to do is clamp the head seamer onto the piece then use a table top to use as a backing plate that can be used to "hold" the rest of the part stationary while you "force" the bend in the part. Now... if I could anneal the piece it would be so much easier to bend. Annealing would require that I take the torch and with the "A" on... put a layer of soot on the piece. I'd then go back with a few pass with a flame knocking off some of that soot to make the aluminum soft and plyable (read elsewhere on the internet about this). This would need to be done BEFORE I glue the pattern on. Apparently the piece hardens up over a period of days or weeks.
August 28, 2015: Just went to the "wayback machine" online and found Captain Al Rice's indexed pages (no photos though) and found the info about annealing... To anneal the alum, I first coated it with acetylene soot. Then I adjusted my flame with some oxygen to have a long feather and played the flame over the soot. Gently heat the alum but don't burn all the way through the soot. About 5 passes with the torch will do it. The alum will buckle and move only a little bit if you don't heat it too much. Let it cool and the alum will be real easy to bend. It will regain it's original hardness in a couple of weeks depending on the room temperature.
okay... With some manuevering I get all the inside bend completed and I start on the outer ones. Not so easy using the method I tried to describe above... so I try clamping a block on the upper edge with minimal success. So... I try clamping to a mobile table I have; set up the line of the bend and begin "bangging" (actually tapping) the edge over while moving the three clamps around. (three clamps so that I would always have the piece clamped to the table but able to move the clamps out of the way of my tapping). I took my time and it worked like a charm. Finished off the other two sides doing it the same way. After all bend were completed I laid it on the floor (up-side down) and took a block and whacked the final bends flat.
I just may try annealing the second one before I start the cutting and bending... AND before glueing on the pattern.
Deburring
New insert.
Better bend.
It still needs a little tweaking; sides need to be bent in just a little bit more. Discovered that I haven't filed the inside of the outer frame yet. Not a problem... unless you're test fitting the insert.
August 28, 2015 Seat back insert is ready...
to be match drilled then riveted.
Stole away an hour during lunch to work on the project.
Needed to file and sand the inside and outside edge of the seat frame. Also needed to tweak the seat insert; needed a little bit more bending on the sides.
Point eight hours later...
It needs to be match drilled and riveted still. But... looking good !
August 29, 30 and 31, 2015 Seat back wasn't quite ready...
to be match drilled or riveted.
It's the almost the weekend and I have quite a bit to do... other than work on the biplane.
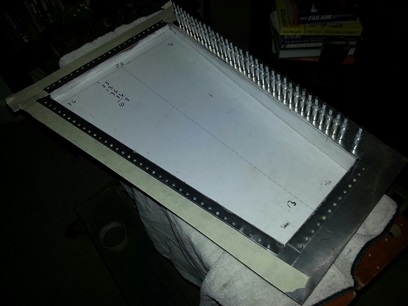
Worked from home on Friday so I could start a little after 5PM on the project... Seat frame and insert just weren't fitting like I'd like them to. Did some additional filing/sanding and made a few other adjustments to the insert so that it would slide easily into the frame. Match-drilled all the holes. Each time I drilled a hole I'd fill it with a cleco. Drill. Fill. Drill. Fill. Drill... fill... and so on and so forth...
Family is coming over on Sunday for a group birthday party and the house needs a bit of cleaning and cleaning out of a lot of the material I have sitting in boxes in the living room and dining room. Basically took all day on Saturday and the evening was filled with food shopping for the part,y among other things. then... On Sunday more cleaning and straightening up and a run for a few last minute items and for the beer and ice. None of this left much time for doing much of anything.
I was able to squeeze in about an hour on Saturday to deburr most of the seat insert. That was it.
Sunday, more deburring and cleaning off of the paper pattern from the front of the pieces and the carpet film from sections of the back.
Monday, a final sanding of the edges of all pieces and a final cleaning. Figured out the rivet length and figured out what I needed to do with the rivet cutter to get a consistant length on each cut rivet. Practiced riveting two thin sheets of aluminum and it's a little bit different than riveting a thin sheet of aluminum onto a thick piece of "L" bracket. That took close to 2hrs... Sat down in front of the TV and watched most of the Phillies game and a few shows afterwards while cutting over 100 rivets to 7/32nd inch lengths.
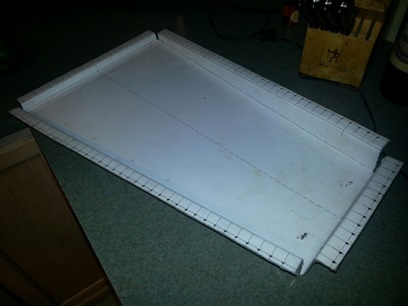
Un-riveted seat... test fit.
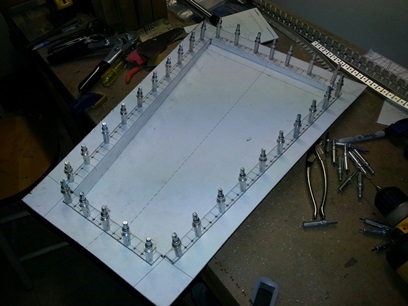
Clecoed up. Ready for riveting !
September 1, 2015 Started...
Squeezing.
It wasn't all a bed of roses but I have to admit... I didn't do too bad. The first seat back is starting to look sweet. Part of the paper pattern is still glued on and the plastic protection is still on the back... but I can see it's gonna look good.
Squeezing rivets isn't a quick process... ya... need... to... take... your... time. I taped off the front side again where it won't interfer with the rivet heads (aka... fall underneath the heads when they are being squeezed). I made sure tht the squeezer was squared up in both directions; I made sure that the head of the squeezer was perpendicular to the sheet of aluminum and that the throat of the squeezer was evenly spaced away from the sheet of aluminum. Ya need to make sure that the head and barrel of the rivet is centered on the squeezer's heads too.
With all that said, you still need to take your time squeezing... and you're still no guaranteed that it's going to be a good rivet pull. I think a lot of this has to do with the cut on the rivet. Last night I found that they cutter I have sometimes cuts the rivet barrel at a slight angle (and it wasn't a cheap cutter). I probably have a dozen rivets that I need to re-do.
First squeezed rivets. Not looking bac. (click on image for close-up)
Close to getting there. Need to re-do a few.
September 2, 2015 I ain't starting...
now !!!
Started out drilling out the "bad bad" rivets. Took the Dremel tool to cut down the barrels of the offending rivets then thought I'd drill through from the back side. BAD BAD idea...
Taking my time drilling through... didn't work. Three of the rivets I mis-drilled. I actually drilled OUTSIDE the existing hole. DAMN ! Worked on getting those three out to see if I could work through a botched job... and... not happy with it.
An undescribable feeling crept through me knowing all that work I had done on it and now it's just a practice piece. DAMN ! Two of them the head of the rivet would have captured the offending hole. The third one... not so much. But I know it isn't the way to do it... I guess some builders would just let it pass. I didn't allow such a job pass on pieces you can't see... I ain't startin' now !
Come to think of it...
There were a few things I would have changed on the second one; the one for the front pit... I'll make those changes to this one now. And that little nick I put on the front from drilling out the one rivet... won't need to be thinking of that now either. Didn't waste any time in cutting another square from the sheet of .o32 5052. Glued up the pattern. Cut the insert blank out. Filed to the line. Centering bit then drilled through each of the holes... and finally deburred all holes.