Mantua, New Jersey
Original Site:
September 2004
E-mail: usav8or@yahoo.com
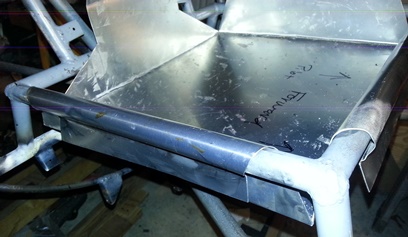
The Radical Radial Driver's seat.
December 20, 2015 More cleaning...
than building.
No... I didn't clean either of the workshop areas. I'm talking about the seat pans... cleaning the seat pans.
Started the bends on the sides where it would be a flat edge once the side wraps around the seat frame... used to rivet the edge to the side to hold things in place. That wasn't a problem. Well, actually the second part, which is cleaning off the paper patterns isn't a problem... other than it taking so long to clean them off.
I'll put down the .6hrs for making the bends but, the 2.5hrs of cleaning (so far) of the paper patterns from the seat pans... that ain't going down on the logs. But, the build is full of these mindless chores we need to go through and so we much endure them to get to completion...
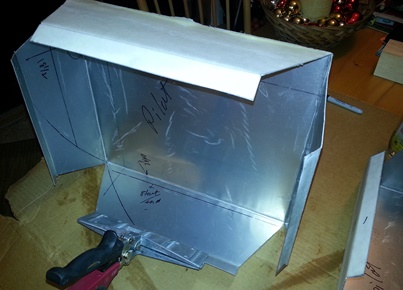
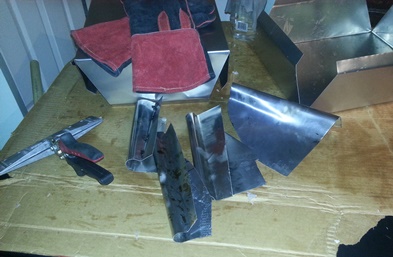
Making bends in seat pans.
Close up of the bends.
Cleaning off paper patterns.
December 21, 2015 And even...
more cleaning.
All I did tonight was... clean the seat pans. and... I'm not logging it as time.
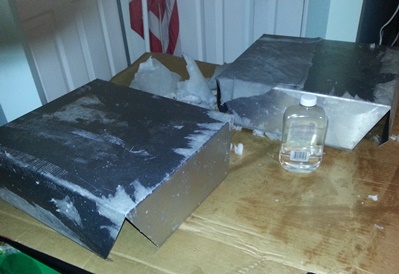
Had to be at least three hours I spent on cleaning the excess glue off the outside of the pans and then taking off the film from the inside of the pans.
Used MEK (outside and with gloves on) to remove all that glue. Just pulled the plastic film off by hand, but it wasn't easy. The film... mindless work that I did inside watching TV. oh yeah... found a dimple on the one pan. Not sure how that got on there. I'll see about taking it to some guy to take it out... one of those guys that takes the dents out of cars.
December 22, 2015 After all the practicing, it's moments like these...
that I need to push through.
oh... I worked on the project tonight. You betcha ! Didn't add any hours to the build though. You betcha !
Spent a few hours practicing the art of annealing. Didn't find it hard not to bubble the aluminum sheet by using the "lay down a film of soot and then buring it off" technique. It's the wrapping of the aluminum around the seat frame that's the difficult part. I'm finding I need to wrap it in a more heated state to get a nicer wrap than to wait until it cools down enough to bend without using thick leather gloves.
All my test pieces have just been free-hand so... they're not as straight as I'd like them to be. I'll need to form a base that I can butt the bottom of the seat pan against so that I have an even 2inch drop on it. I'll then bend it at that point. Also... I'm finding that I'll need to rebend the tab, or the end portion of the wrapped part again once I've wrapped it to give it its correct angle.
I'm at that moment again where one process can screw up the entire piece of work I've been working on for so long... But, it has to be done... like always.
Practice pieces... annealing.
December 23, 2015 After all the practicing, it's moments like these...
that I don't want to happen.
I did it ! I've gone and messed up one of the seat pans. AGGGGGGGGGGGGGGGGGGGGH !!!
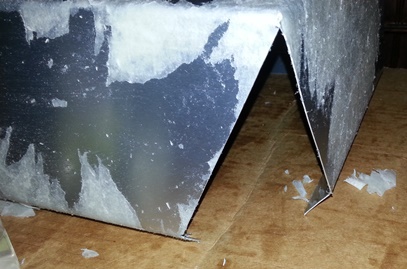
It happened just about right away. I wasn't moving the flame around enough on the first side I was working on and I scorched and "bubbled" quite a bit of it. DAMN ! Went on and heated the rest and did a test wrap. Everything looked good except that bubbled area. Figured what the hell and tried heating another side, I already knew what to do but not sure why I didn't do it on the first side.
Second side turned out great. Sooted up the side. Burned off the soot. Wrapped the edge right away (with THICK leather gloves). Didn't bend all the way up and around so I heated it again and used the end of wood I had for clamping it together to hold its shape (which you don't need to do) and used it to push the end, up and under. Looking good... I'm thinking I just may use the end of the hand-held seamer to get a smooth straight edge up and under... Looks great ! I'd be happy with all eight sides ending up like that.
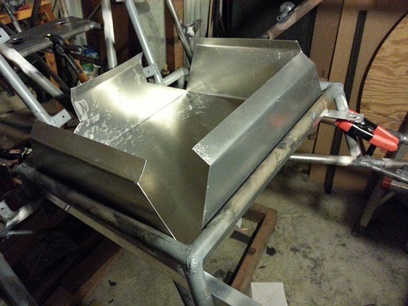
Needed to re-trim the seat pan for better fit.
Simple jig to hold them at 2 inches.
Ready for bending.
Scorched and bubbled !
Good bend. I'm happy with it.
December 24, 2015 Second attempt...
at annealing and bending these seat pans.
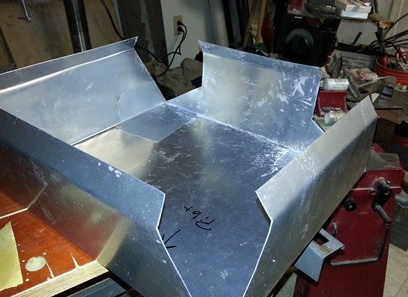
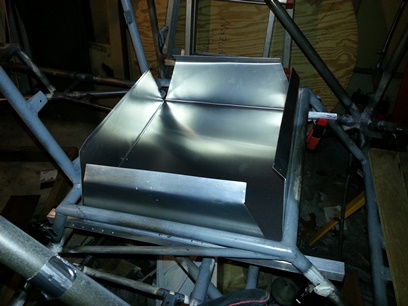
I did it ! I've gone and successfully bent all four sides of the second seat pan. YEEEEEEEEEEEEEEEEEEEAH !!!
Took my time annealing the sides... from the start. Wanted to push the process a few times but backed down right away. Lay down the soot. Burn off slowly. and then... bend. Bend while it's hot. Get yourself a THICK pair of leather welding gloves and grab that hot piece of aluminum and wrap it around the seat frame (NOTE: I'm not telling you to put yourself in harms way. Bend at your own discretion. If it's too hot for you... don't touch it!) With that said, I grabbed hold of the hot sides with those THICK leather gloves and wrapped each one around the seat frame.
In order... each one was pretty much a piece of cake except the last one. If I were to do it again, actually, I'd do it the same way. Anneal the back-side in place. Begin to wrap it as far as you can then take it out of the seat frame and take that side and stick it between the seat frame and the vertical fuselage tube members just behind it and snap the seat pan back in the frame. Re-heat that back-side along the top where the bend area is... then squeeze it again for a close fit.
Let's try this annealing thing again.
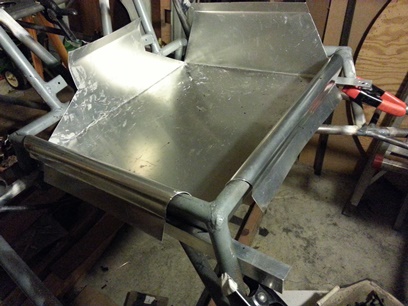
Two bends. Yeah Man !
All four bends made. Still needs tweaking.
Seat pan and seat back in place. Looks good to me.
December 28, 2015 Second attempt...
at making the first one over again...
Gave Fazzio's another try... went over there on Saturday and they decided to give their employee's a long weekend. The nerve of them. :)
They were open so I bought another 4' x 10' sheet of .o32 5052 aluminum. Rolled it. Wrapped it. Stuffed it in the Challenger... and drove it home.
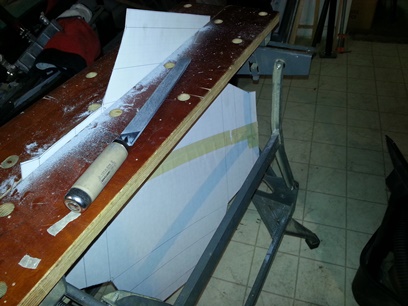
Worked on the "airfoil" for the main landing gear during the day. Tonight... I drew up the pattern on a piece of display board and cut out the square of aluminum I'll be making that seat pan from.
Big ass sheet of aluminum.
December 29, 2015 New and improved second attempt...
at making the first one over again...
All I can say tonight is...
The new and improved usually screws up the first good one.
I glued the seat pan pattern to the .o32 5052 aluminum blank. Drilled the stress relief holes and then adjust the side angle lines to meet the bottom of the hole instead of intersecting the side. Did this on the seat back inserts but forgot until after do my second first seat pan. So... this is the new and improved version of the seat pan.
thing is...
I'm now going to need to: 1. Adjust the lines on the already bent one and cut with a Dremel tool. or 2. Cut out a new seat pan blank and re-make and re-bend an entirely new one. We'll see...
That's my great revelation for today. Other than that... it was just a matter of doing what I did with the first two blank: cutting and tomorrow filing and sanding to the lines.
December 30, 2015 Cleaning the edges...
wasn't the hard part...
On the event horizon of another successful seat pan.
Worked long hours on the landing gear today but took some time tonight to prep (or at least get it closer to...) seat pan blank so that I can bend it up...
Nothing earth shattering... just filed the sides to the lines. The Black and Decker WorkMate that I used to hold the blank isn't very large. It was a puzzle of sorts to figure out how to turn and twist the blank to allow me to clamp and file each of the sides, both straight and angled. It wasn't a rubix cube hard more like one of those kids games of putting the square shape in the square hole the ball in the circle hole the... the piece would only work one way for each side I'd file.
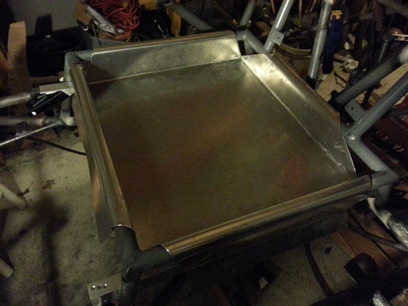
The turn and fit puzzle.
Blank ready for deburring.
December 31, 2015 Second one done...
Now the question is...
do I make the first the same as the second ???
All I need to do on this seat pan is bend it to shape... clean it... anneal it... then wrap it around the seat frame. Done !
Of course I like the new and improved over the original... now, do I re-do the first one ???
January 1, 2016 Second one done...
and back to the first...
or is that the fourth ???
Happy New Year !
Hey, ya know what ??? I worked on the corners of the first one... first thing today. Spent a good 45minutes on it. It looked pretty good. But in this case, as in most all cases... pretty good (as in good enough) isn't good enough.
Back to making a new pattern for the fourth in a series of two seat pans. I knew I would be doing this even before I spent all that time trying to make the corners of the first one like the last one I made. I guess I was humoring myself...
But... since I was making it over again I knew the addtional cuts I need to make on the back panel and an angle/relief hole that I didn't need to have. I'm getting good at this and although it takes a bit of time... I wasn't wasting any of it thinking things through.
It's all cut to shape and filed to the lines. Just need to deburr, bend, anneal and bend to the frame. Something I'll get done today!
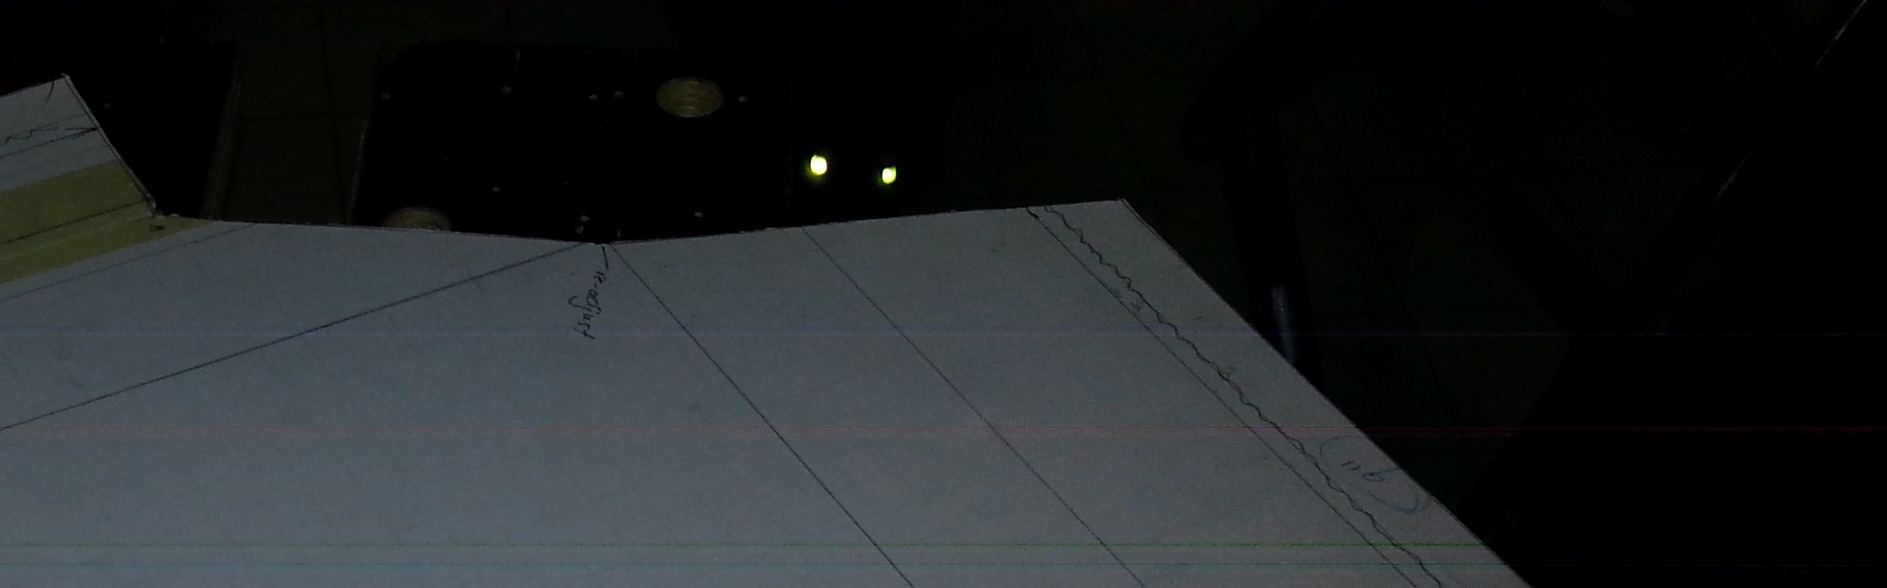
Funny thing... in the photo I took of the new cut-out blank... the cat photo-bombed it. See those to glowing eyes in the upper-right corner... what a ham.
January 2, 2016 "All men are created equal.",
but not all seat pans are...
Second day of working on the fourth seat pan and I'm DAMN happy about it. It's all about working towards Excellence...
First thing this morning I drive over to the airport to bore a few holes in the sky. On my way over I'm thinking what a beautiful day it is for a flight.
Took my time getting out of the house 'cause I know that there was going to be some frost on the wing and tail surfaces. Got there... and I was right. It's happened before, but by wheeling the planes out into the sun and letting them sit there for a little while it starts to melt and a waterfall of drips roll off the wings... drying in less than a 1/2 hour. Not the case today. Josh tried spraying some solution on them to melt the frost... it melted but then turned to ice. I was suppose to take to the air around 8:30AM. It was 10AM and I called it quits. Still another 1/2hour - hour before the wings would be ready to fly. DAMN !!! what a waste of a beautiful day for flying.
I had a few other things I needed to do before motoring home... Got to the house about 11:30AM, hadn't had anything to eat yet today so I made an early-lunch sandwich with some tomato bisque soup. Yum !
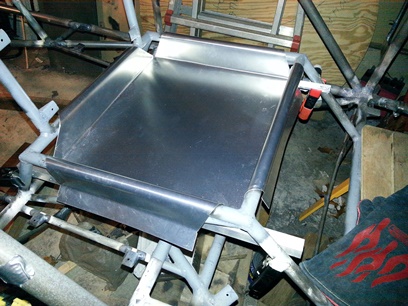
Cleaned up the mess I made making lunch then headed down to the basement workshop to get the fourth, er second, seat pan finished. Needed to deburr then make the initial bends on the piece. Took less than an hour... then put another 1.3hrs cleaning off the paper pattern so that I could anneal and wrap the sides around the pilot's seat frame. Annealing (and I'm getting pretty good at it now...) and wrapping took another hour. DONE !
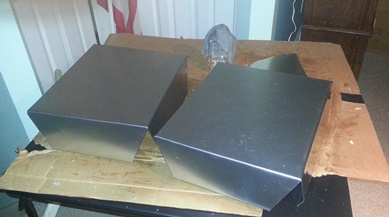
Both of the final two still need one last annealing so that I can push the sides up close and flat for riveting them on...
Click on photo for close-up.
Here's a question for you: What's the difference between the left seat pan and the right seat pan in the above photo? Answer: The one on the left: Good enough. The one on the right: Working towards Excellence. I won't be using the one on the left. oh yeah... those heavy welding gloves you see are the ones I used for grabbing the hot aluminum to bend and wrap around the seat frames. Tonight they were SMOKIN' !!!