Mantua, New Jersey
Original Site:
September 2004
E-mail: usav8or@yahoo.com
The Radical Radial Driver's seat.
September 28, 2015 Repeat...
Repeat... yeah, Repeat.
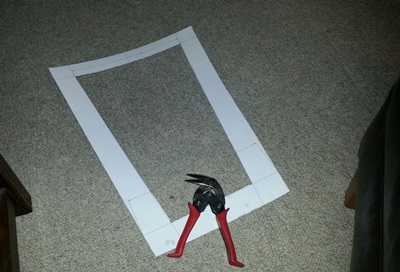
a little... More work on the seat backs. Cleaned up the edges on the second seat back insert then all those rivet holes; drilled first with the cetering bit then with the #40 bit. Next I cut the second seat back frame out of the 6061 T-6 aluminum; glued on the paper pattern then cut out with the tin snips (love those lefty snips!). Still need to file to the line and sand smooth.
September 29, 2015 Making...
no mistakes.
My forth seat back insert... I should be able to do this one in my sleep, eh ?
Well, it isn't the forth one I've bent to shape, more like my third. But... I know the drill and it's just a matter of taking my time as I go through the steps. The forth seat back and it got me to thinking about learning from my mistakes.
It's not necessarily the mistake that makes us better... it's our discovery of the mistake that makes us better. Sorta like someone telling you all day that you're doing something wrong... or you ain't doin' it right. It's not until YOU realize you're making the mistake that the lesson has been learned.
No mistakes made tonight. The 2-piece seat back is close to being ready to rivet up. Just need to file the inside of the frame a little bit more for an easier fit of the insert.
September 30, 2015 Worth repeating...
and repeating... yeah, repeating.
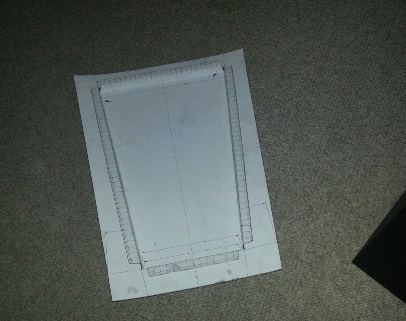
A little over an hour and a half and I have the seat insert and frame match-drilled. Same as the first, and now ready for riveting.
I have to confess...I did mess up the first hole that I drilled last night... OUCH !!! Drilled for an 1/8inch not a 3/32inch rivet by mistake; a number 40 instead of a 30. I'll see if the head of the 3/32 will cover the exposed hole on top... if not, I'll put 1/8inch rivets in the two corner holes.
no photo available :)
October 1, 2015 Tweaking...
still needs more tweaking.
More work on the seat back pieces...
Cleaning off part of the paper pattern and plastic covering from the areas that are in the areas that will be riveted isn't a fast process. Started last night with me soaking the areas with mineral oil to breakdown the glue. Then... pulling off whatever was loose today then another quick soaking Then a lot of rubbing off of the glue that's not easily coming off.
Finished with that and there are areas that were "hidden" by the pattern and plastic that still needed deburring. Did that... then checked the two pieces together again. Still need to do a little more trimming fo the top and bottom edges for a better fit; a fit where the two will lie flat together (well... actually flater together). I'll be riveting these together tomorrow or the next day...
October 3, 2015 Tweaking...
still needs more tweaking.
Spent the night riveting the seat back insert and the frame together. Having the correct length rivet (without cutting them... cause you never square the cut) makes all the difference when squeezing a rivet. Took my time squaring up the squeezer on the rivet barrel and squeeze a perfect rivet 999 out of 1000 times. It's incredible how easy it is.
Monday, October 5th:
The upper starboard side hole was incorrectly drilled for a 1/8inch instead of a 3/32inch rivet. Matched the port side hole with an 1/8inch rivet hole. Probably spent 45 minutes cutting scrap aluminum to drill a few holes in so that I could practice squeezing a few 1/8inch rivets. Finally got to the actual rivets... only two to squeeze... not a problem.
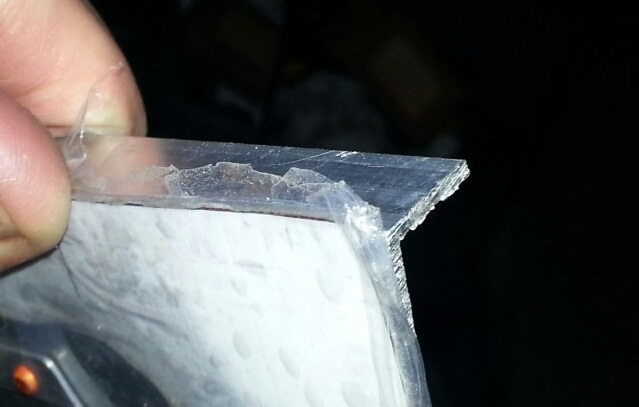
For some reason the frame on the second seat back decided to get a little wavey. Don't like the thin sides of the frame either (can easily be bent during normal use). Thought about it some and came up with the idea of using the same "L" flange that I used on the turtledeck hatch. Just need to order it now...
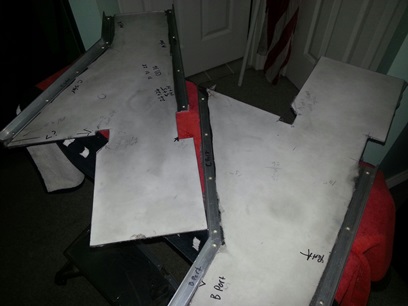
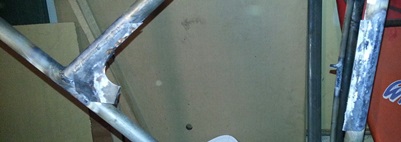
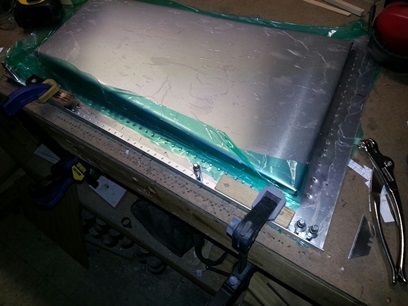
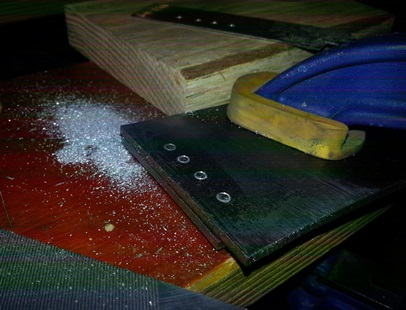
Seat backs in position. Front still needs cleaning up.
"L" flange idea. Click on image for close-up.
October 6, 2015 Waiting for something...
I haven't ordered yet.
Switching gears... need to order the "L" flange for the seat backs. Can't finish the seat backs until I do. SIDE BAR: Can't anneal the frames without them really really distorting. Makes sense, eh ?
What to do ? First thing that pops into my head tonight. Spotted a throttle quad and remembered I needed to make the second spacer (to bring it away from the side of the fulseage). Got the 1/4inch piece of aluminum stock out that was left over from the last one I cut and preceeded to cut the new one out.
Drilled the four smaller holes and one larger hole before cutting the shape out. Followed by a rough, close to the line cut. Followed by a little filing then a rub of 200 then 400 grit paper. Close to where it needs to be unless I want to shine the crap out of something that's not going to be seen. I just might...
October 7, 2015 Waiting for something I had...
but didn't realize it... at first.
Thinking about what to do on the project at work... looking through the punch list and looking at the blog, I saw that I hadn't cut and riveted on the "L" flanges to the front floor boards.
After having dinner I pulled some of the extra 3/4inch x 3/4inch aluminum "L" flange I had... the same stuff I'll be using on the firewall. Wait a second... these aren't the same as the ones on the heel rails. Looks like I might have been mistaken. The flanges I used on the back heel rails are a little bit hardier than the stuff I'm using on the firewall (which has a square instead of a curved angle connecting the floor and the wall of the flange... square is easier to bend).
DAMN ! Not the right flange. Now I need to order more ? Which will push back this project and now I'll need to think of another project to work on. Figured while I'm thinking of what else to do I decidedmight as weel log onto my Aircraft Spruce account and add these pieces to my basket (if you're logged in and place it in the shopping cart it'll keep it until you either delete it or purchase it). Went back looking for the last time I purchased them and saw where it was just recent and it was the amount I needed for the front floor boards. Well I'll be DAMN, again ! must have ordered them and they're sitting here somewhere... Remembered seeing a 3ft long box in the living room. Took a look and, yep !, that was them.
How long will it take to get these three pieces cut and fitted... shouldn't take much time at all. Wrong. With all the small adjustments I made with filing here then filing there and here again... took near 2 1/2hours. Lookin' good through.
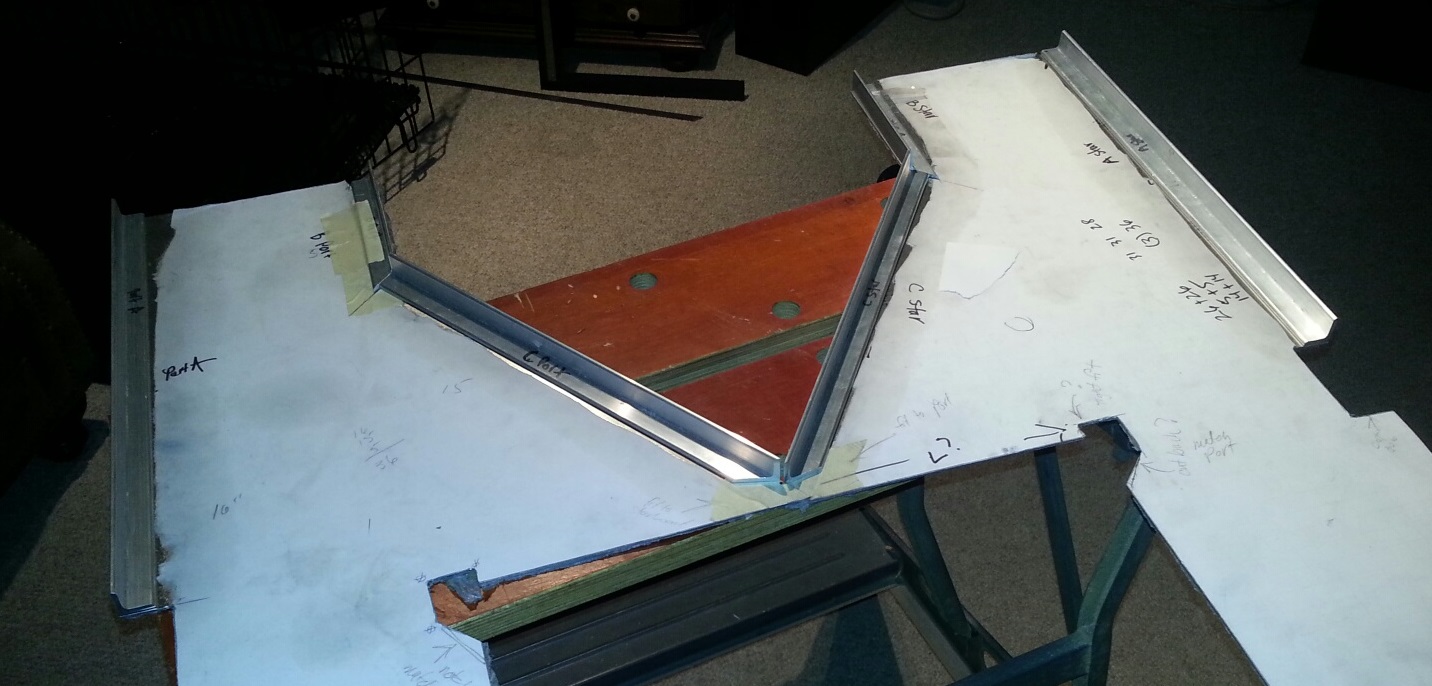
Had to make the decision as to whether I would have the inside angled "L" meet up with the short, forward inside "L" on the front side of the upright or the back side of the upright. Decided to have the pieces meet where the face of the uprights would meet which means that the angle of the long "L" flange is now angled slightly different than before which means I'll need to mark and trim down the flor itself. Yeah, not a problem just something else to do.
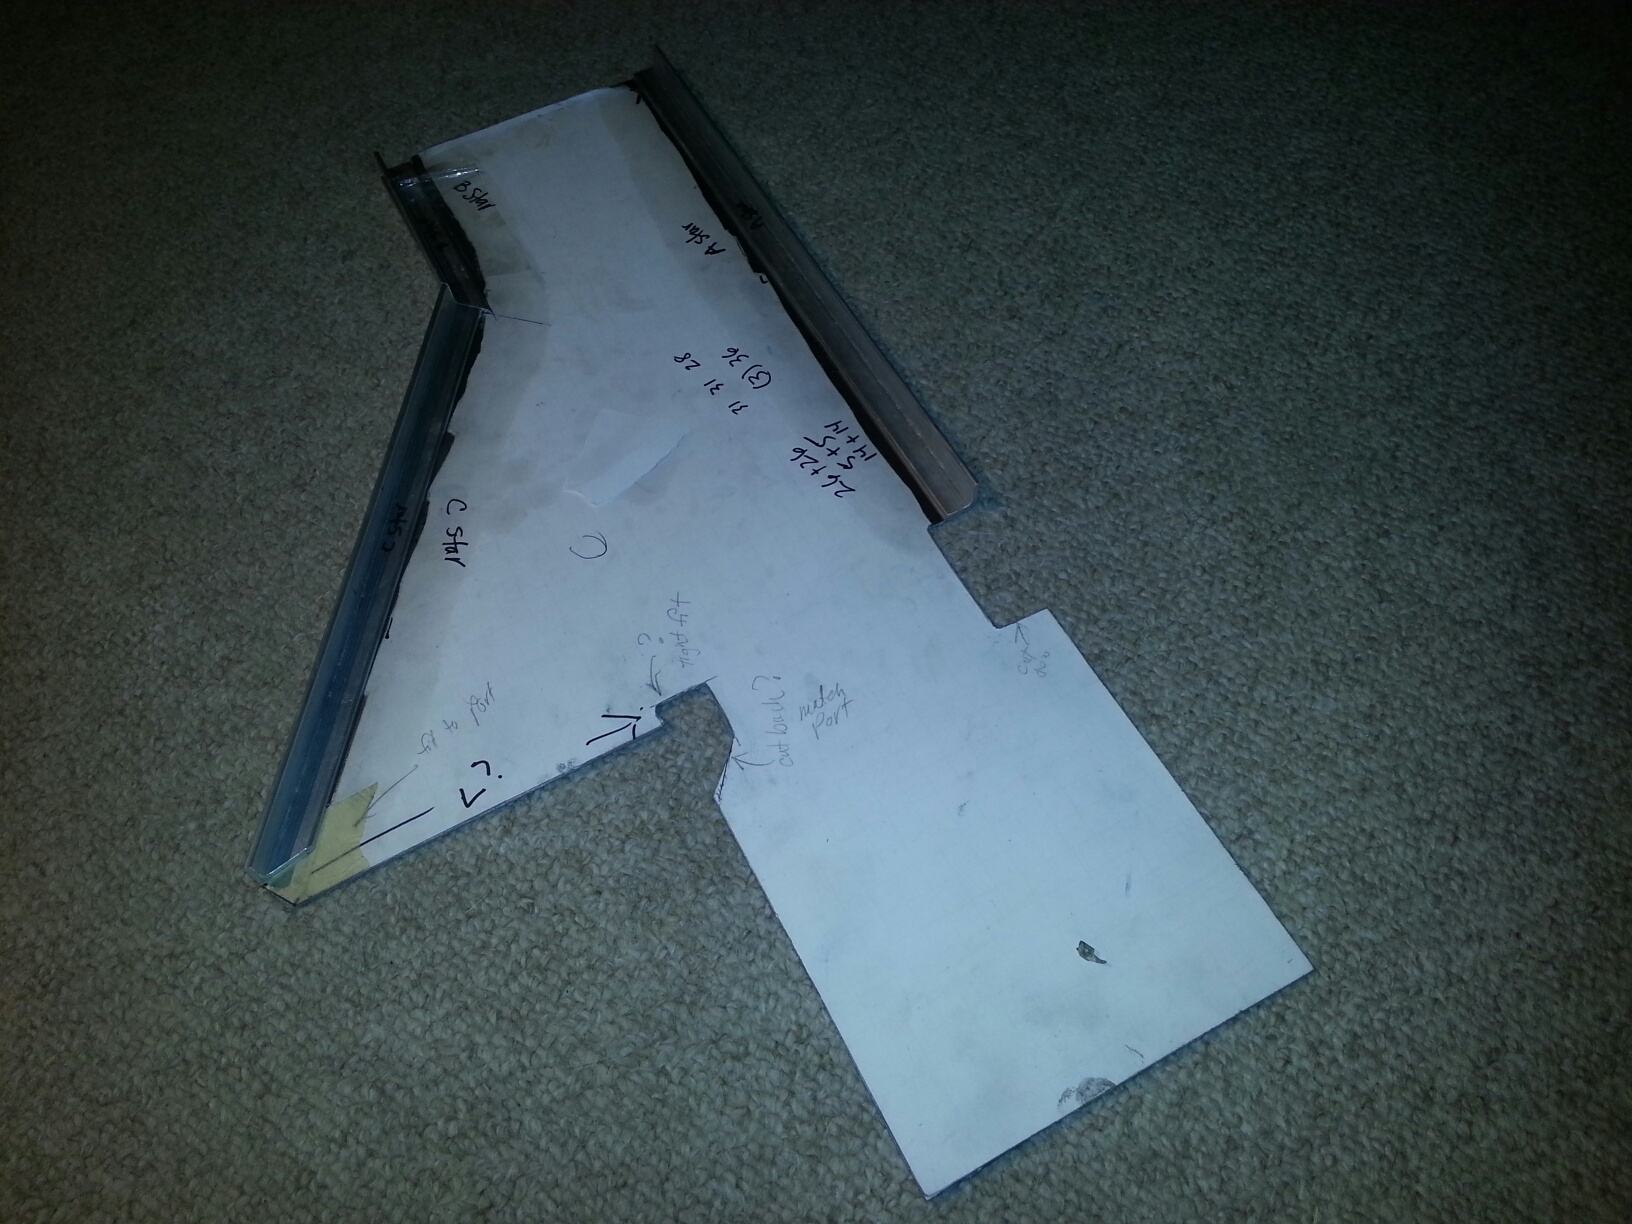
Like I said, I'm real happy with the way that it looks and happy that I took the time to get it looking right. If you look at the larger image (click on below for larger one) you'll see that the small inside flange sticks out past the longer angled flange. I'll be trimming this down after I've aligned the pieces with the rivet holes for final location. Port side tomorrow...
October
8, 2015 A bit of that...
learning process going on ?
We'll
never know.
Tonight... on to the port floor board (before I forget the steps in doing the starboard floor board).
Knew what I wanted to do. Knew how I was going to do it... only with a slight change. Thought that I would try "filing" down the cuts with my sander instead of a file. The first
rough cut I made I left the extra metal a little longer than I would have normally done. Took it over to the sander and being (in my best Elmer Fud voice) very careful... took off
the offending aluminum. Worked like a charm. Straight, smooth and QUICK.
Measured, marked and sanded all six ends and was done in an hour. Shaved an hour and a half off of this from last night's flange and floor board project. The exact same thing. Quicker
and I think probably more precise. I'm not sure if I would have arrived at thinking of this unless I went through the process of first filing it all by hand. Actually... not sure
what made me think of this. Maybe I was thinking I could put a nice smooth edge on the ends using the sander ? We'll never know.
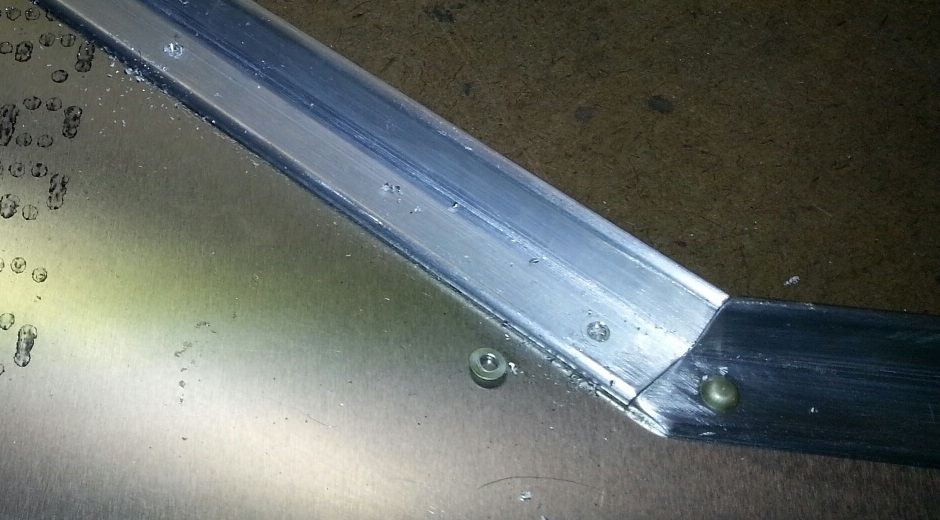
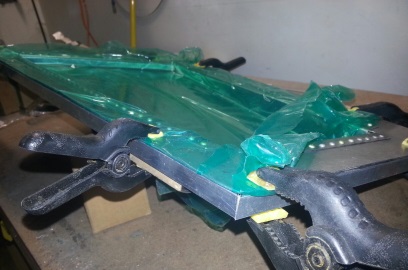
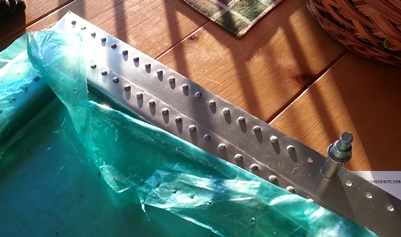
Flanges loosely set into place. Still need trimming.
Still need riveting. (Click on image for close up.)
October
9, 2015 Final fit...
before riveting.
Getting ready to rivet the flooring up. Did a final fit of the flooring in the fuselage and it needs to be tweaked. Made a few cuts... re-cut a few of the flanges and now it's ready for riveting up.
Marked the flanges for drilling... just need to use a centering drill then drill them for the 1/8inch rivets.
October
10, 2015 Final step...
on flooring.
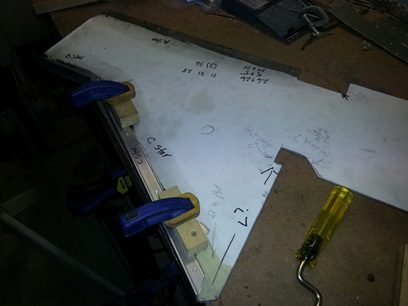
One last step before riveting them together. Made a quick drill guide for drilling up the flanges. Deburred then match-drilled to the floor boards. Same as what I did with the heel rails just a little bit more pain in the ass because they are a lot larger.
Got the box of Round Head AN430-4-5 rivets. Changed the yoke out on the hand squeezer then went to work on the rivets. Without the cuts (which are usually at an angle when cutting with a rivet cutter) it's pretty easy squeezing these rivets symetrical. Fast too.
I'm unhappy with the VERY last rivet I squeezed. Looks like I either didn't debur it or something got under the flange... 'cause it has a gap underneather of the foot on it. I'll need to go back and drill out all four rivets. Check what the problem is with it... then re-rivet it.
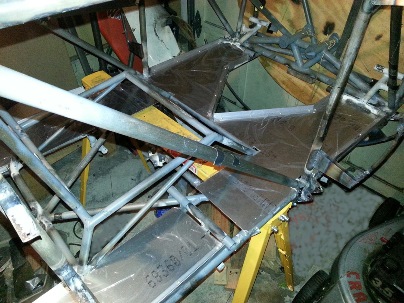
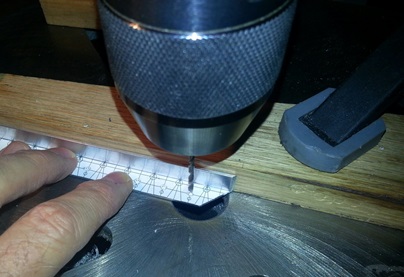
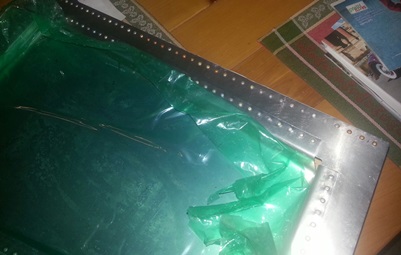
Match-drilling flanges to floor boards.
All riveted up. All oiled up and waiting for glue to
loosen so that I can clean off the patterns.
October 12, 2015 FINAL Final step...
on riveting flooring.
One EXTRA step before finishing the front floor boards. If you remember the last rivet I put in the other day showed that something was amiss; the end of that side was raised a little bit. Being the builder that I am I needed to at least check under there to see what the reason was.
Busy yesterday (Sunday) so I decided Monday night was the night. There's a first time for everything and tonight... it was the 1/8inch rivets. Had looked at a video the other day and it looked pretty easy... up until the point where they said drill until you think it's the right depth then take the rivet head and break it off; down to where the shaft starts. "How deep is that ???"
I proceeded with caution. Drilling a little bit... trying it... drill a little bit... trying it. I eventually got to the point when inserting the pin punch in the rivet head and bending back and forth the head broke off. Did all four rivets (and the drill hole on none of them seemed to go right down the middle of the head... they always drifted off the center and I needed to angle the drill to get it back centered). Taking my time with them and I eventually drilled all four heads without incident.
Those rivet shafts, if done correctly, are VERY tight in the hole. You'll need to place the rivet over a hole (I had a 2x4 with a 2" hole drilled in it) where it is supported on all sides as you put the pin punch on the shaft and tap away. It'll eventually bang out... just have a little paitence.
With the offending flange off I saw that I didn't deburr the top and the bottom of that one side at all, or not very good. Took the deburring tool. Worked it on all four holes and re-set four new rivets in it. And... it's looking real nice.
Drilled off rivet heads.
(Click on image for close up.)
October 13, 2015 First FINAL Final step...
on throttle quad mounts.
Started off tonight by wrapping the heel rails and floor boards with the plastic wrap that I have; protect them from scratching. Been thinking about those throttle quad mounts. Not real happy with the look of them; big flat plates with a few lightening holes in them. A lot cleaner look would be a few pieces of square tubing to mount them to.
Spent most of the night grinding both of the mounts off. Took a few measurements and I'll be ordering a few lengths of 5/8inch x 5/8inch x .o35 tubing. Ordering a length of 1/4inch x .o35 ( 5/16inch x .o58 as back up) to use as bushing to run the 3/16inch bolts through too.
and... since I'm ordering this stuff, I'll order those pieces of 1/2x1/2x1/16 "L" flanges for the seat backs.
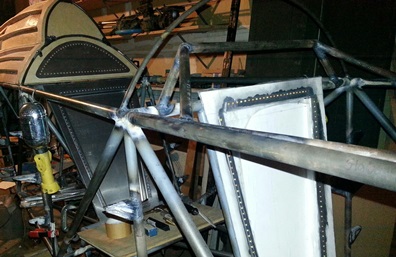
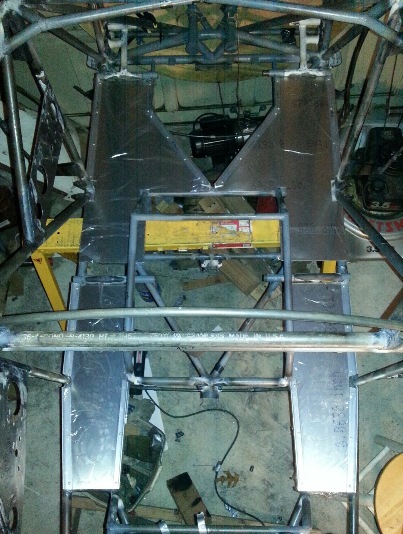
Flooring in place.
Another view... flooring in place.
Co-pilot's throttle quad mount cut off.
October 14, 2015
Spent about a 1/2hour grinding off the excess throttle quad plates. Still need to clean them up a bit by filing and sanding the areas. 'nuff said.
October 15, 2015 Close to mounting the throttle quads...
again.
More work on the throttle quad mount re-do.
Left the fuselage last night with a few rough weld lines. Needed to grind them down and sand them smooth.
Well, actually I thought I would take my time with them and file the weld lines down. Wasn't working. Switched over to the grinder... and took my time grinding down the weld. A little over an hour and I have two of them ground down and sanded up to a 600 grit. Two more to go...
No photo available.
November 28, 2015 Back(s) on...
the seat backs.
Had this entry in the firewall section 'cause I started the day off writing a few emails asking a few gentleman with the UC-78/T-50 web site about the fittings on the fuselage that the engine mount attaches to. So... I'm thinking it's a good idea to put this writing where it needs to be.
... Actual work on the project came to close to three hours. Getting ready to rivet the frame pieces (aluminum "L" flanges) to the seat backs. Still need to cut the 45's so that the four pieces will actually fit together to form a frame. Cut the 45 in the first piece then clamped that and another one up to the seat back frame and discovered two things; 1. all that trimming to get the right angle the first time was for naught... the 45 degree angles will be cutting those all away 2. I cut the wrong leg on the first "L" flange, DAMN ! Not a problem for either one: Sure a little bit of wasted time cutting those angles but that happens and... I hadn't spent much time on that one I screwed up so it was an easy fix to just cut another one.
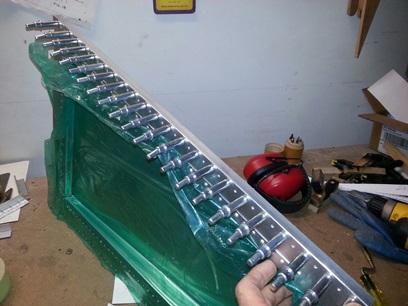
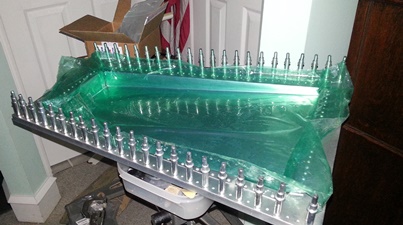
Using quite a few pinch clamps... and after clearing a nice work area on my work bench, I was able to get a close fitting frame for the seat back. I'm a little concerned about the corners and them not clamping tight with the sheet metal of the seat back. So... I'm thinking I'll use a little T-88 in the corners. Clamp them over night. and... I'll be good to go, or at least that's what I'm thinking right now.
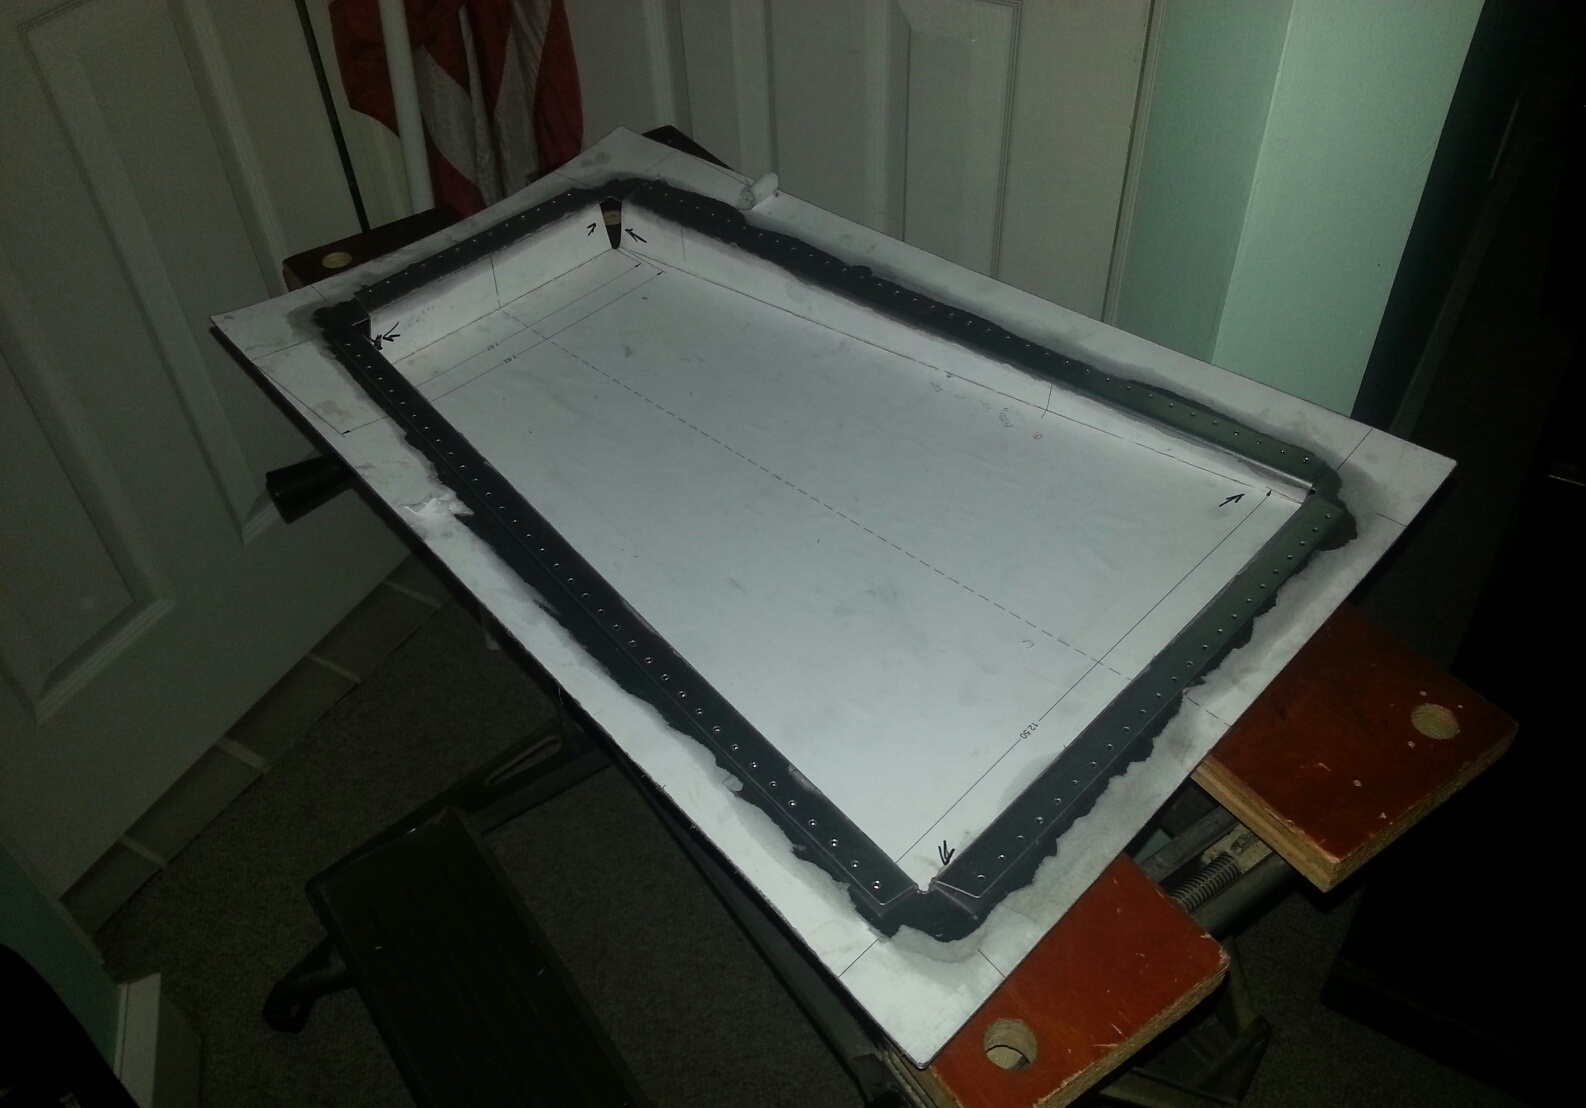
Seat back frame ready for drilling and riveting.
November 29 and 30, 2015 Sitting back...
thinking about the seat backs.
It's been two days since I posted... and I don't want to get into a habit of that. I'm at work on December 1st typing this up during lunch and I should have written down the hours. I know what I did but I just can't remember the hours.
Sunday I worked on drilling the rivet holes in the "L" flanges for the pilot's seat back. Drilled those all out. and... while I was drilling them out I had to deburr the back-side of them so that they would lay flat on the Drill press table.
I've done it before and I've written about it before too: using the jerry-rigged jig for aligning the aluminum for a consistant distance from the edge I drilled all the holes for all four sides.
After all that drilling and deburring I packed it in for the night.
Monday... back at it again. Deburred the other side of the flanges. Clamped one of the sides to the back-side of the seat back and started drilling and clecoing down the line... Finished with the one side I did the other. Only spent 1.7hrs on it today and still had plenty of time to probably rivet these on but sat debating whether or not to cut a few rivets (with the resultant messed up squishes or go with a shorter rivet and know that this isn't structural and that it's holding the edging in place (albiet... holding it real good).
Continued my search on the internet for round head rivets... the 3/32 x 5/16 but coming up empty handed. Just may make a jig where I can file the rivets down to 5/16" with flat bottoms instead of the angled bottoms I'm getting when cutting them. and... I double-checked the cutter and it's tight.
"Should I stay or should I go ???" er, should I cut them or should I use shorter ones ??? Let me sit down and think about that... Whatever I do I'm gonna redo ALL those other ones too. They just look nasty... (the ones that I did for attaching the backs to the front frames.)
December 1, 2015 There comes a point where...
you've got to make it happen.
The lengths I go to...
Can't find the correct length 3/32 rivet. Needs to be a little over a -4. Hell, I'd be happy with a -4... it ain't structural. But, I can't find it. The -5's I have I'm afraid are a little too long and will tend to bend over when I squish. And if I cut them, or any... they're cutting at a frickin' angle. Not good. Not good at all for squishing... at least not for me.
Spent the night kinda wasting time but not wasting. Nothing that I'm putting down as time on the build but time anyway. I am putting time on the... ahhh whatever. I need to have these the correct length so it looks like it's up to me to do it.
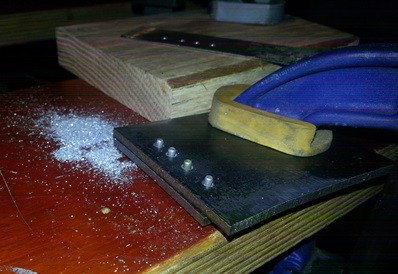
The only thing I came up with that would keep the tip of the barrel square is to file the damn things. Spent quite a bit of time making up the simple jig. Made it so it was four up; four rivets at a time. Might be making it 8, 12 or 16 up. Four is pretty damn slow... not as slow as one.
Put in three hours tonight and have a handful of rivets to show for it...
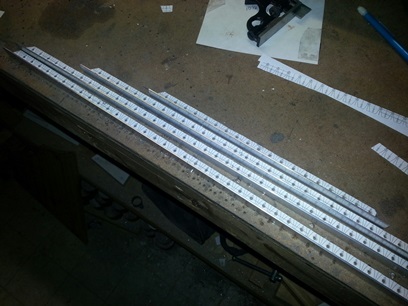
Long rivets in jig ready for filing.
Rivets at the now, proper length. Ya just can't see
the tips of them.
December 2, 2015 Things aren't always...
as they appear to be...
A funny thing happened on the way...
True story.
More non-work on getting more of these rivets trimmed to size. Put a few more holes in the jig so now I'm doing nine-up instead of four-up. You can do the math... it's a little more than twice as fast now.
Anyways... so I'm making more aluminum dust faster than I did yesterday: pumping out those smaller length rivets. After awhile I take a look at the pile of rivets that I have and it looks like I can rivet on the two sides that I have match-drilled. So... I go for my rivet squeezer and 3/32 rivet set and... I only see the 3/32 rivet set that has 1/4 of the die filed away (that I made for tight spaces) and I know that I bought other. So... instead of using what I have, I go on a mission to find at least one other 3/32 die. Never found it. Found ones for 1/8 but not 3/32. okay... so I use the one that I was determined not to use. But getting back to the story: when I was down in the basement workshop I spy a large box that I know rivets are in. I take a gander at them and BOOM ! they're 3/32 rivets. And get this, they're the length I'm cutting down the other ones to. DAMN ! Seriously ? They're not the aircraft hard rivet but there ain't gonna be no stress on these anyways.
Bring the box upstairs and, using the 1/2 eaten away 1/2 die, start easily squeezing these rivets on. It's almost too damn easy. But, when I look at my squish, two of the three are lop-sided. I go to drill out the two that are lop-sided and they are a pain in the ass to drill out. Since they arn't aircraft rivets there isn't a dimple at the top where you can start the drilling out process. Having learned from the past I "set" the drill tip into the soft aluminum and slowly began to drill them out. It was painful. I drilled them out and I didn't screw anything up... but it was painful: slow and no fun at all.
I have a delimma: use the softer rivets and knowing that a few are going to need to be drilled out and sucking up that process or using aircraft standard rivets knowing the same thing about lop-sided rivets and having an easy job of drill them out.
Here I'm thinking that I found that treasure chest of "gold" when I found that box of rivets... The soft aluminum rivets need to have a dead perfect squeeze. My question is: how many deap perfect squeezes do I have in me?
December 3, 2015 The good, the bad...
and yeah, the back side is ugly.
Three hours... I spent over three hours on squeezing a few rivets. and... I'm only happy with two of them.
What is up with this part ? What is up with me squeezing these rivets ? After the first few rivets I realized that I needed to clamp the aluminum flange instead of the seat back frame. Clamping just the frame allowed the flange to twist with the seat back frame (too long and too thin of material to keep it stabilized... I guess). Need to drill out THOSE rivets. okay... So I start clamping the flange, which keeps the piece from twisting, and the squish of the rivet turned out great. On to the next the next the next...
Onto the next the next the next isn't doing me any good. On all except two of these rivets... the barrels are squished at an angle. No matter what I do the damn things keep squishing at an angle. No matter how long I take to make sure that the squeezer is set-up and staight, the squish isn't very good. The front of the piece looks good... but the back is another story.
More thinking needs to be done but I can't let this put a hold on the build... maybe I need to get better lighting underneath to see what I'm doing wrong ???
The good looking side of the seat back.
December 4, 2015 A little more time...
if I had just taken...
a little more time.
okay... going back and drilling out those offensive rivets.
During lunch today (stayed home to work out of the house) I tried a few of the -3 rivets. They ain't meant for being structural see'n that they are only holding the "L" flanges in place to flatten out the edges on the seat backs. I wouldn't be changin' them up otherwise.
The shorter -3 would bend if they were -4.
Later on that day...
Decided to go back and try the -4s (after having squeezed a few -3s). Brought in a drop light to put right there beside the piece I was working on. Took my time... really took my time to make sure things were all nice and center. Took my time.... really took my time to make the squeeze so that I would get a nice semetrical squeeze. And... it worked.
Maybe it was the light that was the key factor. Maybe it was the extra EXTRA amount of time I took setting the squeeze up... but it worked. Out of all the rest of the rivets I did I'm unhappy with probably two of them. One HECK of a better job than the day before... but it all looks the same from the front.