Mantua, New Jersey
Original Site:
September 2004
E-mail: usav8or@yahoo.com
The Radical Radial Turtledeck.
May 26, 2013 Tail group...
before the turtledeck...
Another busy day today... but not on the biplane project. Squeezed in a little time so that it wasn't a complete wash of a day.
Needed to measure, cut, and glue on the final former block on the turtledeck floor. This morning I spent close to 20minutes on that task.
I wasn't able to get back on the project until early evening. I need to figure out the tail group; what goes where so that I can position the stringers that begin on the turtledeck and end at the tailpost.
Need to piece the tail area together before I can figure it out...
I made the metal ribs for the tail group back at the same time I made the ribs for the horizontal stabs (which was quite some time ago). The kicker is... I found one of the ribs for the vertical tail and all four for the rudder. Spent way too long of time looking for the second vertical tail metal rib (of which I didn't record the hours).
okay... I've found all the ribs I need. Mounted a 7/8inch pole to simulate the vertical tail post and taped the leading edge of the vertical tail into postion. Laid the ribs out per the plans and... stepped back. Looked at it for awhile and decided that I need to modify the area where the forward tail meets the turtledeck (scooch it back a little).
Tomorrow I'll modify the forward bend in the vertical tail leading edge and move forward from there...
May 27, 2013 Tweaking parts...
for the turtledeck...
I worked a little on the leading edge of the vertical tail so that I could tweak the look of the turtledeck.
and... in my tweaking I'm seeing where I need to re-make two of the formers. This means I'll need to order some additional 1/4inch plywood. The good thing... I can re-use the larger former to make the smaller former. There's some solace in being able to re-use it instead of throwing it in the trash.
I feel like I'm repeating myself here. and... you'll find that this is an ongoing topic... re-making things to get them right... Good enough isn't good enough.
Decided to re-make the larger wood former as a 1/4inch test piece out of the cheaper builder's ply. Took a few measurements and saw that the upper section wasn't that far different than the former in front of it (the one I routed out)... the bottom needed a little readjusting. I used the same bottom curve from that same former but angled it slightly. Now that I see what I need to do... I'll order up that additional aircraft grade plywood.
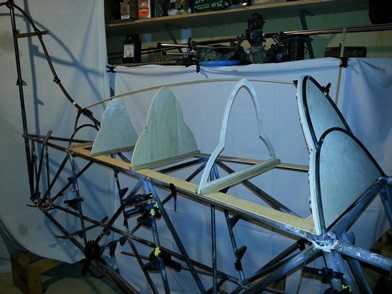
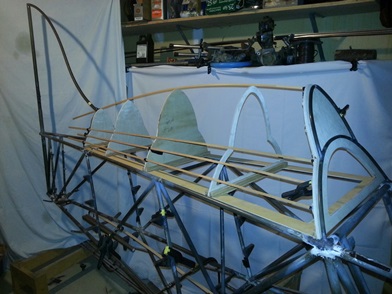
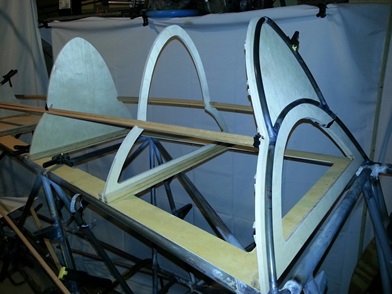
Here's a few photos of the turtledeck; before and after new former shots. The rear former still needs to be re-made.
Old former (just behind the routed former).
New former in old former's place.
Had time for a few sessions today...
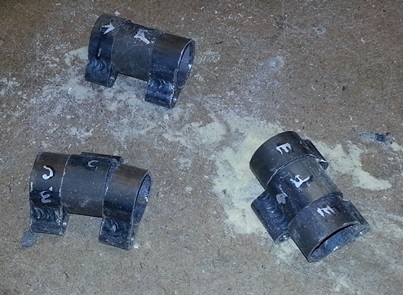
Sat down to review the Skybolt Build Manual on the "Vertical Fin"; aka vertical tail. I have just about all the parts and pieces for it... just a matter of finding them. Most of them are large enough not to lose; everything except the tail hinges. But for some reason, I have one of those minds that can just about always place something, wherever whenever I put it. and... so it was with these hinges. I remembered placing them next to the small sander I have (oh so many years ago). Went down to the basement work area, headed over to the sander, but didn't see them. Dug into a pile of sawdust... and there they were.
These are actually lined up wrong. The 1/4inch holes are the ones that are bolted together.
They still need to be squared up, but the "hard" part of making them is finished.
Needed to reposition the rear, metal turtledeck former. Went about the business of cutting one side free, measuring it, moving it, tacking it... did the same for the other side. Had the torch ready for action so I decided to weld both the metal bulkhead former and the one I just tacked.
Still need to make a few tabs that will allow me to attach the wood turtledeck to these two formers. AND... the front support for underneath the turtledeck, just behind the bulkhead former.
oh yeah... made the metal plate that gets welded to the rear, metal former for the turtledeck. This is where the leading edge of the vertical tail gets welded to (made the plate that attaches to the leading edge tube also.)
Mark me down for five.four hours.
May 29, 2013 Making a pattern...
to make a pattern...
I had plans for doing something else tonight... but they feel through. It was about 9PM and... what the hell, I'll take advantage of the falling though and I'll get something done on the project tonight to keep it moving forward.
I got notification that the plywood is scheduled to be delivered tomorrow. Still needed to route the door opening in the bulkhead former on the turtledeck. which means... I still needed to make the paper pattern to make the plywood pattern to route the door opening.
okaaaaay... I've got my plan for the night: make the paper pattern for the baggage door opening. Take away 15 minutes of time, for the time I spent running around looking for a piece of the pattern I thought I made the other night, and my total time tonight is .5hours. Not a lot of time, but it's .5hours further along than if I hadn't worked on it.
The white you see in the photo below is the pattern I made to make the plywood pattern for the baggage door opening.
May 30, 2013 Making saw dust...
and a door opening...
The plywood showed up today, but I had other plans for tonight...
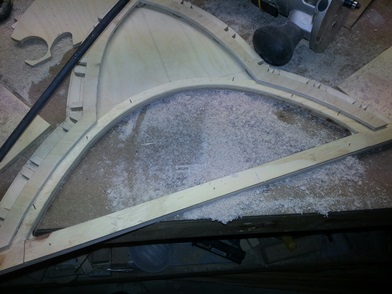
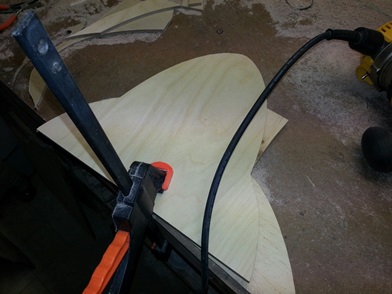
Yesterday I drew up the pattern for the jig to cut the baggage door opening. I've been wanting to route this out for a while now so... that was the plan. Took the pattern down to the basement work area and cut filed sanded the jig for the door opening. Routing out of the hole... pictures are worth a thousand words, eh ?
Hole saw hole to start...
Back-side after hole was routed. Shows jig.
Front side.
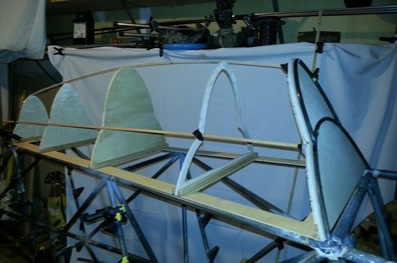
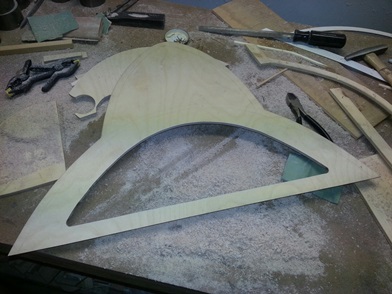
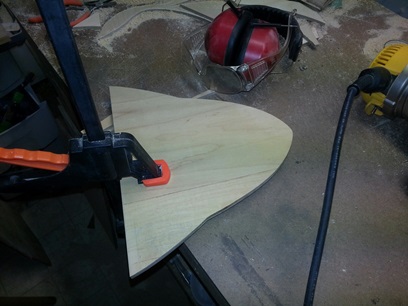
The shape of the turtledeck. These aren't the stringers.
A better feel for the side curve.
May 31, 2013 Tortoise...
or a hare ???
I made quick work of routing that new former for the rear of the baggage area tonight.
The ease of making that former (which by the way, took a heck of a lot more time up front than just routing) didn't outweigh the amount of time I spent on trying to get the last former sized for the the turtledeck. I spent a little over two hours going back-and-forth back-and-forth back-and-forth back-and-forth back-and-forth back-and-forth...
I know where it needs to be and I'm just not quite there yet.
Reflecting on tonight, the thought of "I should have just stopped and left it for tomorrow." kind of doesn't make any sense. I spent additional time on the project, sure, and I'm working my way through whatever challenge I'm having. I would have to do that today... or tomorrow, if I pushed it off. So let's not be pessimists... let's push through it NOW. Or, at least continue pushing in the right direction... and not just toss in the towel.
In sizing up the shape, using the stringer material... I think it would be ALOT easier using 1/4" instead of 5/16inch stringer material. (prior to tonight I was just using 1/4inch material) but... That 1/16inch of wood really adds a lot strength (aka... harder to bend and work with it)... so... I'm thinking I'm better off with it for the "bow" factor. I just may sand in the tops to a 1/4inch which will allow me to still have the stiffness of the 5/16inch the entire depth of the stringer (just thinking out loud) but have the 1/4inch look similar to the aluminum stringers.
Here's a photo of the routed former. Which only accounts for .5hours out of 2.5hours worth of work (?)
June 1, 2013 A shift...
in thinking.
continued... work on making, or let's say figuring out, the pattern for the final wood former for the turtledeck.
It was just a slight modification to the existing wood pattern that I originally made but I wasn't wrapping my head around it. The lower curve was pretty much correct, although I had to shift it over... further out to the edge of the longerons (with a slight overhang that would need to be lopped off). This then meant that the center of the pattern, on that wood pattern, shifted towards the center. I'm still not sure what I did wrong... or now, right.
I've got it transferred to the wood. (WOO HOO !!!) All I need to do now is cut out the wood pattern, test it out on the fuselage... then route the final piece from the "scrap" wood former from the back of the baggage area (it was larger than the one I'm now working on).
Once I get this into place I can then work on these stringers. Oh yeah... need to make the door for the baggage compartment, and figure out the flooring for the baggage area, and...
June 3, 2013 Finally getting a little...
support.
continued... work on the turtledeck shell
Cut and fitted the last wooden former for the turtledeck. Lookin' good !
Last turtledeck former.
Next I need to fit up the plywood that covers the baggage area. It's only going to be 1/16inch ply because it will have stringers attached which will have a fabric covering. No sense in having 3/32inch ply if I don't really need it. Which... brings me to needing to build in some type of spanning-support system for the ends of the ply (between the formers). I decided to use lengths of 1/4inch square spruce; the same stuff I used to make the wing ribs. These supports will allow me to glue the plywood full length... both the top of the bottom radius, and the bottom of the top radius (if you can make sense of that).
How to attach to the formers was the next big thing I needed to figure out (of which I've been thinking about for the past whatever amount of days...) Should I notch out the formers to fit in full lengths of spruce ? or should I make a few saddle gussets and cut lengths of spruce to fit between the formers ? Drum roll please...
Decided that I would notch the formers and glue full span sitka spruce. Although, I'm thinking I just may cut two dual saddle gussets to glue to the back-side of the rear baggage compartment former for a little extra thickness.
After I arrived at the decision on how to do it, I sat back and decided that I'd stop for the night and let the decision stew for a day before moving ahead. After thinking about that for a little while I discovered that I was just pushing back moving forward... the inevitable. I was making the excuses of "thinking about it" to push back moving on something I've thought about for some time now and had arrived at a decision. That realization got me off my ass! back down the steps! grab those formers! mark where the notches are to go! and cut them !!!
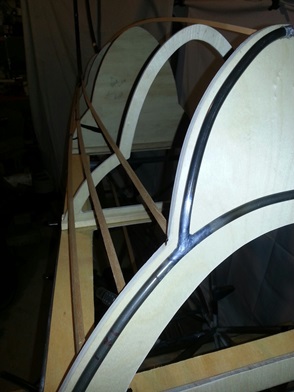
Here's a few photos from tonight's work:
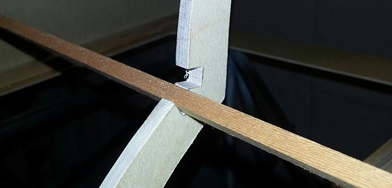
Testing out the spanning support notches.
Close-up of notch on inside former.
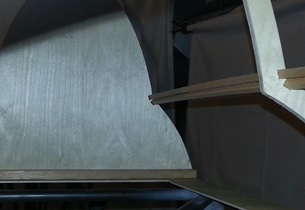
Notches as seen looking in through the door opening.