Mantua, New Jersey
Original Site:
September 2004
E-mail: usav8or@yahoo.com
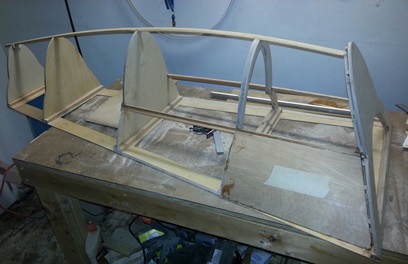
The Radical Radial Turtledeck.
June 24, 2013 Image from last night...
Image taken last night. Getting there...
later on today...
Took a comp day today... since I was at a company function over the weekend. Gots to get my time when I can. Getting home each day at 6:30, during the week, doesn't allow much time for anything.
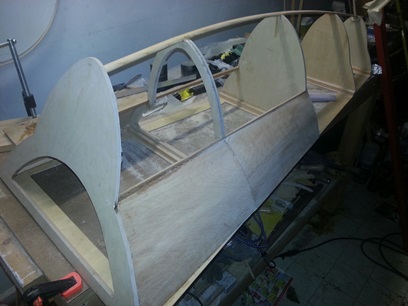
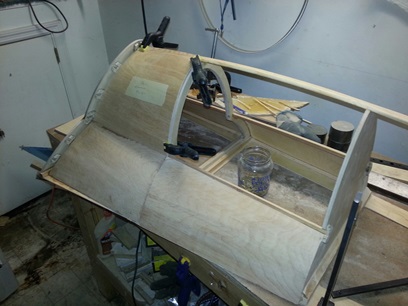
The first thing I wanted to do today was confirm the fit of the plywood sides of the baggage area. It took some time... I took my time... When I was happy with the way all four pieces fit I started figuring out the placement and the shape of all four gluing blocks for the sides. This was kind of started when I was fitting up the ply sides... as I had marked the inside edge of the ply for reference when gluing in the wood blocks.
Needed to get a close measurement on what angle those gluing blocks needed to be. I took whatever the hell that angle-finder is called and laid it up next to the wood former. Got a 60degree measurement on it. Figured it was damn close to what I needed these to be, but I wanted to make sure that the 60degrees was close enough (I wasn't worried about being dead on since the T-88 is a gap-filling glue). First thing that popped into my head was to jam aluminum foil into that recess to get a better read of the angle. Modeling glue would have been better, but I had none.
A few minutes of jamming aluminum foil into the space between the floor and the ply side... a quick measurement of the angle and DAMN if it ain't REAL close to 60degrees !!!
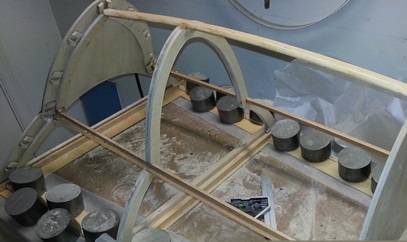
Cut, sanded and fitted all four pieces... then glued them and weighted them for an over-night set. Take a look:
June 25, 2013 Happy ??? un-happy ??? what ???...
What a pain in the arse !!!
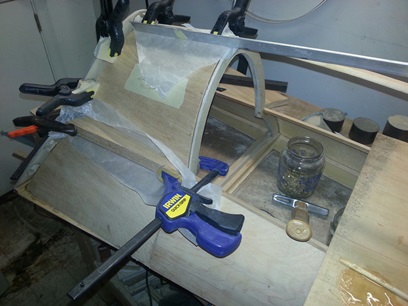
Started gluing on the ply covers for the turtledeck deck baggage compartment. There's just no good area for clamping the piece to hold it into position.
First I needed to clean up the glue blocks I glued into position yesterday. Thought about it for a while... finally figured something out to get it accomplished... clamped it and waiting for the glue to dry...
Thinking back on tonight's work... I really wanted to complete more than I did. Hell, I'm happy with what I got accomplished, but I wanted to clamp a few of these up at a time. Instead of pushing it and getting fustrated with the mess... I held back and only did the one piece. Ended the night... happy to be un-happy...
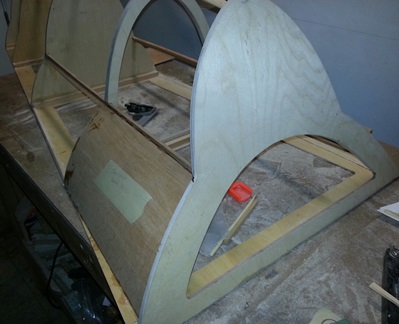
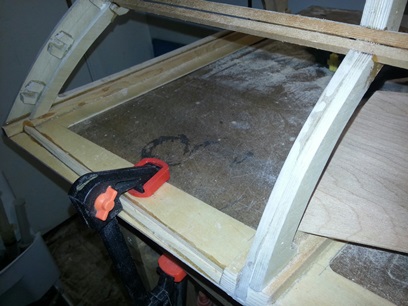
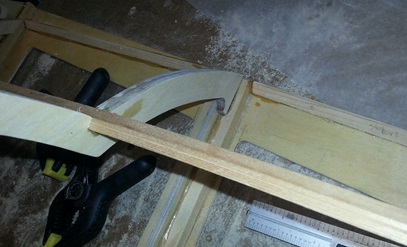
A few photos from what I did yesterday.
Glue block can be seen under clamp.
Glue blocks are along the edge of the turtledeck floor.
June 26, 2013 The waiting is over...
but do I dare look ???
After I aligned, glued and clamped the first ply in place last night... I had to wait. Wanted to go down to the basement work area and check it this morning, but thought better and let it sit all day long to allow the glue to set up nicely.
Kind of hard to describe the feeling I had last night and today. I guess you could compare it to a doctor mending a broken bone; you do everything that you can do to set it right, but until it has done its thing... and you take off the cast, you don't know for sure if everything has stayed where it was suppose to and healed correctly. The same with the ply covering. I slather on the glue, position the ply then clamp it into place. Double and triple checked it before I left... and hope to God that it doesn't move between now and when the glue dries.
After work today, I go down and pull back the wax paper to reveal the finished product. NICE !!! Everything stayed where I put it and I'm REAL Happy with the final product.
Spent about the same amount of time tonight prepping the second ply covering, gluing and clamping it... another night of wondering.
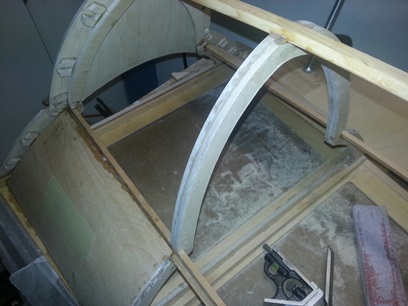
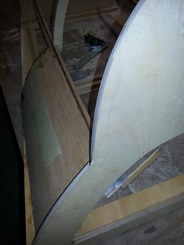
Here's a few photos of the first ply glued in place:
June 27, 2013 Adding time...
to speed up the project.
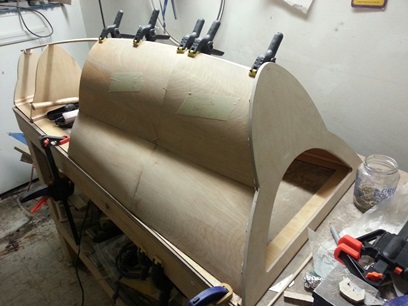
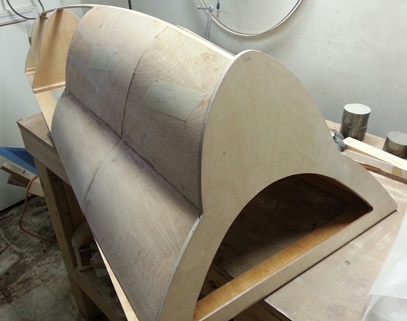
Another piece glued on... another nice looking piece glued on.
An hour to fit and glue on one piece you may ask ??? An hour to glue on... another nice looking piece glued on. Take your time and you won't need to do it over. Which, in this case, would mean having to chisel off the bad piece, cut and fit a new piece and then glue on the new piece.
I'm saving time by taking my time.
View from the top. Both port and starboard glued on.
Inside shot of foward and rear port plys.
June 28, 2013 Same stuff...
different night.
More of the same... more of the pain in the ass of trying to find a way to clamp it and to keep the ply from moving as the epoxy sets. (pain in the ass... but I still enjoy it)
After I get this forth ply glued in I'll coat the inside of these four bottom pieces along with the floor of the baggage compartment. Do it now instead of fighting with trying to reach all the places when it's totally enclosed.
A photo from last night.
June 29, 2013 Pattern work...
and, NO, I'm not flying the plane yet...
Spent quite a bit of time online trying to figure out if you can thin L-26 Seathing resin (this is some stuff Hal Wallace mentioned in the material he sent along with the plans). I am going to coat the inside and outside of the turtledeck with the stuff (it's now called SilverTip and it's put out by System Three Resins.)
The answer is YES, but not without consequences. Apparently it will put micro-bubbles in the resin when dried and that will allow moisture to creap into and get to the wood. Not a good thing if you are applying it for moisture control.
Looks like I'll be using it full strength.
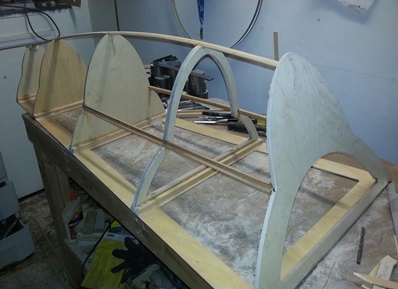
An easy night for me... up in the livingroom with the turtledeck cutting out patterns for the four remaining openings in the baggage compartment. I'll take another look at them tomorrow before rough cutting them out the ply.
Where I am with it up to this point.
June 30, 2013 No more... no less.
That's it !!!
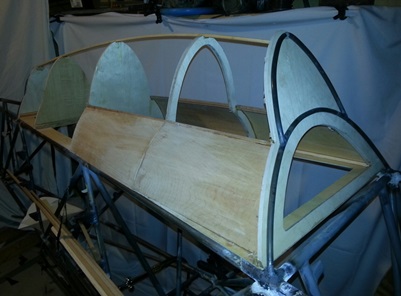
On the home stretch here... rough-cut the four remaining ply pieces for the turtledeck. I then went down and trimmed and fitted the first of those four to the turtledeck. That's it !
July 1, 2013 All trimmed...
and ready for glue.
Trimmed and fitted the remaining three ply pieces for the turtledeck baggage compartment. Not much more than trimming and sanding and test fitting... trimming, sanding, test fitting... until each fit like a puzzle piece.
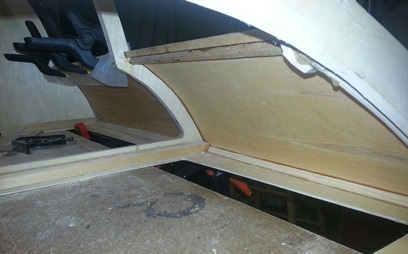
A few pictures from tonight's work sans the final piece of ply that was trimmed, sanded and fitted too.
Starboard side finished.
Port side finished, just not showing the final, trimmed rear ply.
July 2-3, 2013 Clamped...
and glued.
Just putting more time on it... no real rocket science going on.
Yesterday I spent close to a half hour figuring out how to clamp the forward, upper, port ply. Didn't have time to mix up the batch of glue and clamp it.... did that today.
Here it is in all it's glory (Damn !!! doesn't look much different than the one above.) No more time to work on it today... going to a "4th of July" Heart and Jason Bonham and the Led Zepplin Experience concert with Bean Man.
July 3, 2013 A photo of Ray Koob and me...
at the "Let Freedom Rock Festival."
Both Heart and Jason Bonham and the Led Zepplin Experience played at the festival.
Ray and I have communicated for years through emails and texts. I listen to him on "Ray Koob in the Night Time" on WMGK while I'm working on the biplane. It was great finally meeting him.
It was funny... Bean and I are walking into the show and I see the MGK booth... and they're giving away some stuff. I see Ray there and people are lined up wanting a picture with him. I stand off on the side about 10ft away just waiting for a lull in the traffic. He starts to walk away and I introduce myself.. "Hey Ray, Jerry... the guy building the biplane." haha
He said, "These guys are wanting to take a photo of me with them. I want to take a photo with you." GREAT guy !
July 4, 2013 Lesson learned...
not a problem.
Worked on the project twice today... before a morning run with the pup I glued and clamped on the upper, forward, port ply.
After having a cookout for the 4th, I went back down to work on it a bit more.
I've been pushing off sealing the flooring of the turtledeck... now is the only chance I have of getting at it before I put the final two pieces of ply on the top. I have some L-26 sheathing epoxy I got awhile ago for such a project. I mixed equal parts of Part A and Part B (about 3 oz of each part.) It looked and spread just like a medium-thick varnish. Nice...
I took my time putting it on with a foam brush. After about 15 minutes the foam brush wasn't working as well so I switched over to a bristle brush. Same thing... it was beginning to thicken up... already. I began to work as fast as I could since I had only used about 1/3 of it.
I picked up the cup that I had mixed it in and it was getting pretty warm. Stirred the L-26 mixture and it was starting to really thicken. The more I stirred the thicker it got. I worked faster to use as much of it as I could.
I'm not really happy with the thickness of the coat from about 1/2 way into the application, but I kept on applying it thinking I'll sand it down for a nice look.
Lesson learned ! I'll be mixing only about an once of each and have a lot of brushes on hand. At least the flooring of the turtledeck was sealed when the solution was still spreading nice.
Tomorrow I'll sand what I need to sand, re-apply where I need to re-apply and then I'll attach another ply to the top.
July 5, 2013 Covered...
and ready for stringers.
Started sanding down the excess L-26 build up... a little too much for the 100 grit paper I had. I'll need to go get some 60 or 80 grit to knock it down quickly. Leaving it for another day. No sense in wasting my time with the 100 grit.
Two sessions of work today. Started off with the above sanding on the first one then fitted, glued and clamped the third piece of ply. Here's photo of it:
The second session was the same as the first, sans the sanding. AND... it was the final piece of ply to be attached to the turtledeck. I'm still not finished with it, but I'm DAMN close !!!
July
7, 2013 The highs...
and
lows.
Yesterday was kind of a disappointment... again. It looks
like when I clamped the straight-edge onto the side of the
ply it wasn't catching it correctly. I thought it was hitting
all points but apparently it wasn't. I spent the morning re-gluing
and clamping it so that I could move forward.
Today I had a few work sessions.
The first was to clean up the sides of the ply: get rid of
all the glue squeeze-out.
The second... make a few more mounting tabs so that I can
mount the turtledeck to the fuselage. I found the extra patterns
I had made up for the tabs I made before (nice planning on
my part !); glued them to the 4130, rough cut, drill, grind,
and sand to a finish on the edges. That took just a mere one
point nine hours.
Last session of the day... so far, was to align and tack the
tabs onto the fuselage... another 1point6 hours. Not sure
if I'll be going back out today or call it a night. Already
put four point one hours on it.
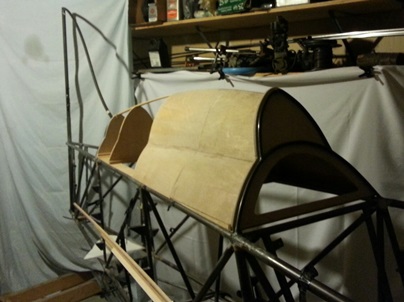
Here's a shot of it on the fusealge - ready to work on the
stringers and stand-offs. I'm REAL happy with the look of
it !!!
July
8, 2013 can you say...
smoooooooth ?
A little welding today... had another day off... for a really nice long holiday weekend.
Yesterday I made and tacked on eight mounting tabs for the turtledeck. Today I welded all eight on. Nice looking welds too !
Next up: the turtledeck stringers.
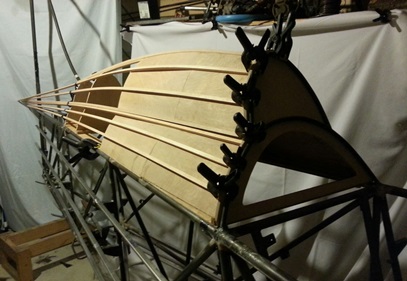
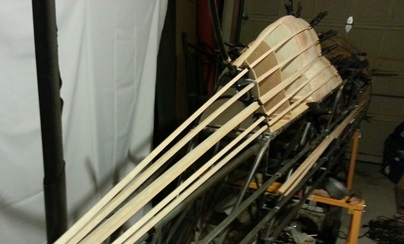
Started laying up the stringers on the turtledeck. I needed to see how they need to actually lay and where they'll end up at the tailpost. It looks like the bottom stringer on each side will end just before the horizontal stab. The rest will merge at the tailpost. I've put them in position on the starboard side (not an exact placement... but close) and took photos of it and close-up photos of the tail area so that I can look them over and figure out what I need to do for the stand-offs. The photos will allow me to look at the project when I'm away from the project.
A few photos for your enjoyment. Note: The view from the tail area shows that I placed the stringers on the starboard side only. It also shows that the center stringer, that runs along the spine, is off-set slightly. I've left it long for cutting to size later... it will be centered on the forward leading edge of the vertical tail.
Is that smoooooth or what ?
July
10, 2013 Workin' on...
the opposite side
of the business side of the biplane.
Tonight... one of those nights where work on the biplane project was no work at all.
Head scratching... looking and staring... thinking and more looking and staring.
Another challenge to be worked out: I need to decide how the rear stringers on the turtledeck will meet at the tail end of the fuselage. and... once I figure that out I need to figure out how I'll attach it to the fuselage.
I actually took a look at the CAD I did, to see if everything was the way it was suppose to be, and saw that I forgot to place the two (split) stringers coming down from the spine to the tail post. It's an important line on the biplane for me.
I looked hard at it for almost an hour and a half... kind of figured it out. Not sure... but I think so. I'll take another looksee tomorrow to see if my initial thoughts are still looking good. (my initial thoughts... The top and bottom stringer go all the way to the tail with the center stringers blending into them. There isn't much curviture at the back-end of the turtledeck... it's more flat so I'm thinking that will make for easier attaching... well, as of right now, that's what I'm thinking.)


 Kind of hard to describe the feeling I had last night and today. I guess you could compare it to a doctor mending a broken bone; you do everything that you can do to set it right, but until it has done its thing... and you take off the cast, you don't know for sure if everything has stayed where it was suppose to and healed correctly. The same with the ply covering. I slather on the glue, position the ply then clamp it into place. Double and triple checked it before I left... and hope to God that it doesn't move between now and when the glue dries.