Mantua, New Jersey
Original Site:
September 2004
E-mail: usav8or@yahoo.com
more work on the...Radial Fuselage.
February 15, 2017
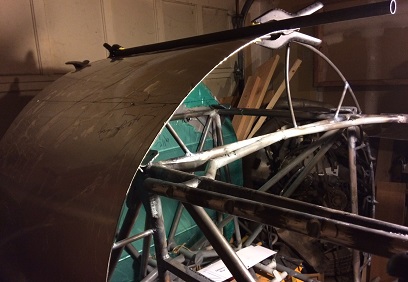
Close to fitting up the aluminum skins...
Let the fitting begin !
Continued work on the psuedo longerons...
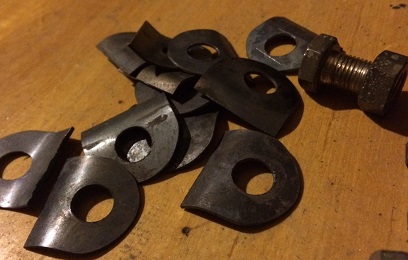
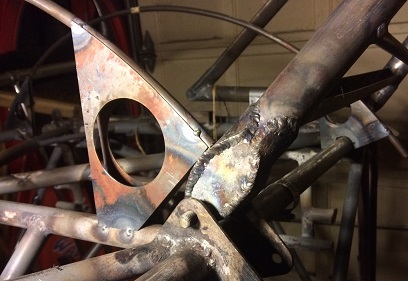
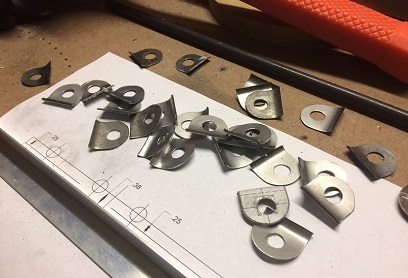
Over the past several days I've cut the remaining cups and welded them on the frame. Needed to cut the ends off of the psuedo longerons... instead of making four more divots on the very ends of the pieces.
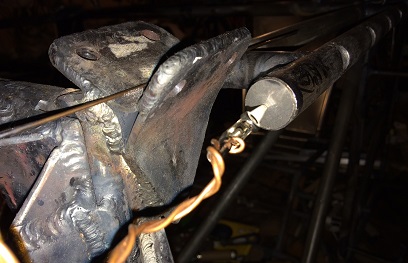
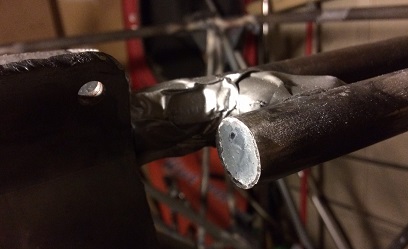
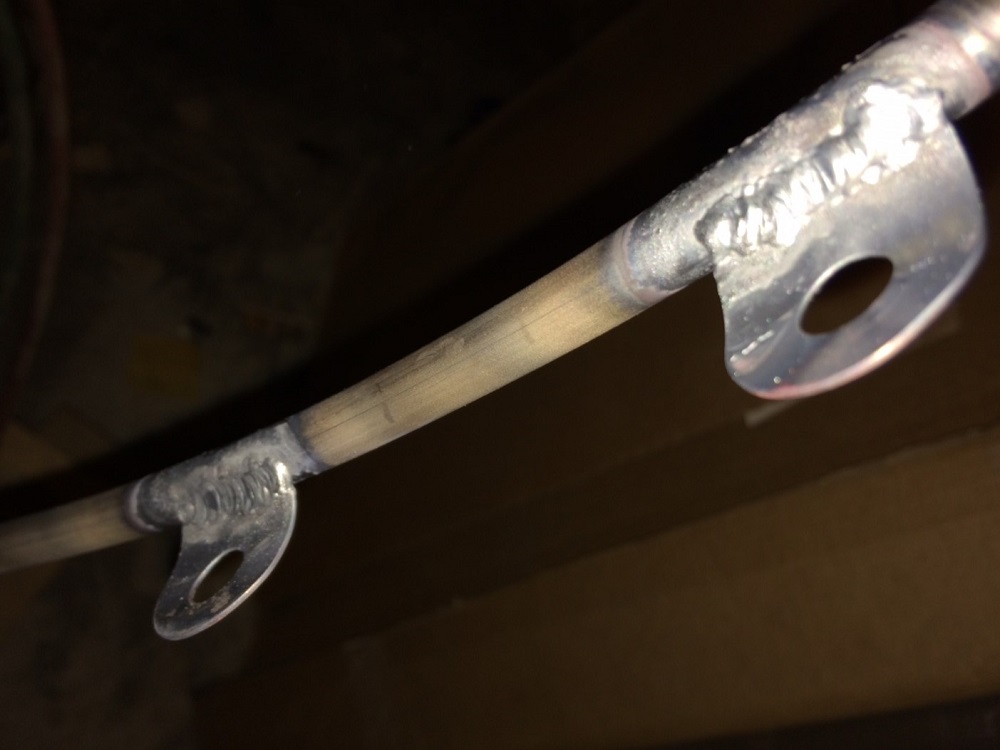
As of today, I have the four caps welded onto the ends of what I cut off, and I have one of them filed down round.
Support to hole cap in place for welding.
One done - three to go.
February 16, 2017
I'm finally at...
the moment of truth.
A little over an hours worth of time and I've filed the extra weld off the three remaining caps. The moment of truth has arrived... stay tuned.
February 17, 2017
Good...
and not so much.
It did not go as well as planned...
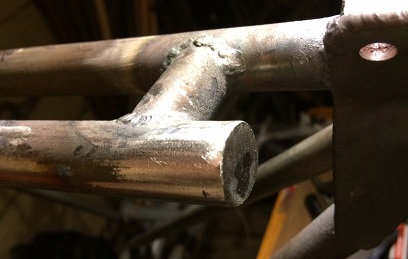
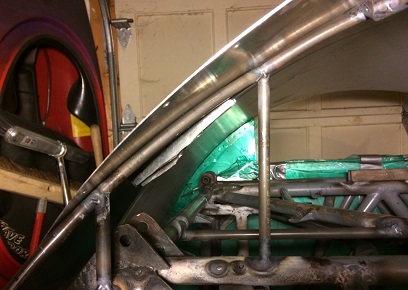
Started back on the starboard side. The notches in the pseudo, upper longerons worked great... Got no problem there, but, there is still a 5/16inch gap between the lower side of the upper former and the sheet metal skin. Thinking... I decided to fill the gap with a piece of .375 tubing that is feathered from almost being fully round to almost a tip... An hour and a half later and it looks like it worked. I'll do the same for the other side.
Once I weld on the feathered filler pieces I'll need to adjust the tabs for the floating anchor nuts...
February 18 - 23, 2017
... not so much.
Yeah... that ain't gonna work.
Spent the past few days working on this former. I knew when I thought I could make a fix that it would be in vain... and it was... as always.
Over the weekend I put six, seven hours on the project. (yea!) Only come to find out that welding those filler pieces on the former warped it AND it looks like crap. I could have fixed the "looks like crap" with some filing... the warping... not so much.
Yuck !
Okay, time to make a new one and then weld on all those anchor nut tabs again... blah blah blah. It's the right way and the only way to do it.
No .375 x .o35 tubing on hand in my inventory (checked my list) so I needed to order a few pieces. Ordered two five footer... the length gives me some leverage for bending. The second one in case I screw up the first. While waiting for said material I went about cutting off the old, and making the pattern for the new (tracing the firewall, which is better than what I did the first time which was trace the wood mock-up firewall).
Had time to make those additional tabs I needed so I looked for one of the sheets I printed out with the tabs on it. Had a helluva time finding it... actually, never did find it. I didn't find what I was looking for, but found what I needed; enough tabs to weld onto the upper former... and maybe enough for the bottom too! Gotta love it... some times.
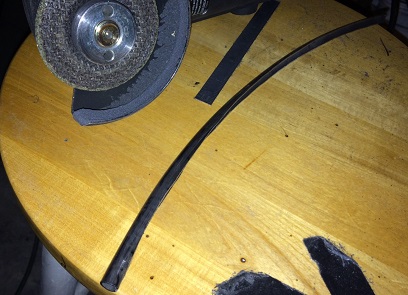
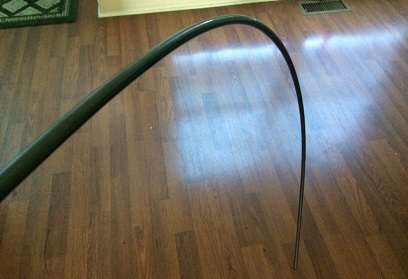
Material showed up two days later and I went about quickly twisting the hell out of the first piece by getting a rough curve to it so that it would lay flat while making the tweaking curves. Me, being too quick thinking I had this down... twisted it while making the bends to keep it straight. Second one I took my time and did one helluva job getting it REAL close to the curve. and... it ain't gonna get any better than REAL close unless I did it with a hydraulic bender.
Bending to shape...
Clamped in place. Ready for welding?
February 24, 2017
I'm loving it !
Much better...
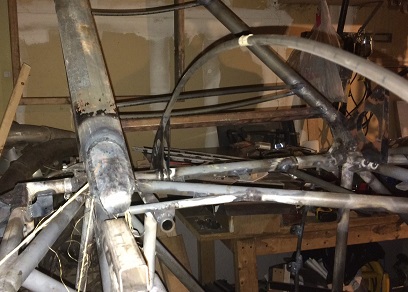
Checked for alignment then tacked the upper former in place. Looks as good as the first time. But... this time it's the right shape. (the other one reflected the shape of the... I don't know actually. But now it reflects the shape of the firewall, which it needs to be.
With the former tacked in place, I cut the existing vertical supports and ground the excess welds down and finished the areas with filing and sanding. Ready for the new, single vertical support on either side.
New, upper former tacked in place.
February 25, 2017
Loving it a little bit longer than I wanted to !
Should be an easy one... cut and notch both vertical supports for the upper former... then weld into place.
The cutting and notching went along well... tacking into place, not so much.
First one tacked into place. Great ! Match the placement on the port side... great... wait... doesn't quite look the same. It ain't ! It wasn't easy getting at the tacks to cut the port-side one off. Not easy at all... probably spent an hour getting at and cutting off.
Did what I had to do to get both the starboard and the port sides the same. DONE ! Pretty muc welded them up except an area on both that I will need to tilt the fuselage to get at. I'll do that tomorrow ?
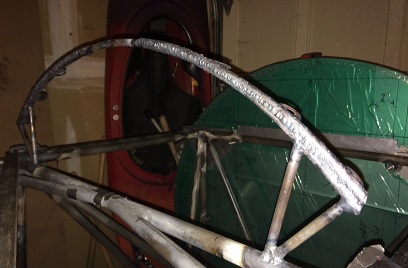
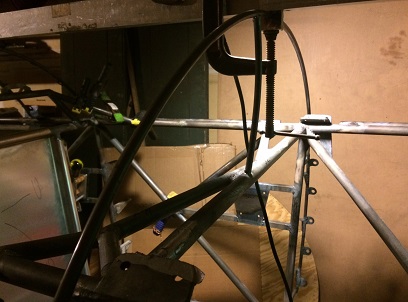
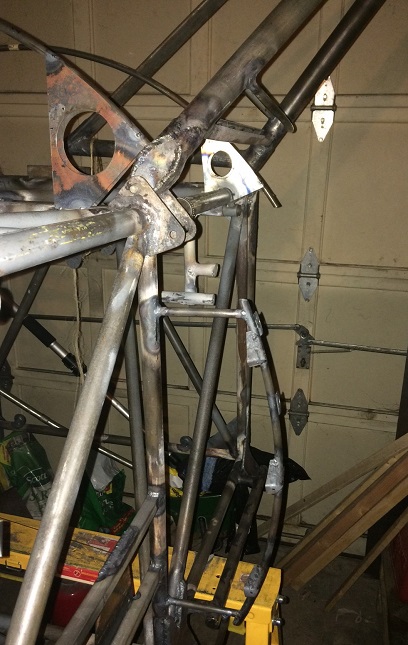
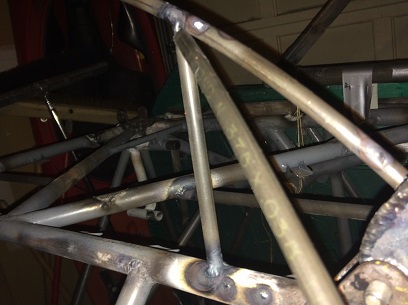
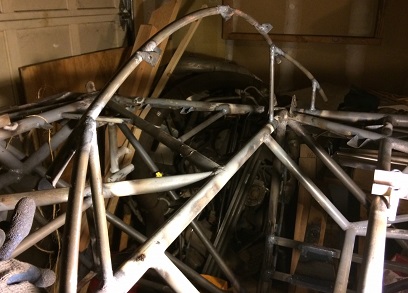
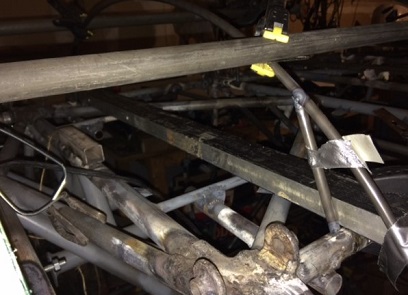
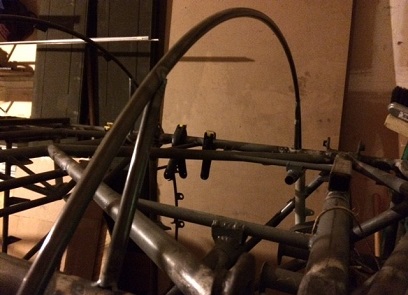
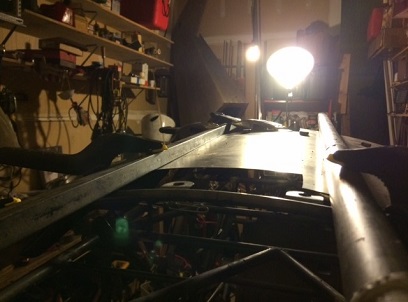
Above image shows where I tacked the upper former to keep it in place (the tack on the right-side of the photo), and the welded in angled, vertical support. Back aways, on the left-side of the photo, is another tacked on piece to keep the former aligned while welding ont he vertical support.
The upper former will be cut-off at the vertical support, or just after it; depending on how the anchor nut tabs fall.
February 27, 2017
Looking for it a little bit longer than I wanted to !
Time for the tabs... spent a little bit more time finding a 3/8inch nut and bolt than I had planned... but I found it and could move forward with tonights planned session; the anchor nut tabs.
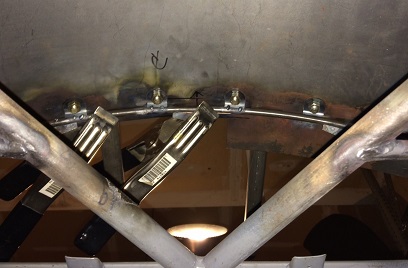
After finding that damn nut and bolt (and yeah, it was important to find it) I was ready to start aligning/centering the tabs on the upper former. Grabbed the piece of .o25 sheet I had with the spaced holes for this project and bolted on all nine tabs. Because of the angle of the vertical former and wanting to keep the top edge level I needed to do each side separatedly. Aligned all the tabs on the starboard side, including the center tabs, and tacked them on. Keeping the center one bolted... I unbolted the other four then pushed the port side tabs into position and tacked them on.
My plan was to get these tacked on tonight. At about 1 1/2hours I wanted to call it a night... but I wasn't finished yet; still needed to tack all nine tabs on. Kept with my plan and an hour later had my plan completed.
February 28, 2017
Work on the project ???
Spent most of the night cleaning the stuff off the fuselage and flipping it so that I could get a good angle on the tabs to weld them. Well... one point one hours later and they're welded.
This begs the question; does preparing the fuselage classify as work on the biplane project ? I think it took me about 1/2hour to weld all seven tabs, but I was on the clock for a little over an hour. My hourly log has a little over an hour added to it...
Click on image for close-up.
March 1, 2017
Looking at the project !
Flipped the fuselage thinking I only need to address the levelness (wurd?) of the belly formers. Not so... saw that the areas around the gear connections, etc. are a little bit more involved than I was originally thinking. Took a few photos and will need to think this through.
Not sure how I'll be able to support the horizontal skin attachment at the lower corners. What about the space over where the landing gear hits the pads (is there enough room for them to fit within the belly? And other such question...
March 2, 2017
A little work...
A lot of thinking.
What the heck... what the heck ???
Belly formers... front one only needed to be moved but I welded the flat plates I originally used as the support. I'm looking at that now and it can only be a place where dirt and oil will collect... an issue down the road. So... I can't just move that and grinding off the old ain't gonna work (I looked closer at it and it is slightly askew from the welding). Looks like I'll be forking over more cash for a few more lengths of 3/8inch tubing.
The second one back needs to stay where it is. I have the stringer tabs on it and there's no other place to support the tubing other than that cross piece. Figure that I'll cut-down it down and do away with those flat plate supports and put two 3/8inch vertical tubes in there instead. I'll need to angle back off of the former and create an area where I can attach the fabric, otherwise there's nothing there to attach it to.
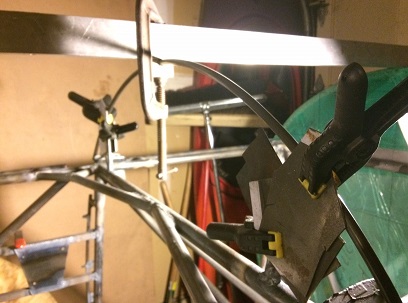
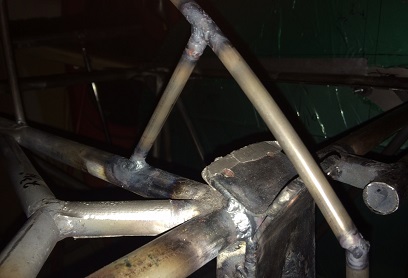
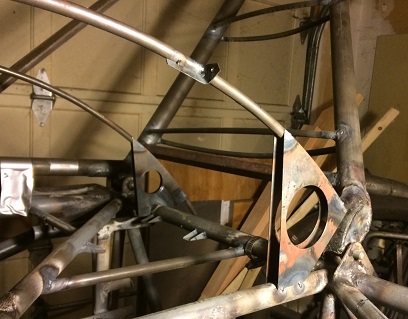
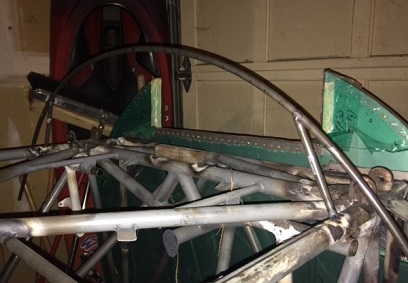
The image below shows the second former with the tacked in vertical support. You can see the angled tube that I'm holding into place. I'll get the sheet metal skin figured out and then bend two pieces (one starboard one port) to fit those areas and then overlap them with the belly skin.
March 3, 2017
No real work...
A lot more thinking.
Still looking at the ends of the second belly former... need the ends to be able to allow the fabric to be connected from port longeron up and over the former to the starboard longeron. Working up and under the pseudo belly skin ain't making things easy.
Working like this... I'm thinking I'm giving it a guess on where things need to be. Trying to figure out a solid way of doing it so that it actually feels like I'm progressing forward, not sliding forward.
I need a belly wrap that will go from longeron to longeron and have enough overhang in the back but not too much of an overhang. After my work session I took a look at a few sheets of plywood; one is too stiff and the other isn't wide enough (needs to be 30inches and is only 24inches). Then I spotted a sheet of 48 x 48 corrugated plastic that I was originally intending to use for a sandwhich (aluminum-corrugated-aluminum) for a light-weight flooring then decided against because of the fumes that would be created if the plastic began to burn (for whatever reason). I'll give this a try tomorrow.
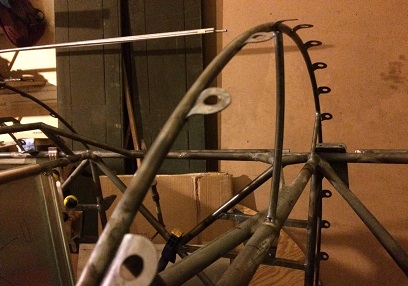
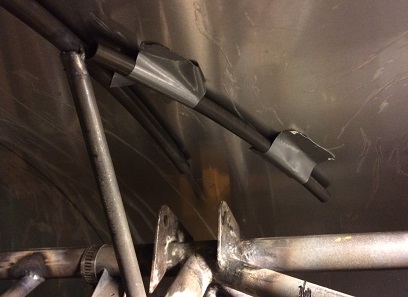
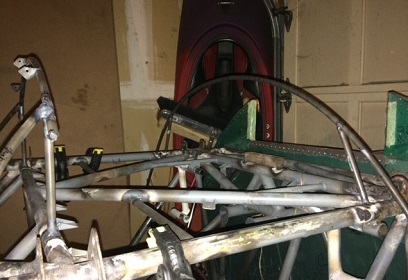
In the image below... one that I think is my solution... I'll cut the length of belly former that goes past the vertical (to allow the rear main gear attachment to fully swing through its arc) and weld in the angled piece that you see taped to the belly skin. At least that's my thoughts on this right now.
Another... see if it works trial and error session.
March 4, 2017
One of the sins...
of working on the biplane.
It all takes time...
There might be times when you feel you aren't getting things accomplished in the given time that you would like to have them completed... and your brain may want to push you to "just get it done". Don't go there my friend. Fight temptation.
I find that my brain thinks of such things when it's working out things that are tedious... lately it's been figuring out the belly former at around station 24. The formers need to end so that I can attach the fabric to it. There can't be a gap between the end of the former and the longeron. Sure, it will be covered up by the sheet metal of the belly skin, but it still needs to be secured. Thus all this tedious work.
It's tedious because I'm having to work half-blind; all my cuts are made to fit the curve of the belly skin and in order to do that I need to have the belly skin in place. Confirmation of the correct cut is done braille-like; with the touch of my fingers. A lot of back-and-forth grinding...
In the second image above you can see the angled tube, which is the modification I've made. The existing tube that is behind it will be trimmed off.
March 5, 2017
Working it all the way through...
to completion.
Reapeat on the other side, or starboard side... First piece of tubing I was trying to use wasn't a real good match to the bend of the belly skin.
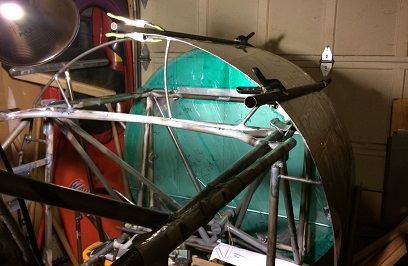
Cut another section from the original former at station 10.o and it was close to an exact match for what I needed. Notched the tube at the one end. Taped it to the belly skin close to where it needed to go. Found the vertical support I cut and notched a few days ago and did a "looksee". Made sure it was vertical then tacked it into position. Secured the curved tube at the top, where it joined the belly former... made a mark on the lower end (soes I can make sure it is aligned when tacking it onto the vertical), removed the belly skin and tacked the lower... than the upper end of the curved tube. Took a break to wait for it to cool down and checked for alignment. Looked good !
Decided that I'd complete all the welds on the four clusters... completed as much as I could while it was on its back. Needed to flip it twice to get a good angle on the remaining welds. Three point four hours later and I'm finished with the basics on of the modified belly former. Still a little thinking about how it will all mate up to the pseudo fomers that I'll be making for the lower longerons.
March 6, 7, 8, 2017
Back to...
making tabs.
Made extra tabs the last time I made them... but not enough extras.
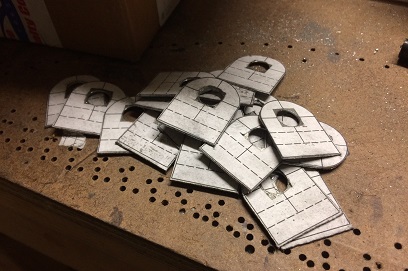
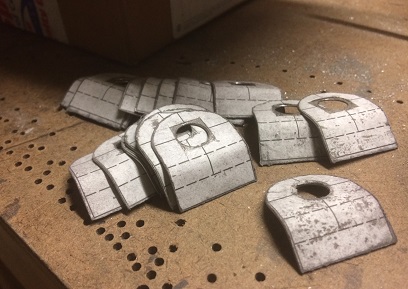
Back to making more tabs. I've been working on them over the past three days... back to the 1. drill holes in sheet of tabs, 2. cut tabs from sheet, 3. grind front curves on each tab, 4. file and sand smooth all edges... lock in vise and bend.
and... That's where I'm at right now. Close to five hours and I have an additional 19 tabs ready to be welded on the fuselage.
oh wait... They aren't ready for welding on yet. I still need to trim these to length.
March 9, 2017
Finished...
making more tabs.
Easy-peasy... trimmed all the new tabs to the correct length. Time to align and weld them onto the belly formers.
March 10, 2017
Started and finished...
making the new belly former.
Tonight's task... make a new belly former for lower station 10.o.
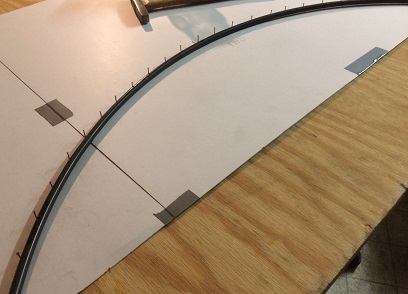
Took my time making the initial curve for the bend (you do that so that you have a curve for the entire length of the piece that will keep it from twisting). Take your time making this initial curve to make sure you don't twist it.
I don't know if it's from me doing it so many times... but you kind of get a feel for where you need to bend/un-bend the curve to make it follow the curve of your pattern. One point five hours and I have my piece.
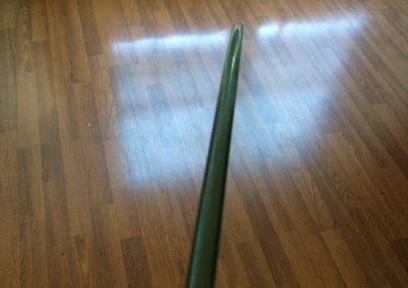
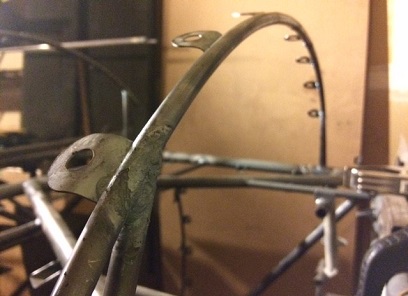
Curved piece...
with no twist.
March 11, 2017
Tacking on the belly former...
more steps than I care to take.
Should not have taken this long. It was all the squeezing past the fuselage and the up an down and up and down the steps to get things that I needed and didn't grab all at one time.
The new belly former looked pretty damn good... just a minor adjustment and it was ready for tacking onto the fuselage. Took longer than I had wanted it to, but it happens. Rather take took long than having to do it again... wait, this IS the second one I'm puting on here !
March 12, 2017
Tacking on the belly former...
tabs.
Felt good... got a lot completed today.
Started off welding on the new belly former. Finished with aligning and tacking on the tabs to the new belly former. Not sure if working three hours on this is a long time, but... I felt I really got a lot accomplished.
Need to tack the tabs on the belly former at station 24.o then flip and finish weld on all tabs.
An aside... looking at the fuselage tonight I think again... man, there's one helluva lot of work put into this fuselage since making the basic box of the frame. Working on each part as an individual project you just don't realize the amount of work that goes into the build. Well, you do... and you don't.
March 14, 2017
Tacking on more belly former...
tabs.
Last of the anchor nut belly tabs aligned and tacked into position ?
Well, now that I think about it, I still have two left to align and tack; the ones on the modified areas of the back belly former. I have the fuselage flipped on its side... better flip it back and tack on those two before finish welding things...