Mantua, New Jersey
Original Site:
September 2004
E-mail: usav8or@yahoo.com
more work on the...Radial Fuselage.
January 3, 2015
Three hours later...
and they were basically ready when I started...
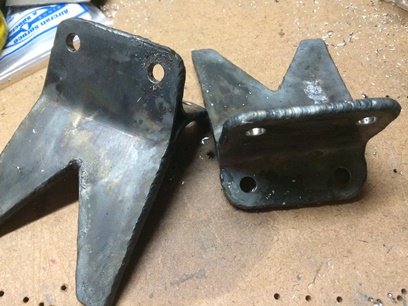
Took a lot longer than I thought it should have... but it's done now. What am I talking about ??? The spring brackets for the rudders.
I basically had them already made. All I had to do, or at least all I thought I had to do, was sand two of the edges... locate and square them up on the fuselage... then tack and weld them in place. Yeah... or at least all I thought I had to do...
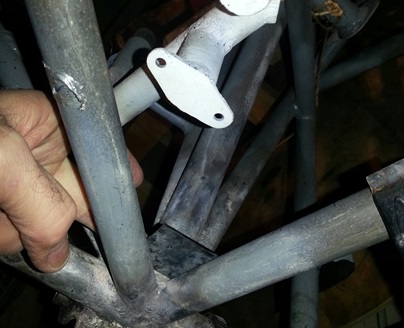
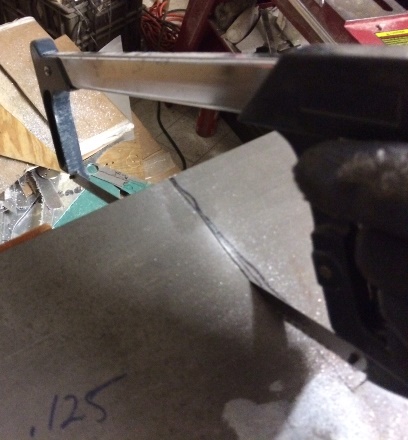
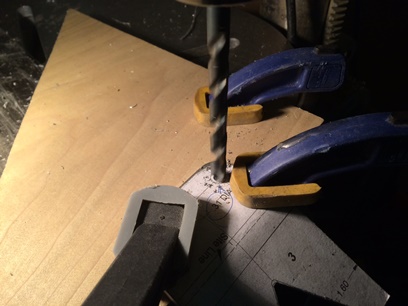
It was a little more than that, or, at least the hours show that it should have been more than that. Turns out that the front tubing is different on the "Radial" bolt. That doesn't surprise me. And with that... I had to re-position where these brackets went. One location, which would have been the ideal location... I thought was too close to the rudder pedals (wouldn't allow enough forward "push" on the pedals. The other location (which I chose) was about twice the distance from the first choice but basically my only other choice. Easy enough decision to make with actually no choices to make a decision on. All I had to do to the existing brackets was mark location of notch, grind out notch, file notch, and sand notch.
Spring lengths come to mind when choosing a spot for your rudder spring bracket (who would have thought ???). I'm not sure of the technical data on springs but it won't be a problem to make a spring work wherever I postion the bracket. The big thing for me was to make sure that the spring wouldn't rub up against one of the tubes. I played with some fishing line on the bracket and made sure there was enough clearance in its full travel before completely welding them on.
Ideal... but not a good location.
Kinda of where it is on the Standard 'bolt
but a lot further forward.
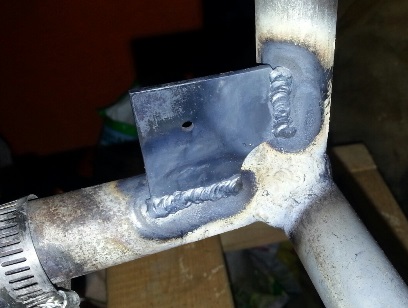
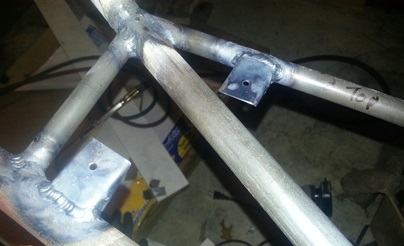
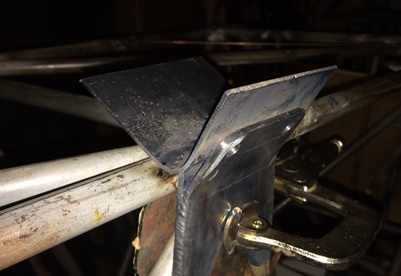
Considering where these brackets are and that the fuselage is not on a rotisserie... they were pretty easy to weld.
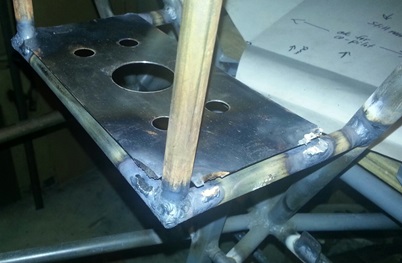
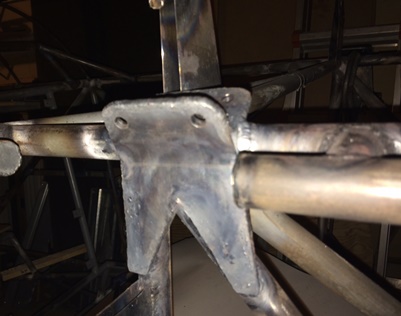
Port-side rudder spring bracket welded on...
May 11, 2015
I've stopped forgetting...
what I need to do with these brackets.
Can't believe it but it's been quite a while since working on the fuselage (maybe I'm getting close to finishing up on it ???)
I keep coming back to these brackets. I keep re-learning what I've already figured out and forgotten several times. So... back to making sure I'm doing the right thing. Took some looking... over the plans again and looking at a photo or two that I got from JimW.
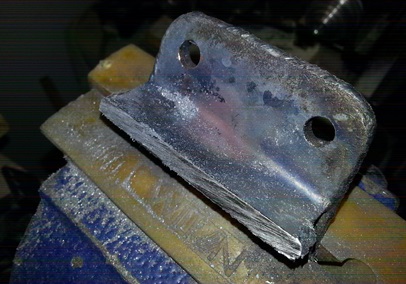
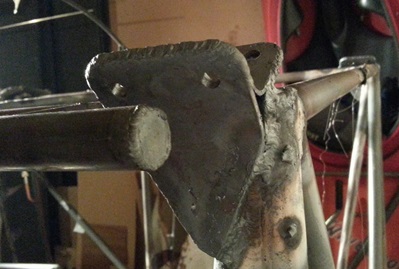
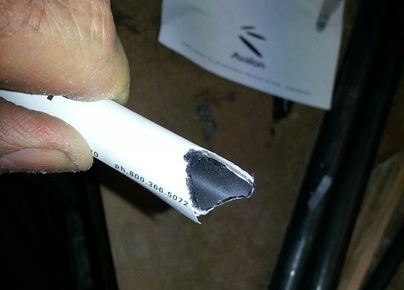
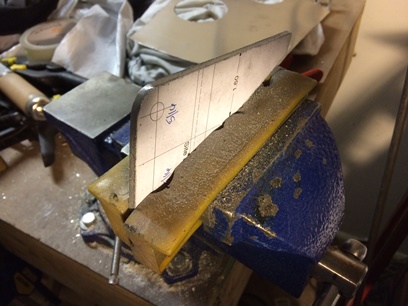
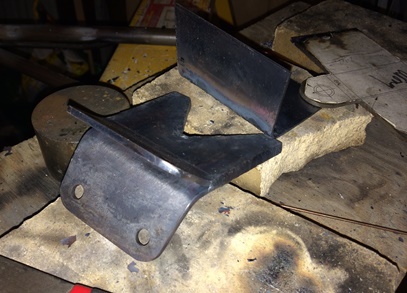
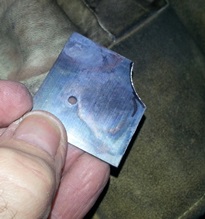
Early on I made a set of brackets that had just the outer leg on it but decided to cut down the forked-tongue brackets I had already tacked/welded onto the fuselage. The front bracket is a double-layer so I decided to keep the back bracket pretty much the same. Curtis shows the bracket I decided to use in a later drawing except he shows the inner leg on it (which doesn't get used). The double up of 4130... stronger, but is it necessary ? by the way... Looking at that first image below, that looks like a single sheet of metal. Not so... it's two big, honkin' pieces of 4130.
Had time to cut the tack welds off the port bracket and cut down (while it was off of the fuselage). Still had time so I started to carefully cut the inner leg off the starboard side bracket while welded onto the fuselage.
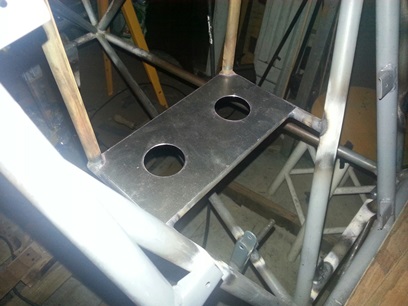
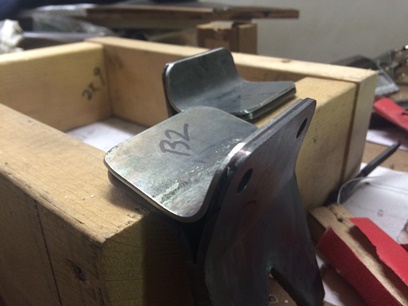
Port bracket. Still needs to be cleaned up.
Starboard bracket. That former needs trimming down.
May 14, 2015
Number 3?
I'm thinking maybe a number 5.
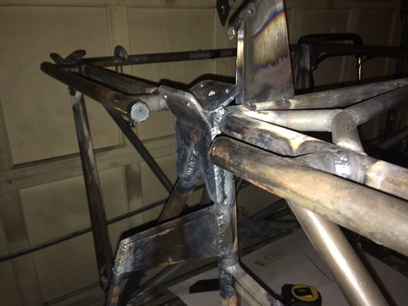
Cut the inside leg off of the rear, starboard sway wire bracket. Had to do it while it was still attached to the fuselage. Spent the rest of the time welding on the port side bracket after I welded the end of where it was cut off.
Not happy with the look of the weld. I'll be grinding it out and re-welding it this weekend. I used a number 3 tip... I thinking I need to use a number 5.
May 16, 2015
Number 3?
Has to be number 3.
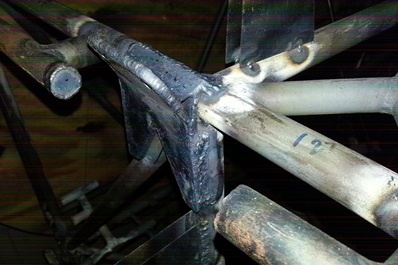
I figured it was time to weld on these sway wire brackets. They've been made forever and they've been tacked (or welded) on the fuselage for about a year. With the inside legs cut off I ran out of reasons why I couldn't do it...
Not much to say about it other than my #5 tip wasn't putting out a nice flame. My #7 tip was way too much (kept popping on me). So... I went back to the three and made it work. Took quite a bit of time to weld these massive brackets to the fuselage.
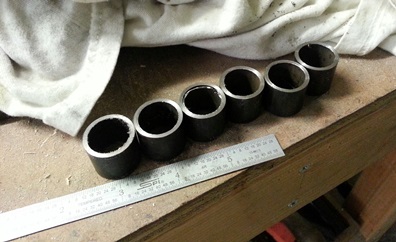
Still had some time to burn so I cut and squared up six more pieces of tube for a few more fairleads. Figured I needed four for the trim system and while looking at the rudder cable I saw that I need two more for it (ran some monofilament from the rudder pedals to the rudder)... which now means I need to order a few more fairlead inserts.
May 20, 2015
Back on the fuselage...
flooring and heel rails.
The tubing for the flooring/heel rail additional supporting framework came in yesterday. Time to jump right on this so it's out of the way. Out of the way so I don't forget what I bought it for...
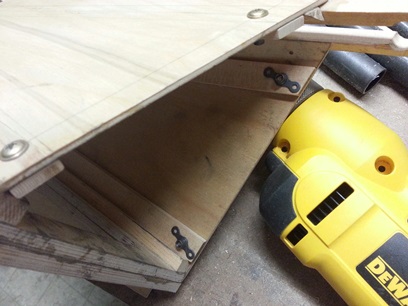
The first part of this work session I worked on the re-work of the turtledeck double-stringers. Maybe about an hour and a half was spent on the stringers. The rest of the time I worked on grinding one of the tubes for the pilot's heel rail support. It takes quite a while for me to hand notch a tube 'cause I like easing up to the fit instead of balls-to-the-wall and screwing the piece up by grinding TOO MUCH of the tube away; what I like to call a practice piece.
Rough cut two of the 10 1/2inch pieces and then started working on the one. Wasn't cutting much off at a time before checking it against the fit. Again, again and again. I looked up at the clock after the final cut and it was ready to put things away and head back to Lombard Street. Saturday I'll work on that second 10 1/2inch tube... Looking at the photo I took I now remember that I need to notch and fit tubes for the trailing edge of those rails.
May 23, 2015
More work on...
the flooring and heel rails.
After checking out the progress of the new stringers on the turtledeck... (by the way it's looking GOOD !!!) I started back on the additional tubes I needed to add to the flooring and heel rail areas.
The notch I had to make on one end of the tubing for the front flooring was kind of convoluted: all kind of angles going all which way. Took my time and didn't make any practice pieces this time. The opposite end was left long so that I could eas up on the length I needed by notching it little by little. Finished with the first I moved on to the second.
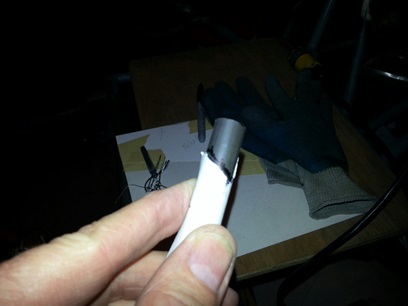
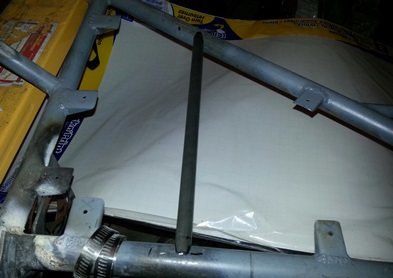
It's been a while since needing to make mirrored, complicated notches. Had almost forgotten my trick of making a paper pattern from the first and then doing a reverse wrap on the new tube. Works every time.
Making and using a pattern like this makes short order of the second tube.
Had a few tubes I needed to still cut, notch and fit for the heel rails. They're a little bit more straight forward with just a slight angle on the one side of each. Got these all fitted up and tacked all the tubes in place.
Support tube for starboard-side floor.
Flooring won't be attached - for additional support only.
Rear area of the port heel rail.
May 28, 2015 Still more work on...
the flooring and heel rails.
After sanding the double-stringers on the turtledeck I set about welding these support tubes for the floor and heel rails. Did the top side on all tube-to-tube joints. As soon as I can flip the fulselage I'll finish up the welds (the other 180 degrees).
After welding I'll be filing and sanding them smooth (since they aren't structural) - only keeping someone from putting their foot on something unsupported.
June
10, 2015
The break away... actually
I'm back on it full time.
Busy with the move back... haven't had a chance to work on
the biplane. Working straight through from Saturday until
last night... moving and unpacking. Just had to break away
for a night to work on the biplane.
It probably ate up most of my time, but I had to take the
tail feathers and the turtledeck off so that I could roll
the fuselage to get at the welds better. It'd be nice to have
it on that rotisserie that I built way-back-when but the tail
won't allow it.
With the fuselage in a spinable state I fired up the welding
outfit and had at it. Unlike all the other welds... I'll be
filing and sanding these welds smooth. They aren't structural
and I need them as smooth as possible since the flooring/heel
rails will be bolted up close and tight to them.
If you insist... here's a photo of one of the welds.
June 11, 2015
More than just a few minutes... every day !
At least that's the plan.
My plans... file all of the welds for the front floor support and heel rail support tubes. Started filing... and... saw that I didn't need to do it to ALL of them. Only needed to do the front support cross tube welds. All of the other tubes were smaller... thus, they were lower than the tubes they were welded to.
With only a few tubes to file and sand I had a lot of time to work on other things... Since I'm working on the heel rails and have the support brackets already made I decided to positon and weld on those additional tabs. oh yeah... I finished welded the trim tab handle bracket too !
I found myself ready to break of working on the biplane at about 1 1/2 hours. I guess it's been ingrained over the past year or so. I had to break that train of thought and finish up what I was doing... which was attaching the additional tabs for the heel rails. I didn't have to stop with just tacking them on. I could actually finish weld them !
A thought I've been having: A square of rubber padding between the tab and the flooring. Keep from wearing and tearing and rubbing...
June 17, 2015 Too much thinking...
Need to get to work.
More work than talk... er, thinking... Worked out how to attach the stringer plate to the tail cone last night. Tonight... I worked on it.
Here's what I did... I wrote about it on the turtledeck page...
Not glued yet.
Watched the end of the Phillies... lose to Baltimore. ahhhhh... Walked into the garage work shop and started thinking of the things I need to do; "if I did this then I could do that." Over and over and over again.
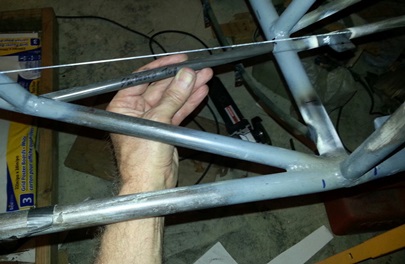
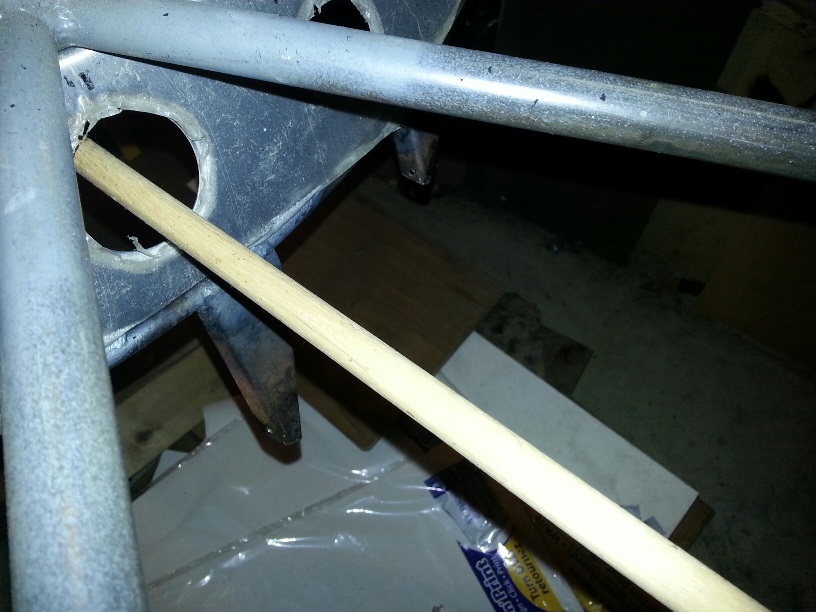
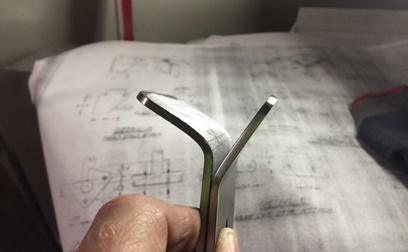
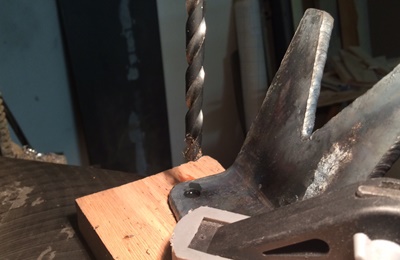
Not getting anything done like that... Decided to test fit the control system push rod from the control stick to the reverser (I wasn't thinking of the push rod when I made the aluminum enclosure) After putting it all together... My luck, er, after all that planning... It Works ! (Note: push rods are 3/4inch 4130, not 1/2inch wood dowels... the dowel is used to test the fit)
Click image for close-up.
June 22, 2015 No plans...
needed.
Tonight... it was a toss up of what to do.
I wanted to work on the firewall... firewall first so that I can work on the tabs/nut plate strips for attaching the sheet metal, but still need to order the material: actually just found out what a few others are using. Didn't want to place an order for those long "L" shaped aluminum pieces for the firewall and then turn around a few days later ordering the strips and having to pay another shipping charge. I'll be ordering the material tomorrow.
Still plenty to do... just look at the fuselage...
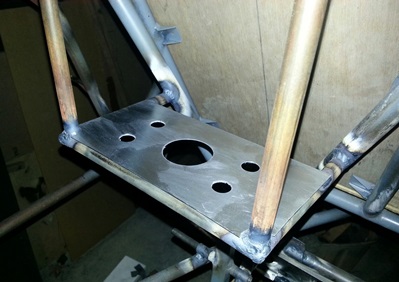
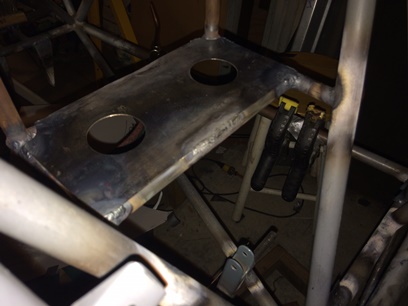
First thing I saw was the battery support frame. Wanted to add a floor to that... Took a few measurements. Went down to the basement work shop. Made a pattern. Found a piece of .o32 4130 and cut out the floor to the battery box.
Put a few lightening holes in it and it's ready to weld on...
November 14, 2015 If you think you're unhappy with it...
take it out.
Plan "B"... I was working on the firewall but had to switch gears 'cause I ran out of anchor nuts. So... here I am.
Wasn't happy with the way I welded on the battery tray. And, actually, wasn't happy with the amount of overhang of the tray on the tube hangers. The edges should have fallen in the center of the tubes and they ended up overhanging. I'm thinking that's one reason for the unhappy weld; a gap between the 4130 plate and 4130 tube.
Time to put it right. Took a few new measurements. Made the pattern. Marked the steel. Made a few cuts. Ground to the line then filed and sanded. oh yeah... made two lightening holes in this one.
Trial fit and it's lookin' good. (just need to make sure that the ends aren't hangin over the short sides...)
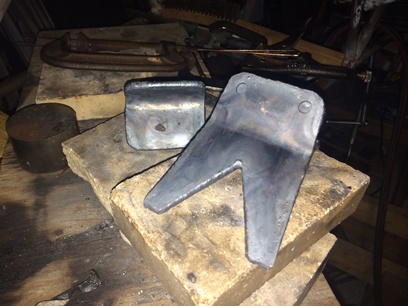
Old shelf... being cut off.
New shelf... ready for welding on.
November 15, 2015 The highs or lows...
of shoulder harnesses.
In one of those moods... one where I stare at the biplane and go through my mind what needs to be done, think through the possible ways to do them. Generally wasting time ? Not so much...
After some time I snapped out of it and thought that I could be doing some mindless duty while thinking. Looked around and saw a set of stringer brackets that I've been wanting to cut off of the back area for awhile now. I welded them on to support the stringers in the tailcone area before devising another way of doing the tailcone area. Anyways... fired up the hand held angle grinder and had at it. Ground them down as close as I dare then took a file and then sandpaper to make them smooth little mounds of weld puddle.
The big debate going off in my mind today was how I wanted, and where to put, the openings in the headrest/turtledeck for the shoulder harness. How far above the should could I go ? Is the shoulder harness ment to keep you from moving forward with the lap belts keeping you from moving vertical ? Or... does the shoulder harness have some part of keeping you from moving vertical ? I'm thinking moving forward is it's purpose.
Pondered that and a few other thoughts as I moved on down to the basement workshop to finish up a pile of tabs I had started some time ago. Gave myself until 8PM to get as far as I could go. (Saw that Disney's "Planes" was coming on at that time and I hadn't seen it yet.) A littel before 8 and I head upstairs... still not finished with that pile. And still debating about the shoulder harness.
Sitting here making the entry into my blog... and a thought occured that I should throw that question out to the forum. It'll be interesting what I hear back.
November 16 and 17, 2015 The lengths we go to...
for looking good.
Back on the seat backs. I have the aluminum "L" angle for capping the outside edge of the backs.
Nothing new to write about... took both Monday and Tuesday to measure, mark and cut the eight pieces that will be riveted around the perimiter of each seat back. These pieces are not only going to stiffen the frames on the seat backs... but they're going to give them a finished-off look to. Grant it, I wouldn't be attaching these for just a finished-off, good look... that only adds weight. This beast is going to be lookin' good 'cause she'll be light-weight and svelt !
Cut the patterns out for the rivet spacing yesterday so... I'm ready to glue them on and do some drilling riveting.
Warping on seat backs.
Edge "clamped" against seat back.
March 13 through 17, 2016 The beauty of...
making things again.
Ahhhhh... back doing what I've done before.
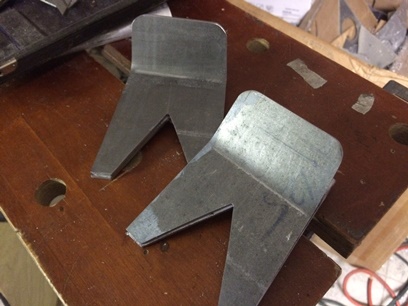
Funny story... about a month ago I was flat out from the flu. I haven't been sick for four or five years and then this... Anyways, that's not the funny part. After a few days I was up to doing things so I checked out the biplane forum. BIG discussion about the sway wire fittings for the Delta wings (which are on the Radial Skybolt). It appears (but you'll need to look and make your own judgement call... even check out the discussion on the biplane forum) that when the CAD person drew up Curtiss' blue prints they mistakenly (?) put the sway wires in the front of the upper wing instead of in the back (the Model 12's has them connected to the back spar of the upper wing and from what I see, the Radial Skybolt's Delta wings should too). Something about the loads need to be carried from the wing into the fuselage there instead of in the front. But, again, you need to make the decision on which way to go... don't take my word for it.
The funny NOW !... I had my fittings all made and welded on like Curtiss had in the original blue prints... wait, NOW the funny... but seeing how a few others interpret the drawings, I cut off the inside leg of the back fitting (DAMN !!!) and cut-off the front fitting and welded on the two-legged fitting. If you're not following all of that, that's okay. Final answer... it's FREEKIN' WRONG NOW !!! I HAD IT RIGHT BEFORE !!! Which brings me to why I haven't written lately...
Same ol' same ol' same ol'... what can you write about the same ol' ? I'll post a few images below to show the work I've done, but it's been done and shown before. I DON'T want to stop writing but I DON'T want to just write to fill up space either.
hey... shit happens, especially in a large project like this. I'm glad that the shit was discovered before moving on with the build. I'm not pissed about it. I'll just spend a few hours remaking the fittings... of which I've been doing. I'm not going to try to salavage any of what I have because I've been down that dead-end road before. It might work this time, but from my experience... it never has.
There's a poem by Rainer Maria Rilke that sums up the build... life in general, as I see it.
What I Want
You see, I want a lot.
Maybe I want it all:
the darkness of each endless fall,
the shimmering light of each ascent.
Give me the build... in all its beauty.
March 19 and 20, 2016 A few reasons why...
I smile.
Moving forward with the re-make of the back sway-wire brackets.
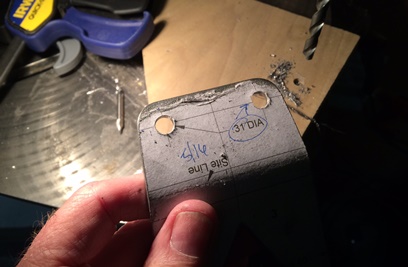
Drilled the holes and deburred them on Saturday. Drilled the holes 5/16 in diameter. Sunday... welded the four halves into two fittings. I enjoyed the welding... get the metal at just the right temp. before starting the puddle and it's smooth as butter... running that puddle. Key to a good run is making sure your arm supported for steady hands.
I find myself smiling when I re-make parts for the biplane. I re-make when: 1. When good enough isn't good enough, and 2. When discovering that it needs to be re-made for whatever reason. Satisfaction in knowing that it's being done right and to the best of my ability.
April 10, 2016 They're here...
somewhere.
Continued, albiet delayed, progress on the sway-wire fittings. Spent the better part of a half hour looking for the two blanks that I had cut for the doubler that gets welded to the top of each of the fittings. For the life of my I couldn't find them.
Decided to just cut new blanks and be done with it. Don't remember where I saw it after making that decision, but I found what looked like a piece of .o71 4130, the size of two blanks. Must have only cut the initial blank for the two blanks and thought I had done more. Anywho, saved a little time not having to re-make them, but... acutally wasted a lot of time looking for the damn thing !
so... Basically cut that blank in half for the two pieces that I needed to heat and bend for the "L" shaped pieces to weld on the fittings. Headed out to the garage to light up the torch and heat things up... got both bent and ready for trimming to size.
April 16, 2016 A little grinding and sanding...
before a little welding.
Back on these fittings for a little while.
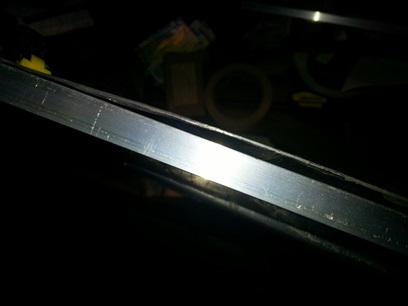
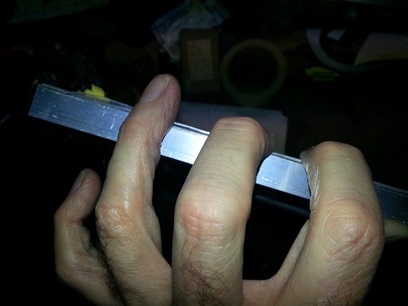
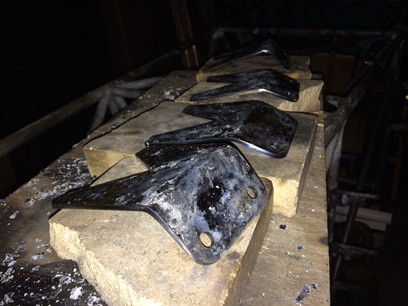
Wanted a break from doing rivets so I decided to pick up those two bent plates and grind them down to size. Marked them with a Sharpie... then cut most of the excess off... then started grinding. And grinding. And... grinding.
Got them close to size and filed them down to smooth and hit the bends with several grades of sandpaper to get them real smooth. The rest of the edges on both of them will be welded so no need to have a polished smooth finish on them... just wasting my time if I did.
They're ready for welding now... and then match drilling.
April 17, 2016 One last thing...
and they're ready.
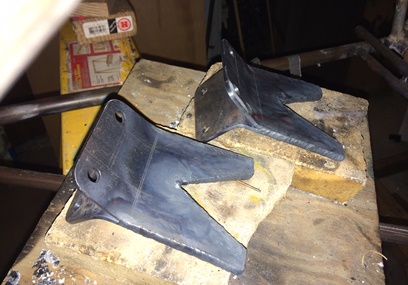
Finished with these fittings ?
Welded on both doublers. I'm ready to cut the offending ones off the fuselage and weld these on... as soon as I match-drill the holes.
April 18, 2016 Wait... there's still a few things to do
before they can be welded on.
Okay... so I still need to match-drill those holes. BUT, I need to grind off the existing bad bad fittings too.
Tonight... I put it off and put it off and put it off... until around 8:4PM. Finally said I need to get started on it 'cause it ain't gonna do it itself. So, out to the garage workshop to start the grinding and grinding and grinding.
Spent close to an hour on the one fitting and I still need to do some more grinding... I'm not a real fan of grinding. The nice thing is, these welds were damn sure good.
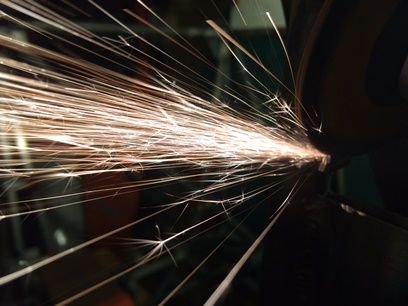
April 19, 2016 You think being green ain't easy...
try grinding off a few sway-wire fittings !!!
I was hell-bent on getting this first sway-wire fitting ground off the fuselage. Not that I wanted to be done with it quickly... I just wanted to be done with it tonight... no matter how long it was going to take.
My man Vince V. got off to a lousy start with pitching for the Phils tonight. Thought I was going to see the entire game... ended up only looking at the first three innnings before calling it quits and heading out to the garage workshop. Good for the project ! Bad for the Phillies.
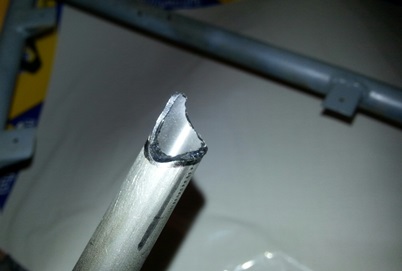
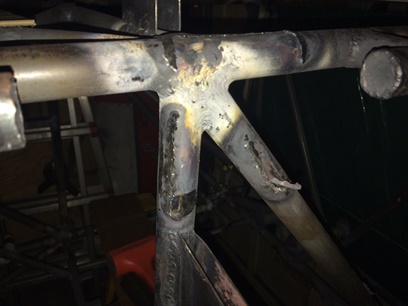
What can you say about grinding off a fitting that wraps around some of the longeron tubing, other than... be very careful (in my best Elmer Fudd voice). Even with being very careful, I nicked the tubing a few times of which I will run a bead of weld over it and make it nice and strong again.
I approached the grinding several different ways... and was finally able to peel larger pieces of it away from the fuselage. There are two layers that were initally welded together before welding it onto the fuselage... which was a real ballito buster. It was what it was and is no more.
Grinding off fitting.
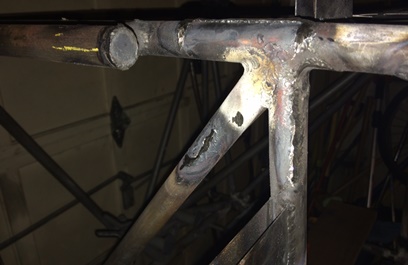
Fitting ground off.
April 20, 2016 I guess if you know how to be green...
things are a lot easier.
What you learn from the first you make up in time on the second... Shaved about an hour off of grinding off the second sway-wire fitting. Made a lot of metal "dust". Still need to hand file the weld beads down, and then hit a few of the areas I nicked... with a run of the puddle.
April 21, 2016 Be happy with your accomplishments...
big and small.
Excess weld puddle... needed to file it down around the areas where I ground off the sway-wire fittings. Doesn't look like I did anything if you looked at it now 'cuase you didn't know what it looked like before I worked on it. Sort of like the shifting sands of the Sahara... go there and look at it. Hasn't changed to you.
Anyway... a very small task that needed to be completed. And... I completed it.
April 22, 2016 Almost there...
back to where I started.
Put time on the project three times today...
Needed to weld a few of those small nicks I put in the fuselage tubing to make sure that they are up to speed. Later on I went back after they cooled and filed/sanded them down.
Down to the basement workshop during another period of work to matchd-drill the 5/16inch holes in the two replacement sway-wire brackets that I had sitting on the bench. Almost back to where I was when I started cutting off these brackets. Actually almost back to where I cut off the inside-leg of the properly made brackets back oh-so-when...
April 27, 2016 Getting closer to there...
back to where I started.
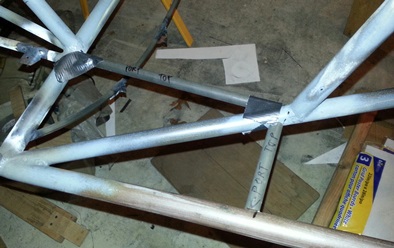
Welded on the first of two, new sway-wire fittings. Needed a lot of heat to weld this puppy on...
April 29, 2016 I'm back...
to where I started.
Number two sway-wire fitting... welded onto the fuselage. Well, actually... I left some of the back-welding for later on; when I can turn the fuselage to get at things better.
Used a number three tip for both of the fittings... couldn't get the number five to burn with a nice flame. Just needed to turn up the heat on the three a little bit more and it worked out fine.
oh... The Phils beat the Indians, 4 - 3, with a wal-off home run by Ryan Howard in the 11th... !!!
May 28, 2016 One of those things...
to fill some time.
Looking for things to do... and welding on the battery tray is one of them. It's been there sitting for a while now... waiting for a time when I needed something to do. And now was the time...
The .o32 sheet is a pain in the arse to weld to the tubing... the flame keeps wanting to eat it up and it wants to warp with a little bit of heat. Got the job done though. Ran beads on all four corners and the centers on the long sides.


 I basically had them already made. All I had to do, or at least all I thought I had to do, was sand two of the edges... locate and square them up on the fuselage... then tack and weld them in place. Yeah... or at least all I thought I had to do...