Mantua, New Jersey
Original Site:
September 2004
E-mail: usav8or@yahoo.com
more work on the...Radial Fuselage.
August 12, 2016
Firewall on...
re-form(er) is needed.
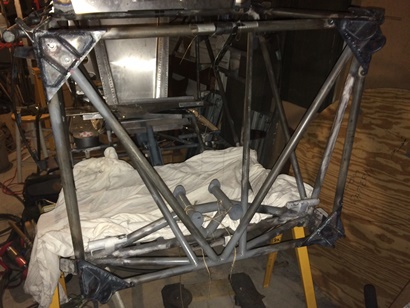
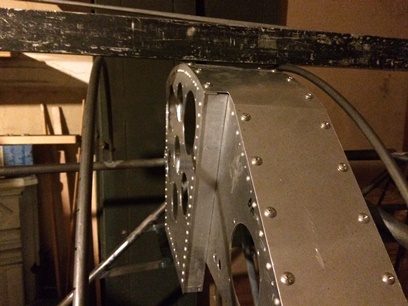
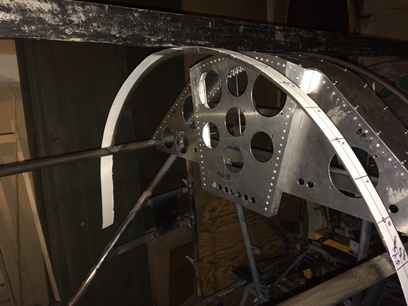
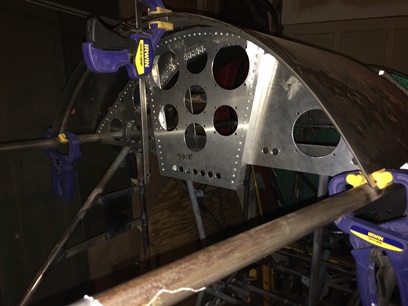
I have the firewall mounted and locked into position with six, count them... six 1/4inch bolts. Needed to mount the firewall with the bolts 'cause the Jake doesn't have an engine mount that you attach by bolt onto the fuselage. It actually has butterfly fittings (that I made) that it bolts on to.
Butterfly fittings.
Rear view of the firewall. Locked into position.
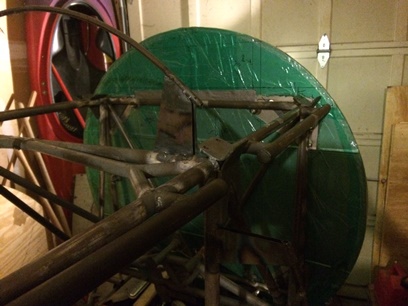
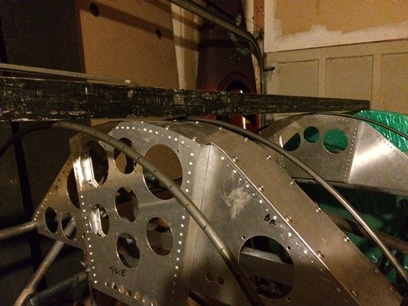
With the firewall in place. Well, let me back up a bit. When I was making sure that the top of the firewall was inline with the upper former for the rear cockpit I clearly saw that the former just behind the front pit was down quite a bit (saw this when I was making the rear instrument panel.) So... with the firewall in place I can now re-make that former.
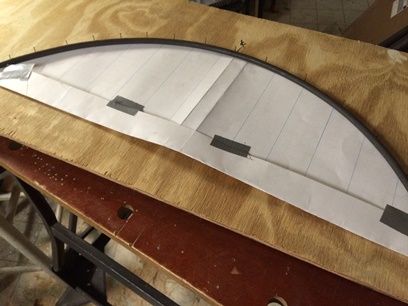
Been down this road many times. Took a while to find the paper patter for that station on the firewall. Knew I had it... just had to find it. Found it. Made a outline of the upper curve with about a dozen and a half brads on a piece of plywood so that I could get to work.
There's a little bit of magic that goes on when bending smaller tubing. You're going along trying to make it work... bending here, bending there, unbending here, bending there, unbending here and here, bending there. Then you've just about got it but you want to just tweak it a little bit more so you unbend it there and the ENTIRE piece look like you've just started bending it. One bend screws up the entire piece... and you can't remember where you bent it and whether it was a bend or an unbend.
A simple little former like the one you see below took 1point7 hours (that includes finding the paper pattern and making the plywood pattern, but still... damn ! So... I worked it some more and got it to the point of wanting to just tweak it a little bit more but stopped there. I'll walk away for the night, come back tomorrow to see if I want to make any changes to it.
August 13, 2016
Oppps
need to re-do the re-do.
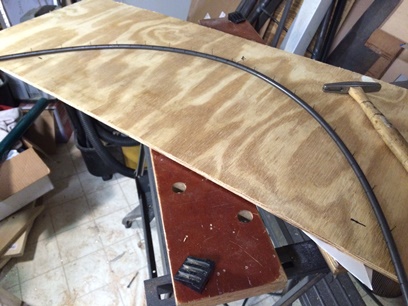
Yesterday... for some reason I made the wrong size former. It's too narrow. Looking back on what I did I see where I made the mistake.
So... Tonight I started to look for the right size pattern. Couldn't find it after looking in a few locations that I keep the patterns (yeah, why don't I just put them all in one location). Decided I wasn't going to waste time looking so I pulled up the CAD on my computer and jotted down the numbers... marked them up on a piece of display board, drew the arc then cut it out.
Didn't take long to make this second one... relatively speaking. There was a short enough period of time from yesterday to today that I remembered what not to do... for the most part.
August 14, 2016
An Oppps
turned into a yeah.
Tight spaces make everything you do take so long to do. Today... just aligning the new former took a lot of time... one side, then squeeze over to the other side, repeat a few times. Tack weld. Not happy with it. Break the tacks. Again, align the new former... one side, then squeeze over to the other side, repeat a few times. Tack again. Good.
Needed align the rear most former again (slight adjustment). The slight adjustment turned into cutting off too much. DAMN ! But... the first re-do of the former I made the other day was the correct upper former for this station. Yeah baby ! Just a matter of taking my time to make this one fit. So, again... one side, then squeeze over to the other side, repeat a few times. Tack weld. Not happy with it. Break the tacks. Again, align the new former... one side, then squeeze over to the other side, repeat a few times. Tack again. Good, again.
August 15 - 16, 2016
Resisting temptation...
thinking this all out before pushing forward.
I'm being patient... very patient. Ya got to when building an airplane for the first time.
Drawings, back in the day, and that is when these drawings were drawn, have the basic information on them. Take for instance the tabs for attaching the sheet metal skins to the fuselage. The plans show small square on the fuselage, in no particular spacing. Copy reads, baically, tabs made of .o32 metal spaced 4inches apart. That's it. Not that it's a problem, but I want to make sure that I am putting on the best attaching system that I can. Attaching system being tabs, and the strips of metal that get attached to the upper longeron.
Lookin' through Tony B's books I don't see anything on it. Looking at a lot of photos of fuselages I'm not seeing it.
Go to the biplane forum and throw out the question. A number of responses... now it's a matter of making a decision. Decisions decisions decisison... I like the one idea of making rounded tabs with a 3/8inch hole for a floating tinnerman nut, and then tab-strips like they make for the Pitts. Was thinking of modifying these tab-strips to have the larger 3/8inch opening for a floating tinnerman nut.
Drew up the CADs for both and printed them out. Will post photos of pieces after I have made them. Then... I'll let you know how they worked out.
August 17 - 18, 2016
Homework completed...
time top push forward.
The past two days I've been actually working on the sheet metal skin attachments. Took the CAD's I drew up and printed a few of them out. Glued them up on a piece of .o32 4130.
First things first... drilling of the 3/8inch holes. After each hole I drilled I needed to clean the flashing off the back of the hole so that the sheet of steel would sit flat. It was a pain in the ass. I tried pulling it off with my fingers at first. Took a little bit of time and wasn't the best way of cleaning it off, 'cause all of it didn't come off. Tried using a pair of pliers next. Same end result... just a little bit quicker. Still wasn't as clean as it should be.
Did that type of cleaning for a few holes then thought, why not flip the sheet and just kiss the back side with the Unibit I was using to drill the holes. The next step up with just ever so lightly clean that edge. BRILLIANT ! Tried it and it worked like a charm.
Enough work...
Back at it again on Thursday. Long drive back from work tonight... close to two hours. Essssssssssssssssh ! Was finally able to start working on the project just after 8PM.
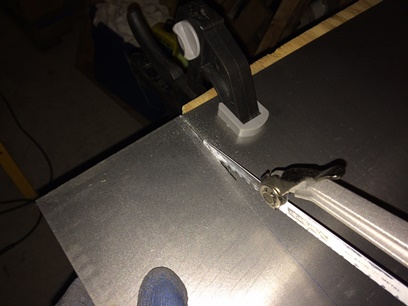
Back down to the workshop to start cutting these puppies out. Had to change the band-saw blade for one with more teeth to cut the .o32 metal. Set that up then needed to tape down a few pieces of metal to close the gap up around the cutting blade so that it wouldn't be pulling the thin pieces I'm cutting off down below the table before cutting all the way through. Anyways...
With everything set up I started cutting away the metal leaving rough-cut looking blanks. After cutting all thirty-three of these to a rough shape I took them over to the grinding wheel and started grinding them down to the line.
Next up... filing and sanding the edges smooth.
August 19, 2016
A change of...
plans.
Didn't do what I wanted to do. Did what I had to do.
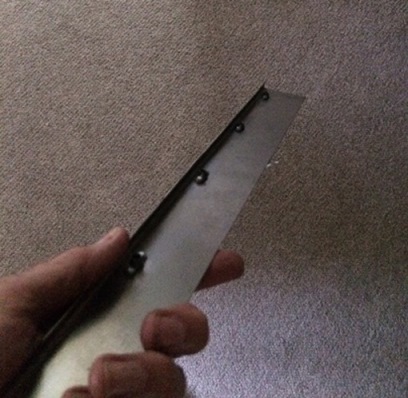
It all started when I went out to the fuselage with a few of these new tabs to see what I needed to see. And, I saw that they needed to be cut down and bent at about a 45degree angle.
One of the guys on the forum (biplane) gave me the idea of these tabs with the larger hole... and he showed a former-bender that he came up with. Thing is... it'd take me longer to make that bender than it would to bend up the tabs I needed bending.
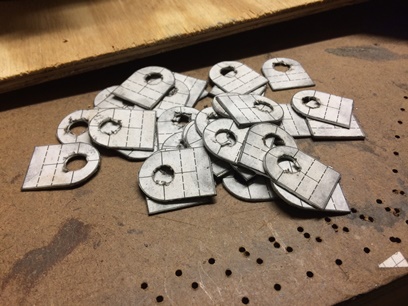
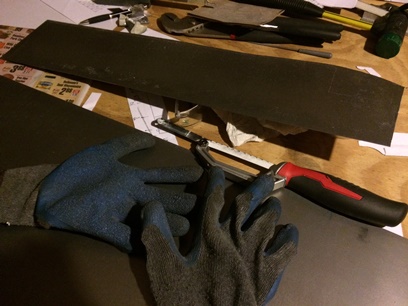
Anywho... after seeing what I needed to see I went to work on these tabs. I usually file and sand smooth the sides of a piece before bending them. But... I did't this time. Thin tabs... bent at a 45degrees... so I bent them. I didn't have a fear of putting any stress cracks in them (an they aren't structural). After bending each at a 45degree I took them over to the bandsaw to cut most of that extra length off then ground the rest off with the grinder. So... that's where I'm at right now. Two.2 hours and I'm just ready to file and sand the sides... of which I thought I was going to be doing today.
All except the two far-left tabs are bent and ground to size.
August 20, 2016
Some things I can figure out...
others I don't get.
Started filing and sanding smooth the edges of alllll of those tabs. Not a big deal, just a lot of endless, monotonous work. About half-way through and I thought that I'd better burn off the paper pattern to make sure that there aren't any raised edges hidden by the paper that need to be addressed.
That's it... that's all I've done. Thinking... I don't know how some builders can have a scratch built biplane/airplane built in such low hours. I'm not getting that...
August 21 and 22, 2016
Some things I can figure out...
others I don't get.
Finished up. Figured out. and... filed to length...
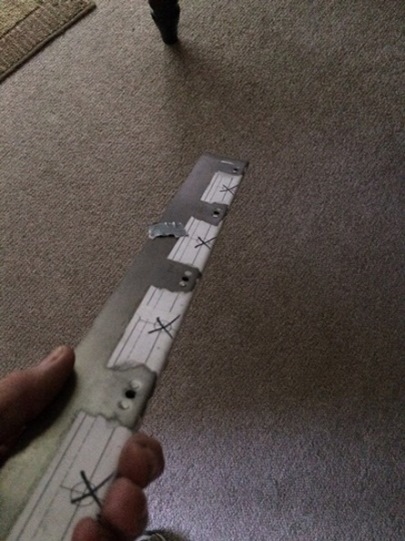
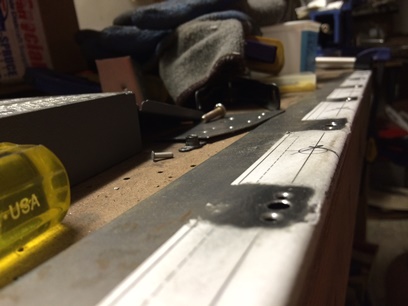
Over the past two days I finished work on the tabs. Got them all nice and round... smooth with no edges. Then sat down to figure out how to 1. space them, then 2. getting them ready for the jig.
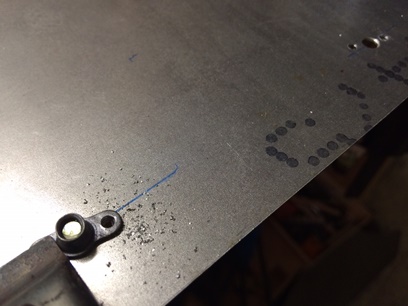
Had a piece of .o32 steel sitting around. It was just large enough for me to wrap around the upper former on the back pit. It'll work beautifully if I only had a longer piece to wrap. And ya know what... I need to buy some .o25 4130 for the metal that I'll be bending up to attach to the upper longerons for attaching the sheet metal to. All I need to do is be an over-sized sheet and use it to first jig the tabs on the upper formers. BRILLIANT !
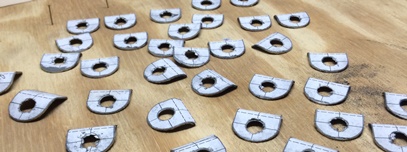
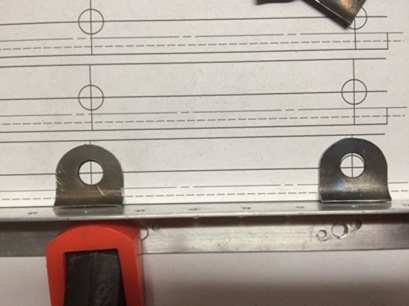
Once I figured out the jigging I saw that I needed to trim down the length of the tabs so that they all fall within the 3/8inch holes that I will be drilling into the jig. Spent a little bit of time doing just that.
Left is good. Right... toooo big.
Okay... I have some extra time that I need to keep busy with. Decided to work on figuring out how to close that gap up between the turtledeck and the fuselage tubing. Read about it here...
August 27 and 29, 2016
Friday, Sunday...
starboard, port.
Thinking the hardware attachments through... now, instead of before purchasing, I see that I should have purchased the 10-32 anchor nut plates, not the 8-32. I'll need to send these back (they road along with the large piece of 4130... so I didn't waste any money there) for a credit and order the larger anchor nut plates along with a dimpling set for the starboard and port sheet metal former supports.
I thought that I would need a longer arm on the sheet metal former so I cut the first one by hand (looooong time cutting). Once I got into laying out the holes and seeing what I needed to do (tack weld to the outer pseudo longeron instead of the real longeron) I saw that it didn't need to be as wide as I had cut it. It actually needed to be less than 1/2 as wide. Put 3.5hrs of time on the project today; went from big piece of metal to little blank with enough holes to attach the anchor nut plates (standard ones).
(August 29):
Yesterday I had a pretty full schedule; over to Mom's to work on cutting up the wood from the old porch to put curb-side, then over to Whitey's... Deneen was up for Karen Murphy's wedding and stopped by his place on Sunday for the afternoon. It was good seeing her (up from Orlando, FL) and the rest of the gang. Chip is missing from the picture... he's the one taking it.
Back to work on these side formers on Monday after getting home from work. Decided to cut down the second one and drill all holes before moving forward with the starboard side former.
That .o25 piece of metal is 6ft long by 18inches wide. Like I had mentioned earlier... the first piece I figured attaching to the original longerons so I cut it extra wide. This time... only needed to cut it less than half as wide. This allowed me to use the bandsaw. Did't take nearly as much time but was a pain 'cause the .o25 metal wanted to bend so I had to support the back-end while cutting the front end in the small little confined space that I have in the basement to do this.
Got it cut and trimmed close to size. Glued the pattern's on for drilling and started drilling. Got to the pooint where I have the holes in it where the 10-32 nuts would go through. Stopped there. Tomorrow I'll match-drill the holes for the rivets and then, ummm... maybe bend the pieces ???
August 30 and 31, 2016
More work on...
starboard and port.
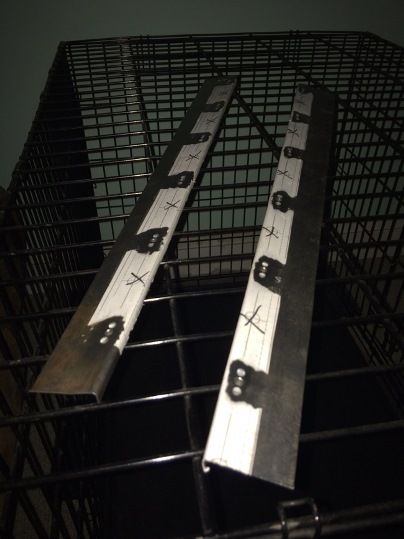
Continued working on the side formers...
More cutting, drilling then match-drilling. Oh yeah, bent both of the first bends in both the starboard and port side formers. Thinking it though I see that I need to dimple them and then rivet the anchor nut plates on before making that second bend (glad I thought things through or I'd be un-riveting them and then riveting them again).
These still need to be trimmed to size after I get done all the work that still needs to be done to them.
September 1 and 2, 2016
yeah... Still working on...
starboard and port.
More work on the side formers...
Received the dimple dies for the hand squeezer. Did a few tests and they worked great. Just an issue of being close to the bend with the holes closest to the bend... a little deforming going on that I'll need to re-shape. Not a problem...
Sept. 2:
Figured out the length of the rivets I needed. Needed to cut down about two dozen to the correct length. Started to attach the anchor nut plates with said rivets. They may be just a little bit too long for squeezing... that or I need to deform the bends again to get the right squeeze... or modify one of the squeeze heads to get closer. THINKing... I may just have one I can use that has been modified.
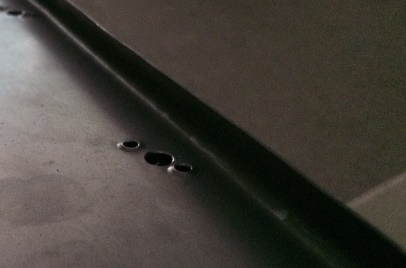
Dimpled side former.
Back side of dimple.
September 3, 2016
Making more work for myself on both...
starboard and port formers.
Time to rivet the anchor nut plates in. And... I discovered that I put the bends too close for a good set on the rivets. I had a feeling I was too close when I went and did the dimpling but I figured with the partly filed off head on one of the rivet squeezer heads I'd be okay.
Well, their is a slight difference between the first one I bent (right on the line) and the second one... just soes you can see the line in the bend. I start off riveting the one that is right on the line... had one helluva time squeezing the rivets... kinda slightly deforming the bend again and not getting very qood squeezes. Decided to work on the second one before finishing the first one. And... much better. Not a problem getting to the rivets for squeezing and I didn't deform the bend that had already been made. I am a little disappointed the way that the .o25 material distorts a little when making the squeeze.
Cut the material to re-make the first one and who knows... depending how well that one goes I just may re-make the second one as too.
Note: Above image; slight snake in bend from me squeezing rivets and... this is the better of the two. I think I'll be re-making both of them with the knowledge I gained from making the first two "test" pieces.
September 4, 5, 6, 2016
Still making more work for myself on both...
starboard and port formers.
Knew I was going to do this after seeing the outcome of the first side former. Cut the metal for the re-make of the starboard side former. And this time... I only had 1/4inch of material for the bend instead of 5/8inch. Wanted to see if this was the ticket and made the bend before drilling the holes in it. Not a problem other than it taking a little longer than if I had drilled the holes beforehand.
Anyways... made the bend and saw that there is plenty of space for using the hand squeezer on the rivets with only a 1/4inch of material being bent. Proceeded with the drilling of the pass-through holes for the screws then match-drilled the holes for the rivets. Put the squeeze on them and they look pretty fine.
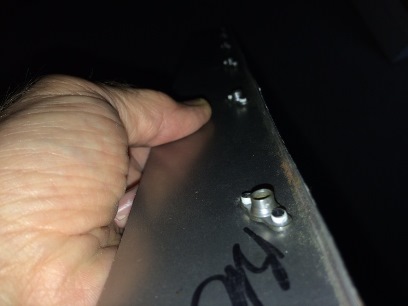
Nice small bend with not much overhang. Easy to rivet.
Match-drilling anchor nut plates.
Anchor nuts riveted in place on re-do.
Top-side of re-do.
Happy with this re-do... I wasn't as happy with the second one I had made so... off to make the second one a second time.
Trimmed and holes drilled in second re-make.
Ready for bending.
September 7, 2016
Re-peating...
when re-making...
Same stuff. Different day.
Took the blank that was cut, and drilled for the bolts... and did some additional work on it.
First I cut the piece down closer to the correct size then match-drilled the rivet holes for the anchor nut plate, deburred the holes then put the edge-bend in it before dimpling those rivet holes. Whew... long frickin' sentence... kinda run-on like.
Ready for rivets.
September 8, 2016
Ya learn something every day...
At least you should.
More of the same stuff. Different day.
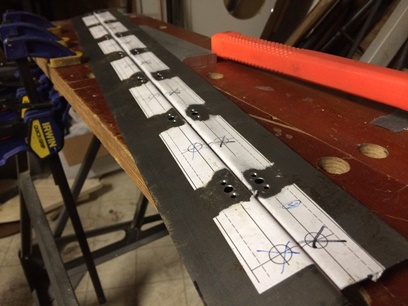
Time to rivet on the anchor nut plates to the second side former; one of six. Did this the other day with the first side former and I'll be doing it to the additional four side formers; two middle and two rear formers for the sheet metal along the upper longeron. Had the rivets already cut down so it was just a matter of lining things up and squeezing.
Forward ones made... and a few lessons learned. On to the center ones... than the rear ones. Then... hey, hopefully more lessons.
September 9, 2016
Think things through...
Nothing is routine.
More of the same stuff. And another different day.
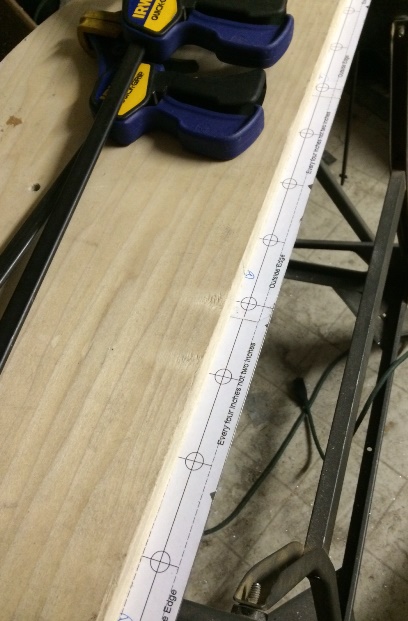
Back to prepping the sheet metal former for riveting; drill the holes, match-drill the rivet holes, bend the edge then dimple the holes. It's getting to be too automatic so much that I'm thinking ahead an not thinking through...
First off, I almost make the bend before I drill the holes. Not a big problem, but it's easier when I do it the other way. Then... when I'm drilling the holes... my pattern has a hole marked every two inches but I'm putting the anchor nut plates every four inches. I usually cross out the ones I'm not drilling. But... oh, no, not this time. This time I drilled my first hole without thinking about it and it was in the middle of the piece. My fifty-fifty chance of drilling it in the right spot was on my side this time. Murphy must have been doing someone else wrong at the moment...
No, not yet !!!
Almost a boo-boo. Fifty-fifty chance... but not this time.
After those two near disasters I was able to concentrate on the things I needed to and managed to have a productive meeting with my project.
Ready for the rivets.
After those two near disasters I was able to concentrate on the things I needed to and managed to have a productive meeting with my project.
Ready for the rivets.
September 10, 2016
Got another one done...
Eeeeesh !
A repeat of yesterday including cutting the sheet... which added quite a bit of time onto things. Eeeeeesh ! The frickin' sheet decided to move on me while putting the initial bend in it too. Eeeeesh !
Both center side-formers. Ready for rivets.
September 11-14, 2016
The Humaness...
of a homebuilt...
Over the past few days I've been working on these .o25 thick side formers. For some reason... just not getting much out of it mentally. I'm enjoying the work, as always, just not having the drive to get out there and do it. Maybe... it's the frickin' almost 2hour drive home... then the run with the pup and then eating that big ol' salad (most nights) and finally getting around to thinking about picking my ass off the chair and start working on the biplane, say 8:30 or 9 at night.
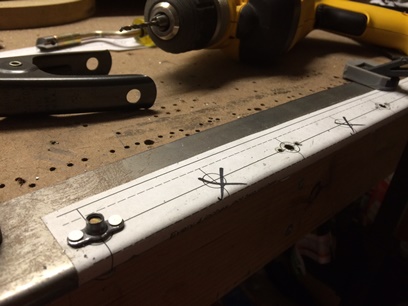
But aside from that... I'm actually getting enjoyment out of the humaness of the build. Not much on here that I haven't done by hand and that includes the bending of the radius on the ends of these side formers. You can see the slight ripples from the hammering... the imperfect squeeze of the rivet squeezer... holes aren't EXACTLY on the every-four-inch mark. It could be on that mark at the roll of the dice but I don't have time to roll dice here. And no matter how many times I go back and re-make something the only thing I know is that it will... be... imperfect !
My Excellence is imperfect ! I'm okay with that 'cause there ain't no perfect. The faster we understand that, but still work towards the standards of aircraft building, the more flying machines we'll be seeing.
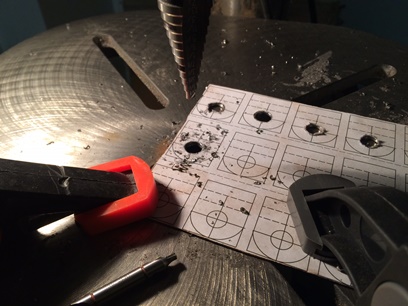
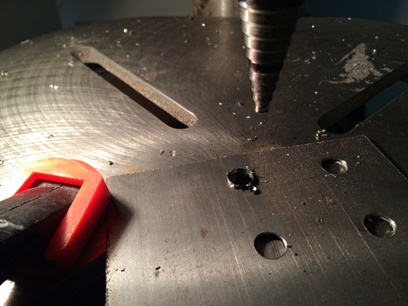
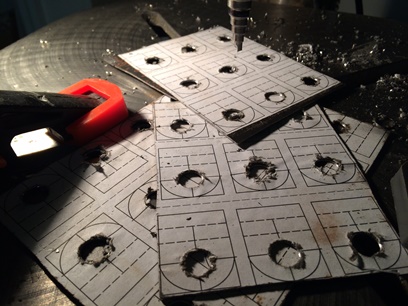
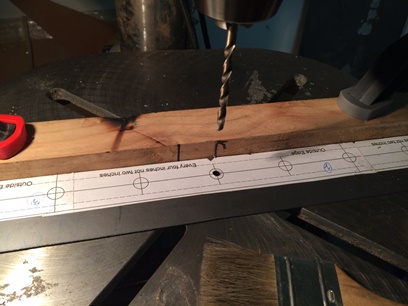
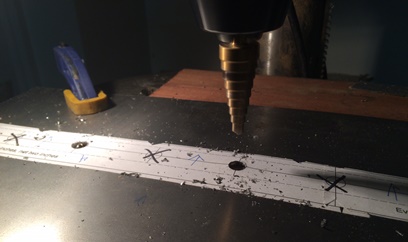
And here, my firends, is another photo of my imperfection !!! Actually it's a shot of me drilling a few holes in the tab alignment jig, but they're probably not dead-on the exact spot that they would be if they were drilled using a computer guided milling machine.