Mantua, New Jersey
Original Site:
September 2004
E-mail: usav8or@yahoo.com
more work on the...Radial Fuselage.
May 25, 2018
A little forward movement...
on the lower belly.
Another WOW moment. Still haven't worked on the project on a consistent basis... maybe this holiday weekend will kick start it again.
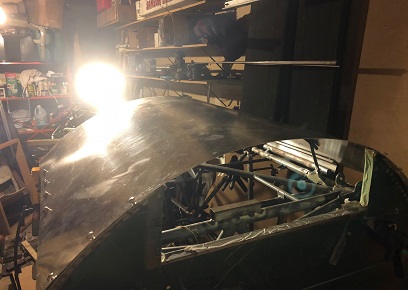
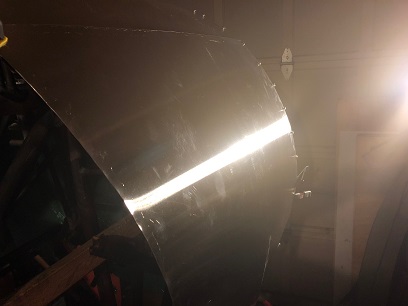
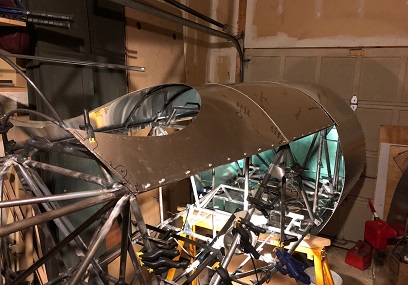
Looking at the photo below there doesn't seem to be much progress... but, oh... how deceiving it is.
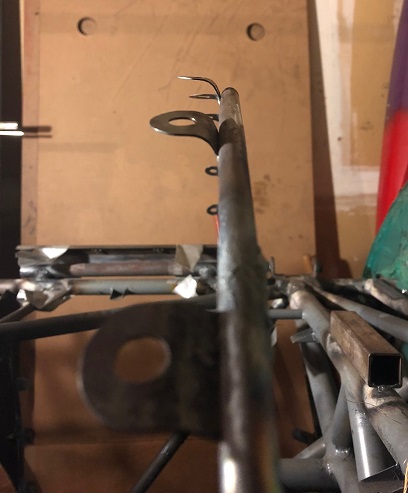
I've fitted up the lower, starboard side-rail and have welded it into place. I've also decided (actually there was no debate) that I'll be re-making the belly former between station 0.o and 24.o. In addition to making the curve fit closer to the belly skin, I'll be eliminating a few of the anchor-nut tabs. These will be the three or five that are behind the exhaust "shute" which exits from the lower firewall.
May 30, 2018
Feeling...
just a little bit better.
Felt pretty good with my commitment to the project this week. Not quite as much as I would have liked... but I am doing better.
Welded the lower, starboard side-rail in place. Test fitted the belly skin... and it's a definite belly former re-do.
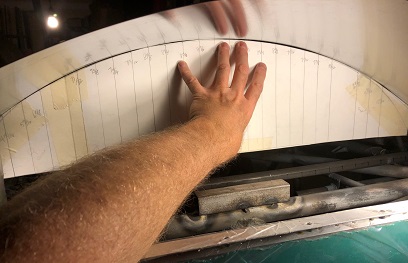
A bit of a challenge here. I need to create the curve between two different curves. I don't feel like playing around with it with my CAD program. I would be shooting in the dark with it. I decided to set a flat piece of tubing in place, as a base with one inch markings on it, and take measurements every inch... lay out the measurements... cut the pattern and test fit it in place. Well... it took three tries to get it right for some reason. The first two were WAY off... the third just needed a little tweaking.
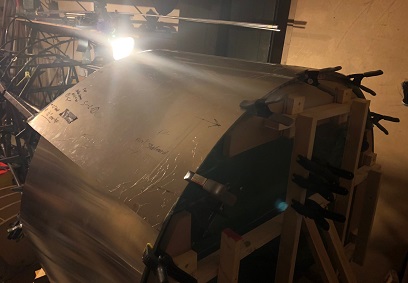
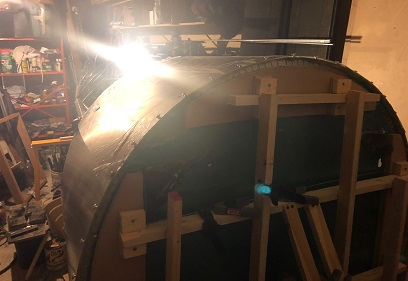
Below are a few images. The first shows the existing belly former with about 3/8inch gap between it and the skin. Not sure how that happen. I was so careful in laying all the formers out (that goes for the entire build...). The next image is of the finished, tweaked pattern. It's ready for me to bend a piece of 3/8inch x .o35 tubing to shape.
July 2, 2018
Naaaa...
I don't think so.
Ahhhhhhhhhhhh... half of this on and off again thing is making a decision as to what I'll be doing with this ONE belly former.
Working on and off... and thinking more on than off... final decision; make longer tabs and use the existing former. NOT before I ordered up three lengths of 3/8 x .035 tubing. The reason for making longer tabs instead of making a new belly former; 1. no matter how hard I tried I couldn't get the correct (to me) shape of the former... it was still somewhat off, 2. there isn't a real need for this former, I actullay placed it in position to support the backend of the air exit port just behind the firewall. Instead of beating myself up in trying to get this thing "perfect", while ending up getting close, I decided to extend the tabs.
Made the replacement tabs... THEN cut them too short. Made a newer set... and cut them to length. Used the aluminum belly pattern to align and postion the new tabs. Tacked and welded in place.
July 3, 2018
Attaching the belly...
on the beast.
Out to the garage work shop and wondering what to do. What to do??? I'm pretty good at getting some things to the point of attaching them to the plane... and then leaving the attaching until later.
Went out the garage today and asked that same question... and it was sitting there right in front of me. DRILL THE HOLES AND ATTACH THE DAMN BELLY SKIN... well ya ??? And I did just that!
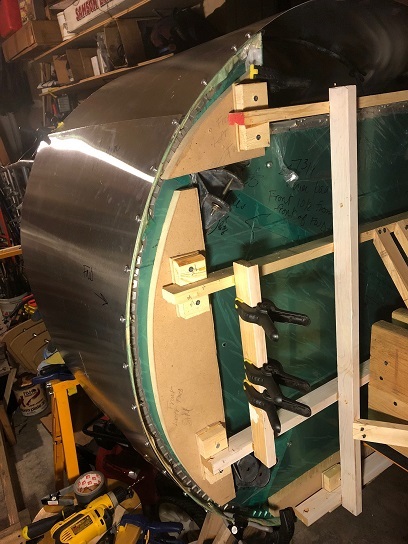
Aligned and clamped the belly skin pattern in place. Grabbed the hole transfer tool and my drill and a few drill bits. Match-drill a hole... drill to size, deburr... put in a screw. Next hole... Match-drill a hole... drill to size, deburr... put in a screw. Next hole... Match-drill a hole... drill to size, deburr... put in a screw. Next hole... Match-drill a hole... drill to size, deburr... put in a screw. Next hole... Match-drill a hole... drill to size, deburr... put in a screw. Next hole... Match-drill a hole... drill to size, deburr... put in a screw. Next hole... Match-drill a hole... drill to size, deburr... put in a screw. Getting the picture? oh by the way... each time I drilled the hole to size I'd put a scrap piece of wood behind it as a hard point to keep the... ahhhh, it keeps the hole from being screwed up when enlarging it. Drilled all the holes and they're just a little too tight (#11)... took the entire belly skin pattern down to the basement workshop and drilled them to a #3.
A few times during the drilling I needed to keep myself in check. I wanted to skip a step or two when going from one drilled hole to the next. Like not putting in a screw in the next hole you drilled hoping that the following match-drilled hole you drilled would be inline with the one prior and the one you just drilled. Instead of unbolting six bolts, drilling out to size, deburring and then screwing in all said bolts before drilling that next one. What are the chances that not doing all that work would end up with a perfect set of hole... not good enough for me. Needless to say I did a lot of screwing and unscrewing of bolts as I progressed along with the drilling.
Back up to the garage to check out my creation... beautiful! Still need to decide on how I'll be match-drilling the tab holes on the formers with the belly skin... I'll be thinking about that one while I cut, fit and match-drill the side skins that fit between station 0.o and station 24.o.
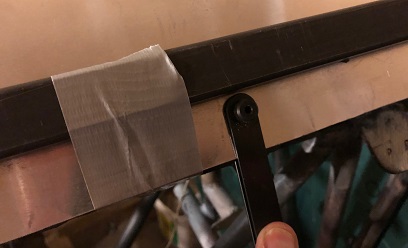
Alignment tool to match-drill holes to anchor nut plates.
Holes... duuuuuuuuuuh!
July 4-6, 2018
Making the sides...
of the beast.
Continued work on the skin patterns.
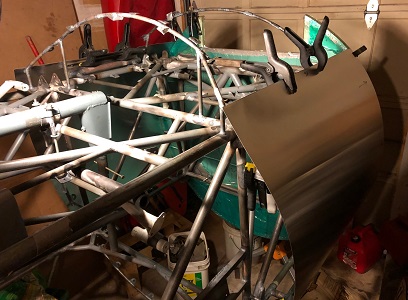
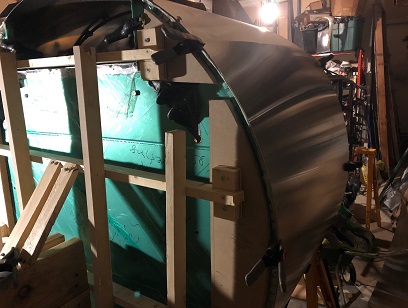
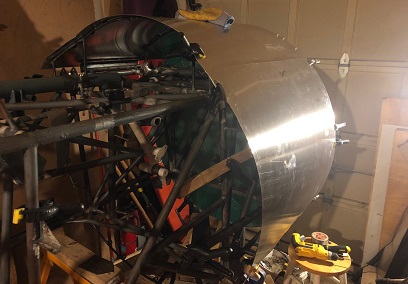
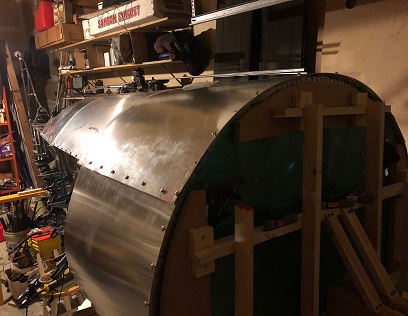
Over the past three days I cut and aligned the two side pieces; pieces between station 0.o and station 24.o. It's really starting to look like something now... beyond the rail dragster look. Rail dragster... cool looking, but not what I'm building.
Made both side pieces so that I can make sure that the firewall is squared up on both sides before match-drilling the holes for attaching to the side rails. I'll be locking on the belly skin too to confirm the firewalls squareness.
Both sides are clamped in place... just about ready for match-drilling
Oh yeah... did some cleaning up and hung some hooks so that I could better organize the large pieces I've made for the biplane. Not only are they organized... they're up and out of the way too!
July 7, 2018
Attaching the sides...
of the beast.
More work on the skin patterns.
reflecting back... once I got over how I was going to do that one belly former... I've been moving along pretty good on the project. Anyways... squared up the firewall by clamping on both side skins and a straight piece to the bottom area. Looks real good to me. I'll find out after I match drill these, attach both sides and the bottom and then flip to do the top...
Decided to try what I wasn't going to try and that was to match drill without unscrewing the screws holding in the previous match-drilled holes (after I had enlarged the holes for the screws) for each new hole. I instead did that for the first two, locked them into position with machine screws and then proceeded to visually keep things lined up, keeping things clamped into place of course. It worked beautifully... all except for the last hole (drilled a little off, DAMN !). Based on this experiment... I'll do the same, except for the last two holes. I'll drill all previous holes to the correct size, attach with screws and then match-drill the last two. Should work... easy peasy?
Understand? Yeah... me neither.
By the way... all this aluminum I'm using for the patterns was bought at a local metal shop. It's .o32 5052. Costs about $48.00 for a 4ft x 10ft sheet and costs me about $4.00 in gas to pick it up. I'll be buying the .o25 2024T3 Alclad Aluminum for the skins from Airparts, Inc.
July 27, 2018
Taking a step...
back?
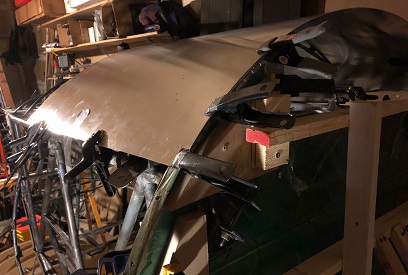
Put the top piece on that had be previously match-drilled... then started attaching the sides that had been previously match-drilled and it wasn't coming up roses.
The holes on the sides were a little off. Apparently when I thought the fire wall was square while match-drilling the sides... it wasn't!. DAMN! (yeah... I say that quite a bit) What to do... what to do... Need to come up with something that will hold the fire wall square and still allow me to match-drill the skin patterns. It took a few weeks of thinking but I've arrived at a solution. And instead of working on something else on the project while I thought about the fire wall... I didn't!
Here's the jig... almost ready. Used the pattern that I made for aligning the motor mounts (I think that's what it was for). It took me a little while on figuring this out. I had a number of ideas that when I thought them through... probably wouldn't really give me the squared up fire wall that I was looking for.
Weights on for gluding up. I'll be screwing the framework to the MDF curves. This will all then be squared up with the fire wall and the firewall will be adjusted to be squared. Fingers crossed...
July 28 - August 11, 2018
Taking a step...
back to where I was.
I'm not quite sure why I've been dragging my feet along with this. It ain't rocket science...
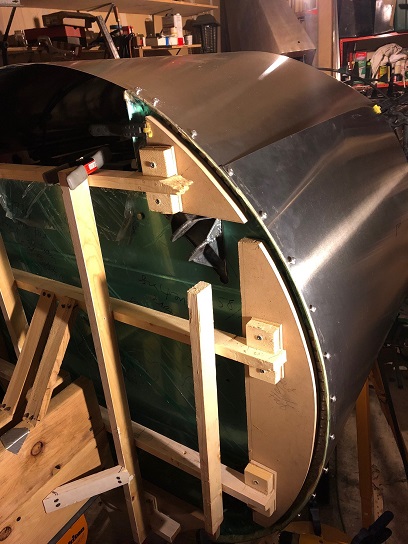
As you can see from the above photo, the jig for keeping the fire wall square is ready for action. Just needed to pre-drill the holes for the screws so I didn't go splitting the attachment blocks (although... I did split two slightly).
Took above mentioned jig out to the fuselage and tried it on for size. It WORKS ! Squared it up nice and right!. And then I let it sit for a few days... Not quite sure why.
Back out to work on it on Friday... took the original to see if it was useable and only two of the screw holes aligned, the rest were off by at least a half a hole. Ain't gonna work. Spent the evening cutting a new test blank.
Out to the fuselage on Saturday... took the new blank and squared it with the fire wall, clamped it in place. Clamped and secured the sides... then started the process of match-drill, drill to size, deburr, test with a screw... match-drill, drill to size, deburr, test with a screw... match-drill, drill to size, deburr, test with a screw... match-drill, drill to size, deburr, test with a screw... match-drill, drill to size, deburr, test with a screw... so on and so forth. Each time I would put the screws into the existing match-drilled holes to make sure things were staying aligned, only having to unscrew all those screws then re-screw them in for the next match-drill hole. It's all good. It works for me.
I completed match-drilling both sides of the belly test pattern. Next I'll be match-drilling the holes for the fire wall. Also... I need to weld on a tab to each side, back past the rear wing attach. There's a lot of sheet metal just hanging loose out there.
August 12 - 17, 2018
Not getting much done...
with the lawn.
I'm being a little more than over cautious with the pattern skins on the second go 'round. Since locking in the firewall to the jig... I haven't mowed the lawn... because of my slow forward pace. Thought I would have been done it by now, but NOT yet!. I'll have to try and squeeze the mower out without knocking the firewall out of square. The grass is getting high, so I've got to do something!
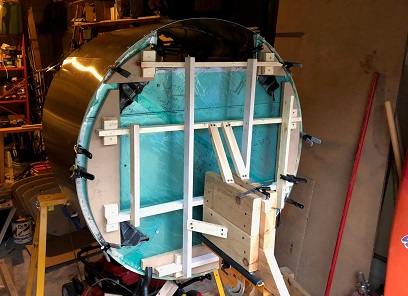
Had enough .032 aluminum to re-make one of the side pattern skins but needed to buy another 4ft x 10ft to cut the other. Spent the week cutting, filing and sanding these two pieces... and fitting them up. I'm about ready to start matching drill both the port and the starboard sides. Wanted to have them both aligned to make sure things on both sides were lining up before match-drilling the first.
The edge of the sides, where the meet the bottom, look a little high in the photos below... it's because I still have the screws holding the bottom skin in place.
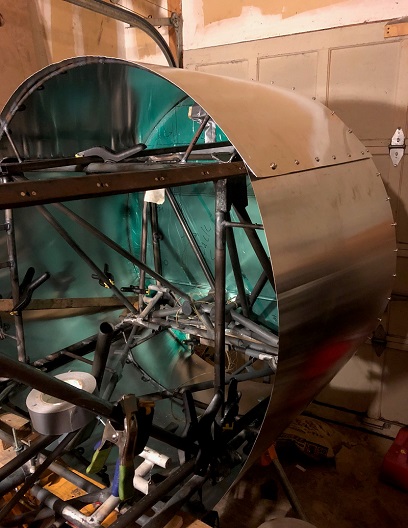
Firewall with jig attached.
Belly shot!
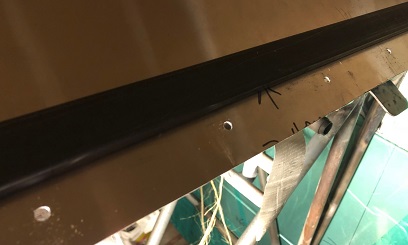
Starboard side.
Port side.
August 18-23, 2018
Hey!...
It's about the learning!???
Learned a little bit more about match-drilling skins for the biplane...
Started match-drilling the port side panel... moving right along. Or so I thought. Moving right along, but the damn holes were a little bit more than slightly off the hole I match-drilled it with. WTF!???
DAMN! It looks like when I have both the leading edge clamped AND the top and bottom of the piece clamped, the top and bottom are pulling it back away from the front edge enough to make the hole close to half a hole off. I'm not positive on that, but I'm thinking... I'll need to try my theory out. The port side... another "test" piece? Back out to the sheet of aluminum I bought to cut another port side piece.
After cutting and prepping the piece I try out my theory... and it's working as I thought. Next night... the same with the starboard side (although I did allow the aluminum drift back on the first hole I match-drilled. DAMN!) Other than that, the rest of the starboard "test" worked too.
Now to match-drill the top and bottom edge on both of these pieces.
After drilling the top and bottom of the side pieces... time to flip the fuselage and match-drill the piece I cut for the top side... if it fits now. If not I'll be cutting a new piece and matching-drilling that.
August 24 - 30, 2018
Hey!...
It's about being a Type A personality!!!
JUST lost my write up... "fatal error" in DreamWeaver. F'er !
Let's try this one more time... More on the match-drilling side of things this week. Discovering that the best way to match-drill the side skins is with them pre-shaped. I'm having an issue every once in a while with the hole "drifting" off the center of the hole I'm match drilling it to.
Ya see... for the test skins I'm not having them pre-bent to the 44inch diameter shape. What I'm doing is clamping them into shape and match-drilling it. Maybe the edge of the skin lifts slightly and allows the tool I'm using to center over the hole to be slightly off center. I'm having to use a rat-tail file to open the hole to allow the screw to center over the anchor-nut hole. So... instead of spending money on having these "test" skins pre-bent... I'm being a type A personality and just pushing forward with what I have.
I make a note of this on the aluminum skin I'm working on (the shift... not the Type A personality) so when I go to make the final piece I'll adjust for it (or most likely another test piece). I'll also be opening the holes a little bit more to allow for more "wiggle" room. This will help tremendously when fitting things up. Right now... there's not much space between the screw shaft and the sides of the hole.
As of today I just need to match-drill the edges of the upper, forward skin. None of the holes have been match-driled to the formers. I plan on doing that next as I progress from the front to the back on the top pieces.
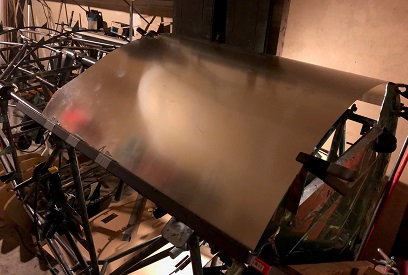
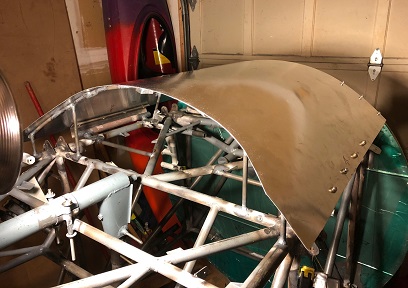
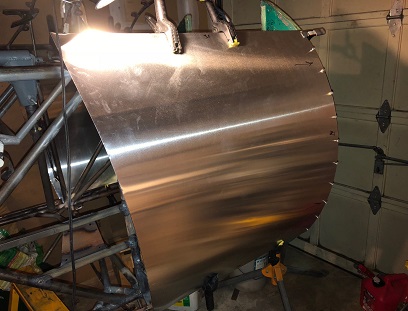
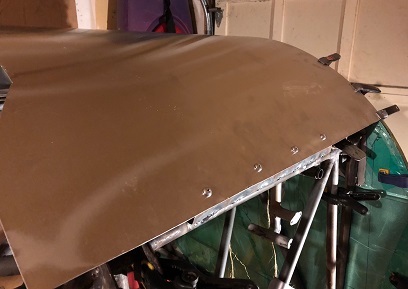
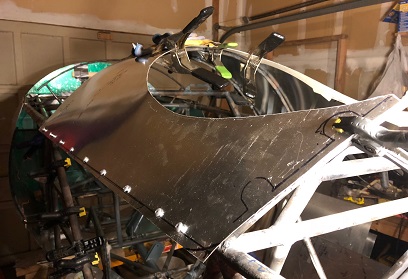
Top skins roughly clamped in place.
Forward, top skin clamped and ready to be match-drilled.
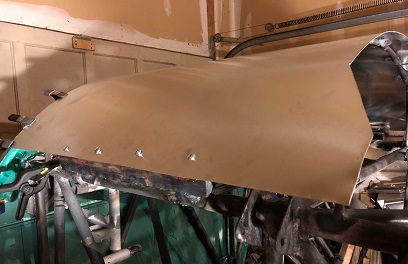
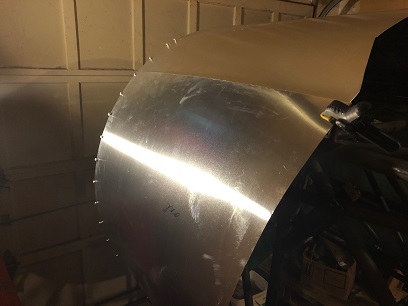
Finished match-drilling forward edge...
Finished match drilling forward edge...
September 1-8, 2018
Hey! sometimes we have them!...
brain farts, that is!
More work on the work I just worked on!
Re-cut a new blank for the upper/forward pattern skin. Match-drilled the forward edge... nice.
Worked up one side and down the other... match-drilling the starboard and port sides. Took a look at it and... DAMN! didn't clamp the back end and it's lifted probably about an inch from the rear former. DAMN! Had thought about clamping it but got to doing something else and went right into the "up the one side and down the other" of match-drilling.
next session... un-screwed thow bolts and clamped the back edge and filed the holes to where they needed to be. Still needs just a little tweak to get it to sit perfect on the rear former. It's a test pattern skin... the second or third one. I'm learning... we'll actually I had learned and had a brain fart and forgot to clamp that back edge. WON'T happen with the final skin.
September 10 - 15, 2018
Hey! lookin' like a biplane!...
still a ways to go...
Work on the 2nd and 3rd upper skin patterns.
Just a matter of taking my time and working through the match-drilling of all those holes; use the alignment tool for alignment of hole, drill pilot hole, remove small bit from drill, insert large bit into drill, check pilot hole for center aligment, place wood backing block under pilot hole, drill larger hole, remove large bit, insert small bit, clean back of drilled hole, test with screw, start all over again. All the time I'm doing this I'm screwing in and unscrewing the screws to make sure that the panel is aligned the best that it can be...
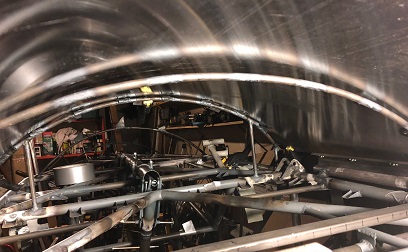
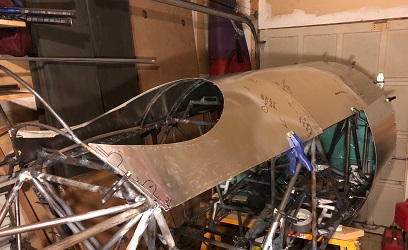
Finished up with the third panel (the rear cockpit panel) and MAN! it's really looking like a biplane. SWEET! After match-drilling that final upper panel I placed all the panels on the fuselage and screwed them together. All fit... overlying holes ALL match up. I'll probably do one more set of skin patterns with the holes in their exact place where, on these, I filed them into the correct location by opening up a few holes. Next set should be the final pattern set to cut and drill the final panels from.
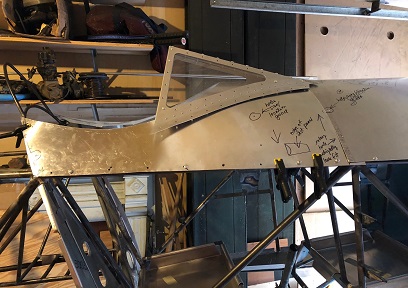
Staurday I inserted most of the misc. parts, that I've made over the years, into and on the fuselage; foot trays, instrument panel, seat pans, rear enclosures, windshield, ect. Made notes of what still needed to be done with the fuselage; tabs, ect. Made a note that I need to trim the ends of the instrument just a wee bit so that it doesn't have the chance of rubbing the skin in flight.
I plan on leaving the next set of skins long (side to side) initially so that I can mark the panels for cutting... a smooth looking line for eye. I'll be shortening up the front to back on the first upper skin. As you can see in the photos... there is a gap where the first skin overlaps the second one. I can cut that opening down by shortening up on the length of it.
Looking at the fuselage you'd think... connect these parts, hang the engine and the set of wings... and away we go!