Mantua, New Jersey
Original Site:
September 2004
E-mail: usav8or@yahoo.com
more work on the...Radial Fuselage.
September 22, 2018
The act of building...
is the goal.
Reading an entry in Mark Nepo's book... "The Book of Awakening", a snippet; the act of flying, is the goal (talking about birds flying, but I relate it to us flying). And that applies to building the biplane too. It's the act of building that is the goal.
And I've said this numerous times, when I first started building, it was the finished biplane that was the goal. It wasn't until I changed that mind-set to "the act of building is the goal", when I started enjoying the process of building my biplane. It wasn't until then that I began to appreciate my failures as much as my accomplishments with the build.
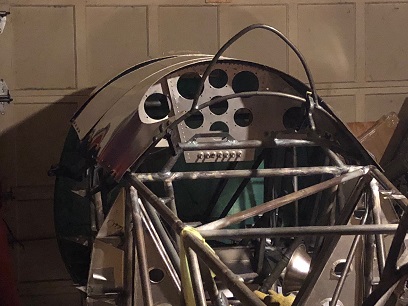
I've put the skin project to the side for a bit (still need to drill out the holes for the former attachments and get the final shape of the skins nailed down). Decided that I'd trim the edges of the instrument panel for the back pit so that it wouldn't be rubbing up against the sheet metal skin (what would have eventally made a hole/slice in it). At first I was going to make small eyelet covers to bring out the side so that it wouldn't hit the instrument panel then decided... why go to all of that trouble (I don't want bumps on the sides to begin with) when it would be relatively easy to file the front corners off of the instrument panel.
I make my marks and started filing away. Thought better not to use a grinder, 'cause once you grind off too much there ain't no going back. It took about an hour to do, but it's looking nice. The sides are about 1/16inch away from the skin. Nice!
Later on in the week I took a look at what else needed to be done and decided to work on that side-panel for the breakers. Something I started earlier and never finished.
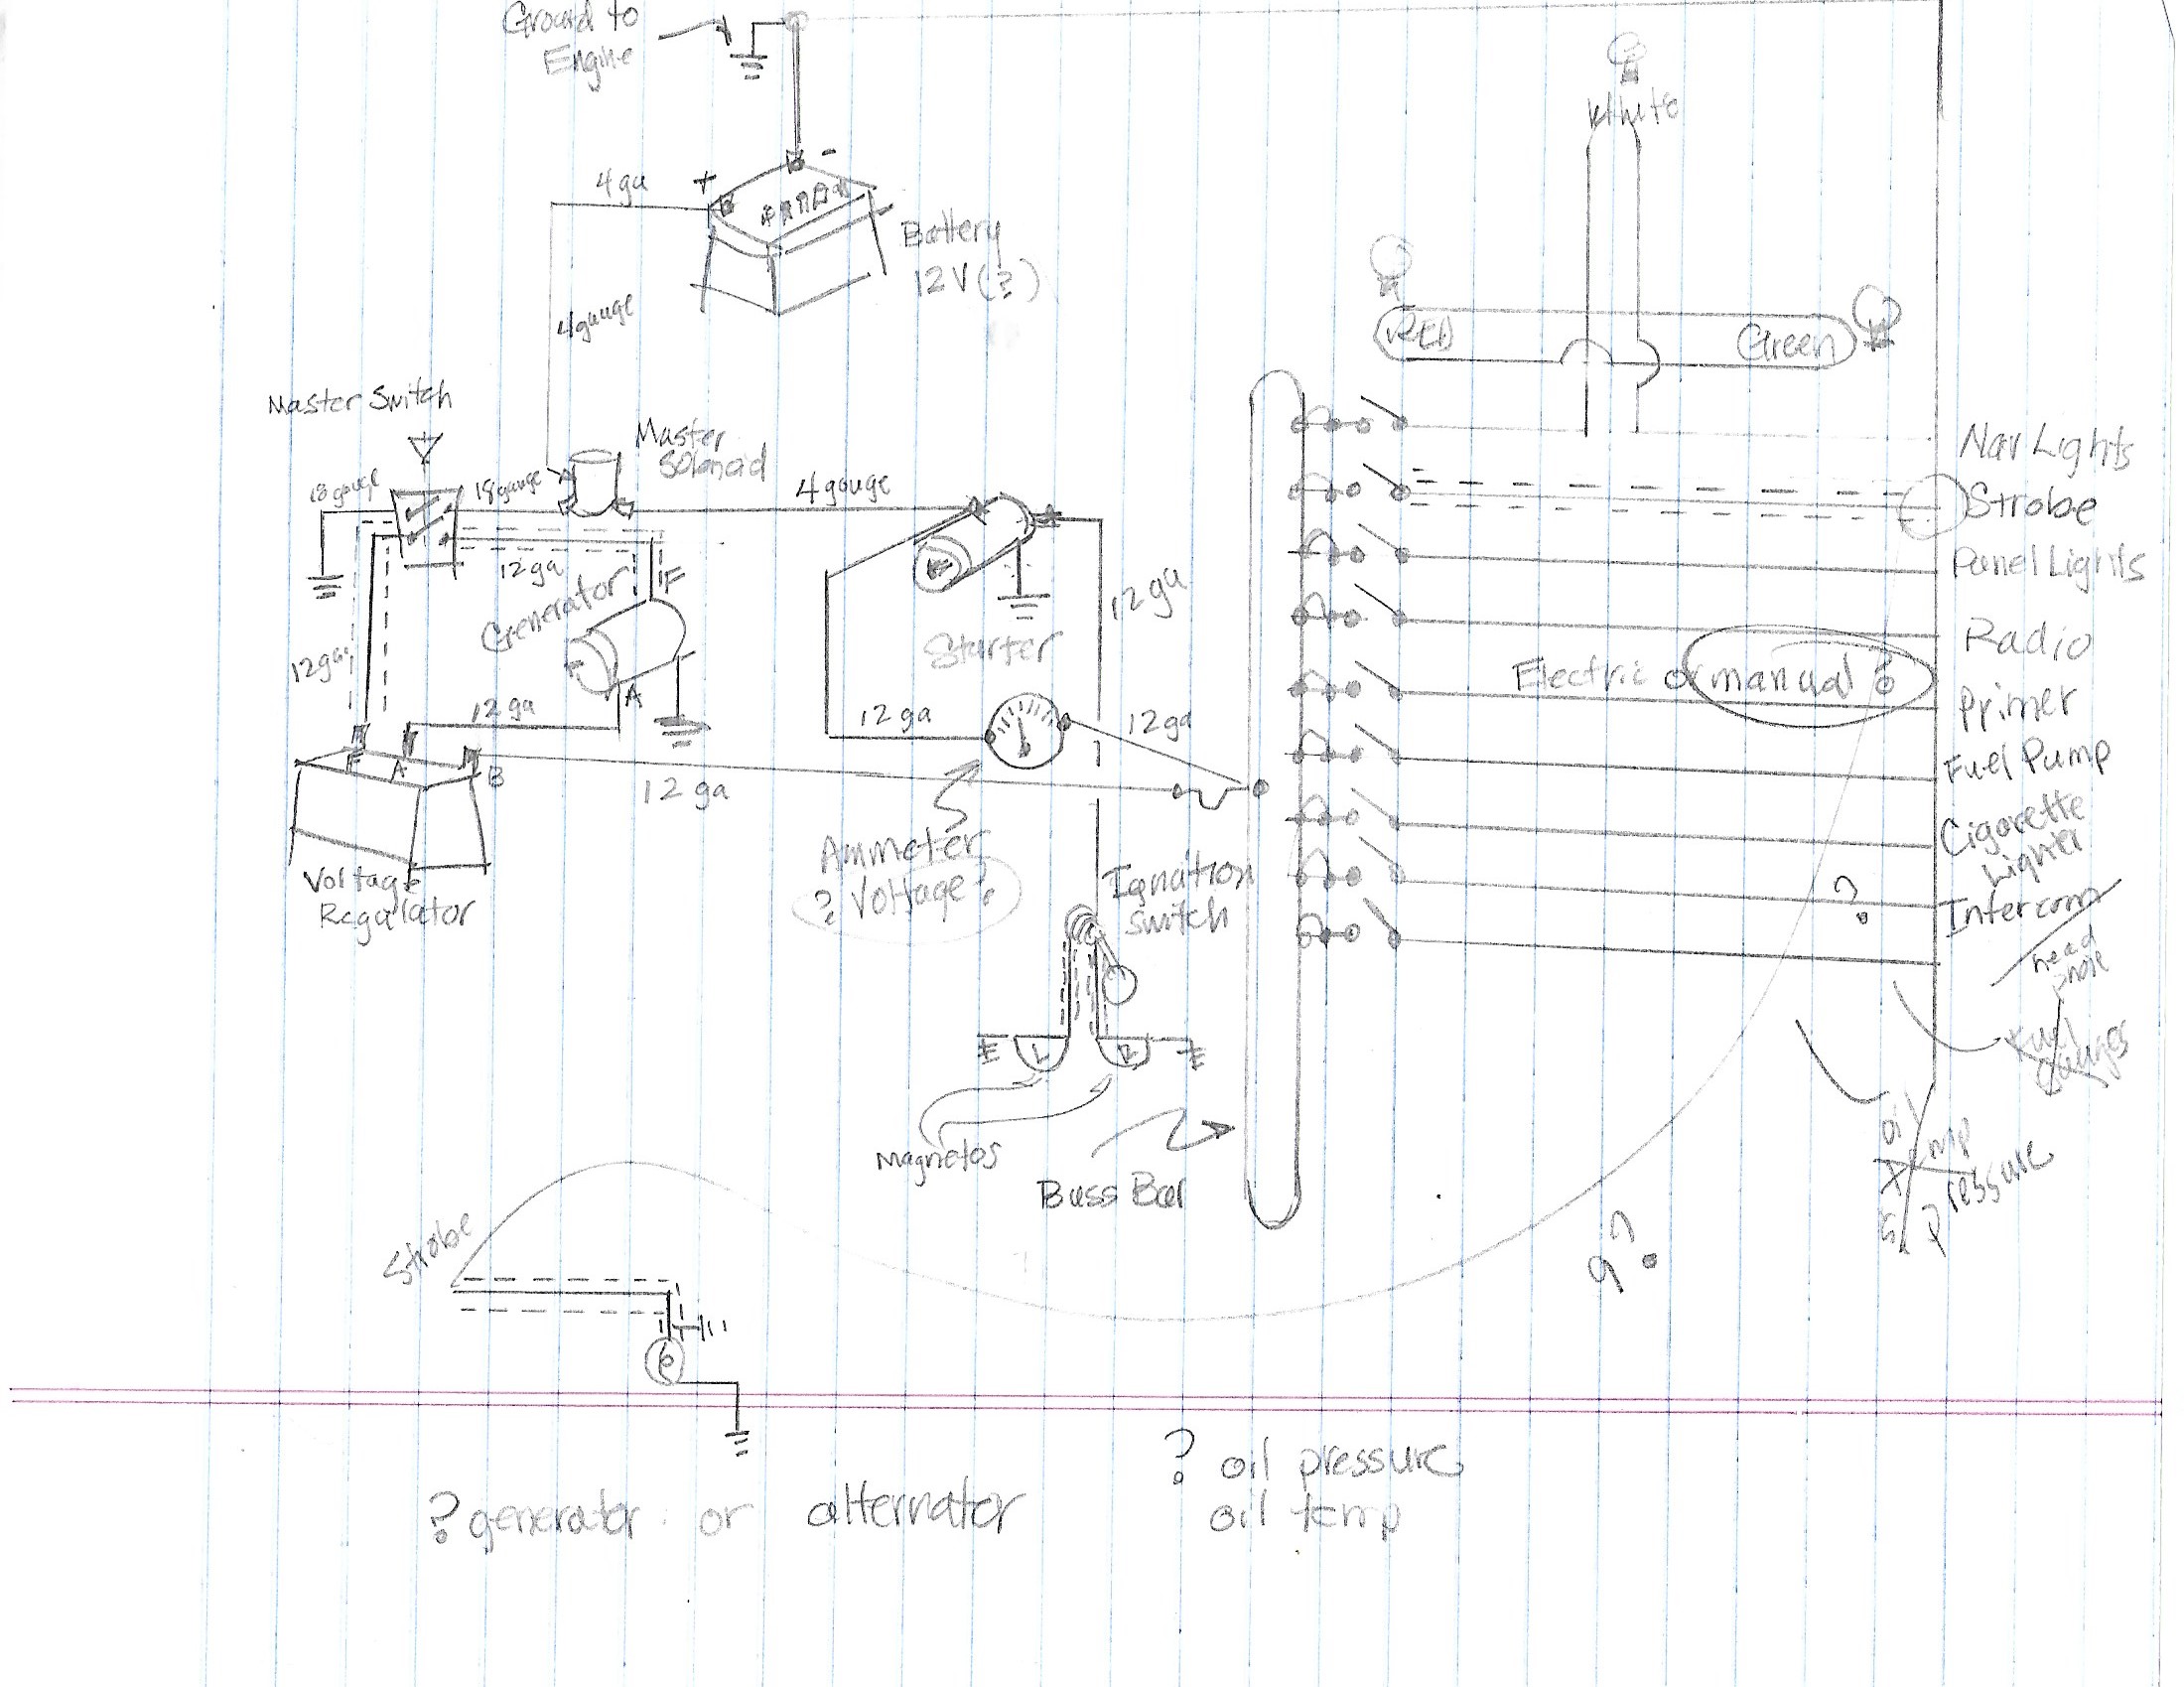
Located the electrical layout that I had drawn up... thinking that I got it right. I think I might have one or two extra breakers in there, but figured I'd rather have a few more than not enough. Here' my final/initial design. I'm no electrical engineer...
Click on image for larger view.
Already had the .040 aluminum blank cut for the side panel all I needed to do now was figure out how I wanted it all laid out. Looked through a few of the note I had when thinking about the side panel and saw that putting the intercom and the headset jacks on it was an idea I had. With that information in hand I set about laying out the design in my DeltaCAD program.
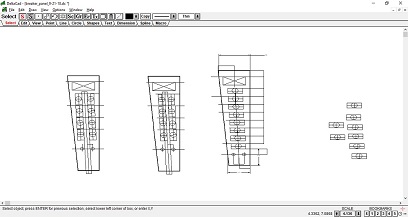
Had the first layout and thought it was pretty good, well, not actually. Really didn't like it at all. Did a second layout (better). Another layout (yes). Well... if I angled the breakers along the angled down line what would it look like (YES!). (side note: now you can see why it's taking all this time to build my biplane) Once the panel is made you won't even really be able to see the difference between the third and forth layouts... for building purposed, it gives me a little bit more room to the edge (where the "L" angle is) which in turn has me trimming less of it away.
Below are three of the four layouts. I actually don't have the third which would show just about no difference from the forth. The forth design is the one on the far left; 4, 2, 1.
September 24 - 28, 2018
Discarding a "good" idea
thought turns into reality.
All week on the side-panel, and I'm still not finished with it.
What I thought was the layout I wanted (and still is!) was politely discarded when I attached the intercom to the panel and held it in place in the rear cockpit. It stuck so far out of the back of the panel it would have looked ugly with all those wires runing to and fro. With that... I decided to have just the breakers on the side panel, along with the mike jacks. What looked good in my mind and on paper... was different than what reality showed.
My decision to discard the intercom idea wasn't until after I had tested drilling the holes for the intercom (to make sure that they were in the right place), and a "test" blank drilling the holes for the intercom AND the breaker openings (of which the first one moved, which made it a "test" piece).
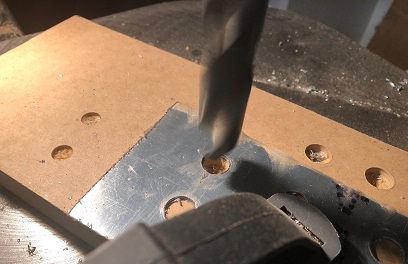
With all of that behind me I created a few more CAD's... decided on one and started drilling again. The larger 1/2inch holes put a lot of burr on the back side of the blank. Tried filing them off at first then remembered that I used a larger drill to knock off the excess slag. Worked like a charm...
Friday, I attached the breakers and the mic jacks to figure out how the aluminum "L" edging needed to be notched. Made my marks, made the cut, filed, sanded... and its ready for glueing up.
Deburring excess slag on back.
September 30 - October 11, 2018
Still discarding...
"good" ideas?
All week on the side-panel, and I'm FINALLY finished with making it, but not mounting it.
It's the inevitable 90 percent done with 90 percent to do. It's the little things that seem to take up a lot of time.
Not a lot of hours of work... and not a lot of hours really thinking about it. But, I did think... I thought of where to mount the side-panel, and the more I thought about it the better I liked how I wanted it mounted. I've arrived at a location on the right side. Originally I was going to have it squared to the floor of the cockpit... now, I'm going to have it slightly angled toward the pilot. Yeah, nothing that will really be noticed by most, but I'll know.
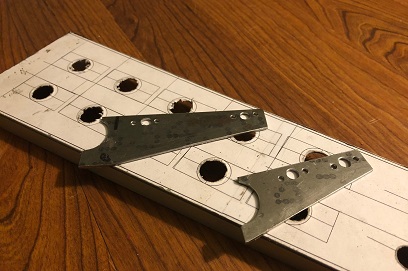
I determined that the brackets I used for the stringer stand-offs won't work. I discovered this when I went to mark the hole locations when holding up the brackets to the side-panel edging. There's not a lot of vertical wall on the "L" edging. The hole is pretty close to the face of the panel... so close that the bend in the bracket doesn't allow a full hole to be drilled without the bend interfering.
Plan "B"... CAD up a set of new mounting brackets. Did that. Drill, cut, file, and sand. Did that. Aligned and match-drilled the rivet holes for the anchor nut-plates. DONE! Now they're ready for attaching to the fuselage. Still need to make a jig for holding them at the correct locations.
October 14 - 16, 2018
Streamling my time...
by making the most of it!
I just haven't gotten into "that" routine again... the one where I come home run, eat and the go work on the biplane. Things need to change... I need time to work on it. I need to find more hours in the day.
With that being said, I'm buying a treadmill so that I can run in the morning (I really purchased it so that I could run day or night in any weather... last year's winter was brutally cold with a lot of ice... kept me from running as much as I wanted to). Anyways... with the purchase of the treadmill I can run any time day or night... good weather, bad weather. Idea: The pup usually gets me up at 5AM. I can put that time to good use now... taking my run in the morning instead of after work?
And with that being said...
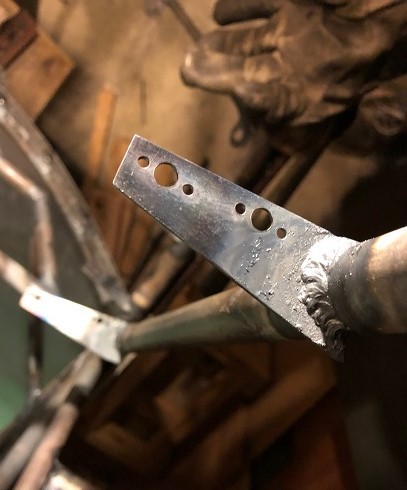
Back to work on the biplane. Made a jig for holding the side panel brackets in place. Aligned, then tack, then welded them into place. I put quite a few hours on it the one night... I had to flip the fuselage and that ain't a quick process when I need to first connect it to the rotisserie.
Next up? Took a look at the notes I wrote down a while back of the things that I still need to do. I'd like to get the main fuel tank made and the brackets made and welded in place... gathered up the information that is out there on building it; the old Skybolt newsletters, and the Skybolt "builders manual". Starting to look through the information to plan my attack on the project.
October 8-16, 2019
Solving the small order placement...
aka, The old new plan.
Something happened to the month of September? I don't see a DAMN! entry into my biplane log and I KNOW I did something.
oh... by the way, I did get my main fuel tank design and constructed. Listed under a different page name... "The Fuel Tank".
Hey, I'm back on the stringers. Went through all kinds of gyrations coming up with the best way to attach the stringers to the stand-offs. Came to the conclusion that riveting on anchor nut plates would be the best solution. Came up with that idea sometime back... a ways back.
Jump to the here and now... and I'm thinking (after I just purchased everything for using the anchor nut plates for the project) that there is no need to go through all this just to attach the stringers to the stand-offs. Anchor nut plates are used in a situation where you can't get to the backside easily. I've got easy access to the stand-offs so why not just use a nut and bolt?
"New Plan": use nuts and bolts to attach stringers to the stand-offs. Went out to the biplane project just to think this ALL THE WAY THROUGH. There were nothing but CONS against it; no room for a nut on the underside, a slight possibility that a nut could come off and jam the controls (although I could use Lock Tight on those bolts), blah blah blah.
Okay, back to whatever plan that was before this latest plan,
and I'm sure that the plan I'm going back to is pretty high
in the alphabet. okay.. Great!? I have the hardware for doing the old new plan
RIGHT now. Looked for the #40 drill bit for drilling the rivet
holes. I know I have at least a half dozen of these things.
Can't find ONE of them. They're not where they're supposed
to be... in the drill box, or floating around inside of where
I keep all of my riveting tools. I'll need to purchase a few
more, but I don't like placing a small order because of
the high cost of shipping just a few dollars worth of items.
I'll just need to bite the bullet and order the drill bits.
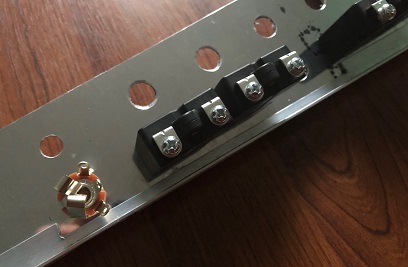
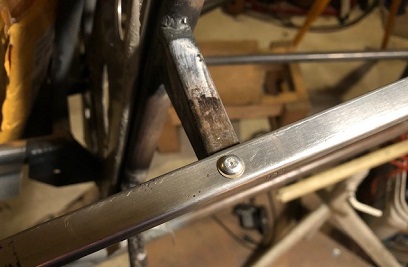
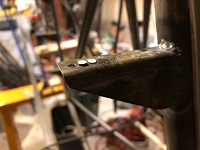
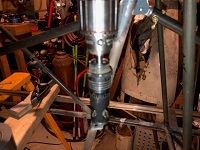
I do a test fit of the bolt to the stringer/stand-off to make sure that not too much of the machine screw was sticking past the end of the anchor nut plate. Checked it out... no problem with it sticking out past the stand-off BECAUSE I only calculated the length for the thickness of the washer, thickness of the stringer, and the thickness of the stand-off. The end of the screw came right to the far side of the stand-off... NO thread came past the stand-off. I guess that solved my small order placement. I can now spread the cost of shipping over the cost of the drill bits, 5/8inch machine screws (I had 7/16inch machine screws), and oh yeah a handful of thin washers that I didn't have.
With correct length machine screw; 5/8inch.
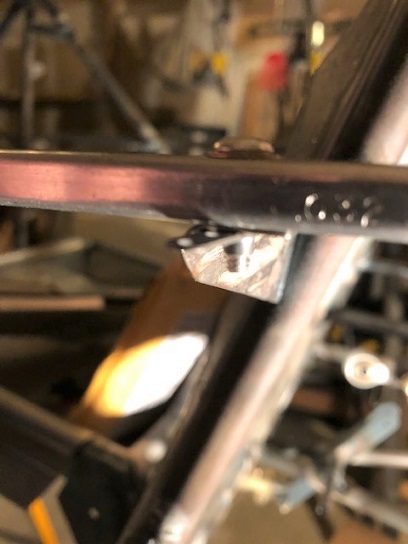
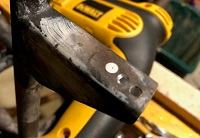
Showing underside/anchor nut plate. Still needs to be riveted on.
Placed my order today for the additional hardware I need. Order total... something like $36.00. And of that $36.00, $10.00 was for shipping. Thank God for small favors...
Today's time with the project wasn't all in vain... I needed to enlarge the holes on the stand-offs for the #6 x 5/8inch machine screws. It took a little over an hour to drill the holes and then deburr them by hand (aka a file).
October 17 - 18, 2019
I'm re-discovering that...
it's all an Illusion.
One thing leads to another...
I was paying a stupid amount of money for something I didn't even use... I no longer have cable tv. I kept the internet... but no more tv.
It's been two weeks and I haven't even noticed the change. Although, I find myself reading a lot more... filling my time with the biplane project too.
I'm finding that the books that I'm reading reinforce a lot of my approach to living; flying and building this biplane has focused this way of living. A mindful life, absorbed in the now. Experiencing the minute for all that it is worth. My early reading from my teen's... Richard Bach's books spoke of this too; "Jonathan Livingston Seagull", "Illusions"...
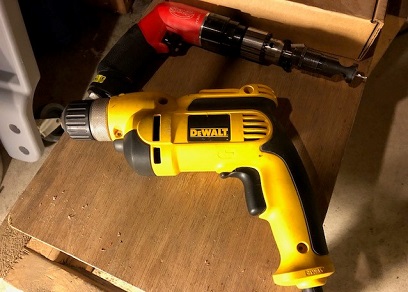
The drilling of the holes for the anchor nut plates is going along a lot smoother than I had anticipated. Just needing to think things through... aka, how to approach the drilling of each hole. Sometimes the the fuselage gets in the way of me being able to drill a straight hole into the stand-off from one direction or the other. And... I found that I need to use my Soux air powered drill to reach quite a few of the back stand-off when beveling the edges on the holes 100 degrees. It's all a process... loving every minute of it!
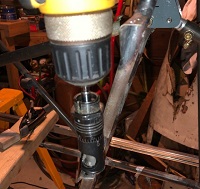
The dilemma I had with not having enough room for the DeWalt drill... fixed by using the small Soux air powered drill I have.
October 20 - 26, 2019
A few discoveries...
Good and bad.
While looking for a 100 degree counter-sink bit I discovered that the deburring tool I have is a 100 degree "bit". Ah Ha! So I figured I'd trying using that for counter-sinking those holes that I was going to use the Sioux drill on.
BRILLIANT!!!
It did the trick! No need to fire up the air compressor for those holes... I may need to later on (aka this weekend).
Finished riveting the anchor nut plates ot the stand-offs on both the starboard and port sides. Gotta do the belly stand-offs now.
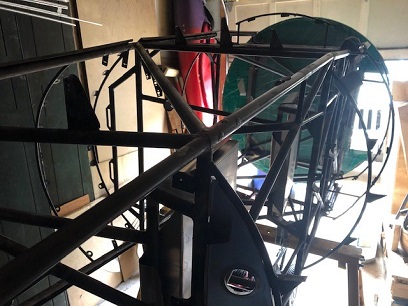
A discovery when flipping the fuselage on Friday night. I was going to do the usual rotation by bolting the cross brace on the front with the tube and then resting that on the front support. Lower the front saw horse. Then go to the tail-end and rotate. Put the front tube in its cradle and bumped it around a it to move the fuselage forward to allow the rudder to sit on its side (needed more room in the back because of the shelving back where it was... wouldn't allow it to rest on its side). Did that a few times and it felt like the cradle it was sitting on loosened up and was allow it to fall back and down ??? WTH ?
On closer inspection the tack welds that I used to connect the tube to the flat plate (which I screwed onto the cross brace) broke. DAMN! What to do? I'm hear holding the front end of the fuselage up off the ground. If I set it down there is a good chance that I'm going to break some of the belly formers. DAMN! Saw a few rectangular tubes close by and Jerry-rigged it so that it was pretty steady (fingers crossed) which freed me up to go back and place the saw horse back into positiion. Disaster adverted!
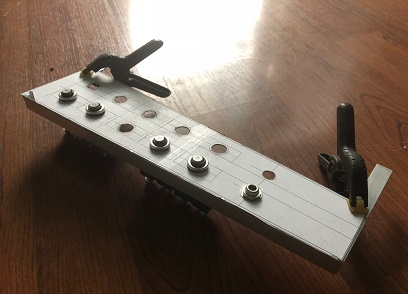
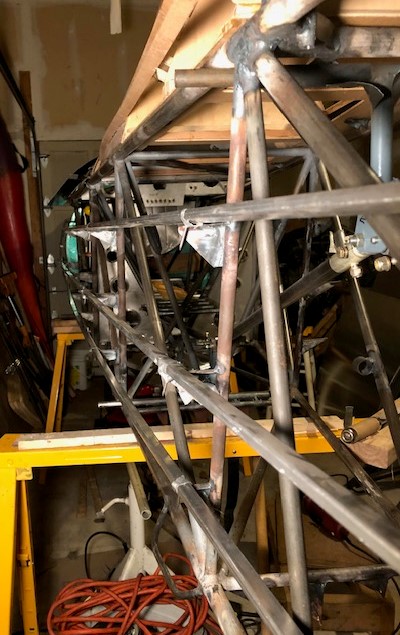
Exposing the belly of the biplane.
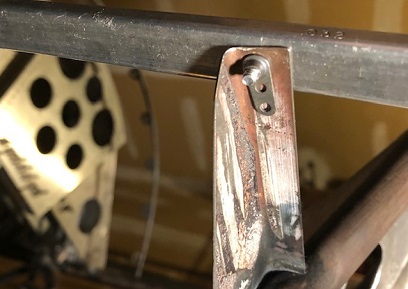
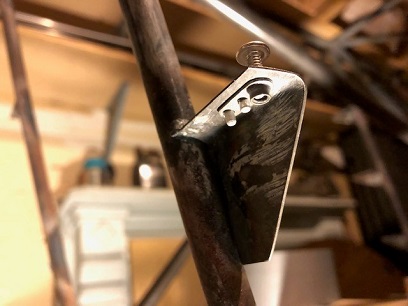
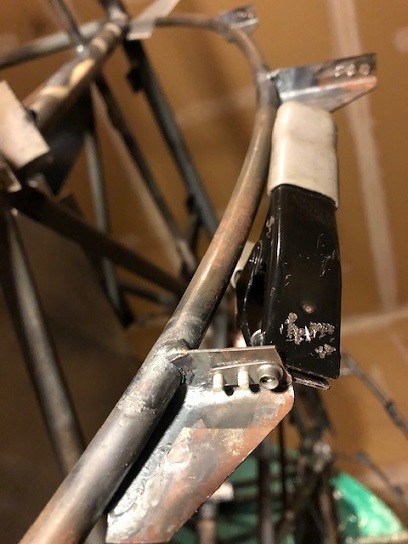
Clamp holding the nut plate tight against the bottom
of the stand-off.
as shown above...
Saturday night I match-drilled the holes for the anchor nut plates. Cleaned them up too... so that I can just start riveting them on during my next session.