Mantua, New Jersey
Original Site:
September 2004
E-mail: usav8or@yahoo.com
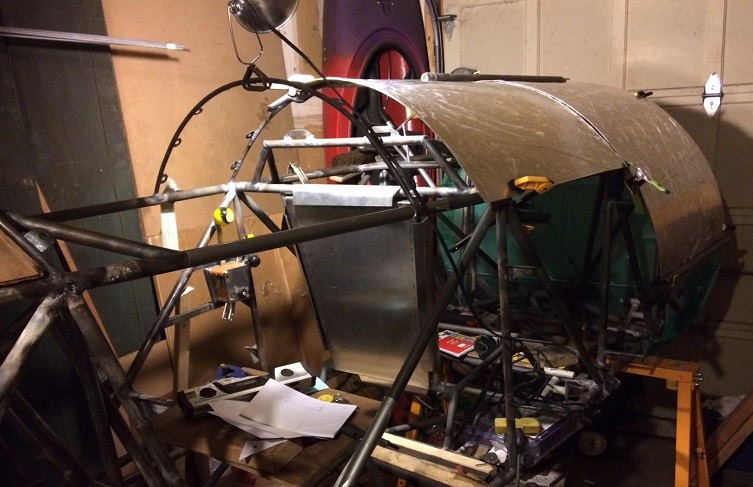
more work on the...Radial Fuselage.
September 29 - November 2, 2016
Three thousand nine hundred and fifty hours...
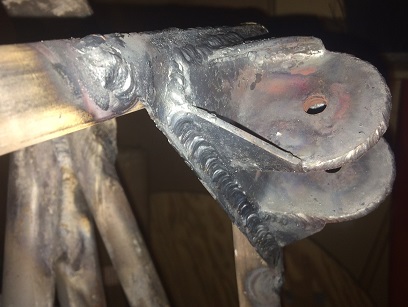
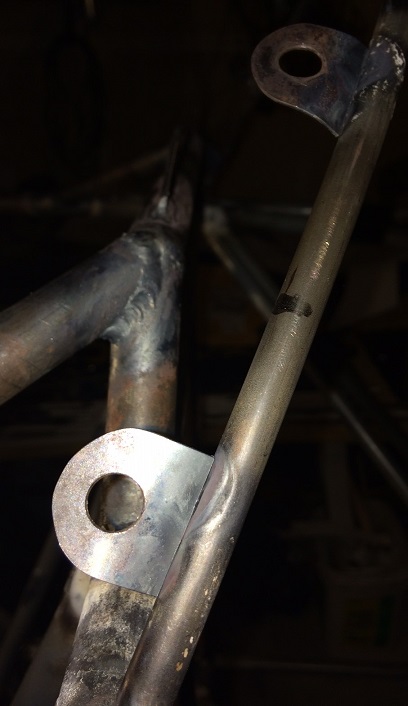
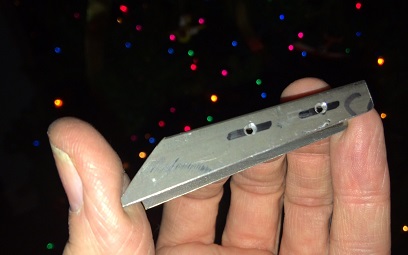
motor mounts are fully welded on the biplane.
Worked on it three out of the four days. Decided to go over to Whitey's to hang... saw my good friend Mark over there. Always a good time hanging with Mark and Whitey. Came home around 8:30PM, from having a few beers and a cigar and didn't really feel like starting in on the project.
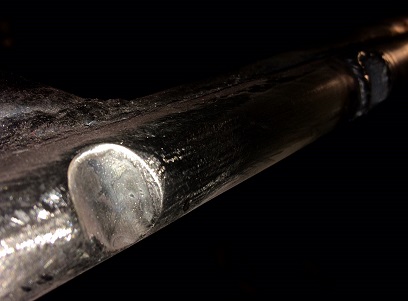
For the past couple of days I've been playing with the sheet metal patterns. All fun... or so it seemed. But, I've been wanting to tackle getting the motor mounts fully weld... to be done with it. The past few nights I worked towards that goal. Used a number 203 on most of it... some of it I wanted to use a 205 but couldn't get it to reall work; didn't get a nice flame coming out of it. Not sure if it's a nick (got there some how... but don't know how) around the hole ? Whatever...
November 3, 2016
The in between hours...
keeping busy on the build.
Waiting to get those side former bent... I'm trying to keep busy with a few smaller things. Also need to purchase a few large ticket items to keep moving with the bigger picture; expensive bearings for the controls, wheels/brakes (not happy with what I have)...
Began the night by looking at the fuselage figuring out what still needs to be done then thought that that is just an exercise in wasting time. I had things to do, both big and small... just get about doing it !
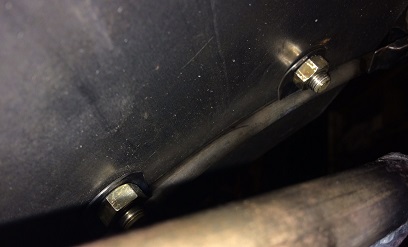
Grabbed a 1/4inch reamer, had to look for the reamer handle, and reamed out all six motor mount tabs (the brackets that I made to bolt the firewall onto the fuselage). Check.
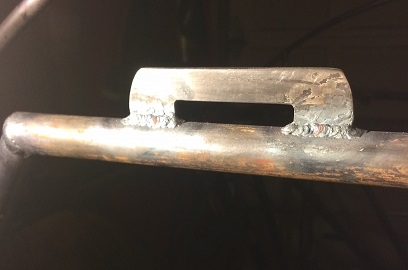
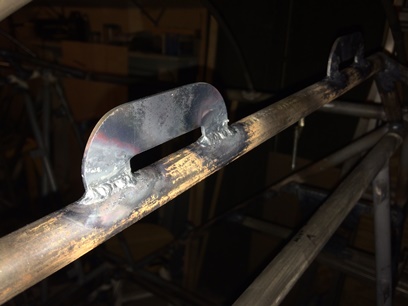
Wanted to cut down the guides for the shoulder harness straps ever since I made them (too big). Took a lot more time that I wanted to invest in them... but it's done.
Need to weld on the tabs on the upper former behind the pilot's seat for the sheet metal. Been thinking about that and how I want to align them. Figured I'd take the measurement of the tabs on the former just in front of the pilot's seating and make them match it. Makes sense to me...
Shoulder support guide cut down.
Support before cutting down.
Upon further inspection, I just may angle the sides of the supports to give it a better look AND take away some of that excess metal.
November 4, 2016
Unexpected...
expectations...
Ever been there...
where you feel something just isn't right. Sometimes it's obvious... so you make the change... and sometimes that doesn't even quite match what your unknown expectations were expecting. There's something not quite right with it... still.
I guess there is a point where you get from "wanting to get it made"... to "wanting to get it made to your unexpected expectations".
It's in the little things... the shoulder harness guides. And... it's in the bigger things... making all new seat backs. I just have to smile inside with a little disapointment... or, maybe it's a little pride in knowing that I'm working toward "excellence" whether anyone else knows it or not. Taking that a little further... there are things that you "have to do" and then there are things that you "Have to do"; the first, you do it because you have to do it (whether it's an obligation, a society norm, etc.), the second, ,you do it because it is intrinsic to you. If you fail on the second, you fail on yourself.
Still doesn't look right (to me).
that's IT !
Now to get to work on re-doing those seat backs...
November 6, 7, 8, 2016
Filling the void...
keeping the forward going...
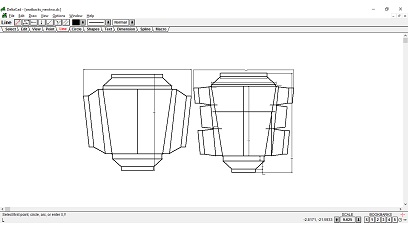
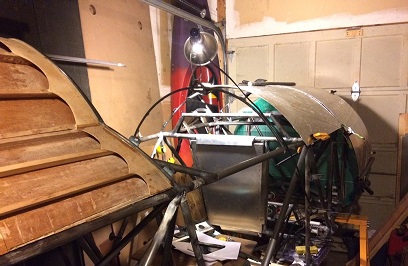
For those seat backs... I'm not drawing them up by hand. I'll take to that 2D CAD program I have and I'll draw them up. It'll be a lot faster and more accurate. Won't seem faster 'cause I'll need to wait to print them out...
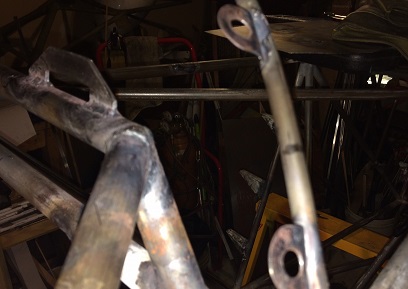
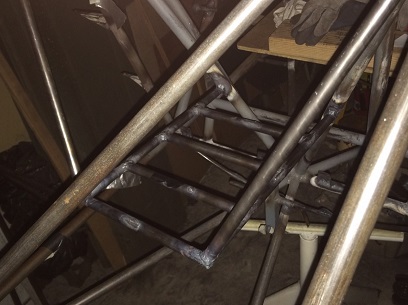
The front seat back won't be an issue with wrapping the sides to the frame... the back... another story. There are a few diagonal tubes for the fuselage structure that "get in the way" of an easy attachment. Pilot's seat back is on the right in the image below.
Wasn't able to get to a print place today (Tuesday, November 8th, 2016) so I decided to align and tack the tabs on the former just behind the pilot's seat, just in front of the turtledeck. Needed to make a simple jig to align the four tabs. Took a little longer that I would have like... but they're now ready for finish welding.
The past few posts should have been posted to another page. Go here to continue reading about the "new" seat backs.
December 15, 2016
Still filling the void...
keeping the forward going...
Over the past few days I've been figuring out what needs to be done... what needs to be bought to make these things happen... etc. Need to purchase a few more anchor-nut plates to finish up the front seat, seat-back pan. Glad I didn't order them right away because I found a boat-load of them here... and there... I had purchased a few 10 count bags at a time in the past knowing that I would eventually need them. Still need to order the screws for attaching.
There's still a lot of little things that need to be done that I just push back... thinking I'll do it when I have nothing else to do. Well, today I decided to "tackle" one of those projects.
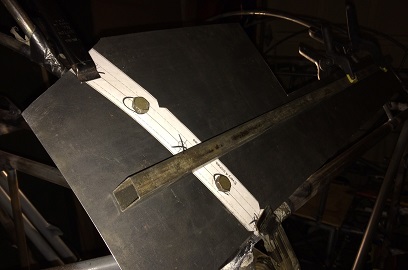
The front edge of the old tail-cone was at a different height than the new tail-cone. So, I needed to make a new one and install it. Did just that tonight. Well, let's say I fabricated it. I haven't installed it yet.
December 26, 2016
Finishing up with the battery tray...
or am I ???
Decided to finish up on the battery tray holder... ya know, where to mount the solenoid, blah blah blah. There was a slight issue I knew about before which I was going to just work around; the issue of the pilot's shoulder harness and the tubing supporting the tray getting in the way. Yeah... something I was going to work around.
Get on the project today and start figuring out how to connect the battery to the tray to keep it from moving. Discovered that it is MUCH too close to the seat-back pan to get a U-shaped thingie to secure it. Okay... so now I'm forced to re-make the entire tray; supports and all. THIS TIME I've designed it so that the ends of the shoulder harness fall nice and straight and I'll have an actual connection for it secured to the main part of the frame.
December 27 - 28, 2016
Yeah, I'm working on ...
the battery tray.
Cut it off and re-design. That's what I did over the past few days.
As mentioned above... the new one is out of the way of where the pilot's shoulder harness drops... and needs to connect. I've also designed it so that I can move the battery a few inches, front-to-back, to accomadate any weight and balance issues that may arrise from hanging the Jake on the front of this beast.
December 29, 2016
Actually working on...
the battery tray.
Got the tubing in today for the battery tray; 1/2inch x .o35. Drew the outline and made the jig. Cut the tubes and tacked them together. Ready for finish welding and attaching to the fuselage.
oh yeah... need to cut the metal shelf and weld on before welding frame onto fuselage (a little bit easier to do).
December 30, 2016
More work on...
the battery tray.
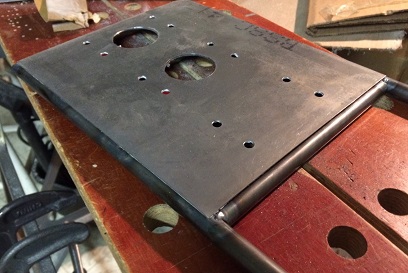
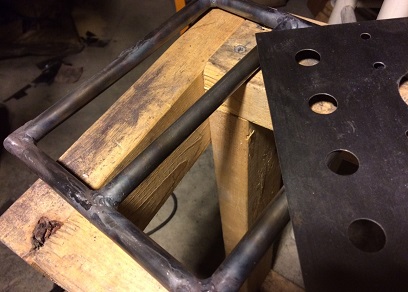
Work on the battery shelf today. It's all quick until you start to use a hole saw on .o25 steel. All it wants to do is bend.
Anyways... came up with the design for the battery tray shelf. Designed it so that I can move the battery front-to-back approx. six inches to adjust for weight and balance (at least that's what I planned it for). Drilled 1/4inch holes for clamping down on the battery. Also drilled two weight-reducing 1 5/8inch holes (these are what took so long). Left the front part of the plate/shelf solid for attaching the solenoid.
Everything is done except welding it to the battery tray frame... still need to weld that together too.
December 31, 2016
Making more work on...
the battery tray.
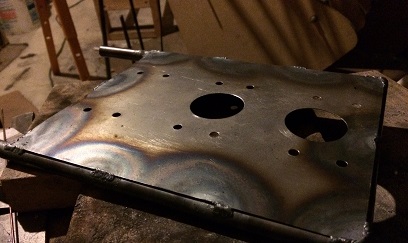
If I told you once... I've told you a thousand times... don't use .o25 metal for a large plate (no one ever said !). But... if they do, listen to them.
Time to weld them plate on. Took my time. Warped. Time to grind the plate off. Just shy of three hours and now I'm back to making a new shelf.
happy new year...
January 1, 2017
Almost done with...
the battery tray ???
Happy New Year !!!
First day of the New Year... beautiful outside. Almost too nice to be inside to work on the biplane... but I do.
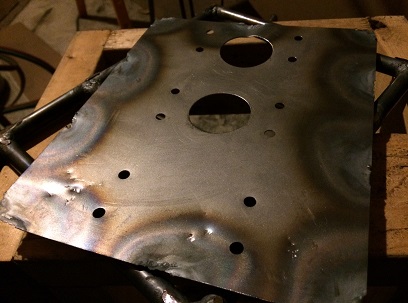
Need to tackle making this shelf/plate again. Increased the thickness to .o32. It worked for me last time... it should work for me this time.
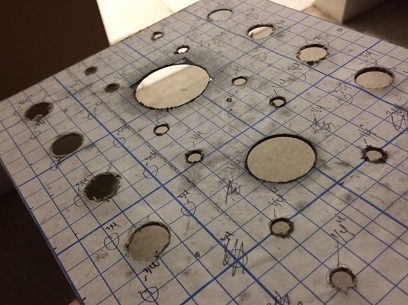
I've got LOTS of ..o32 lying around. Grabbed a nice size sheet and glued on the new pattern I made up for it. Planned on drilling a lot of 3/4inch lightening hole in it but decided to drill a few larger ones. Bad idea... the 1 5/8inch hole took me foooooooreeeeever to make. After trying to make the one hole for what seemed like an eternity, I discovered that the teeth on it weren't sharp anymore so I had to take a file to them.
Other than that one little bump, it went smoothly; chuck the centering bit - drill the starter hole, chuck the drill bit - drill the hole, deburr, repeat... repeat... ad infinitum.
Here's a photo of the new shelf with some lightening holes in it.
January 2, 2017
Almost done with...
the battery tray !
Prepping the parts of the battery tray before welding the pieces together. Had to MEK-off the paper pattern from the new tray. Cleaned it up too; sand off some small spots of surface rust and deburred the edges of some holes. Needed to file down some of the weld left-over from the first tray that was attached to the frame.
I think they're ready now...
January 3 - 4, 2017
Almost done with...
the battery tray ?
Over the past few days I've been making new, welding on and cutting off, battery trays for the battery tray frame. Both the .o25 and .o32 thick material is too thin. Even with me using a 201 tip on the welding rig I'm warping the plates. Both of them would work but I'm not happy with them.
I'm kind of thinking that maybe I just shouldn't be making a tray that large. Maybe a thicker plate that would be welded on once I figure out where it needs to be on the frame. And so... that's what I ended up doing; cutting a plate that is large enough for the battery that would need to be welded where it needs to be.
Here is what I finally ended up with; a smaller plate that is made out of .o63 material. It's all ready for welding into place when I figure out where that is!
January 6, 2017
Doing more...
on the battery tray .
Spent time doing several things on the biplane today... here's one of them.
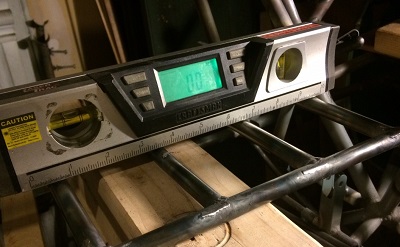
Leveled and notched battery tray. Thinking of supporting by the "hanging" method. Hanging from the side tubing. As mentioned earlier, I'll weld the tray in place once I figure out where it needs to go.
January 7, 2017
Doing more...
than just the battery tray .
Another day of spending a few sessions on the biplane today... five in fact !
Started off by aligning, and tacking on the battery shelf. The first tack... the tray shifted (?) so I had to cut it off, re-align, and tack again. also... Did the initial measuring of the support tubing.
(break)
Back on fitting and notching of the support tubing. Tacked onto tray frame and fuselage.
(beak)
Back at it with finish welding of all things battery tray/frame. Didn't finish before taking a break... then back at finish welding things.
(break)
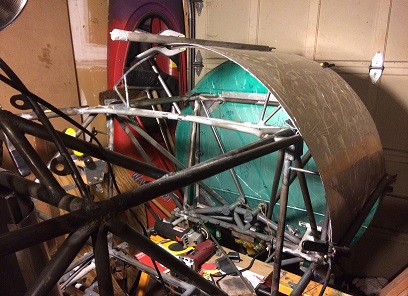
Before the day was over went back out to take a look-see on how the sway wires fit into the front pit. And from the initial looks of it... they'll fit in there pretty far into the pit. It's a shame that they go that far into it. On the plus side... it may make getting in and out easier ???
A few shots from today.
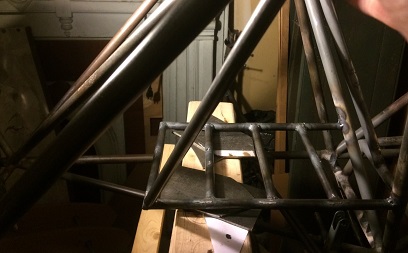
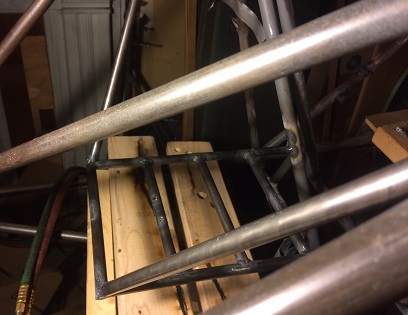
Fitting of first support tube.
Tray all tacked in.
All welded up.
Mock-up/test for sway wires.
January 15, 2017
One step...
back.
I've been patiently waiting for a few months for Steve across the street... to set-up a time to go over his friend's place to bend up the 4130 sheet side-formers so that I can start... fitting up the sheet metal skins. I've mentioned to him a few times...
Anyway, a few conversations between a friend of mine from back in the Display Arts days (where I use to work) about the TIG unit he has and he's looking to sell it 'cause he got a new one. Said I could borrow it if I wanted, until it was sold. Asked him if he had a bending brake soes I could bend these eight side-formers. He did... said stop by any time. A few days go by and it's Sunday morning. I email Mike and said... you around today? If so, I'd like to stop by. An hour later and I was headed down to Wilmington, DE.
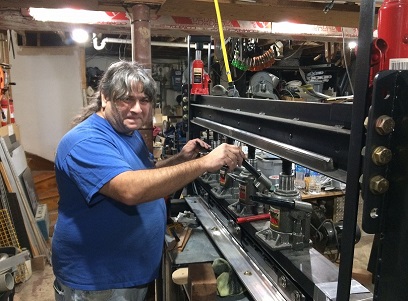
Get to Mike's house and he has ALL kinds of stuff; the two bending brakes (small and large), lathe, two english wheels, etc etc etc. Got to talking... and three hours later I leave with all the side-formers bent. Thank you, Mike !
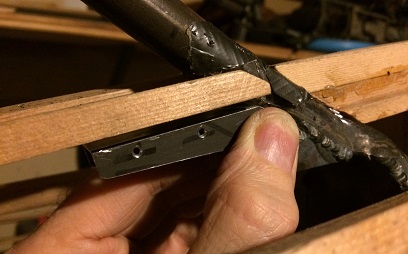
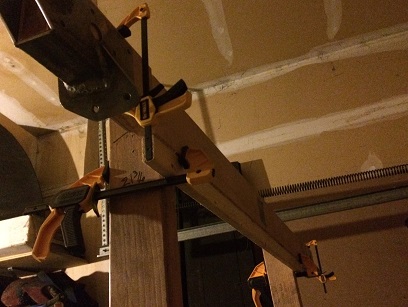
Mike using his four ton bender.
A little tweaking back at the house and they're ready for cutting to size and welding on the airframe.
January 20 - 21, 2017
One step...
back.
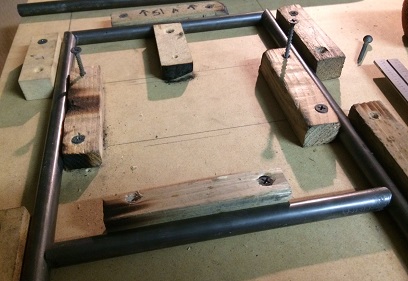
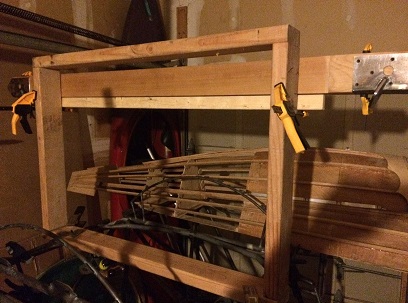
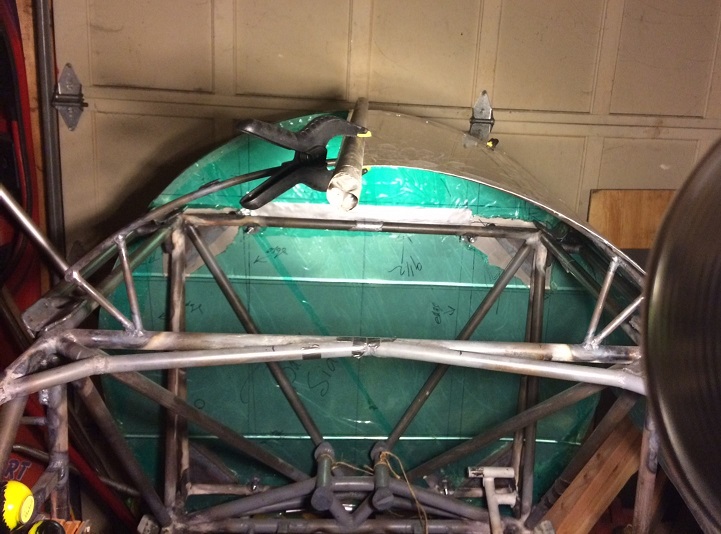
That's pathetic ! That jig you see in the upper photo... not even sure why I wasted my time doing it ???
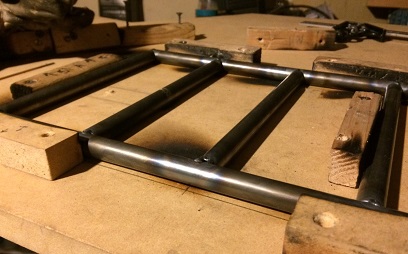
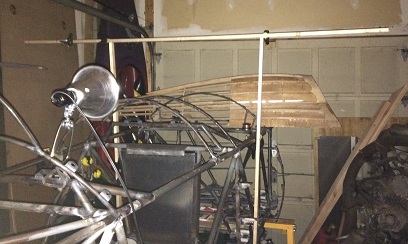
Rigged using a 2x4 frame I had made for another purpose and attached the actual upper wing center section spar, with brackets to it. If you're going to do it, do it right.
Now THAT's a mock-up !
Okay... so what does this prove ? That I've got to cut-off the two outer supports for an upper former and re-located them to avoid hitting one of the sway wires.
Two days... and I'm finally ready to tack and final weld the two new vertical supports. What took me so long, you may ask ?? Had to grind and file down the left-over welds from the first supports.
January 23 - 25, 2017
A few sheets of aluminum...
a thing of beauty.
ok... Got the vertical supports for the upper former at station 24 figure out. Got them welded up too... Now on to figuring out the placement of the 4130 sheet metal formers I made for supporting the aluminum skins.
After playing around, and then thinking about, what I'm going to do to figure out placement of the formers for these things... I decided that I needed to make a blank of the aluminum sheet that will be wrapping the fuselage in the area.
Measured and cut the first one on Tuesday night. Fitted that up on Wednesday and then decided... I need to cut another aluminum blank that will fit behind that to get a better look at what will be happening in that area (as far as what I need for the former placement that is...).
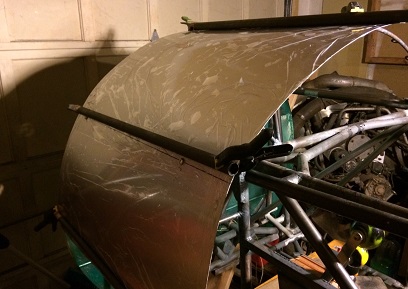
With the second blank cut... I wrapped both of them on the port side of the fuselage... DAMN ! All I can say is Damn... I've been waiting a long time to see what I'm seeing right now. It may not look like much to most, but just seeing these pieces in place... it's a thing of beauty in my eyes.
January 26 and 27, 2017
Playin' with it and doin' it...
are two different trains of thought !
moving right along... Thursday saw me working on the side-formers; needed to make sure that they were as straight as possible. One of the long ones... was a little bent (not too bad) so I was going to straighten it out. Decided to use my crimping pliers on them... ya know, to help bow it the other way. BOY... did I screw things up. Took me another 1/2 hour to get it back to where it was to begin with. Left it at that. Whew !
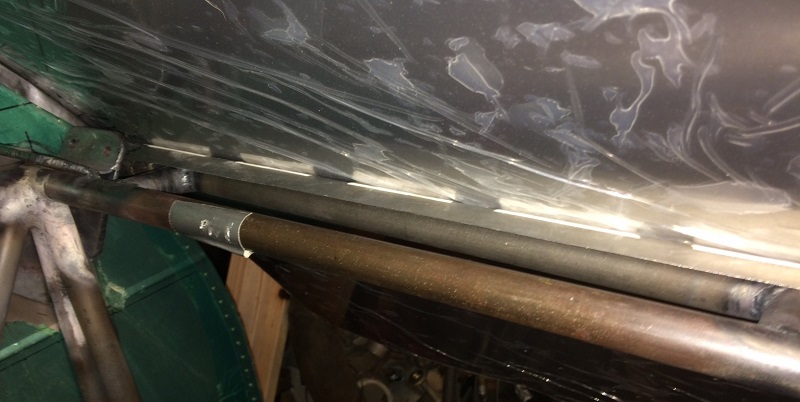
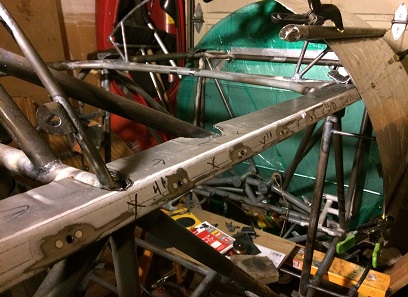
Friday I began to seriously look at how to attach the side-formers in a straight line. It's easy to kinda get it close and then tack/weld into place. It's another thing to get these things in a series, one behind the other with all three pieces of skin that will make up the upper part of the fuselage. After thinking about it I came up with a plan...
Marked the first skin, on both sides, with a line. Figured my back-set from the firewall and marked and drilled/deburred the first hole. Lined up the side former, marked the rear hole and drilled/deburred it too. Screwed on the side-formers and wa-LA, instant jig (well, it wasn't actually instant from the time I saw that I spent on it). Put the skin in place on the fuselage and it looked... GREAT ! Started noodling around with the side-former just behind the first skin. After playing with it or awhile it looks like I'm going to need to either notch the support tubing I welded into place just for that side-former, or cut the entire tube off and weld another one in place. We'll see...
I also need to make the transition, on the upper skins, from the angle of the first skin to the more angled second skin. FUN !
Click on image for larger photo.
Click on image for larger photo.
January 28, 2017
Started doin' it...
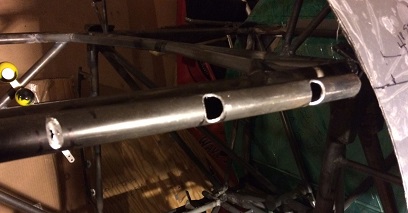
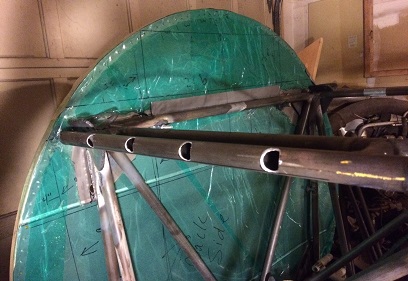
It was a decision between cutting off and grinding down the back psuedo upper longeron or filing notches into it to allow for the anchor nut plates to lie close enough for the shape of the biplane. I decided to notch the piece...
Not much to write about notching, and filing, a piece of tubing. Took close to two hours for the one, and I have another one still to do. And... I still need to seal up the holes on this one. I have some .o25 4130 I'll heat and bend into place... then weld.
January 29 - February 2, 2017
Still doin' it...
Working my way through "capping" the notches I made. Not just a matter of capping these... I needed to make a few bent washers out of light-weight material.
Pulled some .o25 4130 stock I had and cut it into a few 1 1/2inch squares. Held each piece up to its respective hole and drew an oversized circle. Back and forth... back and forth... up and down a set of step over and over again... to get these close to the size before heating them up and wacking them into a wood jig I made for bending them.
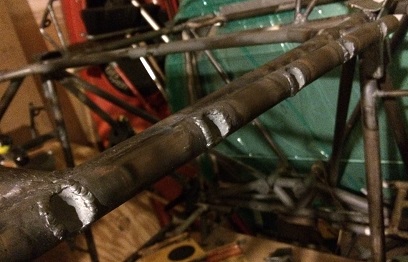
Got them bent to the correct shape and then tacked and welded them into place. Problem is... the weld build-up needs to go. These welds aren't for structural purposes so I filed and sanded them flush with the tubing (I'm not saying to you that this is right, but I figure since it is not structural I'm doing it for the purposes of just sealing the hole that I made). Make sense ?
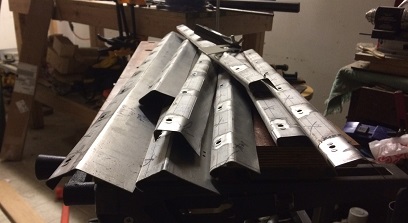
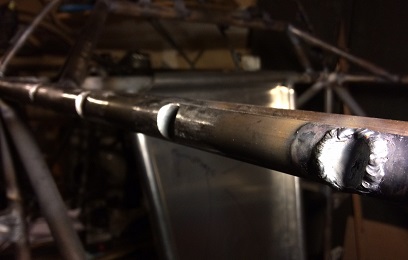
Here's a series of pictures from the past few days of me making these bent washers and welding them on...
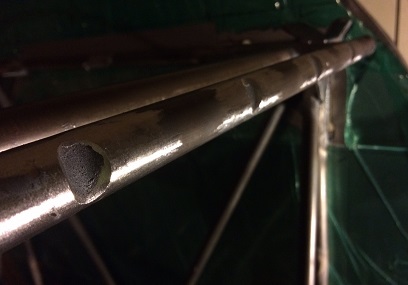
Cups welded in place on Starboard side.
Starting to file and sand off excess weld.
Close-up of filed cup.
February 3 and 4, 2017
Second round of still doin' it...
Finished filing the last weld build-up on the Starboard side. Aligned the sheet metal on the Port to figure out the hole spacing... then proceeded to file the holes in the pseudo longeron.
The sheet metal didn't lay as straight as it did when I was originally aligning it for the upper former and the spacing of the anchor nut tabs on the upper former. Saw that there was a slight gap in the sheet metal at the firewall also... me thinks (I know) that I'll need to cut these recesses in the forward pseudo longeron for it to lay up against the longeron.
I was still able to get the spacing for the recesses from station 24 back... Filed those holes and cut out the blanks for making the cup fillers.
February 5, 6, 7, 8, 2017
Third and forth round of still doin' it...
More progress on the recessed areas in the pseudo longerons. Filing more holes... cutting more blanks... banging out more cups... welding in said cups... filing smooth. Repeat, repeat, repeat...
The reason for all of this... there are long welds that attach the pseudo longerons to the actual longerons that I don't want to mess with. I'm leaving them in place and basically "working around them".
February 9, 2017
Fifth round of still doin' it...
It's seeming like a broken record... MORE progress on the recessed areas in the pseudo longerons.
Cut a few additional blanks... 12 in all. Wacked four of those into shape to cover the four holes I made. Tacked then welded them into place. Tomorrow... I'll file these smooth and maybe have time to make the final four (sounds like college basketball, eh?) holes. THEN I can see how the sheet metal lays in place.
February 10, 2017
Pushing myself...
through the Sixth round.
Out to the garage work-shop. More work on getting the pseudo longerons to the point where I can weld on the side-formers.
Filed four more "cups" on the starboard side. Still need to make the holes, make the cup inserts, weld onto the port pseudo longerons and file smooth... four more. THEN... I need to create the pseudo longerons for the bottom from station 0.o to station 24.o.
It's times likes these... a lot of repetitive work, that I need to give that extra little push to get out there and work on the biplane. But once I'm out there... the time just flies by.
February 11, 2017
Last four...
holes ?
It seems like the weekends are the days I get the least done on the project. An entire day... and I only put .8hrs on the project ? Eeeeesh !
Filed four more holes; the remaining four holes, in the forward, upper, port, pseudo longeron. I have the blanks for the cups cut out. Need to heat and wack them into shape then weld and finish file.