Mantua, New Jersey
Original Site:
September 2004
E-mail: usav8or@yahoo.com
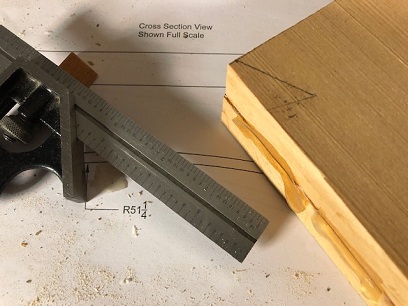
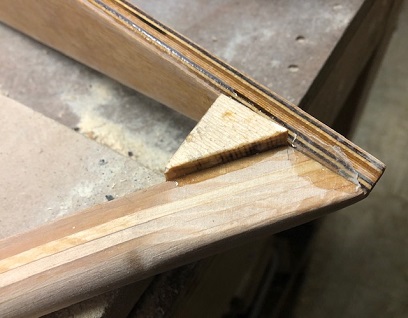
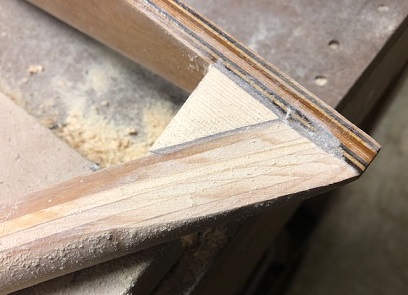
Three-piece upper wing... stronger than Babe the OX.
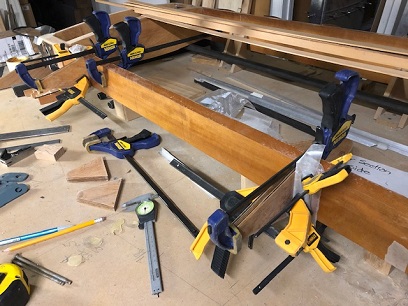
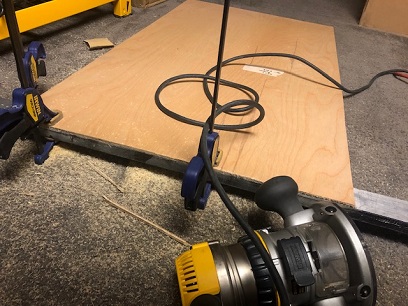
December 29, 2016 Laying the foundation...
I'm not sure what's up with the upper-wing center section. I keep leaving it for other things to do. May be a good thing... since the CAD's aren't the same as the original drawings done by Curtis.
Well, I didn't do any actual work on the upper-wing center section... what I did do was set up the table in the spare room upstairs and looked over the orginal blue prints along with reading the thread in the biplane forum about it.
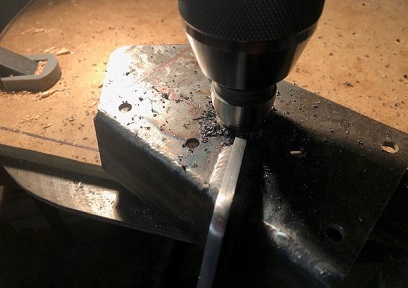
I think I'm ready to start laying out the pieces... getting the upper wing tank welded up and finishing up and moving onto the rest of the upper wing.
January 9 - 13, 2016 Wrapping my head around it all...
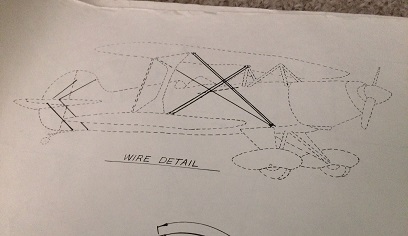
Wow... WOW ! It all started on Monday. I wanted to start diving into the wing center section... start figuring out what needed to be done. A thread on the biplane forum pointed out the CAD for the 3-piece wing was incorrect (lets say that it was pointed out that the sway wires are being shown on the front of the center section instead of the back like all other aerobatic biplanes).
So... I broke out the plans and tried to wrap my head around them. Kinda makes it tough when you need to shuffle a few different plans together. After looking over the plans for a while I had the urgency to see the CADs for the individual parts and pieces (maybe for a more in-depth look?). Thing was... I couldn't find them... for two days. okay... so I find them, make sure that I had them all, then started comparing the smaller CADs to the larger CADs. Found all that I needed to find... Then, looked through that thread on the fourm to see what was wrong and what was right.
After a few nights of what seems like aimlessly wandering around... I still couldn't figure it out (I'm no aerospace engineer and I'm not going to forge ahead into unknown stress territory). Today, Friday, I just about threw in the towel two or three times. The CADs weren't right, I wasn't wrapping my head around what was said on the forum, my Pitts Model 12 plans didn't help any... None of it was helping. Started writing on the forum two times about my decision to revert back to the original one-piece design of the Skybolt. But... I didn't want to give up on it. There was an answer somewhere in that pile of drawings on my card table... I just wasn't seeing it yet.
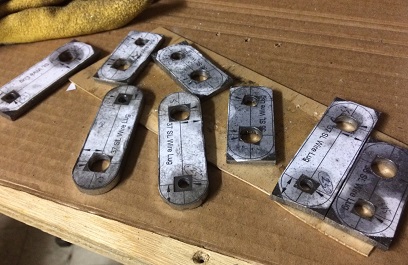
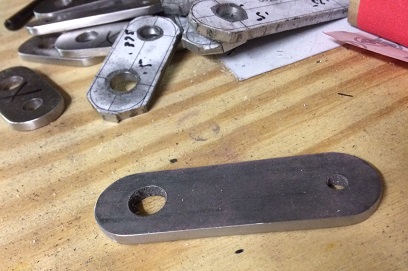
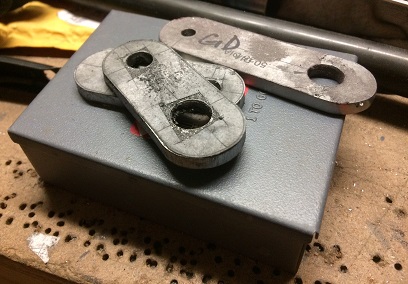
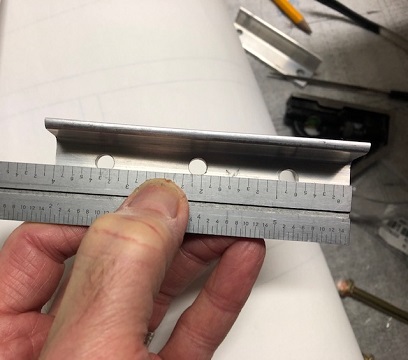
I dove back into it deciding that all the CADs were wrong (not that they were) and focused on the original plans that Curtis drew up. Looking at it... drawing some sketches on a blank sheet of paper. A little more looking... a little more sketching. It was starting to make sense. After about a half hour I thought I, make that, I had it figured out. Checked the pieces that I had made and the only thing that I need to do is make (4) -36 SL Wire Lugs and (4) -37 SL Wire Lugs.
The problem all along was trying to make the CADs work with the blue prints... and that my good man, ain't gonna work. Thank you annonomous guy (he doesn't want to be known) on the biplane forum that pointed me, and everyeone else, in the right direction with this.
Thinking back over the past week... something inside me wants to just break-out and start doing something with my hands... anything. I've learned a little restraint with the build. Sometimes you just need to sit back... think it through... and then move on. And believe me, some of those "think it through's" miss the spot and you need to re-think it through. All the while... you're not building a DAMN ! thing, thinking you're not getting it done. Ya just gotta accept moments, sometimes days, weeks or months, like these and push through...
I saw this video on Facebook the other day; a speech by Charlie Day, Creator of "It's Always Sunny in Philadelphia". Kinda sums up this struggle, the build... and of course life. The below quote is not verbatim... kind of condensed. You should listen to the entire video for yourself.
"My lesson is this... you cannot let the fear of failure stop you from doing what is going to make you great. You cannot succeed without the risk of failure. Be willing to fail. Let yourself fail. Fail in the way and place where you would want to fail. Fail, pick yourself up and fail again. Because without this struggle, what is your success anyway?" - Charlie Day
January 14 - 19, 2016 Trials and tribulations...
Wrapping my head around it all.
Been basically waisting my time playing with the idea of figuring out the sway wires and how they'll effect the upper former at station. Went about it half-ass at first (the playing part). Not quite sure why...
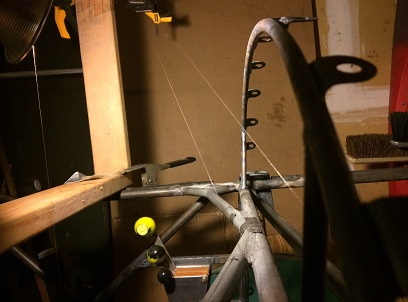
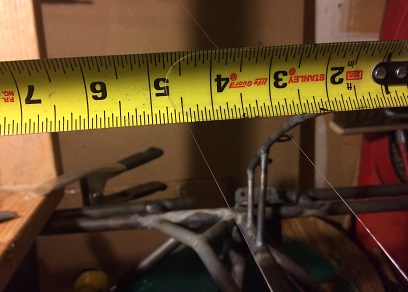
A day or two of half-ass and then on the third day I decided that maybe it'd be a better idea to located the actual spar, with the two brackets on it, in place and then string the line to see what hits what. It'll also tell me how far into the front pit the sway wires will come. So... on the forth day I jig the spar in place strike my lines and low and behold... the rear sway wire barely misses the former's outside, vertical support. DAMN ! We'll the fishing string that I used barely misses it. The actual wire would be hitting it. The forward line misses everything by a long shot.
Found out that the sway wires will be front and center 4.5inches inside the front pit... and the further you go up the wire... the further it's in the pit. Not so sure if anyone will be very keen on having sway wires that close to them.
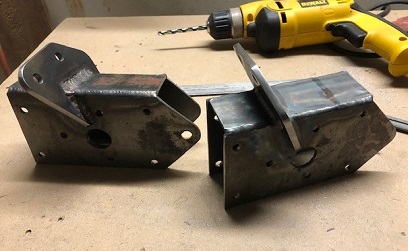
From my mock-up I've learned two things; 1. I'll need to cut off and re-locate the outer upper former supports and 2. I just may be constructing a single-seat biplane?.
Here are a few photos...
Time to move the two outer upper former supports.
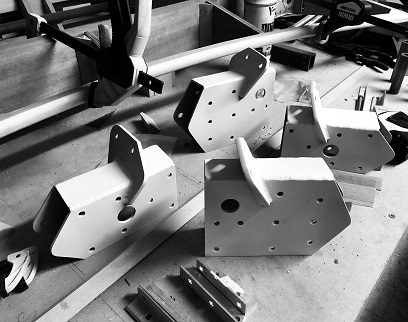
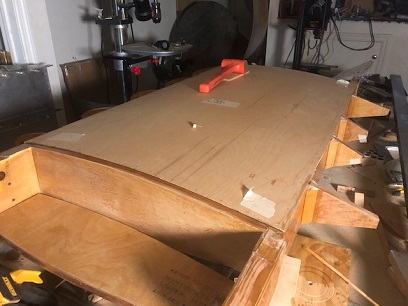
April 19, 2016 A few parts...
to keep me busy.
WOW ! I never did get very far with the upper wing center section. I was focused on the formers for supporting the sheet metal skin all this time.
I'm still working on that project but have a break waiting on some material. Decided that I would begin making a few pieces that I need for this section.
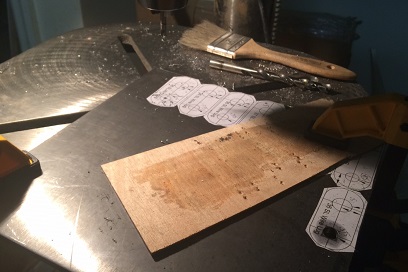
After a little looking I found the patterns that I had printed out so long ago... glued them onto the piece of metal and began drilling holes. Did NOTHING but drill holes tonight; 1/4inch, 3/8inch, and 1/2inch. Two hours of drilling holes. Now all I need to do is cut the parts out, grind them to size, file and sand smooth... oh yeah, and ream the holes out to size.
April 20, 2016 A few parts...
to keep me busy.
Another step towards completing the lugs... spent the night rough-cutting all eight out of the .190 metal blank. Ground down two to size.
That's it.
April 21, 2016 A few parts...
still keeping me busy.
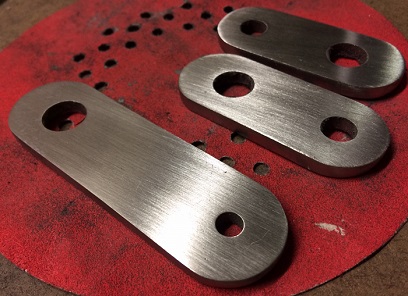
Another step towards completing the lugs... spent the night grinding all eight to size. Started filing and sanding three of them... each of those close to being finished. Just a few more scratches to file/sand out.
again... That's it. And, "That's it." took a little over two hours.
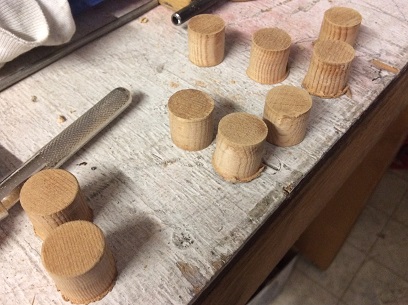
In the image below... Three right have been filed and sanded up to 180 grit. Need to file a few more of the scratches out and sand up to 220 or maybe 400. The other five still have the marks from the grinder on them.
Click on image for larger photo.
July 12 - 15, 2016 Way too many lugs...
nineteen and counting.
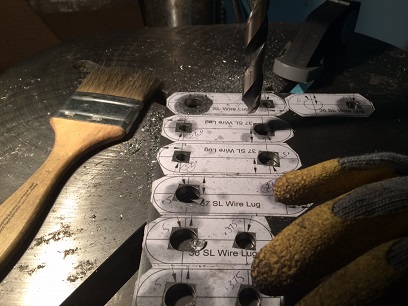
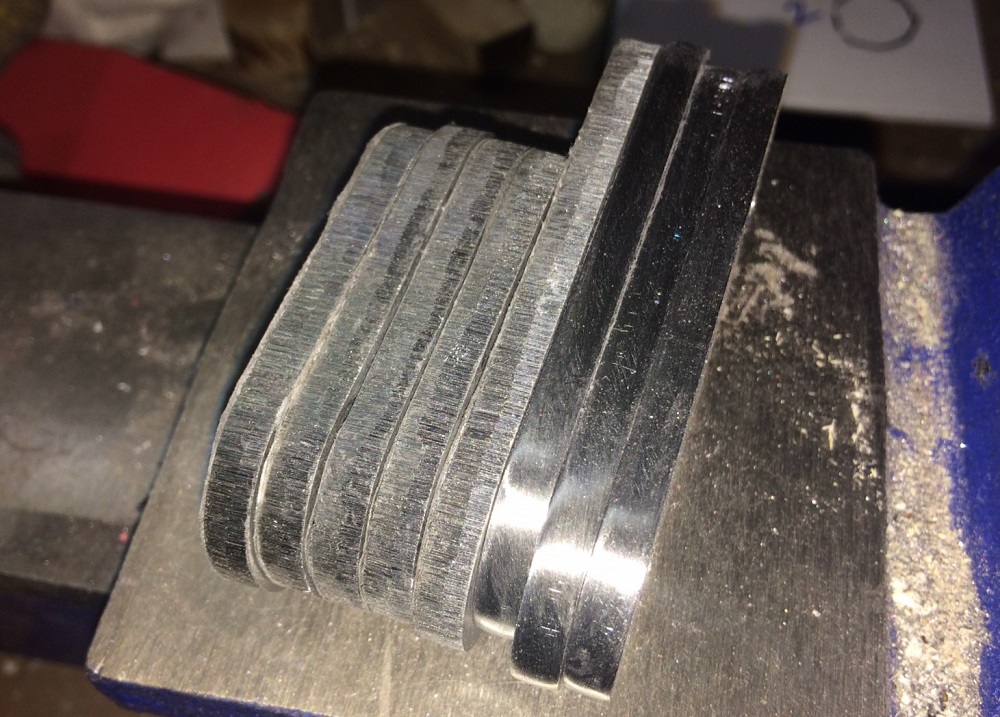
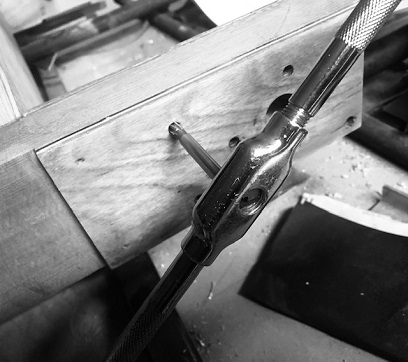
Not sure what it is about these lugs... tried reaming out the 1/4inch and 3/8inch holes and I'm not doing it... Locking the lug in the vice and using a hand reamer to do the job. The initial bites into the smaller hole (must be because the hole is too small ???) aren't straight and it ends up making the hole over-sized.
Decided to re-make them drilling the hole with the correct size drill bit. No problem... or so I thought. When rough cutting the lugs (before grinding and sanding them to size) I cut a little too close to the line and when I did a test on filing it smooth... the filing took it well within/past the line, so I decided to re-make that one again. Glued the pattern to the .190 material, picked up the 1/2inch drill bit that I had been using. Double-checked the size... WAIT ! this AIN'T 1/2inch. It's slightly smaller ! DAMN ! Picked up the 1/2inch bit and drilled the hole, along with the 1/4inch hole.
okay... I'll try to re-drill all these other ones to 1/2inch. and... it AIN'T workin' ! okay... I have enough material to make a few more and then I'll need to buy more material. First of the third batch... drilled the 1/2inch and the 1/4inch holes. Cut, then grind and file to size. Second of the third batch... it's taking FOREVER for the 1/2inch bit to drill the hole. It's dull... but being the person I am, I am bound and determined to drill this hole. What should have taken ten minutes probably took a good 45 minutes. The rest of the piece was easy-peasy.
Before making the third one, I went out and purchased a new 1/2inch drill bit. The 1/2inch hole for the third of the third batch of lugs took a total of 12 minutes. Yeah... just what I thought. Both holes and cut, grind/file to size took less than 45 minutes. ThankYouVeryMuch...
July 17 - 22, 2016 I've said more...
than enough.
How much more can I say about making the SL lugs ??? Eeeeeeeeeeeeeeeesh !
All I can state is... I drilled the holes to size. Period.
UPS initially directed the shipment wrong somehow and it took a day longer to get the metal for the newest lugs. $27.00 to ship a piece of 9inch x 9inch x .190 material. Somethings wrong there. I'll need to call Aircraft Spruce about it.
Anyways... I've been drilling, cutting and filing my way through the remaining lugs. All I need to do now is sand them smooooooth.
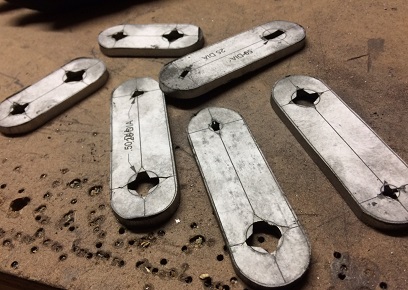
NOTE: There are nine SL lugs shown below. I only need eight; four large and four small. Had the extra large one already glued on the sheet of metal with the holes cut before I realized I didn't need to make it... figured I'd finish it... just for shits and giggles.
wait wait wait wait... I do have something to say. It's not about the lugs, but it has something to do with the two sets of plans for the upper wing center section.
I spent two hours trying to shuffle the original Curtis plans with the new Steen Aero plans. It wasn't working. I finally decided that I would just go with the orginal Curtis plans.
July 23 - August 2, 2016 It's ready...
but am I ?
How much more can I say about making the upper wing center section ???
More questions than answers...
This shuffling stuff (again) is for the birds... Standard plans ? Radial plans ? They're overall pretty much the same... except the sway wires and landing wires. oh.. the Radial plans have a tube for a compression "rib".
It was stressed to me (and you need to make your own call on this) that the sway wires need to be on the back spar in order to transfer the stresses correctly (or something like that). Over the past few weeks I've been fiddling with all of this.
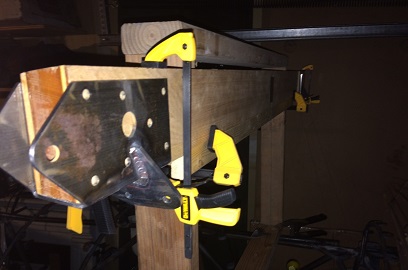
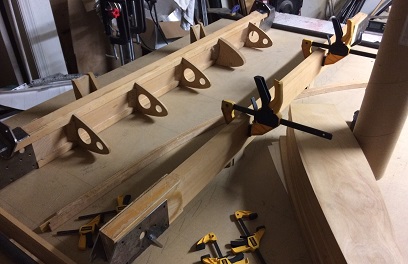
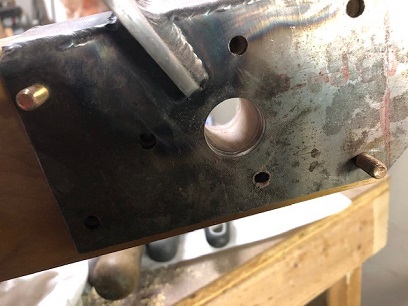
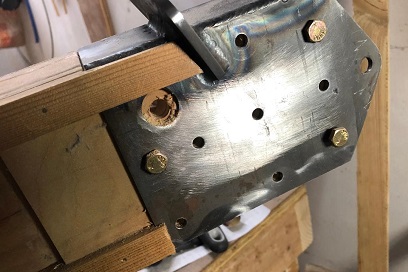
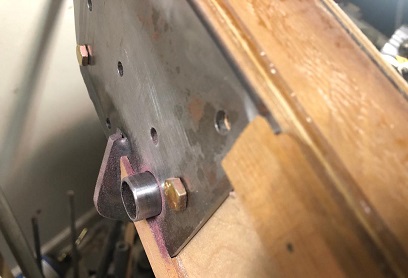
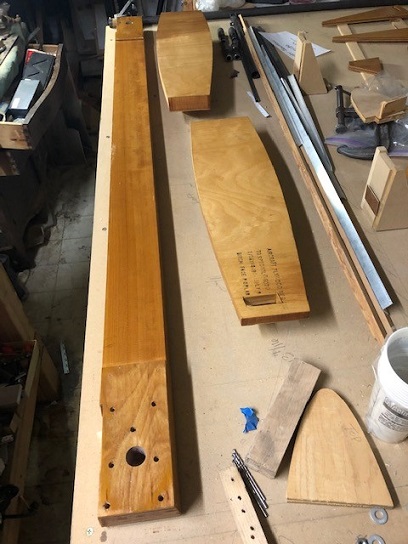
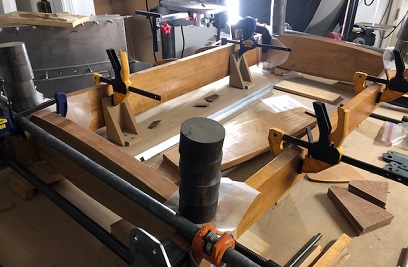
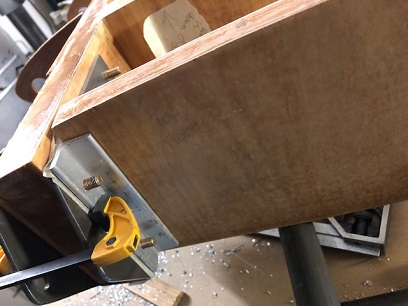
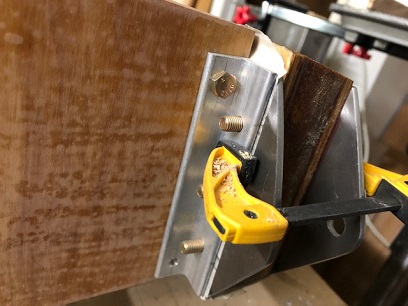
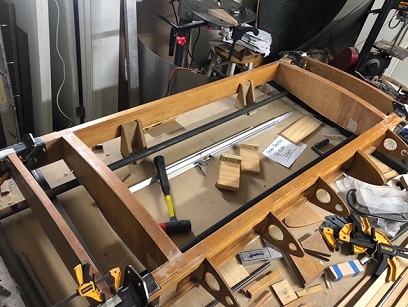
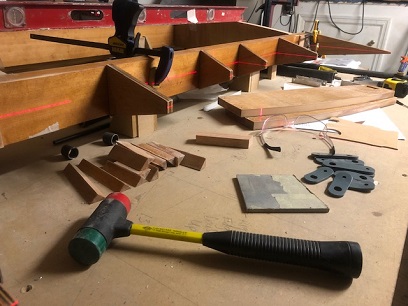
The table is set up. The fittings on the back spar are locked into postion. All I need to do is rise about my fear of making a mistake when drilling those two 3/4inch holes into the back spar.
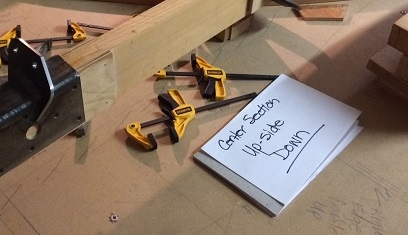
Images below: Landing wire connect to the back spar only. Table ready for production... back spar locked in upside down with front spar just laying on table. Last image shows the spars locked in the correct postion and a note reminding me that it is being built upside down.
August 4, 6 and 7, 2016 A rollercoaster...
of emotions.
I'm slowly creeping towards having to drill the first hole. It's inevitable... but it seems like I'm just making excuses not to get around to doing it.
Took one entire work session to re-ream the 1/4inch bolt holes that hole that fittings into place on the rear spar for the UWCS. Didn't see that one coming... but I guess I was happy, since it did push back the inevitable.
Needed to make that jig too. The one that I will use to keep the hole going straight through the spar. Worked better on the test piece. A little off center when doing the first "real" hole. Damn... First started to enlarge the smaller hole with stepping up the drill bits.
My initial plan was to end up drilling the final hole with a 3/4inch bit. It wasn't working out that way... After messing around with trying to use even a 1/2inch bit in the hole (without success). I had to think of a plan "C". Had a large set of adjustable reamers that I got way back when. Figure... what the hell.
The hole was off-center so I first enlarged the hole by filing a larger opening while at the same time making the hole more centered in the match-drilling process. I slowly worked my way up from 3/8 to 3/4inch using three of the adjustable reams... slowly meaning s-l-o-w-l-y. It took me three hours total from initial drilled hole to final "match-drilled" hole. What I at first thought a disaster turned spot on.
Lessoned learned:
Second and final hole... I'll drill up to the smallest I need to begin using those adjustable reamers.
August 8 - 11, 2016 Not good, or...
good ?
Received the 3/4inch reamer and... More work on the 3/4inch holes for the upper wing center section. Not sure how I did it but I'm not happy with either hole.
I will be ordering a few lengths of tubing so that I can make sure that the 3/4inch reamer aligns perfectly with the opposite 3/4inch hole. This is a set-back that I didn't want to see happen.
I'll be plugging both holes with sitka spruce and starting the entire process over again. WOW... didn't see this coming... The learning that we need to go through at times. In a week or two I'll be happy I went through this learning.
August 20, 2016 Same size...
or next larger ?
Made a few plugs for the two holes. Got to thinking after I made them that maybe I'll open them up to 7/8inch, from the 3/4inch, and insert larger tubes with correct size hole for bolt? Or, try and re-do the 3/4inch and if I'm not happy with it go up to the 3/4inch?
The jury is still out on this one...
I'll be plugging both holes with sitka spruce and starting the entire process over again. WOW... didn't see this coming... The learning that we need to go through at times. In a week or two I'll be happy I went through this learning.
April 4, 2020 I...
Figured it out!
It's been years thinking of this through. And I probably had this thought a few times, of which I don't remember...
I'm enlarging the holes (both of the ones on the rear spar) to 7/8inch. I'll purchase a 7/8inch x .065 tube and ream out the I.D. to 3/4inch. I'll insert these as bushing into the back spars. It'll be a little bit stronger than the original of which is was just going through the wood.
Yesterday I enlarged all four holes on the brackets for the back spar and ready to again start making the hole in the rear spar.
April 3 - 10, 2020 I'm okay with slow...
and no screw-ups.
I've learned! Last time I tried to make a quick solution for something that needed a little bit more time. So... sloooow and easy this time.
Needed to clean out the "slag" from when I drilled the holes... first.
A combination of wood files and various grades of sandpaper... and I'm enlarging the holes so that a 7/8inch tube fits inside of them. Took me over and hour for the first one, and a little over an hour for the second one.
Both tube slide easyly into the openings and through the other side. I still need to coat the inside of the hole with T-88 and then ream out again. AND, I still need to put a coat of paint on the tube which will also increase the thickness of it too. So, I have it done, but I don't have it done.
On to filing/sanding out the large holes on the brackets that are on the front spar.
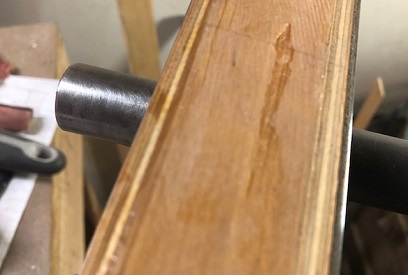
A few hours spent on the back spars...
Starting hole drilled.
April 11, 2020 It looks familiar...
and that's a good thing.
One final hole to ream (file/sand) and it is now ready... Located all of the pieces... and kinda sorta put most of them in the right location. All checks out fine. Threw the photo up on the biplane forum and Cam, another guy building the "S" wing in Australia, said it all looks familiar to him!
Decided on sealing the wood with System Three's "Clear Coat." Ordered up 1.5 quarts and awaiting delivery.
June 5, 2020 I'm...
baaaaack...
Man, on and off again with this puppy. Need to get through this. It's something new. And it's something... once you glue and lock things in, if it ain't right, you're doing it ALL over again. I can't let this keep me from moving forward...
Started out re-confirming my re-confirms that the spar openings on the upper wing ribs were jiving with the spar brackets on the upper wing center section. Kind of confusing when first looking at it... the opeings on the brackets are 1 1/2inch, then go down to 1 1/14inch and then the final 1inch of the actual spar. Wrapping my head around that to let it sink in.
Okay... how many times do I need to do that? Each time I come back to it after a hiatus, that's how many times.
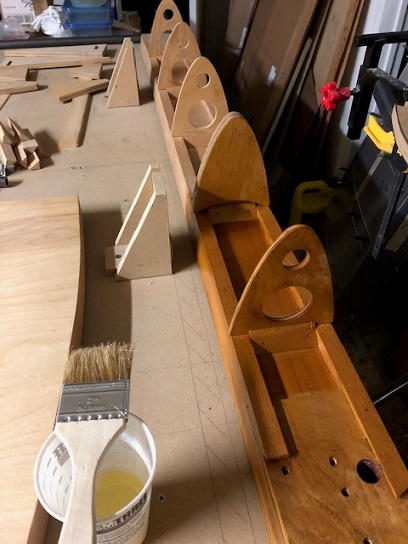
First thing I need to do is Clear Coat all the pieces... and System Three's "Clear Coat" is what I used. I had used their L-26 for sealing part of the turtledeck and was unhappy with how thick it was. Maybe it was just me... I don't know what the reason. But, pinged the biplane forum to see what others were using to seal the wood on their projects and saw it was the "Clear Coat" and they were happy with it. The viscosity would allow it to be painted on and it spread easily. (I used it on the floor frame of the turtledeck just the other day and realized that I had purchased it some time back... but had just bought some new for the upper wing center section. And... it worked as planned on the turtledeck per the guys writing about it.)
Not a lot to write home about. It was just time spent on brushing on the Clear Coat on the first side of the pieces. Not real happy with the cheap $1.00 brushes that I bought because they shed their bristles onto the work piece, but that's nothing new with these brushes. Maybe I'll head out and pick up a few foam brushes to use? Or better yet?, I'll just keep my Type A personality and fight through the remaining brushes with their shedding bristles...
Close to two hours and I have the one side of all pieces Clear Coated...
Front spar part of the way done.
Rear spar.
June 12, 2020 More...
than what we see...
More of the Clear Coating going on this week.
Going through the motions?
There's so much more going on than brushing on of Clear Coat. Experience it. Or maybe let your mind wander... and think things through (alliteration)with this part of the project' aka upper wing center section. Don't let the monotony of the moment take away the experience of the build.
After the last coat of Clear Coat dried I reamed out the existing 1/4inch holes in the Upper Wing Center Section spars. I needed to first sand down the excess Clear Coat on the face of the areas where I was slipping the brackets back onto the spars. Lined them up and got to reaming them. Got all four brackets completed in the one night...
July 10 - August 7, 2020 Multiple...
checks and re-checks and re-re-checks and...
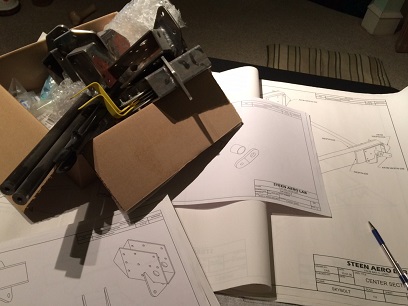
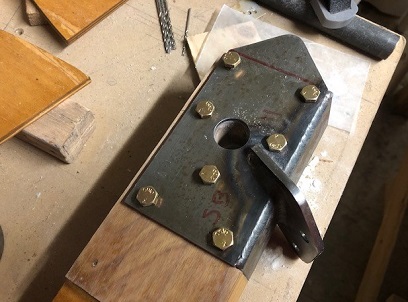
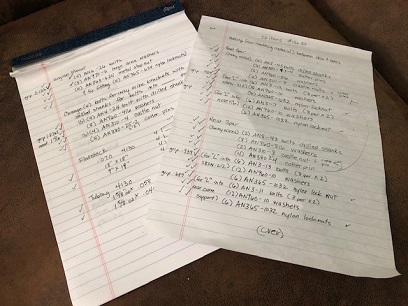
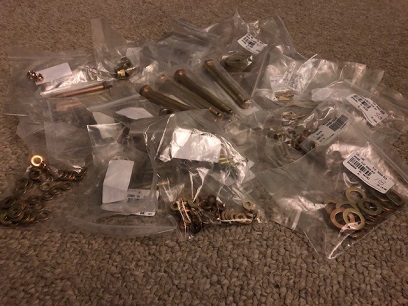
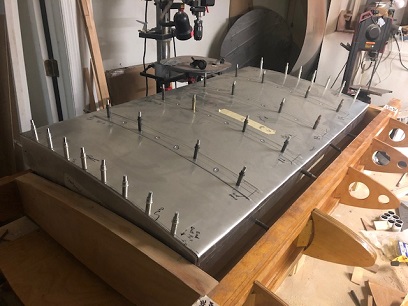
Spent an inordinate amount of time making sure that I was ordering the correct hardware for the upper wing center section. The original hand-drawn plans for the upper wing center section done by Curtiss had the hardware listed, but with that and the re-draw of it into CAD form I just couldn't put my faith in what hardware was listed would be the exact hardware that would now fit the CAD build. Thus... my measuring and checking a muptiple amount of times; nuts, bolts, washers, cotter pins. And, I happened to catch errors along the way... and I now think that what I ordered will be what is needed. All total... I have $71.00 of hardware for the upper wing center section, not counting the previous hardware I had purchased.
List of hardware for upper wing center section.
Time to start bolting things together... or, at least test fitting them.
February 20 - 26, 2022 Not enough...
checks and re-checks and re-re-checks and...
Getting back on this part of Big Ass Bird... and I think I know where that hardware is that I spent all that time figuring out ^^^.
Yes... back on the upper wing center section. I finished up a few miscellaneous things on the fuselage to get it ready for me to work on the engine cowling. Waiting on the wheels and brakes so that I can hang that engine to do that work. They should be shipping in a week or two. But for now... to keep things moving forward I'm back at work on the wings.
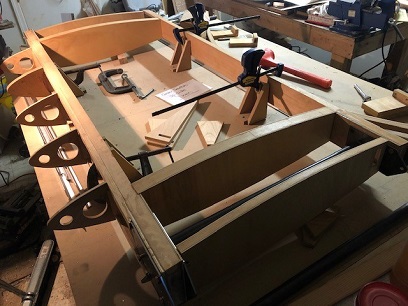
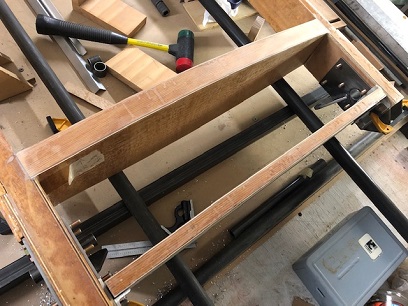
Now to spend a little time checking and re-checking... And re-checking of measurements. Re-checks to make sure I have everything right before gluing it together. I decided to cut a few spacer blocks to hold the bottoms of the spars at the correct height from the table instead of relying on the clamps to hold them in place for this critical step. And then... after five or six hours these multiple checks I thought I'd pushed off the inevitable of gluing long enough. Mixed up a batch of T-88 and started brushing it on.
Got all the pieces in place. A clamp here. A clamp there. Another clamp... and another and another... blah blah blah. NOT enough clamps... and not enough thinking it all the way through. The two ribs began to slide from their respective spots. NOT good... So... off with ribs, WHICH, was a godsend (I had them on up-side down... YIKES!). I was just TOO focused. I have a note on the work table saying it was upside down. The ribs had a mark showing the top side. I completely ignored the sign on the table and... put those two ribs in like the upper wing center section was right-side up. I almost throw in the towel for the night...
As I wiped off the glue from the ribs and the spars ready to close shop for the day... I started thinking it through a little bit more. At that point I decided to get some additional clamps, and cut a few pieces of wood to hold those ribs in place.
A review of how everything was secured and kept in their respective spots: The spars have spacer block underneath of them to keep them at the correct height, then clamped at the proper spacing between the two of them. The box ribs are held at the proper height with spacer blocks underneath of them also. They are kept aligned and butted up against the spar blocks with a few straight pieces of wood that are clamped into place. The top of the ribs are held down with a stack of four weights on each of them (the same round weights I used on making all those wing ribs years ago). And the spars are clamped against the ribs with the use of a pair of long pipe clamps. Finished this all by 7PM. I checked them before going to bed (at 11:45PM) to make sure things hadn't moved. And... we were still good to go. YES!
Glued. Clamped. Weighted.
February 24 - March 5, 2022 more up...
instead of down
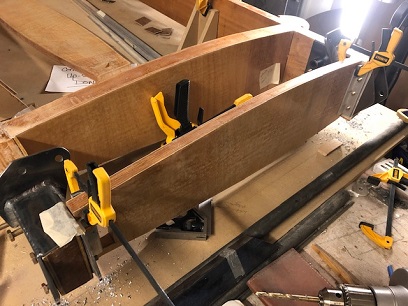
H H Happy... with the gluing up of the box ribs to the spars on the up wing center section. Now to match-drill the "L" brackets to the spars so that I can attch the outer ribs in place before glueing things up.
Needed to first feather some of the box ribs to the spars to get a nice transition. With that completed it was on to the next project... the outer spars.
Took a few meaurements and started scratching my head. Why are the outer spars 1/8inch deeper than the box spars. I know that something called Pettis is requested to be placed on the upper side of the box spars... but why? Threw the question out to the biplane fourm. Apparently Pettis bedding is used in boat building to keep moisture out (and here I thought it was some type of cloth for plant bedding... haha!). It looks like Curtis wanted to make the tank easily removable. Maybe yes, maybe no. If I do, I think I would want to make some sort of spacer to keep the plywood in the area of the screw from pulling the face of the plywood down 1/8inch and looking pretty sad.
My thoughts are to sand down the outer ribs and glue the entire structure together like most planes/biplanes. I would think this would make it a stronger structure also.
With those thoughts floating around in my head I got to the
task of match-drilling the "L" brackets that hold the outer
ribs in place. Did a beautiful job of keeping things vertical...
nicely centered side-to-side on the brackets. Did all four of
the inner brackets; front and rear spars. The next day I go
to level the outer spars with the inner spars (on the bottom
of the center section)... looks good. Start the process of match-drilling
the "L" brackets that are already match-drilled to the spars
and see that I didn't center them on the hole for match-drilling
(top to bottom). There is more room at the bottom than at the
top. I wasn't happy with the amount of room to drill the 3/16inch
hole at the top so decided to re-make the larger brackets and match-drill
those again, this time centering them top to bottom. I also
made them about 3/8inch longer to give a little bit more meat on the ends for drilling those 3/16inch holes.
Undrilled. Drilled.
1/8" difference from the left hole to its end compared
to the right hole and its end.
March
6 - 12, 2022 Riddle me this...
Why
1/16 front, and 1/8 back?
Alluding to Joker's questions to Batman.
All the "L" brackets have been match-drilled to the spars. And...
they have been match-drilled to the outer ribs.
Note: NOTE! Look closely at the alignment of the opposing
bolts in each of the "L" brackets AND the other bolts
in the spar brackets. I made sure that the bolt heads on the
"L" brackets themselves were far enough apart.... BUT
I didn't figure in the bolts that were already in the spar brackets...
the ones for the flying wires. "Luck" has it that I can thread
each of the bolts as long as I have the nuts in place and start
threading them as soon as they poke through the holes in the
piece I'm bolting together. BUT... there is A LOT of bolt head
action going on and it's going to be close no matter what you
do.
With all that being done and now said... I re-visited the plywood
for the upper wing center section. Again... why the 1/16th edge
overhang for the front pseudo nose ribs and 1/8th inch for the
rear trailing ribs. Reason... the nose ribs are wrapped with
1/16th inch ply (that will then make them 1/8th inch thicker)
now making them even with the 1/8th inch top and bottom ply
(whew!). Sometimes it takes me a while to figure it out AGAIN.
One question I have is... why would you create a center section that needs a fraction over a standard width? The ply covering for both top and bottom is 24 1/8th inch. That's 1/8th inch
wider than a 1/2 a sheet of plywood. Why... why why why why would you do that? Rhetorical question...
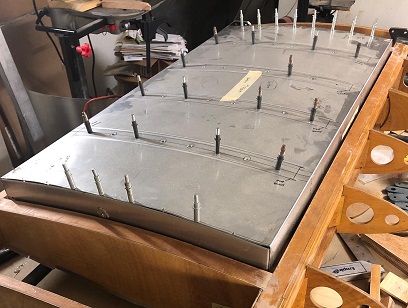
I'm past that, AND I did buy ply that is wider than 24inches but not 48inches. Must have cost a fortune... and that was before the supply chain collapse caused by the pandemic. Now to measure, fit and cut the ply. The top... pretty much a no-brainer. Three pieces across the top. The two outer pieces capturing from the end of the spars (yes, past those outer ribs) to 1/2 overlapping the box ribs. The third piece locked in place after the upper wing tank has been installed (which I checked, and it fits like a glove). I'll be cutting all three pieces so that I have the best fit for the center piece. I'll then align all three and glue/screw the outer ones in place.
The bottom ply is a different story. You have the wings of the spar brackets extending out below the spars. What do you do? Make patterns to create cutouts around those bracket wings. Several hours of doing that and I'm now ready to cut and fit the bottom skin... we'll lets say, I have the patterns finished and deciding on whether I want to attach the lower ply before drilling the plumbing holes for the upper wing tank...
A few photos showing my progress... "L" brackets being match-drilled. All four "L" brackets match-drilled to spars AND ribs. Fuel tank FITS LIKE A GLOVE! Pattern work for the lower ply.
March
13 - 19, 2022 Gotta love
some of that technology.
Things are moving along smoothly on this puppy. Over the next few days I'll need to drill the brackets that will attached the outer trailing edge of the ribs to the spars and then glue the four center trailing edges ribs to the spar.
One eigth inch top and bottom. The overhang of the forward part of the trailing rib on the spars. First to mark where the ribs will glue to the spar, making sure they are square to the spars themselves. Mark the area for little scuffing of the surfaces on the spar, and on the ribs themselves. Scratching my head for awhile to figure out how I was going to keep the ribs square to the spars and keep them from sliding out of place because of the "slippery" glue. Decided to wrap a "L" piece of aluminum with wax paper. clamp that onto the spar. Clamped the rib to the "L" piece of aluminum and then put a clamp on the rear of the rib - front of the spar. Worked beautifully.
Using some new school technology on this old school bird. Confirmed with a lazer level... The smaller center trailing edge rib pieces were glued and clamped the same way.
Still needed to match-drill the rear "L" brackets onto the spars so that I could attach the out rib trailing edges. Used a hundred clamps to keep them from moving... and moving they did not! Wasn't happy with how close the one hole on the starboard side was (so close to the upright on the "L" bracket I would have needed to sand quite a bit of aluminum off the bracket) so I re-made that bracket. Then got out the lazer level again and used it to make sure that the trailing edges of the outer two ribs were level to the center of the other four trailing edges then clamped those puppies onto the "L" brakets and match-drilled them. Easier said then done 'cause you want to make sure that these guys are level with the other ribs.
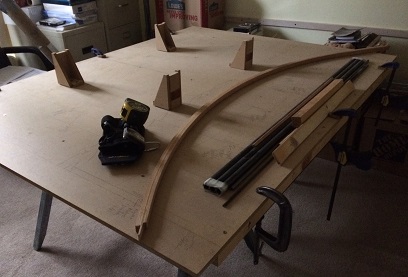
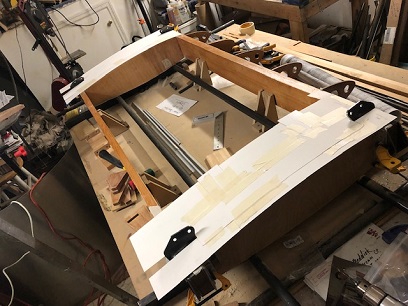
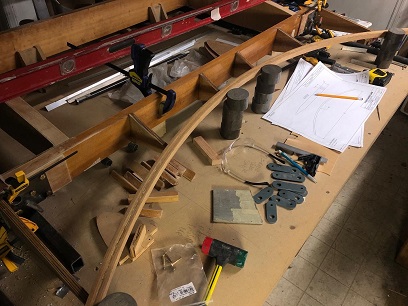
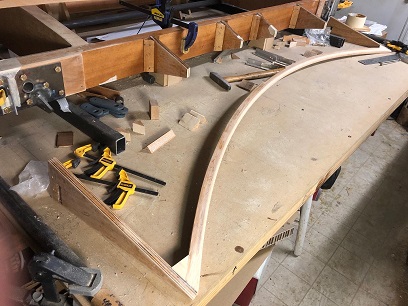
Now to see if this bow I made fits the area that I just made with the trailing edges of the ribs. (drumroll please...) And it's a near perfect fit!
Spent some time marking where I need to angle the trailing edge on the ribs, and the areas that I need to cut the bow to fit it onto the upper wing center section trailing edge. Fast forward one night... and I've been figuring out the best method of beveling the trailing edge of the bow. I tried several size curved router bits at different depths and so far... not happy with the results. Tried making a pattern out of a scrap piece of oak, to the shape I want. Attached sandpaper to that... not happy with that either. Still up in the air on how I'll best shape this piece.
March
20 - 26, 2022 A WHOLE lot of... making angles
with squares
Progress on the upper wing center section!
Tackled the contour of the bow. Went back to trying various heights of the larger 1/2" curve router bit. Using that at a specific height as to leave just enough of the straight edge for me to flip it over and use that as a guide for making the opposing routed shape allowed me to use the router to cut most of the bow's shape. Got that? If not... it's okay. If you did... GREAT!
Spent additional time shaping it with sandpaper. In the area of the handhold, I shaped both sides of the bow; both the concave and the convex sides. All happy with that and set it to the side...
Next step of the process was to fit the bow up to the ribs. So... I needed to notch/angle the trailing edge of the ribs. Spent an enormous amount of time squaring up the outer ribs, and making sure that the overlay of the bow on the ribs was near perfect. Marked the bow for the length of cut for fitting it up to the outer ribs. Made the cut, then tweaked it to fit nicely up against the outer ribs. With that pretty much in the position it needed to be I made the angled marks of where I needed to sand the angles in the trailing portion of the trailing edge ribs.
Used the square A LOT over the next few days... Making sure that the notches were square to the horizontal of the bow and level with the rest of the center section, then marking the corner blocks for fitting up to the bow.
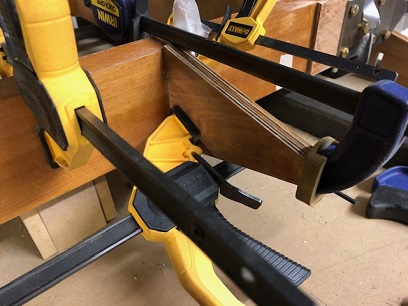
One thing with the corner blocks for the bow, I originlly cut them out of 3/4inch sitka. Nice fit... just didn't like that fact that the thickness of the wood wasn't enough to capture the angle of the four inner trailing edge ribs (aka... they looked like pieces of wood glued to the center of the trailing ege only enough material to go top to bottom on the rib's profile at the trailing edge). Not happy with that I glued up two pieces of 3/4inch sitka spruce and re-made the corner blocks for those area. NOW I'm happy with the look of them, and it will be a nice, smooth transition from rib to bow of the gussets. Once the fabric was on you wouldn't know it, I wouldn't see it, but I would know. A little bit of that 90 percent extra effort for those finishing touches.
BIG Block of wood for corner blocks.
Overhang of excess wood for smooth transition...
After making myself happy with the re-make of the corner blocks it still wasn't time to glue them to the center section. I still needed to glue the bow to the trailing edge of the ribs. I decided to do this beofore installing the hardware on the center section... thus, I still need to be able to remove the outer trailing ribs so that I could paint the hardware and reposition it on the spars. With that in mind, I glued up the bow to the outer two ribs and will be glueing in the corner blocks only on those two ribs. And that my friends, is where I am at...
Bow: Lazer leveled and glued on.
March
27 and 28, 2022 Just about ready...
for paint!
A few finishing touches to the upper wing center section before I pull it apart for painting the hardware... New corner blocks were made and glued in place at the juncture of the outer ribs and the bow. Once the glue had cured it back to feather these puppies for a nice smooth transition from bow to rib.
While waiting for the glue to dry on those, I positioned (tacked in) the brass nails in the corner blocks. Next day after feathering the above corner blocks, I glued and nailed these into the back spars where the ribs exit.
Finished up the week with sanding the spar brackets... getting them ready for some paint.
Blocks glued onto bow/ribs and the spar/ribs.
Pre-feathering.
Post feathering...
June 4, 2022 Just about ready...
for paint!
Back on the upper wing center section. Not 'cause I want to
right now...but, because I need to finish it to the point where
I can take it off the table so that I can use it to make the
cowl ring with its intake. So... I started priming the brackets
today.
June 5 - 25, 2022 It's all coming together...
now.
No time to update the blog!? Always time... when you make it. Need to stay the course with the build and my BLOG updates. I don't want to let the BLOG fall the the way-side like so many builders do. Not only do you get to enjoy my writing (haha), but it helps me to lock into my mind what I've learned during each step of the build (I remember better when writing it down, it's a refresher of the work completed). Anywho...
More hours were spent sanding and priming, and sanding and painting the brackets. Not the "expert" finish that I would like, but a mighty fine job non the less.
I also worked on locking in the bottom section ply on the upper wing center section. I am doing it in three pieces instead of one. This will allow any f-ups, if any occur, when notching the outer edges of the ply for the brackets.
After attempting to hand-trim the ply's front and back edges I decided to take the time (much less time at that) and do it with a straight-edge and router. Hand-trimming it was taking fooooooorever and it wasn't that nice of a job. Thank God I stopped the process before screwing things up!
Once trimmed to size, and quadruple-checked for fit, I mixed up the glue, clamped, then tacked down with brass tacks I had from when I first started this project back in 1993 :0. Somewhere during all of this fitting and glueing up... I coated the holes that were drilled in the spars, and ribs, and then reamed them out to size again. A test fit of the painted brackets and Wa-La!... they fit like a glove.
Reading through the UWCS posts on www.biplaneforum.com, and I saw where Kevin (of Pitts Model 12 fame) suggested, instead of safety-wiring the bolt for the compression member, they made a custom washer that spanned from one bolt to the compression member bolt. A tab would then be bent up to keep the bolt head from turning loose. Great idea... so that's my plan! And with THAT plan, I think I need to get eight new longer bolts for those four bolts that will allow me to have enough threads on it to attach the nuts. I'll make the custom washers and test fit before making that purchase.
Inside of holes coated and sealed. Reamed them out.
Routing plywood for lower section on UWCS.
Above routed plywood glued and tacked!
Test fit of fuel tank (albiet with clecos still holding
it together). So... it doesn't quite fit yet.