Mantua, New Jersey
Original Site:
September 2004
E-mail: usav8or@yahoo.com
The Radical Radial Turtledeck.
April 11, 2015 Re-making...
'cause of too many re-makes.
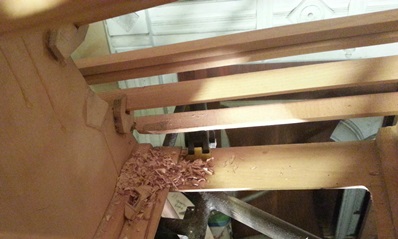
Yup... pull the trigger on making an entirely new tail cone. The first one has been patched so many times... with so many better ideas... that I thought it best to make a new one incorporating all those ideas into the new one without all those patches.
After working on it this long the new one won't take nearly as long to make. Although the spine on it will create a challenge with all the notches I need to make on it for fitting it up to the tailpost, trailing edge of the horizontal stab's leading edge and the support tube for the leading edge of the horizontal stab.
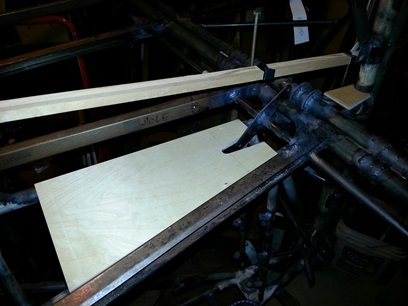
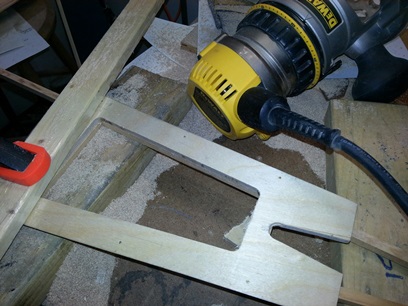
4.5hours and I've managed to make the bottom plates for the forward and rear section of the tail cone. And yes, the spine was a royal pain in the ass. But, I have that completed and will be moving on to cutting out the sides and glueing them up.
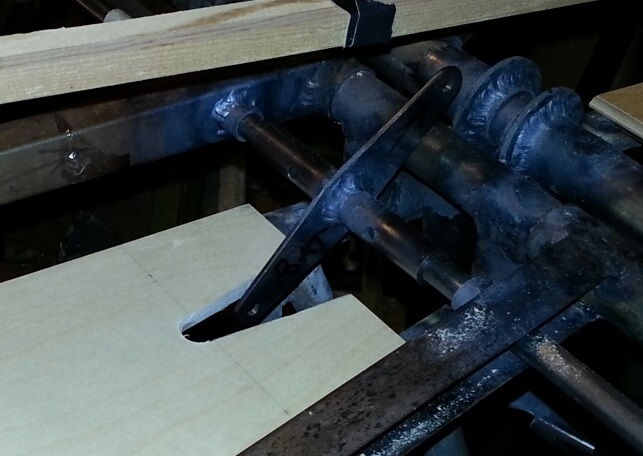
Click on image for close up of trim horn cutout.
The changes I've made so far... smaller forward plate and I've cut more of the area out where the trim horn swings.
April 13, 2015 Re-making...
'cause of too many updates !
The above headline better describes the re-do of the tail cone. Just too many revisions using the original skeleton that I thought it best to start from scratch.
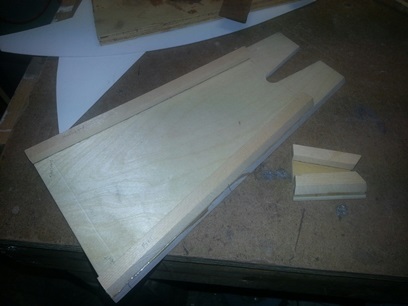
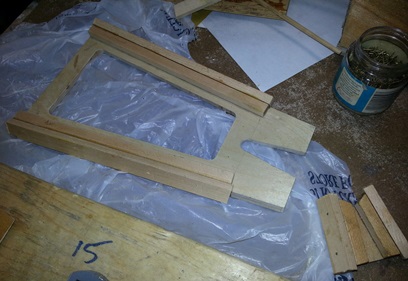
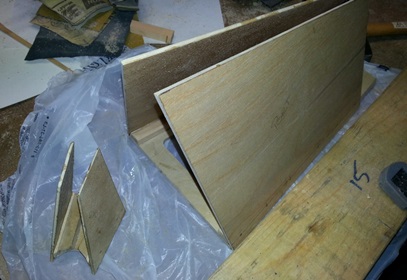
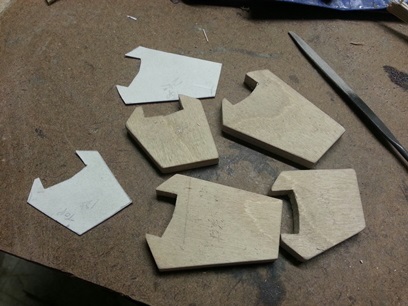
Made the patterns for the sides (both foward and rear sections). Marked and cut the 1/8inch ply. Sanded smooth and thought I was ready to glue it onto the bottom plate... Hold on thar bubbalou !
Still need to seal the insides of the sides (and I should have done the bottom plate but forgot) before putting it all together. So... that's what I did; sealed the insides of the side walls. Next session I'll be sealing the bottom plates and putting a glue edge on the bottom's also: 1/8inch isn't quite enough to glue on to...
April 16, 2015 Moving right along...
with the tail cone re-make.
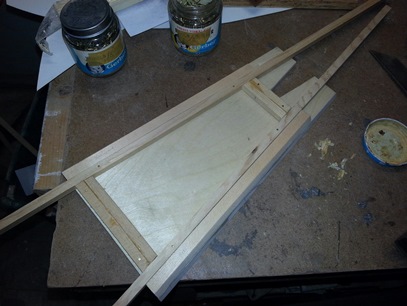
Moving right along with the new and improved tail cone. Cut and glued on the glue blocks to the plates (floor) of the tail cone.
April 18, 2015 Trying to move along...
with the tail cone re-make.
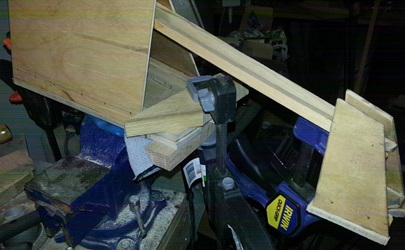
Moving right along with the new and improved tail cone? Routed out the bottom plate then glued the sides on the front and back plate. Saw that the angle was too extreme (especially for the rear plate) and took the sides off and glued on a build up block on the glue blocks so that I could sand new angles.
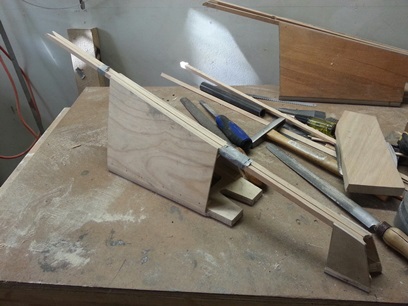
Jig for routing lightening hole.
Routing hole.
Decided to pull these off and re-angle them with new blocks.
Glue block build up.
April 21, 2015 Good idea??? Bad idea???
Better to do and not having to have done it...
Not sure if glueing the extra thickness of wood onto the forward plate was such a good idea. Tonight... by the time I was done sanding it down there was practically no wood left from wood I just glued onto it the other night. The rear plate was another story. About half of the blocks I glued on were left on there (with a slight angle to them). Ah... didn't spend a lot more time on them and I at least tried to get them as close as possible to being perfect... I at least now know that the forward plate didn't need doing.
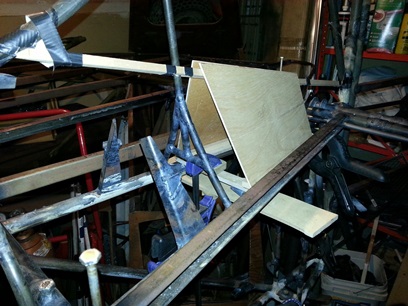
With that said... the only thing left for me to do was glue on the sides to both the front and rear tail cone plates. And here's a picture of just that.
April 23, 2015 Good ideas...
just take a bit of time.
Positioned and glued the forward tail cone walls onto the spine. Looks like I will be adding a few glue blocks to the top-inside for additional glue support.
I'm getting there... I think.
April 27, 2015 Good ideas...
just take a long time.
Glued on the side walls of the rear tail cone plate onto the spine. (Looking at it... I'm going to want to raise this 1/8inch or so... DAMN !) Took so long 'cause I kept playing with positioning of the different parts... readjust readjust readjust.
(no picture today)
April 30, 2015 Good ideas...
take a lot longer time.
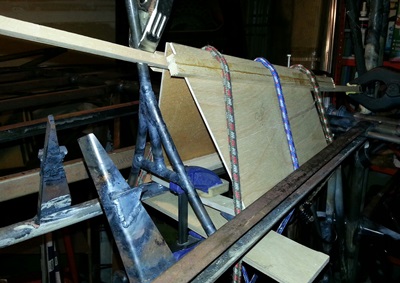
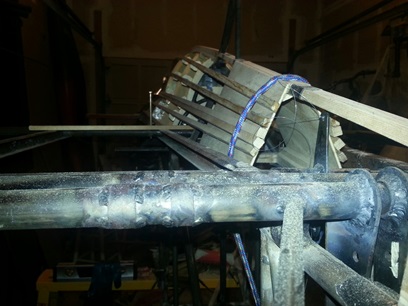
The 1/8inch plate build-up will barely do it... clearing the trim horn, that is. I don't want to "JUST" clear it... so I glued a 1/4inch piece of ply to the forward and rear tail cone plates (again). Real good clearance on it now. I'll be routing that out just like the one before it. And... now that I have the height of the tail cone I could see the build-up I need on the spine for the turtledeck. The piece that I had cut so nicely earlier couldn't have worked any better with the tail cone spine match-up. (that's a first)
Got that cut, trimmed, glued and nailed up; both the plate build up and the turtledeck spine. Tooks some time to do but I had time to burn. Decided to work on re-figuring out the flooring; heel rails and front flooring/heel rails.
Watching glue dry.
Spring clamps for holding in position only.
May 3, 2015 Making it work...
takes a long time.
Don't ask me... ask the damn guy who's making the thing ??? oh yeah... I AM the guy, but I don't know WHY the HELL this turtledeck is taking so long to make (actually I do... it's working towards excellence). I think I wrote this before... I could have built one of those kit planes in the amount of time it's taking me to make this turtledeck.
Another almost-3hours put on the project on Sunday. More re-work on the tail cone ! More work on the tail cone ???
Routed out, filed and sanded (whatever I needed to do to clean them up) the bottom of the 1/4inch build up (seems like I've been here before). Re-glued the spine on the foward tail cone section (wasn't enough pressure on the piece for the T-88 to work). Re-worked the spine and glued again. Had the glue mixed up so I cut an angle on both the existing double-stringers and then added on wood cap strips to make them as long as the other turtledeck stringers. Yup... that's it for tonight; another almost-three hours.
(no picture today)
May 6, 2015 Making this turtledeck...
is a worthy endeavor.
Getting closer... I think ???
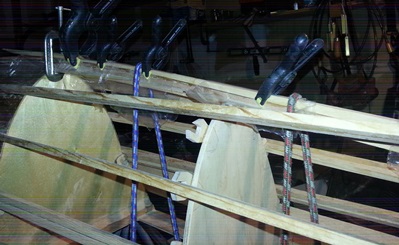
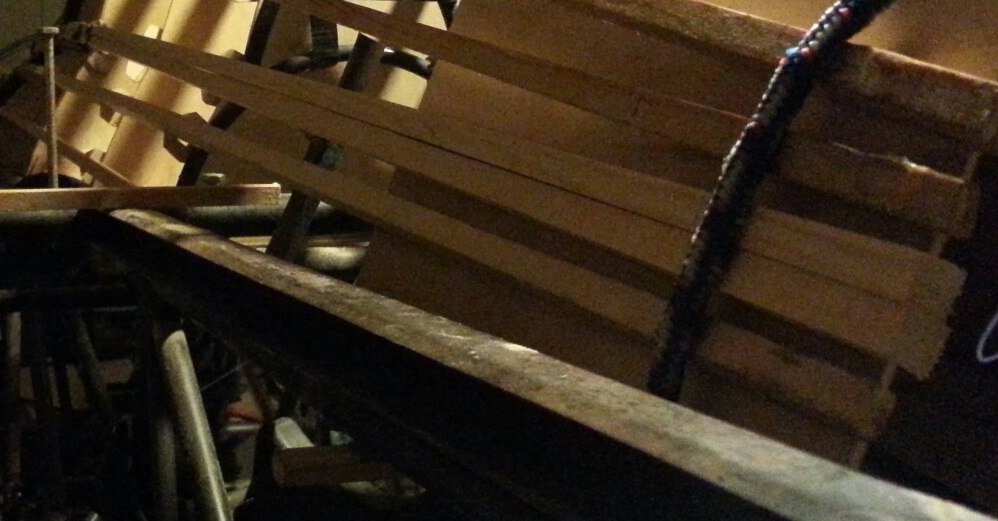
Cut the tri-cap strips to size, figured out the angle, sanded down to the angle, glued and nailed into place... These are the glue blocks that I made for the upper-inside of the side-wall on the forward tail cone section. Wanted to make sure that there was plenty of plue area contacting both the spine and those side-walls.
May 7, 2015 Making this turtledeck...
is beginning to be a pain in the Arse.
I'm getting tired of this... after shaving the top overhang off both the front and rear tail cone pieces I was back at work on the turtledeck stringers. I've really worked myself into a corner here... The enclosed section of the turtledeck wider half-way back then gets smaller again. AND it goes straight back before it needs to tun down toward the tail cone. WTF ???
Can I make this work ??? So far... not. I may just do away with the stringers being exposed ? I don't think so but it's starting to look like an option.
It's these back stringers... THEY'RE (yeah... it's all THEIR FAULT) not making that smooth look that I'm looking for.
May 9th, 8:41AM update:
I think I've figured it out. It's the doubler-stringer that is f'ing everything up... I'm thinking. I'll take a look at it today and if that's the case... no problemo !!! Instead of ending that as a single (which is where I think all this trouble is coming from) I'll keep it doubled all the way back... wee wee wee all the way home.
May 9, 2015 It feels good...
re-making the turtledeck.
Cause I know it's right.
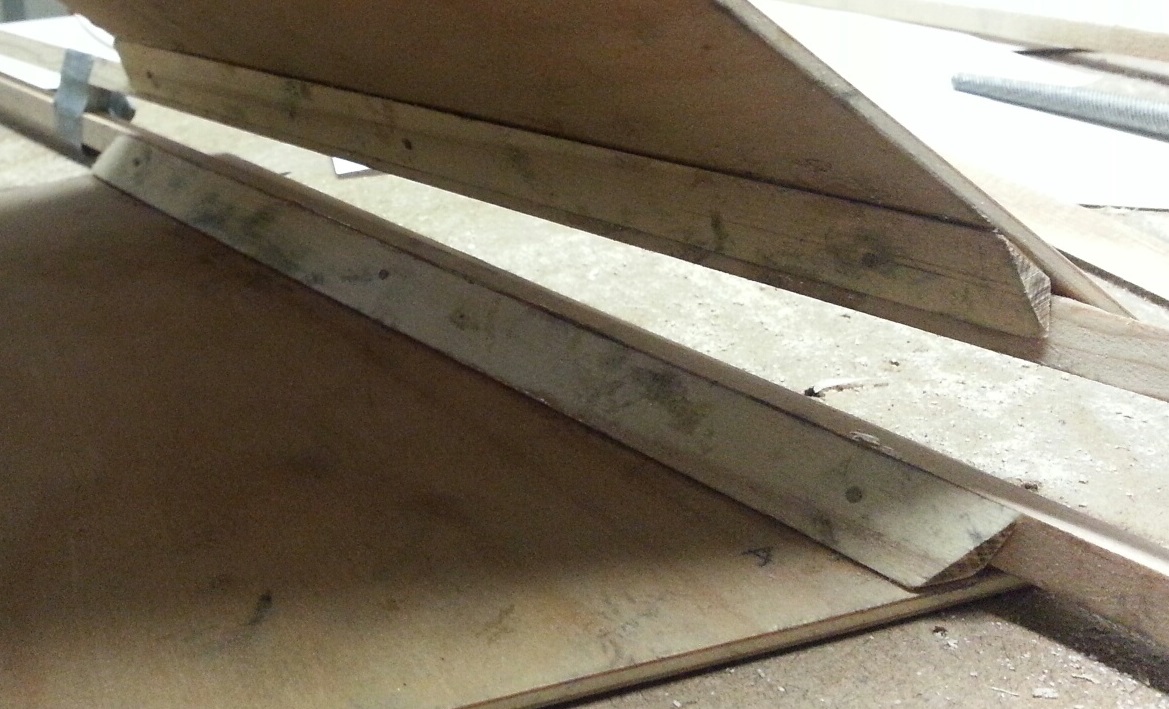
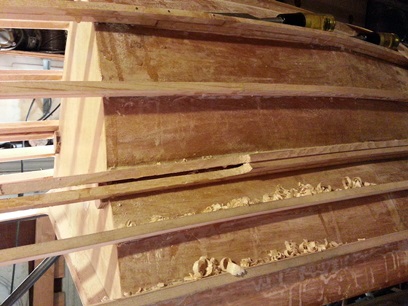
It has to be done... re-working of the double-stringer on the turtledeck. Kinda thought that when I was just thinking about it on Lombard Street after my last work session, but when I took the trip over to Woodstream and actually looked at it, it was so obvious that I should have gave into it some time ago: not only is the wood stringer uneven where I tried taking it down to a single width from a double-width but it is also uneven along the ridge line (top of it).
The only thing to do with this is whittle them off and glue a few new pieces to it. I'll be ordering up the new 5/8 x 5/8 cap strips and (crossing my fingers) it'll be the last of re-doing it.
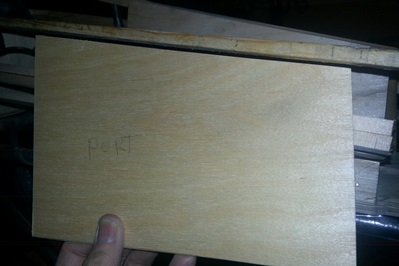
First time for the doubler.
May 10, 2015 Prep work is done...
just waiting on the stringer material
Which, by the way, I still need to order.
See the image above, from yesterday? Instead of starboard... make it port. Squared off and cleaned up both port and starboard cuts.
May 19, 2015 Package arrived...
stringer material....
too big.
Got the stringer material. Bought 5/8th's instead of 5/16th ??? Seriously ??? (doesn't happen often, but it does occasionally happen... buying the wrong size - actually I think this is the second time it has happened) anywho... I ripped down four of these to use on the turtledeck. Took a while only because I had to reconfigure the table saw which I had to take apart somewhat...
It didn't give me much time to do anything else (took some time getting home from work - set up the table saw for ripping - get hair cut - come back and start playing with the stringers/turtledeck to see how they're going to work out.
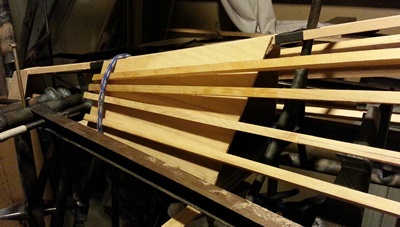
After cutting two of them down to a close approximation of length and taping them to the existing... they look pretty damn good. Looking REAL good.
Was getting late so I called Andrea to see if she wanted me to pick up an Eggplant Parmesan Sub - yes... and it was goo-ood !
Stringers still need trimming up.
Sheet of phenloic for making washers. (should be posted on the fuselage page)
May 20, 2015 Next ! Check and glue.... and some thinking.
Checked the two upper stringers, on the double-stringers, to make sure things were good... the fit, ya know. A little tweaking and I glued and nailed them in place. That was the first thing on my to do list... went and did some work on additional tube supports for the heel rails then came back and used some of the thicker, more mature glue, to fill in some of the gap between the old and new stringer material.
I don't mention it much, but there is a lot of thought that goes into each and every step I take with the building of this biplane. It's not just a "press on regardless" approach... I research, think it through the best that I can and then move forward. But... at times, I find myself thinking back as to whether I thought enough about it. Did I take enough care and time with that part of the biplane?
What's the difference between "production line" and "hand built" as far as quality goes. I believe that quality can be had with both, but the hand built version is a part "A" fits part "B" for that single biplane.
For instance...
Today when I was cutting and fitting up one of the tubes for the heel rails I found that the one was a little off from the other. Not perfectly symetrical ? No... not perfectly. But at the same time... I'm proud of the fact that it's not perfect. It's a hand-made plane: hacksaw and file style.
Could I have gotten it closer to being exactly like the other side?
May 23, 2015 A quick check...
Spent all day working on the notching and fitting up of the additional tubes for the pilot's heel rails and the co-pilot's flooring. BUT, I did take the clamps and wax paper off the first two stringers of the double-stringers and it's looking damn good !!!
Was going to do the additional two stringers but not enough time and I didn't want to rush through it and mess things up.
May 26, 2015 A slow fit and fix...
Time to fit and attach the final two turtledeck stringers. Not an easy task. Should have attached these lower ones before I attached the upper ones.
They're a little tilted... easy fix by sanding a little of the area where the old and new meet (I hope).
May 28, 2015 Getting closer to being all fixed...
Sanded smooth and looking good !
The ends of the stringers aren't in their exact locations and are a little long...
June 12, 2015 Making plates...
And no, I'm not a potter....
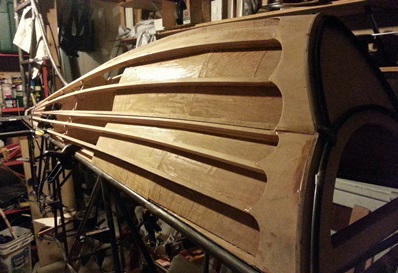
Did my "give-it-a-day" look at the stringers and they're... still looking good. Kinda crazy bends to it, but that's it. That's the way it's got to be based on the design.
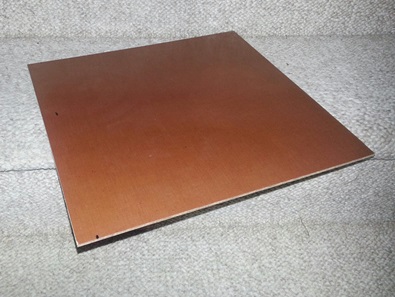
Wasted a lot of time trying to make a slightly too small plate work on the existing design. backing up a few months... I had made plates with holes in them figuring I would "tab" the stringers into place and then "lock" them on somehow afterwards. THEN I came up with the brilliant idea of glueing the tail-end of the stringers onto the plate and attaching the entire plate to the tail cone. Better idea all around. New design of the tail cone needing the new designed plate... starboard plate didn't have the holes cut yet but the port side did. In order to cut of the holes on the plate it would be approx. 3/8inch too short. Nobody would see it right ? I could "design" it to make it look like I planned to make it that way. Yeah... I could do a number of things, but I'D know that it wasn't planned like that. So all my fussing with thinking of making that existing plate work was all for not.
backing up again... I couldn't find a piece of 3/32 ply. 1/4inch, 1/8inch, 1/16inch... but no 3/32. AFTER I made the decision to go with an entirely new plate... I found a 2foot x 3foot piece of 3/32inch birch ply.
Anyways... cut and trimmed the new piece of ply. Need to go back to Tony B's books and take a look at the best way of attaching the plate (with hardware) to the tail cone. Me's thinking nut plates, but we'll see...
New pate.
Kinda in position. Port side.
June 15, 2015 Making sawdust...
Removing a few supports.
I've been working on the turtledeck recently so I might as well continue working on it... With the re-work of the double-stringers I'm wondering... Should I cut those four double-stringer supports off or leave them on and glue the new ones to them ? DUH ! Another rhetorical question I've seriously thought about. DUH !
Took a chisel to all four tonight then I made the patterns for both the front and rear supports. I'll cut these out and position/glue them on tomorrow.
Still need to figure out the attachment of the plates...
Removed stringer support.
You can see its shadow.
June 16, 2015 Making...
a few supports.
Continued work on the turtledeck/tail cone... finally found a section in one of Tony B's books about using nut plates on wood. Kinda remembered what was written... just needed to see and read it again.
The plan... to have a backing block of wood to give the sides some depth for the screws I'll be using to attach the nut plates. Wanted to build up the underside of the tail cone sides. Thinking... one of the 5/8inch x 1/4inch un-used stringers. When looking for the stringer I spotted the cut-off I had from the too-large of stringers material that I bought a while back.
Marked, cut and fitted up the four pieces... gonna work out great ! Now all I need to do is locate those nut plates. Actually, not sure if I want to use those. Won't be sure if they're large enough until I find them.
I'll locate the nut plates I have (I think they're... ahhh, I don't remember) tomorrow and if they're the right size I'll be... I thought it was going to be tough to connect the nut plates to the back side of the backing blocks. Thinking it though, what I'll do is; 1. stack the wood backing block, tail cone wall and stringer plate together 2. Match drill four holes 3. Place some epoxy on the wings of the nut plates, stack pieces together and then place screw in and tighten up 4. Allow to dry over night 5. Screw wood screws into wings of nut plates using another dab of epoxy 6. Allow to dry before glueing wood blocks into place.
Back up an hour... I actually cut and filed/sanded these turtledeck supports before doing any of the above. Need to confirm the shape/postion of the stringers then glue them into place.