Mantua, New Jersey
Original Site:
September 2004
E-mail: usav8or@yahoo.com
Those round things you need when Earth Bound
aka The Wheels...
May 20, 2014 A closer look...
at those things that spin...
It's about that time... time to start looking at things other than the things I'm making. I need to begin looking at the Jacobs, instruments, wheels and brakes...
Bought a set of wheels and Cleveland brakes from Gus way back when. Put the wheels together about two years ago so that I could roll the fuselage around when I got the gear built and attached. Figured it was time to look at the brakes to see what I need to do to bring them up to speed.
Broke open the Cleveland PDF manual that I have on a flash drive and started looking at all the parts and pieces that go to making up the brakes. Needed to make sure I had everything... just the start of refurbing them.
After reading the section on parts and comparing them to the picture of parts, I picked up the two brakes to see what I had. First impression is that I have two different brakes. They look similar... but they're either the same with a different covering or they're just out-and-out different. I'm not finding any labels on them so I'll need to look at them a little closer to see if there are any stamped part numbers I can see.
If these aren't a set I may just put them on ebay and buy a matched set.
As for the wheels... they just need a few screws, a felt gasket, maybe a metal gasket cover... and some cleaning up. A little fresh paint and they'll be ready to go.
May 21, 2014 An even closer look...
at those things that spin...
It's not looking good. Actually it's not good at all.
The two wheels and the two brakes are different; I have two different wheels and each of the brakes are different. Sure, both wheels are 6.00-6 and sure, both brakes fit each of those wheels. BUT, that's not how I roll (pun intended?).
Sure, they probably came off a Cessna 185, like Gus said... but they ain't matching. I should have looked at them closer.
Looks like I'll be buying a set of 199-104's or -105's. that match... this time.
more to come....
Oct 13, 2025 Found another page that I made when I finally go the MATCO tires and brakes (smacking my head!). Soes... I copy and pasted on the orignal page I had for THE WHEELS.
April 4, 2020
Thinking about...
but not yet doing.
Another one of those... I need to make a page for this stuff. The brake system... (still to come.)
March 16, 2020
The rolly thingies...
arrived today.
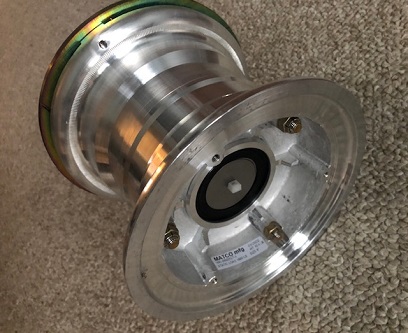
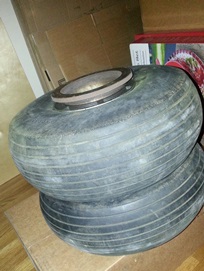
Big Ass Bird's wheels and brakes arrived today. Beautiful packing! Beautiful Wheels. Can't wait to mount these puppies!
April 3 - 9, 2022
The BIG... PUSH!.
Still getting things settled in to start working on the cowling... which mean getting on these wheels and brakes. The BIG PUSH mentioned above... a push figuratively and literally.
Ordered up the hardware I THOUGHT I needed to complete the job, only to find out a few 1/4inch x 3/8inch grip length bolts should have been ordered... along with wheel bearing grease, nuts and cotter pins for the axles, and a few more blah blah blahs.
Back to ordering... AFTER I figure out what type of grease to buy for the a bearings. Asked the group on the biplane forum and received some responses. Also sent a letter to George, the owner of MATCO (great guy!). Waiting for his response as well.
I'm to the point in my wheel and brake research that I've taken one of the wheels/brakes partially apart and slid some of that "apart" onto the starboard axel. All lines up... just need those 1/4inch bolts!
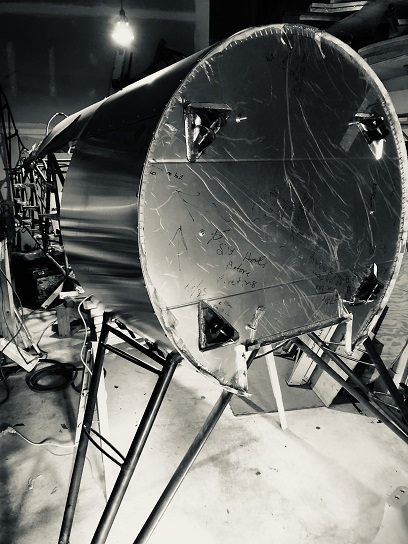
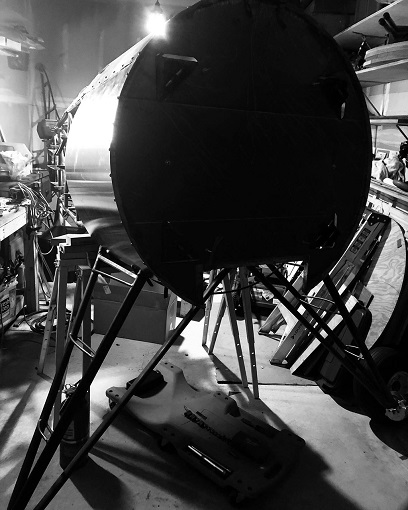
While waiting on the order (still to be placed) I attached the gear back on so that I could then re-attach the firewall. With the firewall attached, I re-attached the lower side panels and took a few beauty shots of BIG ASS BIRD. Looking good...
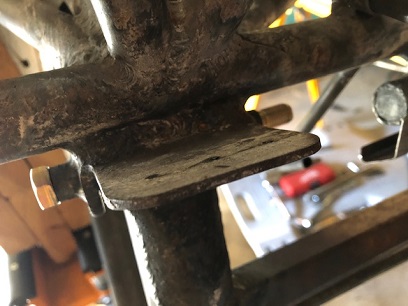
When re-attaching the gear, I had no problem getting the bolts in this time. A few taps with the mallet and both the 3/8inch and 7/16inch bolts slid right into place.
Photos show where I stand at this point in time.
Purty...
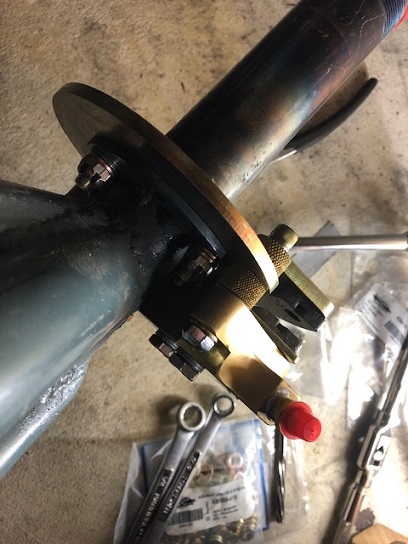
7/16inch bolt... tapped into place
Getting the brakes and wheels on...
April 11 - 16, 2022
Moments...
like these.
The more bits and pieces that I attached to the biplane's fuselage, the more real it seems to be.
Years of building parts, only to set them to the side (and hopefully finding them again when needed)... for another day. You work work and work and all you see is a larger "pile" of parts. Sure, you attach them by match-drilling them. But then you take them off so that you don't damage them while working on other parts of the biplane.
There are AH-HA moments all along the journey. But when those AH-HA moments come from the culmination of many of those parts and pieces being attached in ordered to take the next step... I'm at one of those moments now.
Attached, the brakes and wheels so that I can hang that BIG ASS RADIAL. Attaching, and making sure the sheet metal skins are just right... so that I can begin fabricating the engine cowling. Wow. WOW!
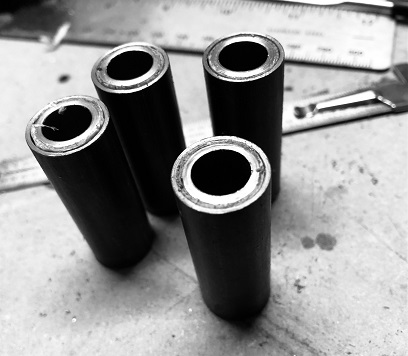
Of the many things I've ordered from Aircraft Spruce overthe last week (two orders, with two over-priced shipping charges) I forgot to order the stock for the bushings for the rubber mounts for the engine. I need 5/8inch stock that has a wall thickness that will allow a 3/8inch both. I refuse to pay $20.00 to ship a foot of tubing. So... Jerry needs to look for some existing tubing stock that will work. Found a piece of 5/8inch stock with a wall thickness thicker than I need. Figured I'd ream it out. After working on it for about 1/2 hour and only making 1/4inch progress I decided that reaming this tubing wasn't the best use of my time. Time to find another piece of 5/8inch tubing.
To make a long story short, I found a few pieces of 5/8inch tubing with a thinner wall. Found a piece of 1/2inch tubing with the correct wall to allow a 3/8inch bolt to nicely slide into it. So... I'll use these double-bushings for now to hang the engine to allow me to continue moving forward with hanging the engine. I'll order the correct 5/8inch tubing on my next "group" order to Aircraft Spruce (to help spread that larger shipping charge).
The double-bushings have all be lathed to the correct length and are ready to duty! I should have the last shipment from Aircraft Spruce on Monday that will allow me to attach the brakes to the landing gear which will allow me to attach the wheeels.
Just... about there...
By the way, I decided to use Mobil 28 Aviation grease for the wheel bearings. A lof of the guys on the forum suggested it, and George at MATCO pointed me to a page in the instructions that were sent with the wheels that lists several greases to use and Mobil 28 was one of them.
April 18 - 23, 2022
Messing about...
in planes.
A recuring thought I have is an often seen/heard quote from "The Wind In The Willows"... Mole, speaking to Ratty: "Believe me, my young friend, there is nothing, - absolutely nothing - half as much worth doing as simply messing about in boats (insert planes).
Funny... not haha, but funny that... "Wind In The Willows" was on the side of my T-craft when I bought it.
Well, this time it's messing around with brakes and tires for the biplane. Spent this week getting things ready to begin crafting the cowling. And... it looks like I'm still taking care of the wheel business. A LOT of learning about these wheels and brakes. Add on top of that, figuring out how to raise the engine high enough to lift it into place. My thoughts... attach a wood structure to the ceiling joist above the area where I'll hang the engine. Box it out at the top using additional 2x4's and 4x4's to strength it up. It's 12 feet in the air (the ceiling)... so the box structure would attach to the ceiling and come down about 4 feet. A set of 4x4's would then come up from the floor and attach to the bottom of the box structure. Support bracing would come off of both the lower and upper structures to keep things in place. A block and tackle would then be attached to the box structure at the 8' height. At least those are my thoughts for right now...
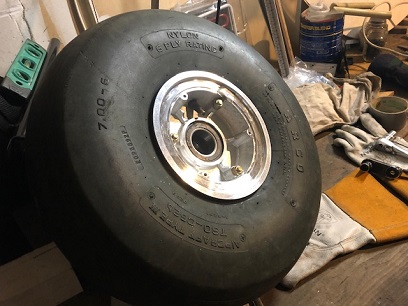
A little bit of wait time for the grease... which showed up early on Friday. The work session that day included putting on a pair of plastic gloves so that I could scoop a dollup of grease into the palm of my hand and then take the wheel bearing and push it into the mass of grease to fill it. Four times that, and I'm done with that messy job.
A little bit of learning the correct sequence for attaching the wheel/brake combination. With the MATCO's... or at least the ones I have. I need to put the disc in place, then secure the second pad (wrench it into place) then slide on the firsst wheel bearing, then the wheel, then the second wheel bearing... then secure with the nut. Finished.
Between the head scratching with figuring out how to lift the engine into place, and attaching the brakes/wheels... I filled up my work sessions on Big Ass Bird this week.


 It's about that time... time to start looking at things other than the things I'm making. I need to begin looking at the Jacobs, instruments, wheels and brakes...
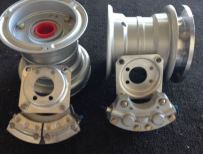 The two wheels and the two brakes are different; I have two different wheels and each of the brakes are different. Sure, both wheels are 6.00-6 and sure, both brakes fit each of those wheels. BUT, that's not how I roll (pun intended?).