Mantua, New Jersey
Original Site:
September 2004
E-mail: usav8or@yahoo.com
working on the...Radial Fuselage.
December 29, 2008 The Past.. Present... and Future ?
The Christmas season gives me a time to sit back and reflect on the past year. And for the past several years that's been taken up mainly by building this biplane.
Wished I had more time to build than just reflect... but it's all part of enjoying the season with family and friends.
I pretty much have all the floor/heel tray mounting tabs all welded into the fuselage. One note... check the placement of all pertinent fittings before securing/welding into place. I thought I had thought through all this but it reared it's ugly head yesterday when I played with the location of the front pedal pivots.
On the Standard Skybolt drawings all the tubes are located where they need to be for mounting all the major parts... not so with the Radial version supplement. You need to cross reference the Standard with the Radial drawings. And I'm cross referencing without knowing what is "missing" from the Radial version plans. I try to think these things all the way through but it just doesn't always connect. And so it is with the front pivot mounts for the rudder pedals.
I took the time to see where I wanted to locate all the mounting tabs for the front floor and the back heel trays. I temporarily rigged the pedals in the back and I thought I had done so for the front too. Alas... when I played with the mounting of the front pedals yesterday I saw that I needed to measure cut notch and weld in two tubes for the inner pivot tube for both pedals. (I had already taken this into account for the back pedals.) The forward end of these tubes fall directly on the spot that I had
just welded on a mounting tab. I thought real hard about moving it over just a little bit... but came back to the same decision as always. "If it's the right thing to do... do it." Don't be thinking that you just welded that mounting tab (or whatever you just did) and maybe.. just maybe you can get away with Jerry rigging it a different way...
Don't do it.
Take the little bit of time now to do it the right, and only, way.
So... Tonight I have the privilege of grinding off two of the four tabs I welded to the bungee truss that wereto secure the flooring in the front. (what's that old saying... ???? one step back, two steps forward... or is that two steps back one step... ???) I still have two mounting tabs at that front location
for securing the floor. If I need another one I'll just make and mount it. Not a problem.
After that small modification... I'll mount the rudder pedals... then maybe I'll get those tail feather finished so that I can free up that work bench down in the basement work shop.
In review... I've accomplished a lot this past year.
- Learned how to weld !
- Notched the tubing for the bungee truss and welded that up.
- A lot of CAD work; figuring bend allowance and set-backs.
- Notched the tubing for the fuselage... welded it up.
- Notched the tubing for the seats... welded those up too.
- Made a set of throttle quads.
- Cut out all the mounting tabs for the floor and heel trays.
- Welded those up.
- Cut and bent up all the metal ribs for the tail feathers.
- Bent the tailing edge of both elevators into place.
- I'll have the pedals mounted before the end of the year.
- Bought that 300 hp Jake, and inertia starter and crank.
For 2009...
my wish list.
- Start overhauling the Jake
- Finish the tail feathers
- Make the landing gear and attach it
- Purchase and install the tailwheel
- Attach most of the fittings to the fuselage
- Weld on the stringer stand-offs
- Make the fuel tanks
- Make the instrument panels
- Install the seat pans
- Fit up the flooring and heel trays
- Start putting the wings and ailerons together
I'd say I have my work cut out for me. The future is secure as far as having things to do on this biplane for the next year.
January 5, 2009 Finding myself in the same place.. pushing myself into the unknown...
Ahhh... I have the rudder pedals mounted up. All I need to do is ream the tubes and they'll be ready for flying.
I'm finding that after I completed the fuselage... these little bits and pieces that I'm making and attaching are so
satisfying. A day or two, or sometimes a week, goes by and I've completed another task on my way to making this dream
come true. The frame, although I broke it down into steps to make it palitable; drawing the layout on the table, cutting
the tubes for the sides and welding them up, sides completed and up on the table, finish tack welding everything into
place and the final welding up of the fuselage... it wasn't really finished until I welded up that last cluster at
station o.0.
Within a weeks time I had my floor/heel tray mounting tabs made. Another two days and they were welded onto the fuselage.
Another week goes by and I have my rudder pedal mounting tube placement figured out and finished welded. nice.....
A New Year ahead of me and plenty to do.
So much to do... wanting to do it all at once. I'll be starting back on the stabs/elevators. Just re-read the Skybolt manual
and a few articles by Mac to make sure that I'm not forging ahead into something that someone else already discovered was
incorrect or could be done a better way. I'll be gathering the material to make the jig for the torque tube controls. (I already
know that I will need to add an extra tube or two to the fuselage to mount the torque tube controls.) Trying to
get hold of an engine mounting ring so that I can start knocking the engine mount out over at Whitey's. Keeping an eye out for
engine/flight instruments. etc etc etc...
I'm finding that these misc. parts that I'm making have an order about them; one can't, or shouldn't, be done before the other.
Case in point... make sure that you have all you "inner" mounting tabs welded in before you weld on the "outer" mounting tabs.
That's just a little case... but you get the point.
I'm moving into unknown territory here again... good and bad thing. I don't want to hesitate on moving to the next step and holding
up the build process. Guess that's why I'm trying to make sure that I cover all my bases before going to the next step.
Ok... time to press on
January 8, 2009 Sometimes.. it's sooooo slooooow...
Thought I was ready to jig up the tail feathers, knew that I wasn't... needed to make something else before making the tail feathers.
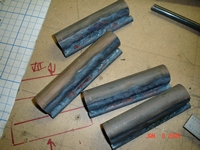
Need to make a few hinges before I could align all the pieces for the stabs and elevators. That meant welding up a few pieces (4" pieces) of 1" x .058 and .375" x .o65. I just now finished cutting out a few hinges from those pieces of tubing.
I'm there working in the shop... first I need to decide on how I'm going to cut these tubes into the .75" and .5" pieces for the hinges. I decided that the chop saw wasn't good for the task because it tends to wander, especially when cutting smaller pieces. Only other option would be to use the bandsaw or cut them out by hand
with a hacksaw. To hell with the hacksaw... that's why I bought the bandsaw.
Started measuring and cutting each piece out from the 4" pieces that I welded up. Takes quite a bit longer than I had anticipated and they aren't perfectly square. That only means more time to square them up
on the sander. In a two hour time period I was able to cut all nine .75" pieces and five .5" pieces. Next session I'll cut the rest out plus a few extra. Always that extra...
Per Randy, on the biplane forum, square up the hinges in matched sets and keep them together.
Just think, if I had a kit I could pull these pieces out of the box, clean them up a little and then weld them onto the tail feathers. Instead, I have about four hours already into making these and they aren't done yet. But ya gotta love it... learning more and more as I go along, even with making these hinges.
January 11, 2009 A little over 13 hours and I thought I was ready
Its amazing how much time some of these little things take. Well... not to mention the big things too.
These hinges... who would have thought that they would have taken this long to create ? Cut the tubing to weld together. Cut welded tubing into .75 and .5 inch sections. Ream .375 tubing to .25o. Square up set of three so that they won't bind on the metal spars. Clean flashing out of 1" tubing. NOW, and only now, am I ready to install these on the tail feathers, align them and then weld them up.
Here they are... Still need to cut the sharp edges off the hinge pieces so that the paint will adhere to them better. WAIT ! that statement that I just made about being ready for installing on the taifeathers... well, it's not right. Give me another 1/2 hour and they'll be ready... yeah... right...
Wonder how many individual pieces there are in my biplane ? Be interesting to know.
January 11, 2009 Finding a new home...
for the fuselage
aka, the Aerotruck
I have the fuselage all welded up and I've been itching to craft the main gear so that I can put it up on it's wheels and start messing around with hanging the Jacobs.
It's so tight in my one car garage that I wouldn't be able to work on the main landing gear unless I cleaned it completely out... and then it would still be tight. Denise had offered up a large building, thats empty, out back of her place. It's approximately 40' x 75'. PLENTY big enough to work on the gear in there. It's a little bit of a drive to go work on the plane but... I'm just happy that she offered up the room. I'll bring the pup with me when I go so that I won't be leaving him crated up each time I go to work on it.
OK... so I have a place to work on the main gear, which entails flipping the fuselage on it's back and building it right on the frame. My truck bed is 96" long... the fuselage is 168" long. Looks like there's going to be quite a bit hanging off the end of it. Figure I'd better move it during the day so that it will be clearly seen by other drivers. Don't need over two hundred hours worth of work getting pranged !


 Need to make a few hinges before I could align all the pieces for the stabs and elevators. That meant welding up a few pieces (4" pieces) of 1" x .058 and .375" x .o65. I just now finished cutting out a few hinges from those pieces of tubing.
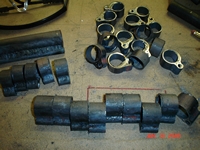 Started measuring and cutting each piece out from the 4" pieces that I welded up. Takes quite a bit longer than I had anticipated and they aren't perfectly square. That only means more time to square them up
on the sander. In a two hour time period I was able to cut all nine .75" pieces and five .5" pieces. Next session I'll cut the rest out plus a few extra. Always that extra...
Started measuring and cutting each piece out from the 4" pieces that I welded up. Takes quite a bit longer than I had anticipated and they aren't perfectly square. That only means more time to square them up
on the sander. In a two hour time period I was able to cut all nine .75" pieces and five .5" pieces. Next session I'll cut the rest out plus a few extra. Always that extra...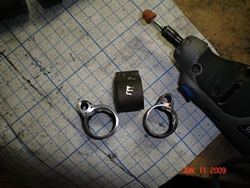 These hinges... who would have thought that they would have taken this long to create ? Cut the tubing to weld together. Cut welded tubing into .75 and .5 inch sections. Ream .375 tubing to .25o. Square up set of three so that they won't bind on the metal spars. Clean flashing out of 1" tubing. NOW, and only now, am I ready to install these on the tail feathers, align them and then weld them up.
 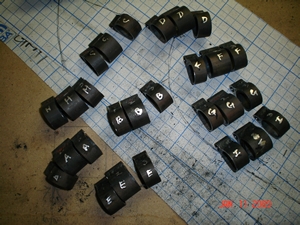 Here they are... Still need to cut the sharp edges off the hinge pieces so that the paint will adhere to them better. WAIT ! that statement that I just made about being ready for installing on the taifeathers... well, it's not right. Give me another 1/2 hour and they'll be ready... yeah... right...
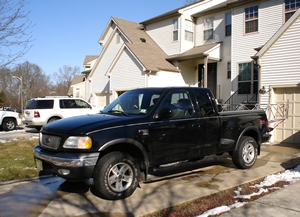 It's so tight in my one car garage that I wouldn't be able to work on the main landing gear unless I cleaned it completely out... and then it would still be tight. Denise had offered up a large building, thats empty, out back of her place. It's approximately 40' x 75'. PLENTY big enough to work on the gear in there. It's a little bit of a drive to go work on the plane but... I'm just happy that she offered up the room. I'll bring the pup with me when I go so that I won't be leaving him crated up each time I go to work on it.
 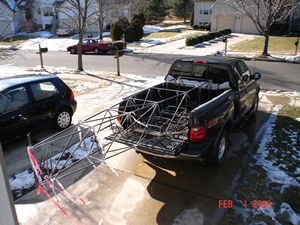 OK... so I have a place to work on the main gear, which entails flipping the fuselage on it's back and building it right on the frame. My truck bed is 96" long... the fuselage is 168" long. Looks like there's going to be quite a bit hanging off the end of it. Figure I'd better move it during the day so that it will be clearly seen by other drivers. Don't need over two hundred hours worth of work getting pranged !