Mantua, New Jersey
Original Site:
September 2004
E-mail: usav8or@yahoo.com
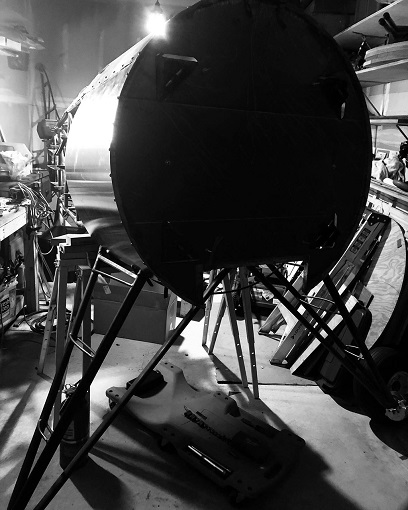
more work on the...Radial Fuselage.
April 18 - 23, 2022
Messing about...
in planes.
A recuring thought I have is an often seen/heard quote from "The Wind In The Willows"... Mole, speaking to Ratty: "Believe me, my young friend, there is nothing, - absolutely nothing - half as much worth doing as simply messing about in boats (insert planes).
Funny... not haha, but funny that... "Wind In The Willows" was on the side of my T-craft when I bought it.
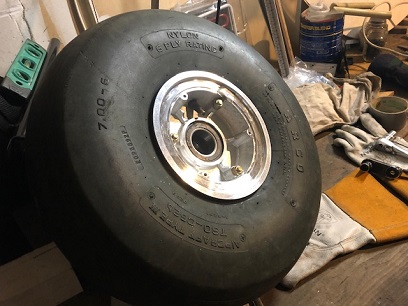
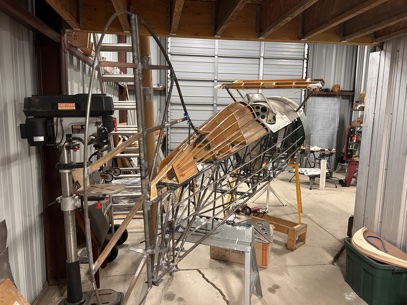
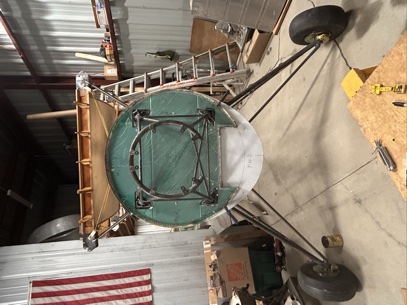
Well, this time it's messing around with brakes and tires for the biplane. Spent this week getting things ready to begin crafting the cowling. And... it looks like I'm still taking care of the wheel business. A LOT of learning about these wheels and brakes. Add on top of that, figuring out how to raise the engine high enough to lift it into place. My thoughts... attach a wood structure to the ceiling joist above the area where I'll hang the engine. Box it out at the top using additional 2x4's and 4x4's to strength it up. It's 12 feet in the air (the ceiling)... so the box structure would attach to the ceiling and come down about 4 feet. A set of 4x4's would then come up from the floor and attach to the bottom of the box structure. Support bracing would come off of both the lower and upper structures to keep things in place. A block and tackle would then be attached to the box structure at the 8' height. At least those are my thoughts for right now...
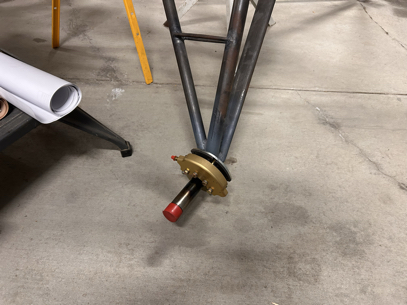
A little bit of wait time for the grease... which showed up early on Friday. The work session that day included putting on a pair of plastic gloves so that I could scoop a dollup of grease into the palm of my hand and then take the wheel bearing and push it into the mass of grease to fill it. Four times that, and I'm done with that messy job.
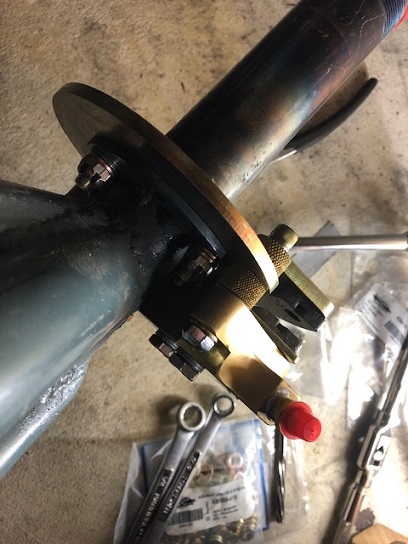
A little bit of learning the correct sequence for attaching the wheel/brake combination. With the MATCO's... or at least the ones I have. I need to put the disc in place, then secure the second pad (wrench it into place) then slide on the firsst wheel bearing, then the wheel, then the second wheel bearing... then secure with the nut. Finished.
Between the head scratching with figuring out how to lift the engine into place, and attaching the brakes/wheels... I filled up my work sessions on Big Ass Bird this week.
November 28, 2025
More than lifting...
It's progress.
The day after ThanksLiving, and yes, I spelled ThanksLiving correctly. Been Vegan for sometime now. No animals were hurt in the making of our ThanksLiving dinner. [thankyouverymuch.]
The only day in the coming days where the temps are supposed to, well... close to 60. Low 50's at best, but still nice inside the hangar.
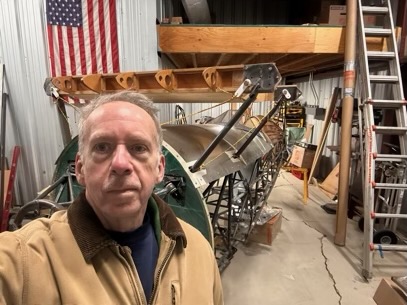
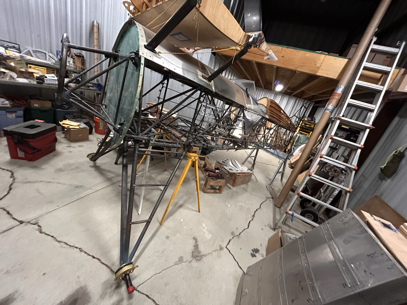
Opened the door to the hangar and yes, BIG ASS BIRD is still sitting there up on the saw horses. My 40 mile hike to the airport is for two reasons today... get the exact length of the bolts for the mounting of the throttle quads, and to lift the front end of the fuselage up soes I can attach the front landing gear.
- 3/16 x 2.6625. Now to order the (8) bolts with nuts.
- Lift of the fuselage... just about there.
Nobody at the airport today... nooooooobody at least that I knew. Black Friday... I get it. Day after ThanksLiving... people away visiting family... I get it.
Me, lifting the front end of BIG ASS BIRD with rudimentary tools, aka a 2 ton Diehard bottle jack, dead-man, milk crate, 2x4's, and some good ol' ingenuity. 2.7hrs later and still need to lift that puppy up a little bit more; say... about 15 more inches.
That's it, folks... Next week I hope to be back visiting with BIG ASS BIRD and putting a few more hours on the project.
HAPPY THANKSLIVING, Everyone!
December 6, 2025
WAIT!
PUT ON THE BRAKES!
LOVE IT!
More time spent with BIG ASS BIRD. This year's hours haven't added up to much but they are all hours moving forward!
Out to FNL to work on BIG ASS BIRD.
The Plan:
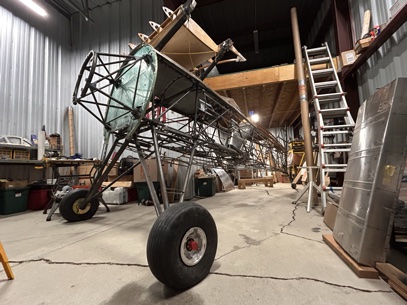
1. Mount the landing Gear
2. Mount the brakes
Used the locating pins I made for the motor mount (locating pins for aligning the holes of the part with the holes of the bracket.) This help tremendously since I had to make sure the front bracket and the rear bracket were aligned before inserting the hardware.
The locating pins were the only easy find... BUT, I did find the exact hardware for the front and rear mounting points; AN7-42A for the front, and DAMN! I didn't write down the rear ones (Note to Self.)
I have an Aircraft Spruce amount of hardware that I need to label and log into some sort of spread sheet so that I know what I have instead of just buying new all the time. Something good to do on those cold winter weekends... until I get a heater for the hangar. :/
Not long after I finished mounting BOTH brakes I saw that I mounted the incorrectly. That'll be a quick fix before I mount the tires to the brakes next time out. :\
MISSION ACCOMPLISHED!
Don't look! They're on backwards! :/
By the way... this should be under thewheels.html me thinks. More mounting of the brakes to BIG ASS BIRD than the fuselage. Think I'll put it there as well.
Until next time...
December 27, 2025
Thinking... just thinking
of mounting the engine!
Back up to Northern Colorado Regional Airport, aka BIG ASS BIRD...
Feels good to be working on her on a more regular basis. Although, looking at the hours for this year... I've only put 20 some odd hours on it. NOT MUCH! But it's that inertia that gets you going again from a long hiatus. I figure that I've lost putting on close to six - eight hundred hours on BIG ASS BIRD from the move. But that's water under the bridge. Moving onward and upward and looking forward to 2026.
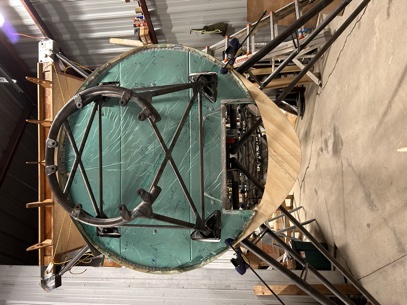
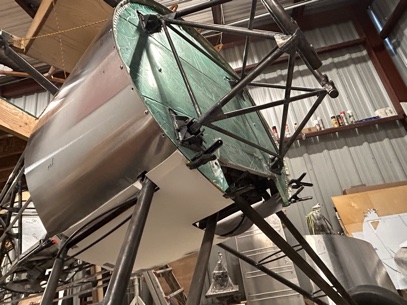
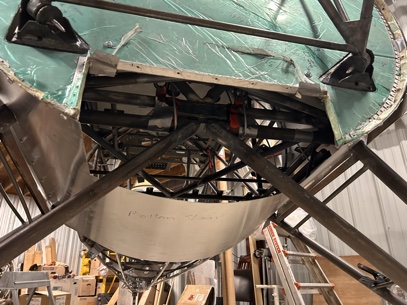
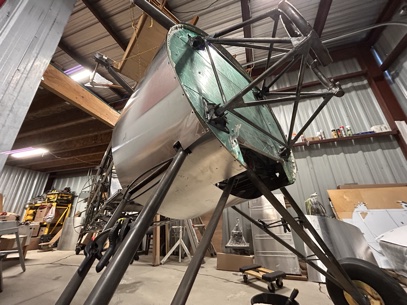
Today's agenda was to fix/repair/bend back the belly former(s) that were bent when moving the fuselage from the POD to the hangar. That's it. To my surprise I was able to tap the one belly former with the deadblow hammer and within about an hour and a half had everything back to where it was before that fopah. All three belly stringers are in place AND straight! Thank you LORD.
Caught off guard I had to think of a few other things to do to fill in my day. Marked and trimmed down the pilot's port side heel tray (having welded in the support brackets for the foot pedals... the front end of the tray was too close for re-attaching). Played with the plywood pattern for the radial engine's air scoop. Looking mighty fine!
Trying out the test fit of the air scoop pattern got me to thinking of the next steps for BIG ASS BIRD.
- Lift the engine into place?
- Which means getting an engine lift to lift it
- Sand bags for the tail to keep from nosing over
- Need the bolts for attaching the engine mount
- Need the bolts for attaching radial to mount
- Fit up round nose bowl
- Figure out sheet metal for engine compartment
- Etc etc etc
Scouting around the fuselage... to see what else I could do with what's there. [1. need rubber for the seal on the faceted windshield. 2. need 1/4" rubber for landing gear pads. 3. fit and attach leading edge to UWCS. 4. finish welding areas on fuselage. a. walking beam b. ends on several belly formers c. areas on engine mount brackets d. tail post hinge attach points e. etc].
I've got some work to do before the next hangar session...
A la prochaine !
January 3, 2026
Thinking... no, MORE than just thinking
of the air intake!
HAPPY NEW YEAR! 2026
The plans for lifting the engine into place are still on. Need to ask around to see if anyone has an engine hoist that will raise that high. I remember Ted mentioning that one of the guys had an engine hoist... just need to make sure that it is large enough to get that 500 pound beast into place.
Started playing with the air intake look again. I have it narrowed down to two looks. The smaller one that I had down-sized it to, and the newer improved version of the larger intake more llike the P-47 ThunderSkybolt I envisoned back 10 years ago on January 27, 2015.
Decisions... decisions.
I'm leaning HEAVILY on the larger air intake... it just SCREAMS -47! But, if going down that road I'm going to need to re-think (aka re-design) the look of the belly. AND, figure out how to 'build' the 'look' around the landing gear. I'm pretty sure that I'll be going down that larger air intake path.
And in doing so... CHALLENGE ACCEPTED!
This is it!
Until next time...
January 17, 2026
Working on the design...
of the air intake!
Okay...found a FREE open source 2D CAD program called LibreCAD. I was forced to look for the program because my DeltaCAD program is on a disc and my 6 month old PC laptop, that I purchased for the drone business, doesn't have a CD slot.
Okay... so, first I need to find the CD (which is with the CD with the blueprints for the Monocoupe and Travel Air Mystery Ship, CD for the DreamWeaver program for website design and the CD with the Jacobs manual.) After going through every. single. box. in the garage that still has everything stored for the house that we didn't have room to unpack (we're talking a lot of boxes) I found the CDs I was looking for. Okay... so now I need to purchase the CD player so that I can load the program onto the laptop. Purchased one on Amazon and two days later I have the CD player. During that time I played around with the LibreCAD.
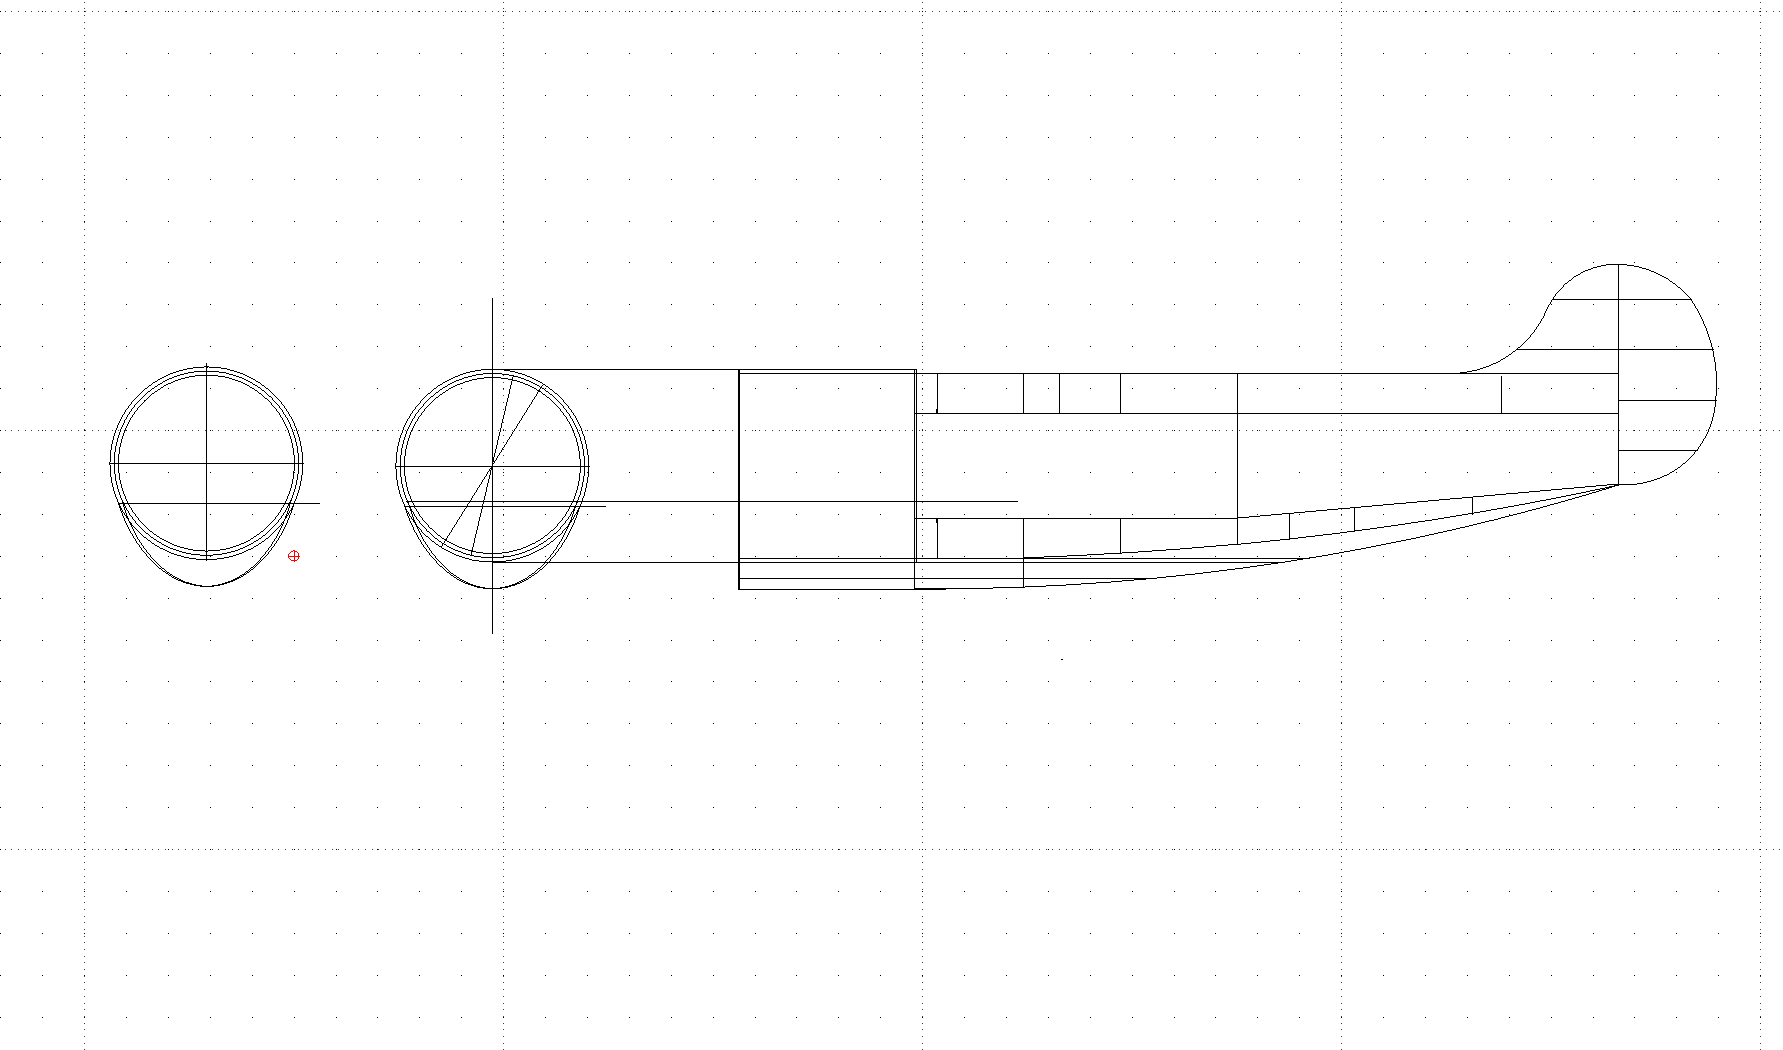
Okay... it wasn't as easy to use as the DeltaCAD but it kept me moving forward. What I did like about it was the fact that it didn't distort the images like the DeltaCAD would do. Example: On DeltaCAD the fuselage looked more like the 1932 Northrop Gamma (if you're not familiar... it has a really looooooong front on it) than the actual look of the radial Skybolt. LibreCAd... it looks like it does on paper as in the program.
Okay... so I received the CD player... plug and played it in and everything is working fine. BUT, I'm liking that LibreCAD better than the DeltaCAD. Delta is a whole lot easier to work with (so far, but that's probably because I used DeltaCAD for years) but I'm just not happy with the look of it (program vs. paper) and the lack of ability to do what I want to do at the moment (create the shape of the air intake... creating the curves, etc.)
Okay... so I'm putting an ass-load of hours designing the air intake (most of it learning the program). If it's hours that goes towards moving forward with BIG ASS BIRD it's added to the Build Log.
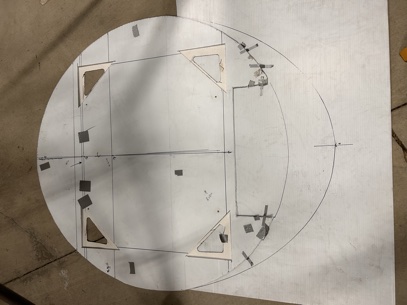
Okay... so ya'll might be asking why I spent all that time on designing the air intake when I already have it drawn out on display board. 'Cause, I needed to figure out how this was all going to flair into the belly of the beast.
Alright.... here's what I have so far. And I think it's pretty DAMN close to what it's going to look like.
46" cowling
44" firewall
6.5" air intake
Looking more and more like BIG ASS BIRD's grandpappy...
Until next time...
January 31, February 3 and 7, 2026
Ratchet straps...
and present participle.
Okay... it's not ALL about hanging the Jake. But a large part of the hours spent these past three visits have been leaning HEAVY on getting things ready to hang that beast.
On January 31st I continued working on the shape of the air intake. STILL not happy with the look of it where it comes from the sides of the ring. I know where it needs to start (dead center top to bottom on the ring) but for some reason the two patterns I've made are hitting that 46" wide width. Each time I position the pattern in place under the ring the top (meeting point) on the pattern still falls below where the diameter starts to turn in. So... I've got this little bump on the side before it proceeds down. THIS SHOULDN'T be taking me this long... Next up is the third iteration. [Okay... off my soapbox.]
I took measurements for lifting the engine into place using an engine hoist. Top of cylinders to where the Jake bolts into the engine mount is 13 1/2inches. With BIG ASS BIRD sitting with its tail on the ground, the bolt holes in the top of the engine mount are 65" from the ground.
(Wait... one more thought... maybe I need to start the air intake fillet a little above the center point? Maybe an inch or so? Let me try that out for size.)
Tuesday, February 3rd I headed over to FNL for the EAA Chapter 515 meeting. Headed over about 1 1/2 hours early so I could spend some quality time with the bird (since I was driving all those miles over). More thinking about the air intake while I hunted down the hardware for mounting the Jake to the engine ring.
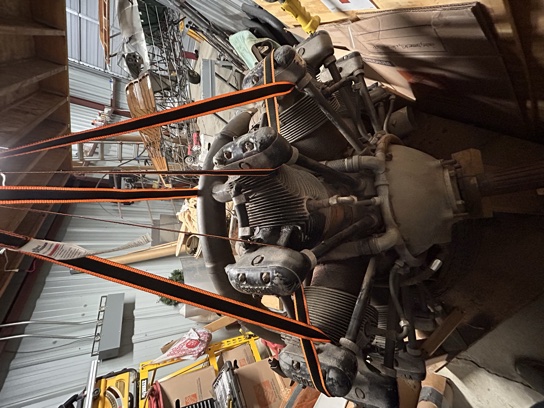
Saturday, February 7th I spent near most of the day working on her. Most of that time was spent getting the engine ready to be lifted. With an old, used Jacob, it's not a matter of uncrating (present participle) and hanging it (don't get me wrong, I know with a new engine there is a bit of work to mount it to the engine mount.)
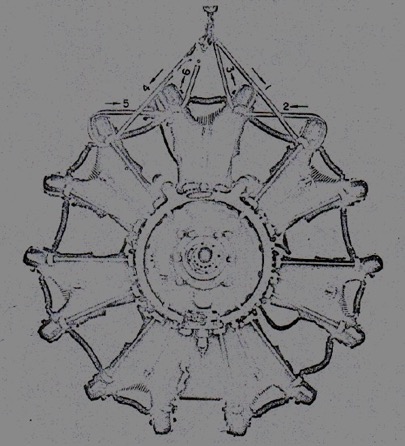
First up was to see what I had to do or should I say how to lift the engine. Is there an eye bolt that is used, what? Found the answer in my Jacobs Operations Manual for the R-755A, R-755B (mine), and R-755S, page 28. I did this in the comfort of my warm apartment. See image below. The original on the CD was so light you could barely read the numbers and see how the strap was wrapped around the cylinders.
The image is dark for your viewing
To be able to wrap the lifting sling (aka ratchet strap) I had to unbolt, unscrew, disconnect whatever was holding them onto the engine. The nuts were relatively easy to unbolt. Two screws holding the two smaller baffles were major pains in the ass. A number of WD40 applications and locking a pair of locking pliars onto the screwdriver for some torque, I was able to break loose both of the machine screws. At times like this you realize you still have some of the tools you need back at home...
With the baffles off I did a trial run of threading the ratchet strap in and around the top three cylinders of the Jake. Took a few photos. Done! Believe me it took me quite a bit of time to remove those five or six baffles.
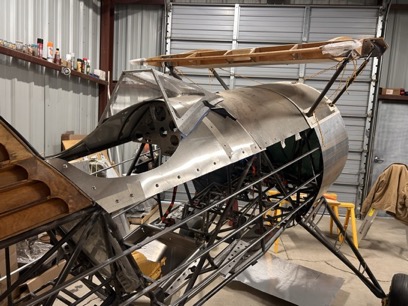
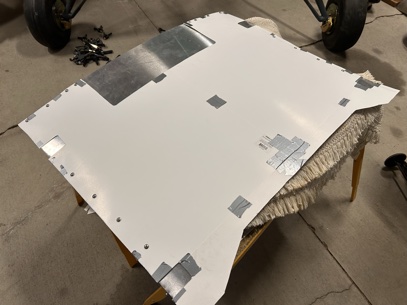
With the sun still burning high enough in the sky I had time to connect a few of the skin panels onto the frame. Port and Starboard front panels went on easy enough. Belly panel... ahhhh... it went on REAL easy when the main landing gear wasn't attached. Looks like I need to make a pattern of the belly panel and figure out where all those holes and cutouts need to go before re-attaching it again.
>
Hope to get some additional hardware counted this week at home. Buy a few sheets of display board (and it ain't cheap... probably cheaper to buy sheets of aluminum)
See ya in about a week...
February 14, 2026
With a build that is this long
ya need to be reminded about a few things.
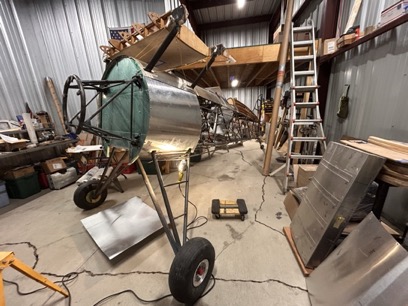
If you didn't read the above post... one of the thing I did last week was to test fit the belly skin on the fuselage. It fit last time, why wouldn't it this time, right? It didn't!
After two or three seconds of head scratching I figured it out. I DIDN'T HAVE THE MAIN LANDING GEAR ATTACHED WHEN I FITED THE BELLY SKIN TO THE FUSELAGE THE LAST TIME.
Time to make a pattern to test fit to the fuselage, with the estimated measured hole cut outs that need to be made in order to be able to attach the skin to the belly. On several taped together display boards I traced out the existing belly skin and marked where the screw holes were. Rough cut the paper pattern X-cut where the screws are to go. Then started the process of measuring and marking holes where the cut outs were estimated to be. Cut out the marked area. Pushed a handful of screws into the screw hole X's for pattern alignment. Attached paper pattern to the fuselage with screws using said screw hole openings AND it looked pretty damn good.
Transferred those cut outs onto the aluminum belly skin AND (fingers crossed) attached it to the fuselage. Wa Freakin' La! ALMOST a finish fit. All I need to do is open up the openings around the two front gear attachments and open up the bottom front air intake opening and I think we're ready to make the final piece. There's still a lot of work to be engineered with the belly skin; aka figuring out the tunnel for the air to escape and then figuring out how to attach and seal that so I don't get a blast of 145 mph wind through the fuselage. (that's a pretty big block of letters I just typed, eh)
One other thought... it's a VERY tight fit getting the belly skin in place (if I'm not REAL careful I'll be scratching painted tubing and the firewall.) Maybe, if possible, making that pain in the ass section of the belly skin detachable so that I can put the skin in place THEN attach that pain in the ass possible source of scratching BIG ASS Bird piece of the skin.
One of those... I still have some daylight to burn tasks... Looked at the price for replacing the hardware for hanging the Jake this past week and it's like 30-some dollars for eight bolts with washers and nuts. Figured I'll wait until I get a bigger order before buying them to try and spread out the cost of shipping. In the meantime... I spent about a half and hour today cleaning up the existing hardware just soes I can hang the engine right now.