Mantua, New Jersey
Original Site:
September 2004
E-mail: usav8or@yahoo.com
January 10, 2015 Pounding on anything...
Never a good idea...
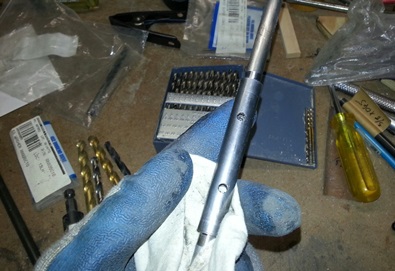
More work on the trim/servo system. Needed to slide the 3/8inch tubes onto the center trim shaft bushing. Tried pounding it on which was a BIG mistake. (ya know... I knew this before I even started pounding on it) All my pounding only slid it 1/2inch of the 1 1/2inches it needed to go. Spent quite a bit of time (aka... a lot of time) getting the now stuck bushing OFF the 3/8inch tube. Decided that I needed to file/sand the ends down so that I could slide the tubes into the bushing.
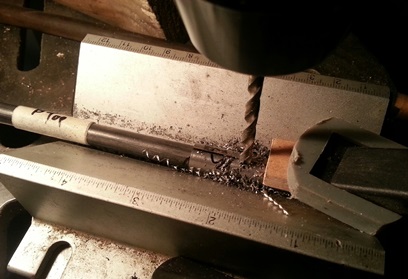
Took some time, but I finally got both to the point of being able to slide in with a little resistance. These now needed to be drilled for a 3/16inch bolt. Used the centering jig and drilled the holes through both tubes.
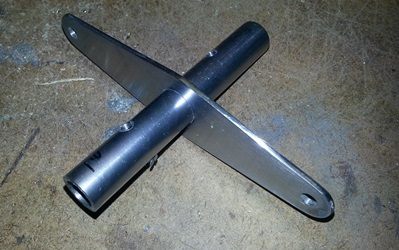
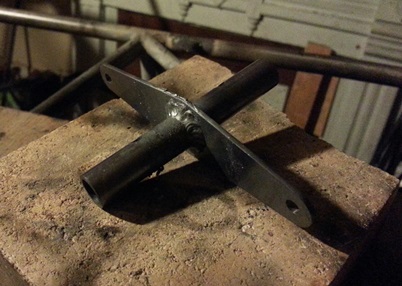
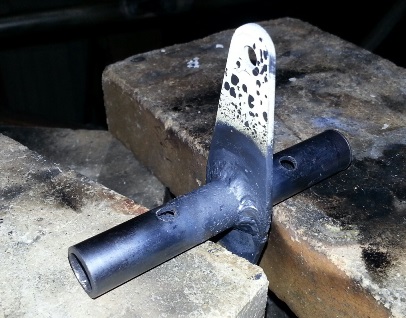
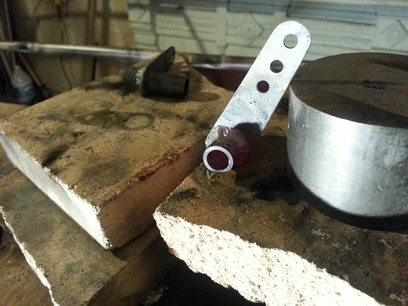
Needed to weld the bracket onto the connector tube assembly that I just drilled. Off-set that bracket as to avoid the push rod connection for the elevators.
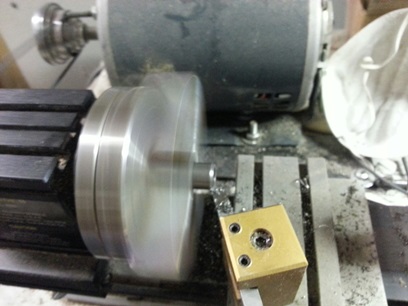
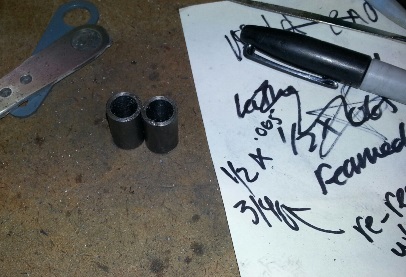
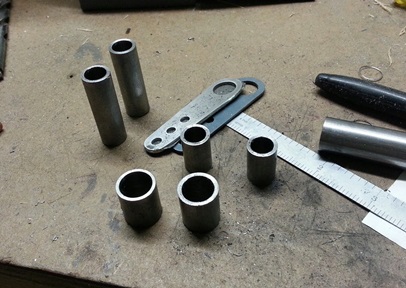
Need to cut a few more bushings for the system from the 1/2inch x .o65 tubing. Marked then rough cut to size. Took all four to the microlathe and cut to size. Still need to re-ream the pieces.
Workin' it.
Two of the four bushings.
January 13, 2015 Sometime you feel like you're close to it...
but you're NEVER defeated...
I read something in one of Mark Nepo's books that wasn't an answer to a question I had but was an answer... "...we are not defeated when we are worn down, just exposed anew at a deeper level."
(I'm writing this on Wednesday night 1-14-15)
I read these words of enlightenment this morning. Kind of put things into perspective with my fustration of working on the biplane last night. Every so often I get fustrated with the "un-necessaries" with the build and it just chewing up LOADS of time. Last night I discovered the the port horizontal stab was about 1inch low at the tip. Needed to fix that so I figured... I'll use a ratchet strap to put some pressure on the stab (connecting it in two spots on the horizontal stab and two spots on the vertical stab) heat two of the tubes and let it pull itself back into position.
For the life of me I couldn't get that DAMN rachet strap to unfurl it's strap !!! It was starting to piss me off. I don't have a lot of time to spend on the build and here I am f'in with this "un-necessary" ! I just had to put it down... back away from it and think of happy thoughts. Got back to thinking of whatever else I could do to fix the situation... Decided that I'd use that 8foot long, square metal tube I have and strap it across both stabs and duct tape it up. Heated it up once I had things in place and left it there. I'll do another re-heat again when I'm back on Woodstream Ct.
Still needed to cut down the 5/8inch bushings from the stock that one of Andrea's guys reamed to 1/2inch for me. Did that and it was close to 2hours of time I spent on it. Two hours. Yeah... two hours and I got two bushing from the deal. Nice, eh ?
Bottom two bushings are the "two bushings".
January 15, 2015 90 percent prep...
the rest is just labor...
Worked from home today... coming down with something that
I don't want to bring to work, but I'm not feeling so bad
I don't want to work. Took advantage of being home and went
out for a new O2 cyclinder today. I was getting pretty damn
low and these places aren't open on the weekends.
A lot of prep work that goes into some of these puzzle pieces.
The trim/servo system is one of those with a lot of prepping.
Ya think you're there, but then... more prepping.
And so it was tonight. After re-heating the tubes for the
horizontal stabs to work them level (again)... I worked on the bushings that
get welded into the horizontal stab ribs and the tubes that
the servo horns get welded to. Yep... then welded them onto
the bushings.
Was about ready to go down into the basement work shop and
sand the trim shaft tube down a little so that it would slide
nicely into the bushings but got a text from Andrea... she
left her keys at the house and wouldn't be able to get into
the house until I got home. It was about 6:30PM at that time
so I packed it up. Cleaned up. and... headed back to Lombard
Street to let the pup out and Andrea in.
January 17, 2015 99 percent...
sanding...
Saturday morning... work on the HOUSE first. I've been wanting
to replace the trim around the garage door for a year now.
I had already cut down the wood from existing boards I had.
and I painted them already. It was just a matter of taking
the old off and putting the new on.
Several hours later and I'm done with it. You might have
guess it wasn't as simple as that. But this ain't a blog about
home repair, is it ???
Just a little bit of time to work on the biplane project today.
Still working on the trim/servo system.
Spent the hour and a half of time I had on lightly sanding
down the 3/8inch tubing so that the reamed out 1/2inch tubing
would slide on. That's it ! First I made sure that the tubes
were cleanly reamed. Made sure there were no "edges" on the
openings of the tubes and then... sanded. Sanded some more.
Sanded some more. Sanded some more. Sanded some more. Sanded
some more. Sanded some more. Sanded some more. Sanded some
more. Sanded some more. Sanded some more. Sanded some more.
repeat...
and... I still have one of the areas left to sand (two areas on each of the two servo trim shafts). Got three
of them finished, though.
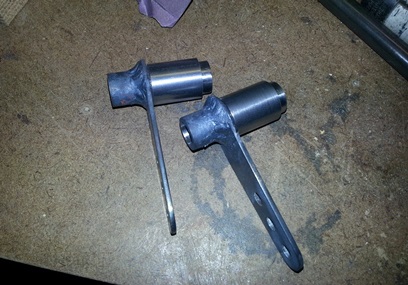
Inner starboard bushing/beraing.
Outer starboard bushing/bearing with servo horn.
Starboard side reporting for duty.
January 20, 2015 I'm still...
sanding...
Getting time... but not much time on the build lately.
Tuesday night and I'm headed over to Woodstream Ct. to get some time on it... We haven't shopped for a few weeks (aka two weeks) and we're pretty lean on supplies over on Lombard. I mentioned that I would pick up a few items to hold us over until the weekend.
Discovered today that it's suppose to snow 1-3inches tomorrow. When they call for snow showers around here people go out in masses to get milk, eggs and bread. It's unbelieveable... the bread area usually looks like a swarm of locust have passed through. So... I'm thinking I'll get the shopping out of the way 'cause who knows how bad it will be with all THOSE people. Got to the ShopRite and nothin'. Hardley anyone was in the place. Good for me.
Even with the quick turnaround with shopping I still didn't get started on the biplane project until 7:30PM. DAMN ! that shrimp stir fry we were thinking of having isn't gonna happen tonight... by the time I get home, peel the shrimp, blah blah blah, it'll be after 10. I'll need to think of a plan B.
Plan A for the project was to get the bushings working on the servo/trim shafts so that I can level the horizontal stabs and tack the bushings onto the metal ribs. Worked on it until they were tight but smooth. Hooked it all up on the tail group and... damn ! the starboard servo tab bushing still needs to be worked on. Still needs about 3/8 of an inch to allow the bushing to slide onto the end of the tube into the correct location. Even though I hadn't put a lot of time on it... it was getting late.
Time to pack it in and call plan B into action. Andrea had ordered egg plant parmesan sandwiches from Piccaco's Pizza down the road from me. Thought I'd surprise her with a egg plant parmesan sandwich for dinner. Call Piccaco's and 15 minutes later I was driving back to Lombard with a few sandwiches and a few bags of groceries.
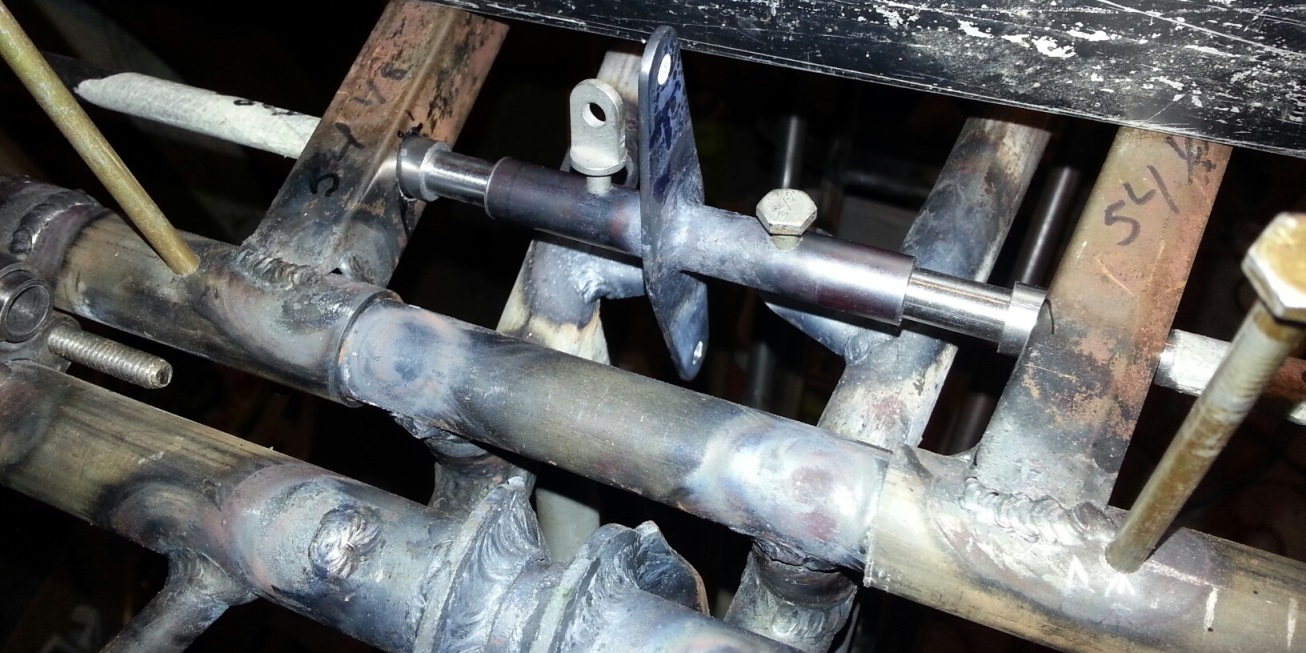
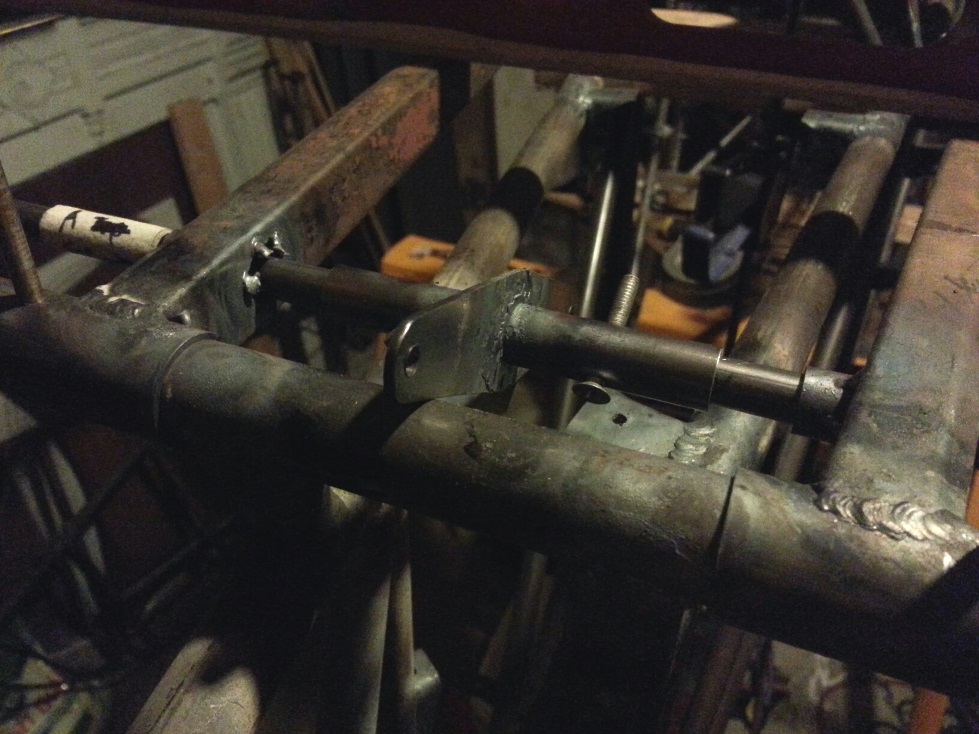
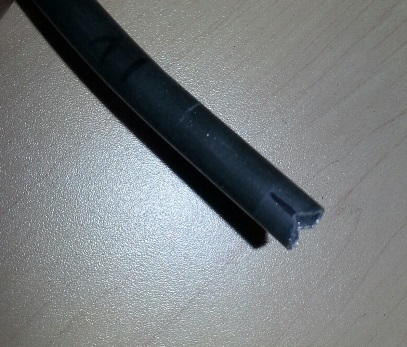
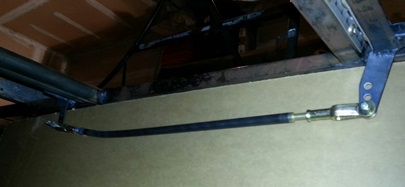
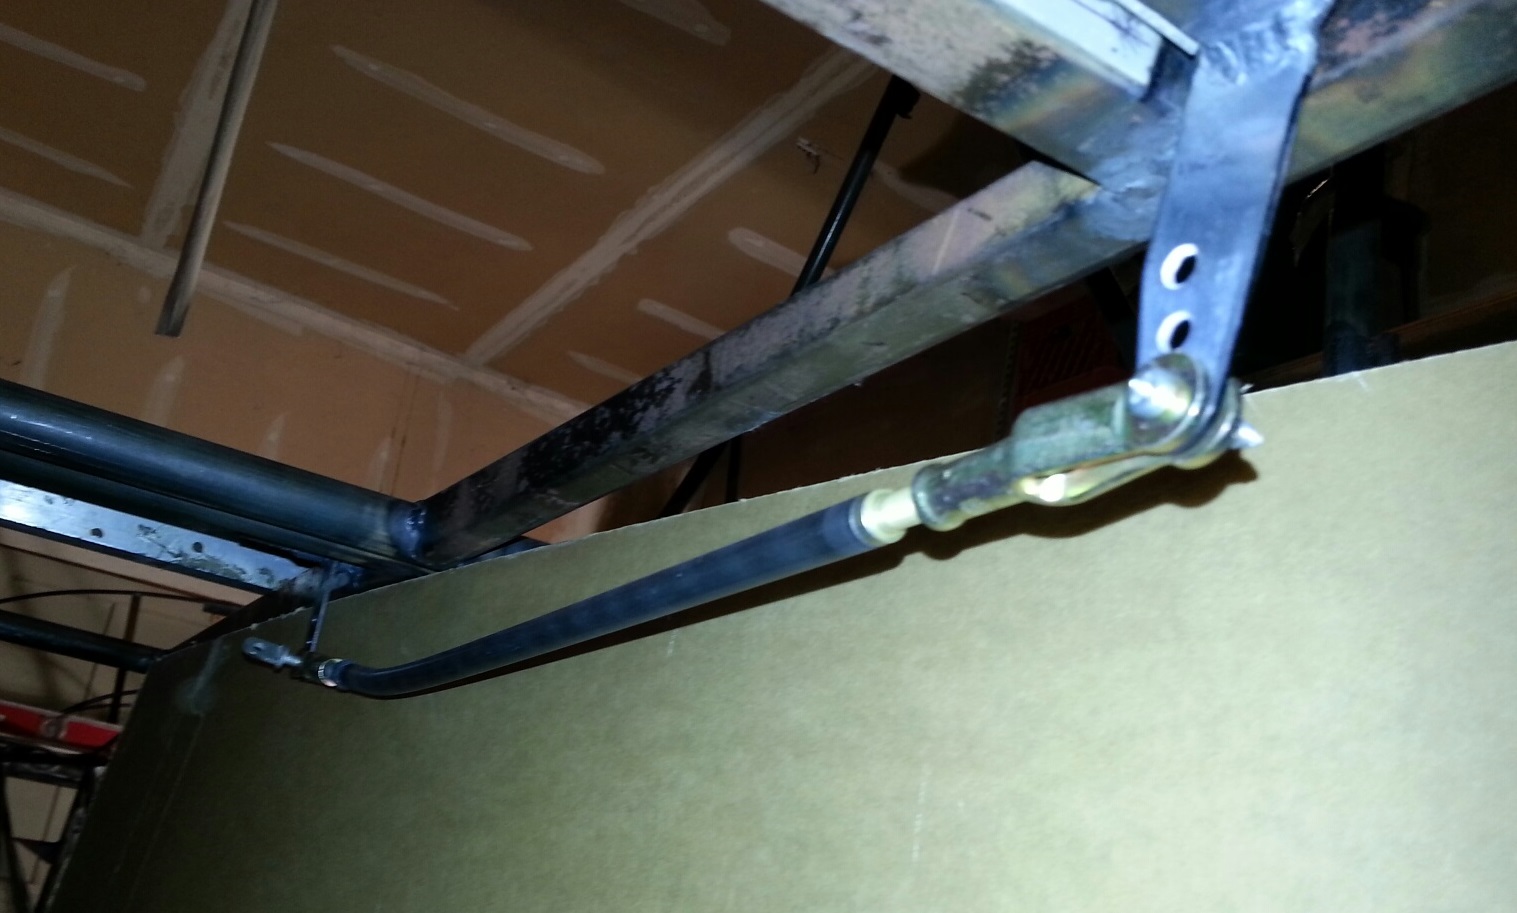
Note: Bolts in image below are just holding things in place while I work on the system. They're the correct diameter... nothing else about them is correct.
System hooked up. (click on photo for larger image)
January 22, 2015 Actually, any amount of time...
isn't enough time.
An hour and a half on the biplane and it's not seeming like enough time on it each time. BUT... the good thing is, there aren't Loooooong periods of time between working on it where I would forget where I had left off.
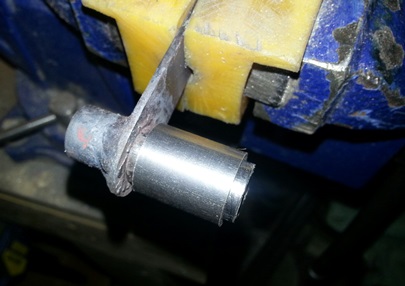
More work on the trim/servo system. Need a bit more sanding on the shaft where the servo horn slides on. With that lightly filed and then 100 grit then 500 git sanding... its ready for duty. Things need to be leveled up...
Taking the time to level things up takes some time. And I'm concerned with 10ths of a degree here. Get it as close as humanly possible and that'll be that. But... I had to leave off before getting it to my humanly possible level. Before leaving for the night I took a thin piece of ply... held it up to both servo horn/tab horn spans and marked them. I can play with these layouts to figure out what degree bend will work in for the tab link arm.
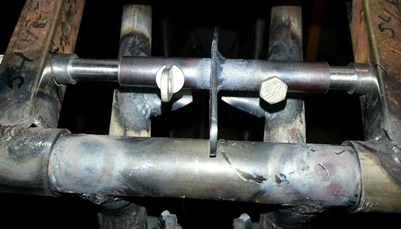
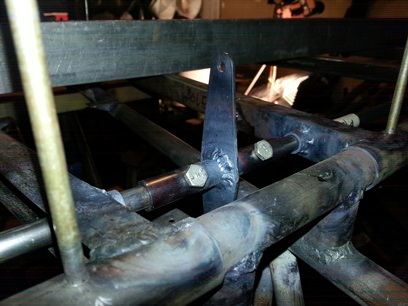
As usual... here are a few photos:
Hardware being used won't be used for final assembly.
Scratched piece in the upper 1/4 of photo
is being used to level the stabs.
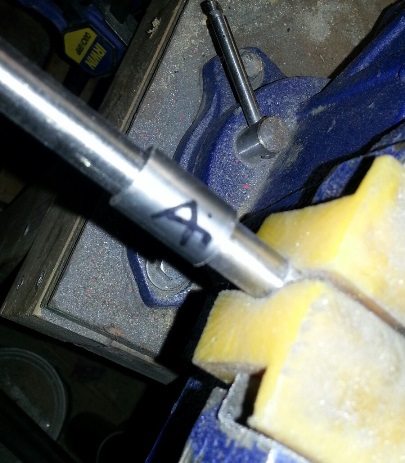
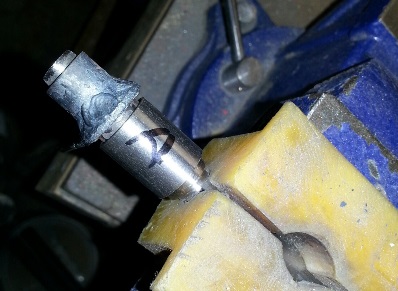
January 23, 2015 Lines, angles and degrees...
and no, we're not in Geometry class.
Friday night... late, and into the morning. Andrea went to bed a short time ago and I'm watching TV. I can't just watch TV !!!
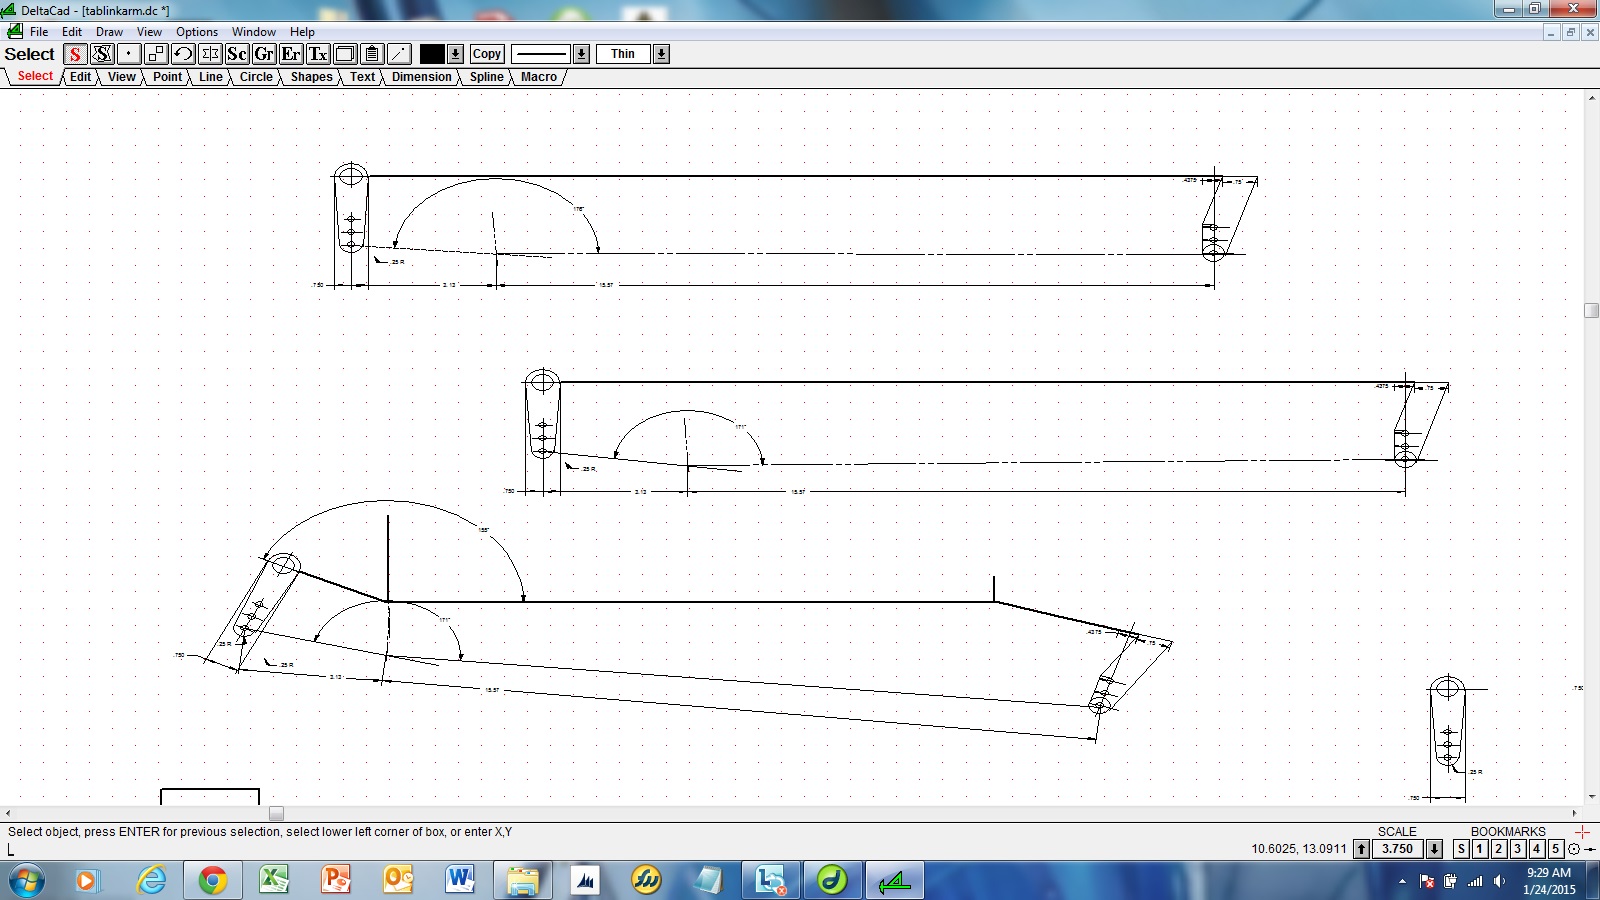
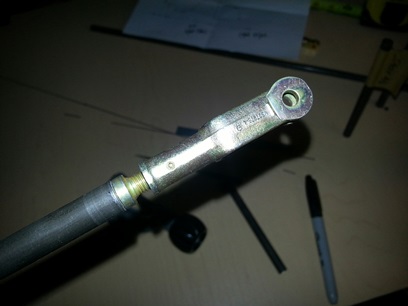
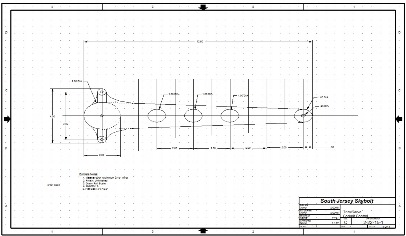
Pulled out the computer and did something on the biplane build. Earlier today I had emailed Eric, aka taff, on the Biplane Forum. Asked him about the angle on the tab link arm for the trim/servo system. He checked. Got back to me. He said it was around 7 1/2degrees. All right ! Thank you, Eric !
What's the computer for ? I wanted to throw the dims up on the DeltaCAD program I have to take a look see... and see how long each length of the bent tube would be. and... The results are in.
With a seven and a half degree bend, the short arm (from bend to hole) is 3.13inches and the long arm is 15.57inches. They're not right on the money but they'll get you close.
Second tab link arm is the final layout with the 7 1/2degree bend.
Click on image for a close-up.
January 24, 2015 A few steps back...
and here I thought I was doing so good.
Started off today doing real good... The fuselage was all set up nice and fine; leveled both ways. The entire trim/servo system set in there so nice like...
Tacked all four bushing in and that's when all hell broke loose. The actually tacking of the bushings went well. After each tack I'd turn the shaft to make sure it didn't get welded in with that tack. All was find until the end. The starboard shaft came off without a problem. The port shaft... another story.
The outside bushing wasn't an issue. The inside bushing, I'm not sure what went wrong. The shaft would hardly turn in the bushing. Taped and tried pulling/turning it out. Tried taping it out. On one "tap" it broke the weld tacks. DAMN ! Took it down stairs to the workshop and tired everything but nothing would make that puppy come off of the shaft. Got it right to the end and that was it. Nuthin' ! Another one of those learning experiences...
Okay... I'll remake the shaft... which I did. Set it up with the connector tube assembly... aligned it for drilling and then started to drill. THAT's when ALL Hell broke loose... it didn't happen quick, or with a BANG ! it kinda just happened. The bit decided to go off center ('cause I was drilling a round frickin' tube and didn't use a centering bit thinking the existing metal hole would keep it straight) and started to have the outer hole of the connector tube assembly for lunch. To the layman... it wasn't real bad. Chewed the top corner off of it. But... it make the piece unserviceable as they call it in the industry.
Time to make everything except for a few bushing and the servo horns. No pictures of the horrific incident. You'll have to take my word.
and... on this new connector assembly... I kinda remember something about extending the one side of the connector tube so that the system isn't as sensitive... I'll make that change as well.
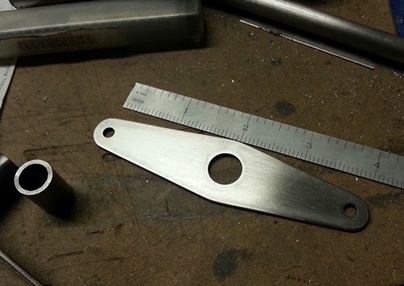
January 29, 2015 Larger...
and less sensitive.
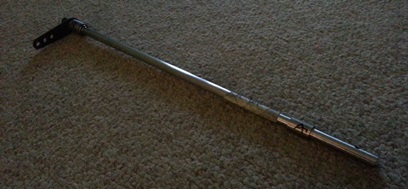
Re-making the trim horn gave me the opportunity to make it larger, per the suggestion from Hal Wallace. The original 3inch between the 3/16inch holes was a little sensitive. Opening this up to 3.75inches makes it a little less so...
I ain't gonna repeat myself on what I did that I did before. Here's a photo from 1.4hours of work. You get the picture.
New trim horn. Three-quarters of an inch longer, hole-to-hole.
February 3, 2015 A reason for everything...
even screwing things up...
It has been a few days since last working on the biplane project. BUT... I was able to put in a number of hours on it tonight.
As you have read... I'm re-doing all the parts (all except the servo horns) for the trim/servo system. Not going to go into it again... I have the new trim horn ready for action, it was a matter of getting everything else that mattered ready for action.
Took a length of 1/2inch tubing and reamed it to 3/8inch. Had two lengths of 3/8 x .o65 and test fitted the first up to the reamed 1/2inch tube. And... the stinkin' piece slid RIGHT IN !??! Like What The Heck ??? I'm not complaining but I thought I was going to spend HOURS of time (again) on filing/sanding these down to fit into the reamed openings. NOT-THE-CASE ! I am so much further along tonight than I thought I would be. Right now ! right this very second... I was much further along than what I would have been (based on the past week or so of work) if I had put in four or five hours.
Side note: When that 1/2inch bushing busted out of its tack welds and got stuck on the end of the trims/servo shaft and when I screwed up drilling the trim horn... all along I knew there was a reason. THIS must have been the reason. The tubes shouldn't have needed filing and sanding to get them to fit.
okay... Did a repeat of what I had previously done with all the parts and pieces (drill, weld, etc... etc... etc) and got it to the point of needing to fit the system up to the horizontal stabs. These needed to be taken apart and re-aligned. Took the 3/16inch bolts out and started looking at what/why the port horizontal stab was out of whack. Read where one of the guys needed to put a few washers under the front connection... said "let me give that a try before taking it all apart." Tried it... and IT WORKED. Just about as level as level can get. Not sure what the heck happened in that area... 'cause I always triple-check my triple-checks. And so... I'll be leaving this over night to check again tomorrow before welding it in AGAIN. (by the way... all that previous heating and trying to bend the tubes had done nothing but... waste time... I didn't change a damn thing when I did all that heating)
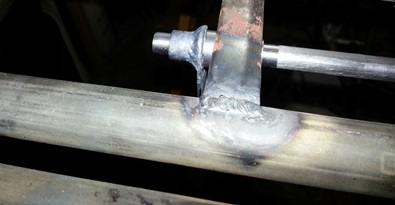
Here are a few shots of the new trim horn and the set up...
Not the correct hardware. Missing port bushing.
Click on image for larger one.
February 4, 2015 It was...
and still is.
There's a reason why something that was originally made right... is out of whack now. It shouldn't be out of whack now ! Of all things... DON'T force it to do what it's supposed to do but ain't doin' now !!! Don't rush it... don't force it back into Whack !... Take a few steps back and think things through. (At times I find myself wanting to rush through things. Like WTH ?! Then, stepping back I remind myself... Hell, if I need to take it apart and take an extra hour doing it... DO IT. For instance... I've had a 3/16inch bolt, bolting on the rear, port stab. It was a bitch getting it on and off. Why ? I reamed it tonight and it goes in without a problem. There's a reason why something isn't working out. Find what that something is.)
With all that being said... I continued work on the trim/servo system. Needed to check the levelness of the fuselage and then the horizontal stabs against that. The two are within .2degrees of each other. Not bad for a hand made biplane !
Once everything was level I hooked the trim/servo system back up and then tacked that last bushing. Took everything apart and welded up all four bushings. Reamed the two 1/2inch tubes (back to 3/8inch)... don't have a 1/2inch reamer so I've got to either borrow or buy one to ream the 5/8inch to 1/2inch.
Still had time on the clock so I made up the jig for bending the tab link arms.
February 7, 2015 Trim/Servo System finshed...
now what's next ???
It's Saturday... I get to spend more time on the biplane today than I do on the weekends... or, at least I try.
Checked the level of the fuselage (although, I first thought... hell, it was level last time and I know it ain't unlevel). What a stupid thought. Checked it and the horizontal stabs are within .1degree of the fuselage. But ya know what... always triple check your triple checks, 'cause there ain't no goin' back.
I didn't beg, borrow or steal a reamer. Didn't even buy one ('cause I knew I wouldn't have it in time for the weekend). Thought I would give the adjustable reamer thought a go and if it didn't go I'd shuttle the two stabs over to Whitey's... he's GOT to have one. Never liked it for doing a true ream of a tube because it has such an angle on the cutters and the upper shaft (that you connect the handle to) is pretty damn small in diameter. (all the hand reamers I've bought have just a light angle to get them started and then from that point on, all the way up the upper shaft, is the size that you're reaming to)
Took out the smallest adjustable and dialed in .5inches by checking it against a caliper several times until I got it spot on. Eased that into the tube and slooooowly worked it back-and-forth. Worked it all the way through. Took some 400 grit sandpaper to it and it fit real nice. Did the starboard side the same way and it's show time now !
Put the trim/servo system back together ('cause I can now... and I need to now). With everything locked together I located where the servo horns need to be positioned (made sure that all the horns were vertical) and tacked them into place. Took everything apart again and welded the horns onto the shafts. After a cool down period I cleaned them up and put the system all back together again.
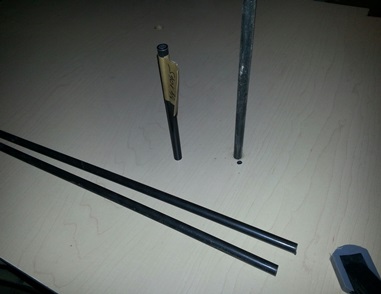
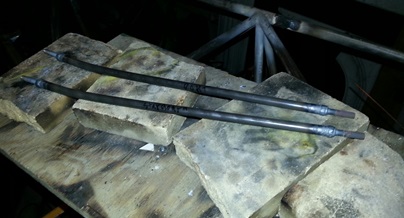
I at least wanted to start working on the tab link arms today. Instead of using the 1/4inch 4130 rod I had purchased... and thread the ends with 1/4-28 (I didn't have a 1/4-28 threader, 1/4-20, but no 1/4-28) I purchased a 3/8 x .o35 tubing and threaded inserts that would be welded onto the ends. I hear that they are stiffer (something that you need for this area so you don't get any flutter... not that the 1/4inch rod wasn't stiff). It's a lot more work cutting and welding but... that's the way I'm going with it.
In my January 23rd post you can see the CAD that I figured this all out with. With the threaded rod... I needed to adjust the length of the short end by 1inch... there wasn't a lot of room for me to weld it on otherwise. So... the exercise of figuring it all out was almost all for naught. It did show me that the tab link arm wasn't going to hit the elevator or horizontal stab.
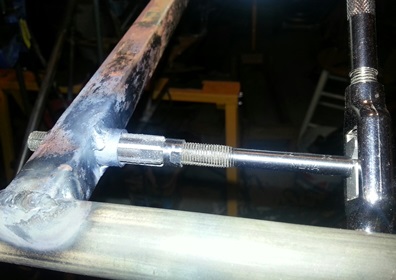
Made the 8 1/2degree bend in the tubes. Cut the short one to length and notched the end for more weld contact, per Neil on the forum (see photo below). Welded the threaded inserts onto the short end then hung them up for a fitting. Saw where the shaft fell on the back horn and made a mark. Figured out the amount of cut-off I needed on the tube to insert the threaded insert for proper length. Cut it. Notched it. Welded them on. BAM ! They're Reporting for duty !
February 24, 2015 What next???...
Looks like the rudder horn...
Seems like I'm all over the place lately.
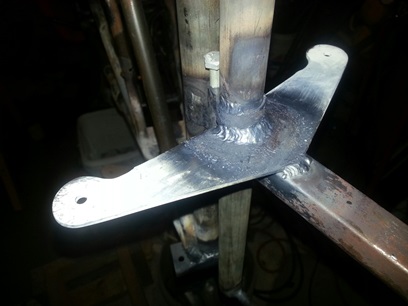
A little bit of time left tonight after working on the upper wing fuel tank... aligned and welded on the upper half of the rudder horn onto the vertical stab. Need to flip and weld the under side.
February 26, 2015 What next???...
Looking past the rudder horn...
Finished welding the rudder horn. A little too much weld build up and it was going to interfer with the pivot of the rudder on the tailpost. So... I spent most of my time tonight grinding that down and then sanding it to a smooth finish. Still a little spot on there that I still need to reach for smoothing it out. I'll have to take a look at the Dremel attachments to see if there is something that will work. I'm sure that they have SOMETHING...
Before leaving tonight I took a looksee at the fuselage... to just look at it as a whole. It's still there... all of it. and... it's ready for all those little things that get attached to it. Although, not as many little things as most builders attach. As mentioned over and over again, I'm keeping it light as possible and pretty much bare bones. Nothing fancy. Minimal stuff.
I need to purchase those expensive bearings for the control system. Once I have those bearings I can drill and rivet them on and that'll be done. A lot of that stuff needs to go on.
I guess I'm looking at making and putting in a lot of the "systems" right now; additional tabs for things like the battery hook ups, mounting brakes, finish up on a few things already started... Start on the wings and that's another story 'bout the whole thing... and nothing but the thing.


 Discovered today that it's suppose to snow 1-3inches tomorrow. When they call for snow showers around here people go out in masses to get milk, eggs and bread. It's unbelieveable... the bread area usually looks like a swarm of locust have passed through. So... I'm thinking I'll get the shopping out of the way 'cause who knows how bad it will be with all THOSE people. Got to the ShopRite and nothin'. Hardley anyone was in the place. Good for me.