Mantua, New Jersey
Original Site:
September 2004
E-mail: usav8or@yahoo.com
March 18 and 19, 2015 With bearings blowing up and parts wandering around...
Lucky to get anything done !!!
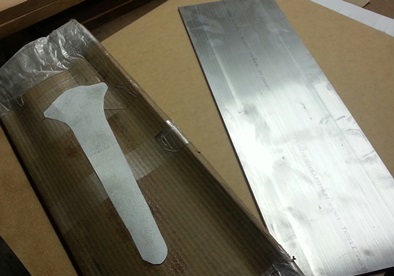
Received the 1/4inch think piece of aluminum from my ebay purchase. I can now see why it is a bit cheaper than the piece from Aircraft Spruce. It's a little rough. Not damaged... but it has that "industrial" look to it... with those lines from extruding.
March 18:
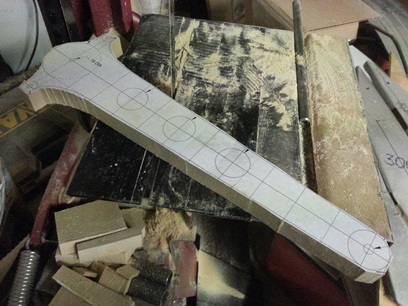
Took the pattern I made with DeltaCAD printed it out (in two pieces)... glued it to a scrap piece of MDF I had and cut, trimmed and sanded it to size.
Had a helluva time figuring out how I was going to cut a smaller piece out of this 8inch x 24inch piece of aluminum I had. Took it to the metal bandsaw and it was taking forever... Cut as far as I could and then started working on it with a hacksaw blade held in a gloved hand. And man... was that ever slooooooow. This ain't gonna be happening any time soon. Thought for a minute... looked around and found a bandsaw blade with less teeth (faster cutting). Figured out the cut of the aluminum on the reverse side - flipped it over - and made short order of the rough cut.
Took it, and the wood pattern, over to the drill press and made the holes in the pattern and the aluminum for holding it in position while routing it. Done for the night.
Still needs to be filed and sanded.
March 19:
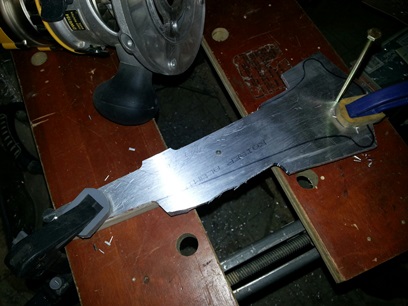
Decided to use the newer Bosch bearing router bit; it's new and it will do me good (hint hint). I had two points of the aluminum bolted to the pattern which allowed me to route the center (it's a bottom bearing bit). I had to un-bolt the one side so that I could route it (the bolt head gets in the way). Clamped it down REAL good and started to route the end... NOT so good. The pattern moved and I did a job on my piece of aluminum. Test piece one !
I knew what I was doing as far as cutting out the blank. Cut another one out in no time... well, it took a bit of time, but not nearly as long as the first. Put THREE holes in the pattern; used the outer two first and routed the center out again. Took one of the outer bolts out and decided to come up from underneather and re-bolt that outer one so that the "point" of the bolt was just below the surface of the aluminum. Did that for the center one too. And... so on and so forth. Everything is going along REAL NICE and I'm heading for home when I notice that the last bit of routing I was doing was taking off more than what the pattern was set up to do. Stopped the router and the frickin' bearing was off-centered and had extended below the end of the bit by about 1/4inch. Great. GREAT ! I use what I thought was the better of the bits and it BLOWS up on me. Great !
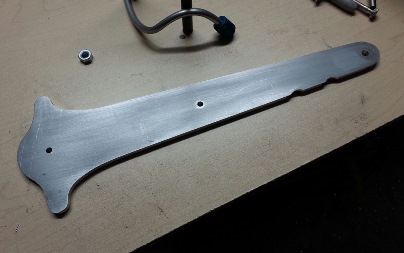
Took that bit off and put on one of my other router bits and finished the job. I worked on filing and sanding it for about 1/2hour to see what it would looke like. Decided that it was good enough for some builders... but not this one.
Routing it...
Handle as it is right now.
It always looked a little overbuilt when I drew it up on the CAD and now in person... it was. I'll re-work the CAD and trim it down a bit. I won't say that I salvaged this... but I did. I'll print out the new pattern on Monday (I'm writing this down on Friday and we're expected to get 3 - 5inches - Happy first day of Spring!) and re-work the piece on Tuesday.
by the way... I wouldn't have re-routed it to the smaller piece if the first one was lookin' good. I would have been happy with the beefy look.
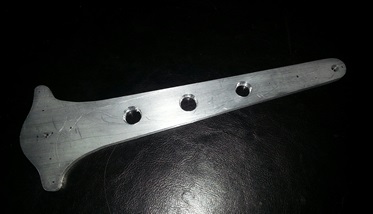
Upper handle... is the new, smaller, improved handle.
March 24, 2015 all I can say is...
It's looking pretty DAMN good !!!
Another go 'round with the trim handle.
Printed out the above new and improved, smaller handle. Glued it onto a new piece of MDF. Cut, filed and sanded... it's ready for work.
Drilled the holes. Mated it up to the existing, larger trim handle and started routing. I learned from the first two... this round was relatively painless.
Wanted to drill a few lightening holes in the handle... give it a little "designer" look. Put a few pilot hole using the MDF pattern I made. Did a test drilling on the first "practice" piece I made the other day. Tried using a 3/4inch drill bit. Glad that I did a test: it moved off center and started chewing the hell out of it... wasn't pretty. Thought for a second and remembered that I had a few uni-bits. Worked beautifully.
Still need to clean it up a little and drill the two holes where the trim cables will attach... but it's damn close to looking like it's gonna look!
March 30, 2015 I haven't done a DAMN thing !!!...
to the untrained eye.
To keep things moving forward I brought something home to work on...
The trim handle needs to be finished off with some sort of polishing. So the other night I start perusing the internet looking for ways to finish off/polish aluminum. And from what I read I'm not sure I'd want a raw metal airplane.
What you want to do is use the less gritiest sand paper that you can and start working on the aluminum to get all the existing scratches out of the piece. Say that's a 120 grit paper. You'll want to take the next less gritty sand paper and go 90degrees to the last sanding. You'll work that sand paper until you get all the 120 grit scratches out of the piece. Next would be the next level of less gritty sand paper and you go 90degrees to the last sanding... and so on and so forth until you're at like 500, or if you care to... 1000 grit paper (if you can find it).
I'm taking one helluva lot of time to get this trim handle to my liking. I've worked on it for 3 1/2 hours and I'm only just now finishing up with the 220 grit (started with 120). I've only done two passes on it. I can only imagine what it would like to sand an entire airplane... Three and a half hours and my fingers were feeling like sausages !!!
AND... you've got to be honest with yourself. You can probably get away with good enough... and leave a few light scratches in the piece. BUT if you want to do the job right you've got to stick it out and get ALL of the scratches out of it before going to the next 90degree pass. I actually f'd up (a little) when I started to use a piece of 60 grit on the first side. Took one swipe and stopped ! Made some DEEP gouges that took quite a bit of time to get out.
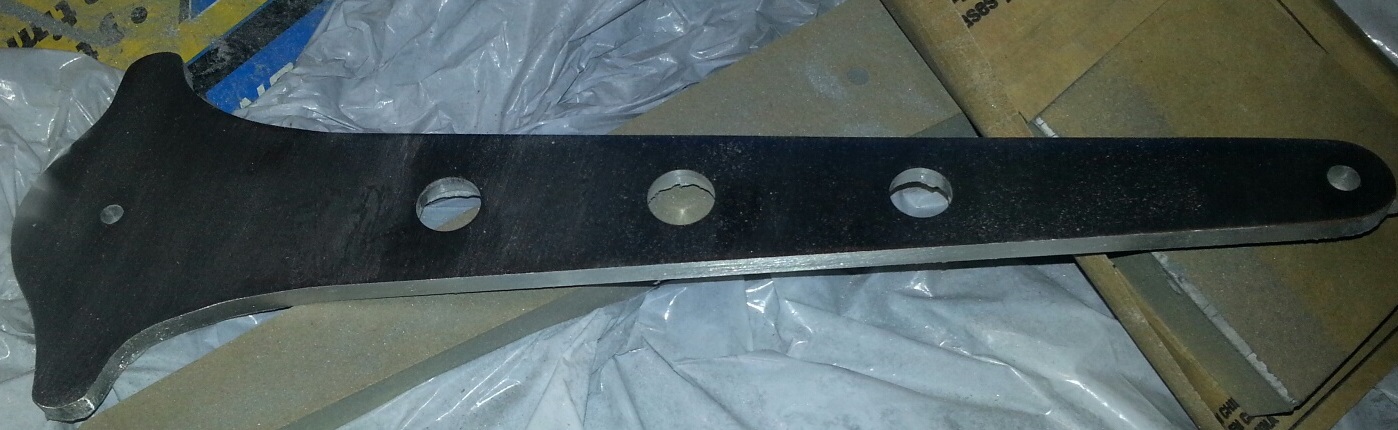
Still in its unfinished state.
April 16, 2015 Close to mounting the handle...
Designing the mount.
Some time between the last post and this post I managed to sand the tim handle down to a 600 grit. I have the 1200 but not sure if I'll be taking it that far. On a polished metal airplane maybe... but not on the trim handle. Anywho...
Drilled the 3/16inch holes for the trim/servo cables in the trim handle.
Sat in the fuselage and made airplane noises (actually didn't make the noises). Sat in the biplane to figure out where I'll be mounting the trim handle. Think I know, but will need to get the throttles in to see where they'll be mounted first...
Came up with how I would mount the handle to the frame.
Click on image for close up.
April 18, 2015 Putting the throttle...
before the trim.
Wanted to make the pieces for the trim/servo handle mount but first needed to figure out where I was going to hang it.
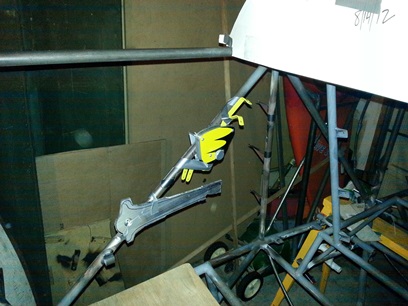
Before I could figure out where I was hanging the trim/servo handle I needed to figure out the approximate location of the throttle in the back pit. and... it wasn't easy. Well... the placement of the throttle was an easy decision... but after that it wasn't too easy of a decision. Where I wanted to place the trim/servo handle would conflict with the throttle. Where I finally ended up mounting the trim/servo handle if I have to have the trim up 45 degrees it'll be hitting the bottom of the throttle. I think I'm pretty safe in saying that that'll never happen. and... looking at this photo now, I'm thinking I'll be able to move the throttle forward another inch or two. Quite a bit of room before the instrument panel and I'll have some type of cushion behind me... moving me forward a few inches.
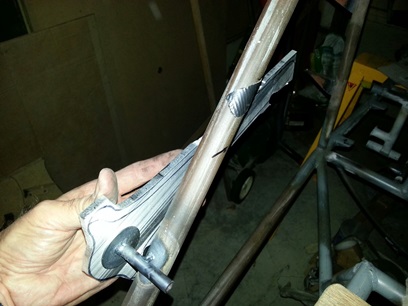
Pictured trim handle is a scrapped piece.
Not the finished piece.
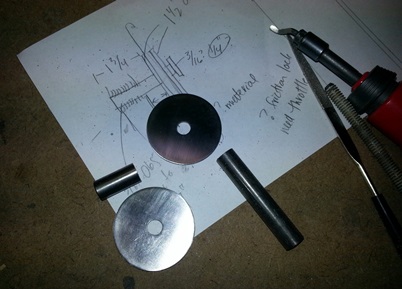
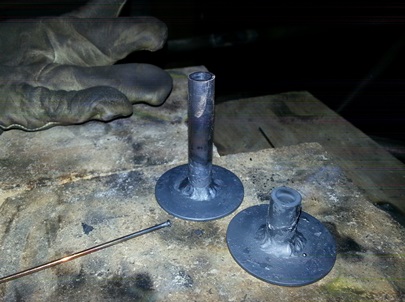
Took a while (because it took so damn long cutting the two 1 1/2inch "washers" with the hole saw) to cut all the pieces of the mount. Used a length of 3/8 x .o65 tube reamed to 1/4inch. Cut then took the pieces to lathe to square off the ends of both pieces. Took that forever time to cut the two discs/washers... the sanded to 400 grit smoothness. Pieces are ready for welding up and attaching to the fuselage.
Before mounting the trim/servo handle I want to purchase some phenolic to sandwhich between the aluminum trim/sero handle and the 4130 washers to prevent wear on the trim handle.
Trim handle mount parts.
April 21, 2015 Saw where they're putting it...
and I'm following suit.
Spent time the other night looking through images of Pitts 12 cockpits. Just wanted to see how they were installing their trim/servo handles. Looks like they're all putting them in the same place as I have allocated BUT they're attaching them on the outside of the fuselage frame to give more room inside the pit. (saw a picture of this being done in the Skybolt manual but dismissed it 'cause it might have been a one-off) Imagonna do the same.
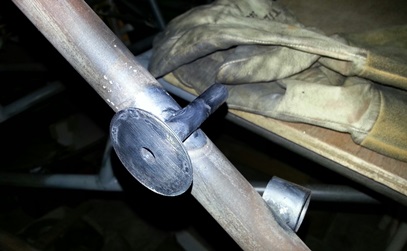
Still need to get the mount ready for welding to the fuselage; needed to weld the washers and the tubes together. Made a simple jig to hole a 1/4inch threaded rod which held the washer and the tube in place while I tacked them together (and creating a nice little fires at the same time). Took them off the jig and finished welded them on some fire bricks. NOW it's ready for welding onto the fuselage. Just need to buy me a piece of that phenolic...
Trim handle mount parts welded up !
April 23, 2015 Eight left-handed gloves...
and one mount.
Spent time the other night looking for a pair of gloves ! Found eight gloves... ALL for the LEFT hand !!! WTH ???
Finally found a set of gloves that could use (working with metal and I try and avoid working with my hands since I put my contacts back in afterwards). Haven't found the match to those eight left-handed ones...
Found two more after taking photo.
Cleaned up the trim mount a bit. Sat back in the rear cockpit and made sure I was putting it where I wanted it put (at least for now). Climbed out and tacked the one side of the mount to the fuselage frame. Lookin' good ! Feels good to begin attaching the finished parts and pieces to the biplane.
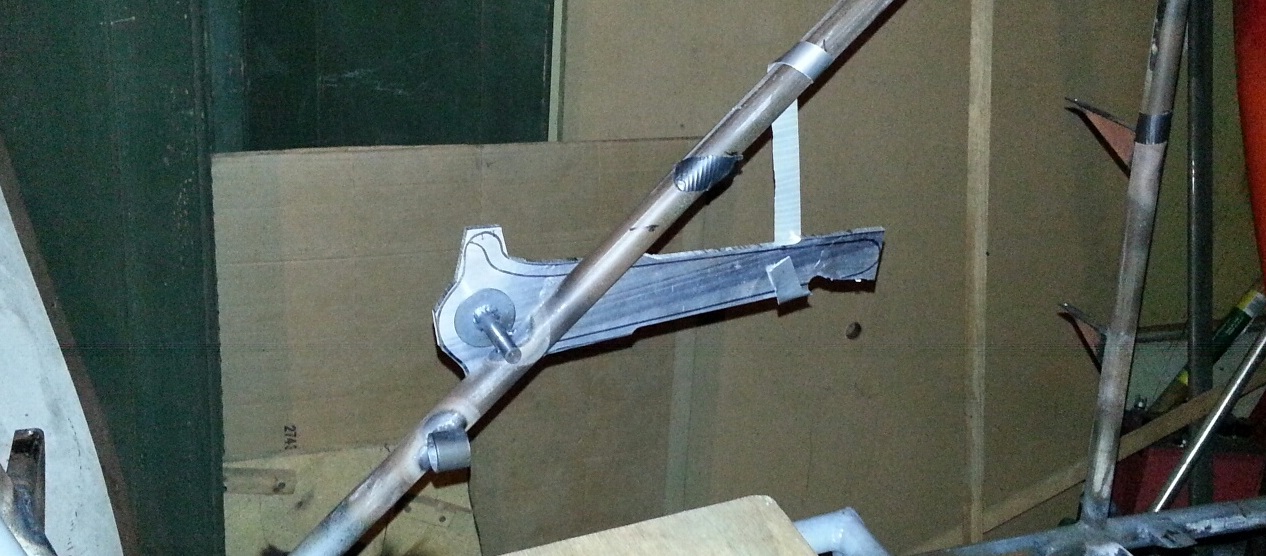
Trim handle mounted on to frame. Again... not the actual handle.
Click on image for a close up.