Mantua, New Jersey
Original Site:
September 2004
E-mail: usav8or@yahoo.com
Building the Skybolt
aka Radial Engined Skybolt..
January 22 and 23, 2016 Circles...
and lines.
Here's a clue as to how long I've been staring at a piece of aluminum with a circle cutter spinning round and round... I've thought this before but only when I was making circles with the CAD program.... "A circle on its side is a line." hmmmmmm... for what it's worth.
The blizzard of 2016 is about to hit... I'm thinking less than more snow. No 36inches gonna happen but on the news they're talkin' like we're going to need to make tunnels through the stuff. We'll see. It's getting late enough where the sun is getting higher in the sky and it'll melt a lot quicker than snow at Christmas time. (Not a March thaw... but.)
Okay... so I drilled two more 3 1/8inch holes. Need to adjust the adjustable cutter to make three 2 1/4inch holes. I've had enough of the circe makin' for one night.
I've been thinking of how I'll be attaching the face panel onto the back panel using the "U" sections of aluminum. Threw it out to the group. From all that was discussed... I thought I was going to go with Cherry Max (aircraft pop-rivets if you will) and then with a thin birch ply as an overlay. I'm thinking now... industrial glue with round-head rivets. Round head as far as I can reach into the piece and then pesudo rivets glue in place where I can't.
Saturday: January 23, 3016
Still tossing around ideas in my head as to which direction I will be going with this. If nothing else... I need to do something with these "U" channel supports. oh yeah... Still need to drill the 2 1/4inch holes before working on the supports.
Fast forward about an hour or two and after re-arranging a few of the hole locations I'm finished with the two, 2 1/4inch holes. Decided not to drill the 2 1/4inch hole for the G-meter 'cause I didn't figure in the layout of the mounting holes with the angled face panel. Not an issue...
Back to the "U" channels... Needed to see where things laid out on the face panel so that I could lay out the cuts in the support channels. Figured I'd take a few Cherry Max, flush head rivets to connect the "U" channes to the face plate (and put those pesudo round rivet in to give it that NOS look). Took my time... measured and check things a few times before making my marks and starting the cuts.
Gotta say it's beginning to look nice. Let me rephrase that... it looks KICK-ASS !!!
January 24, 2016 Nothing new... still LOVIN' the look of this panel !!!
With the roads looking like crap from yesterday's "blizzard" I decided to stay off the roads with my Challenger and work a little on the biplane. Plenty of stuff for me to do on it still...
Started off by sizing up my 3 1/8inch mock-instrument on the face plate to see how close they were to the "U" supports. Decided I'd rather trim a little bit more of the center "tabs" now than having to wrestle with them if they're too close in real life. Didn't take long so I began to tackle cutting out the back of the main panel.
Started off by marking where I wanted to drill the 7/16inch hoes for each of the eight corners and drilled them.
All I needed to do now was connect the dots with a few lengths of cuts... file and sand to the lines. Nothing new today... I've written about it before on similar pieces; cut, grind, file, sand. Nothing new about me lovin' the look of it either !
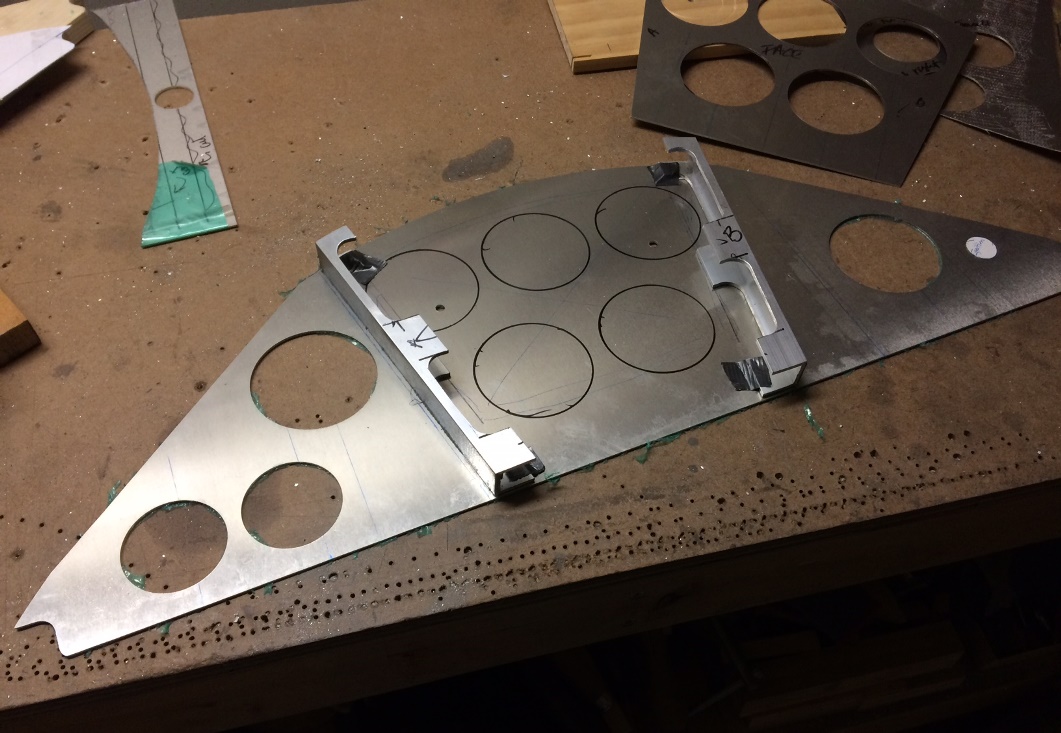
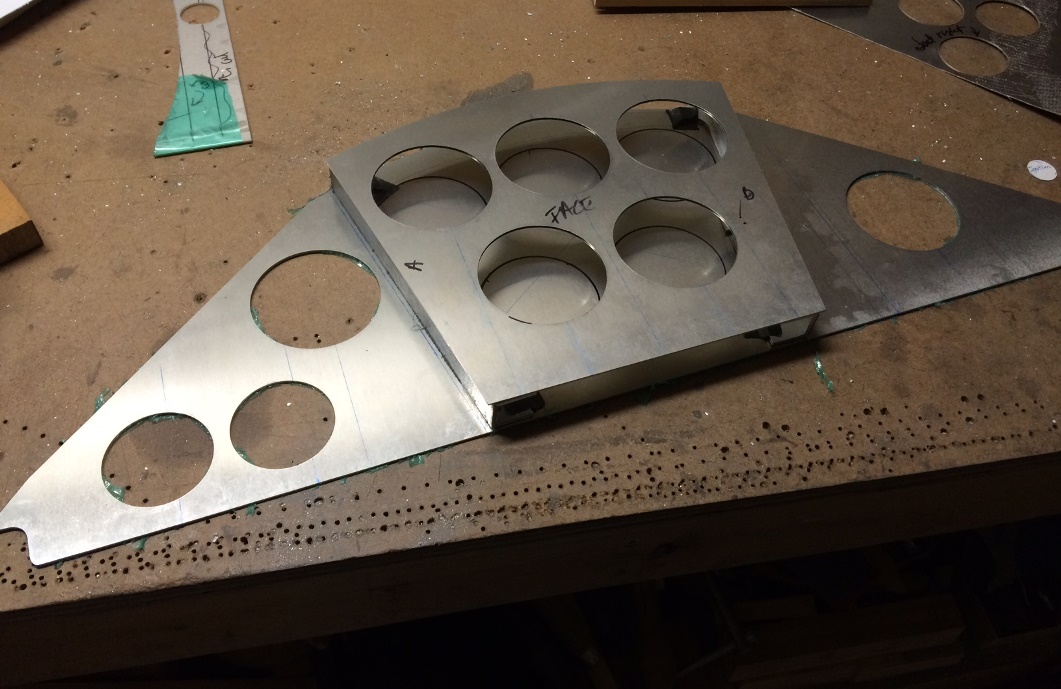
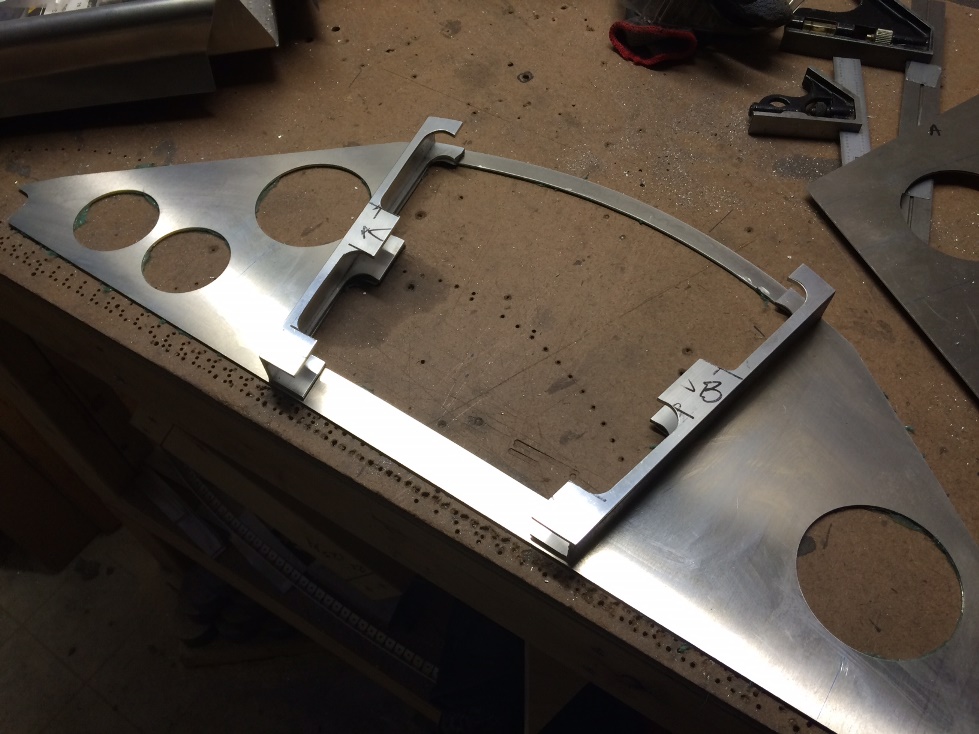
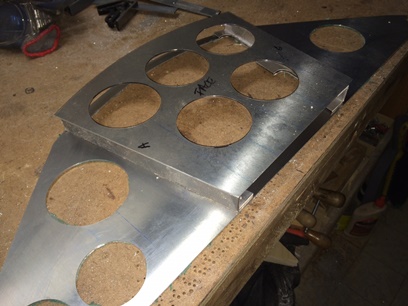
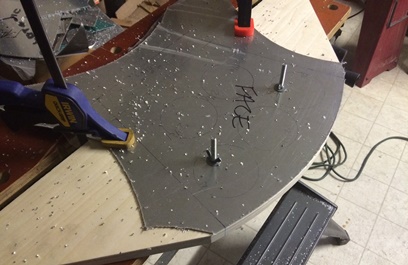
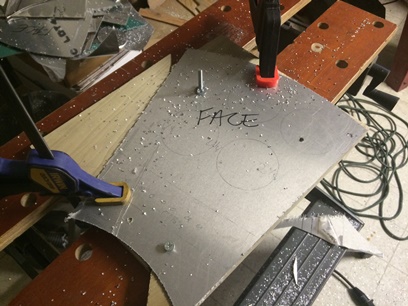
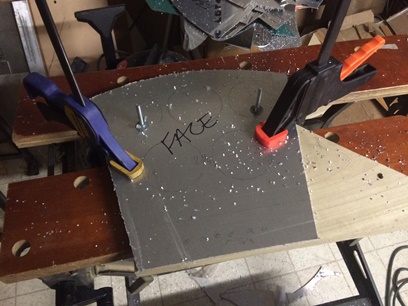
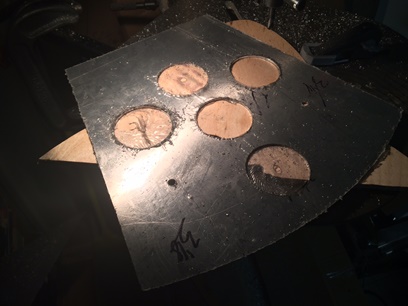
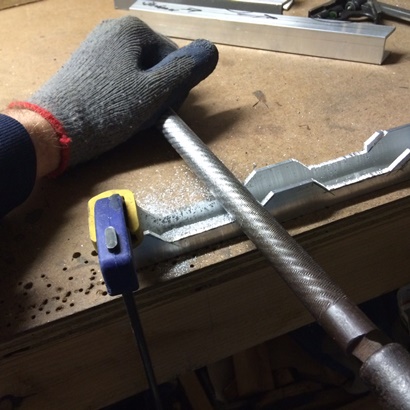
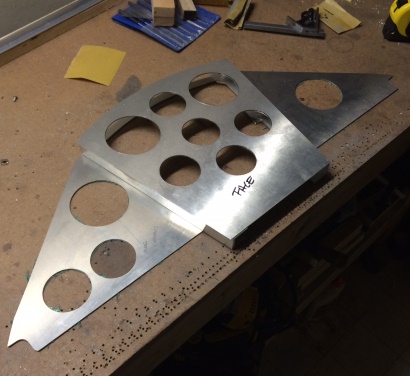
Notched main panel. Click on image for larger photo.
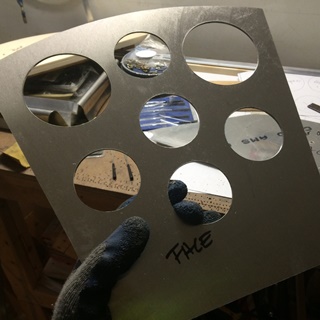
Face plate test fit. Click on image for larger photo.
January 25, 2016 Being "there"...
and getting "there"...
is just a matter of putting forth a little bit more effort.
Thinking all day about what instruments, transciever, etc to fit out the panels with. The big question was the transciever. I was thinking that I would put one in the 3 1/8inch cutout in the lower right-hand side of the face panel. Well... it seems that most of these are made to fit a 2 1/4inch cutout. So I have the option of two places to put the transciever... just under the tach on the left or drill a 2 1/4inch hold in the lower right-side of the panel next to the mag switch.
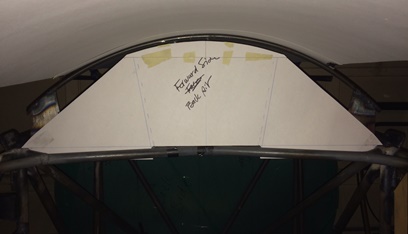
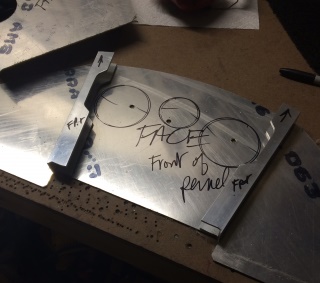
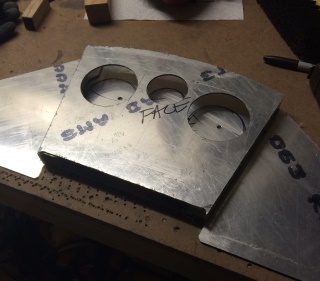
With those thoughts still swirling in my head I decided to look at the shape of the front pit's panel. I want it to be similar to the back pit's panel, but a custom fit for the front pit. As for fitting instruments in the panel of for the front... there's only going to be three (airspeed, compass and altimiter) so there is plenty of room.
After playing with it for awhile I said "That's good enough." and immediately stopped in my tracks. "What was that ??? What did I just say ???"
"That's good enough ?"
The curve at the top was a little off from the curve for the former... and it's NOT good enough ! With just a few more flights up and down the stairs to the basement workshop I had a curve to the top that complimented the curve of the former. And, that my friends, is where I needed to get to.
January 26, 2016 Been there...
doing there...
again.
There are some things on the build that are just plain monotonus... and drilling and notching the flanges for whatever part is one of those things.
I could have started this the other night. I had plenty of time to do it... but I just didn't feel like doing something repetitive. Tonight... I didn't feel any different but it needs to be done.
Collected all the tools and pieces I needed to complete the task and set about doing it. Needed to glue the patterns onto the flanges and then set up the drilling jig to keep the distance off the edge all the same... blah... blah... blah...
Once I got into the swing of it... I enjoyed it. But, it was just the thought of monotony that was killing it. Anyways... chucked the center bit and lowered the bit into the flange for my starting divit/hole. Changed that out for a number 40 bit and drill, and deburred 28inches of holes. (Figured I needed approx. 13inches for each of the center curved sections on the front pit's instrument panel.) Not sure if I'll have 1inch or 2inch spacing for the screws along the top. Once I've decided, I use the patterns I have but just mark the 1inch or 2inch spacing on them...
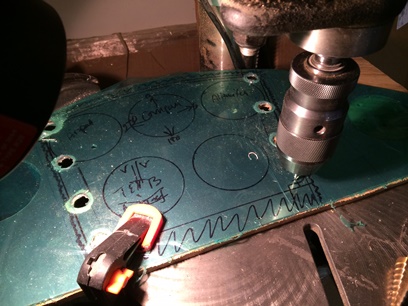
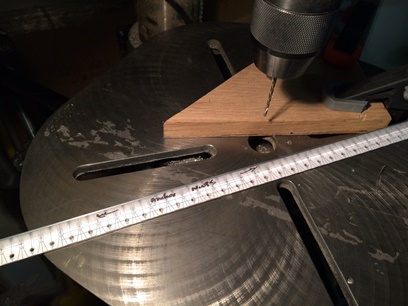
Drilling flange for instrument panel.
January 27, 2016 Sorta been there...
kinda doing there...
again.
I received my bag of goodies today; toogle switches, circuit breakers and the instrument drill guide. Still not sure what I'm doing with all this. What I really need to do is sit down and take a look at the spedific instruments that I will be putting in holes and figuring out the circuit breakers I need based off that. Until then I won't be sure of what needs to be put into the panel. I'm also confused as to why one breaker is used for, say, all the instruments ??? I'm assuming that they are run in parallel ?
One of my big problems with taking time to figure all this out is that; 1. I'm not real sure of all of this stuff., 2. Not cutting, bending or filing something feels like wasted time. So... 1. I need to read up more about it. and 2. Get over it !
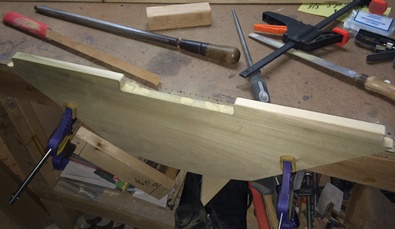
While figuring out all of the above I decided to make the wood jig for routing the aluminum for the front instrument panel. A few hours of trimming, cutting and sanding wood and it's just about ready for work.
January 28, 2016 Set on cruise-control...
tonight
Some days I just grind away at the project. Other days, it's something new and I'm intent on finding the best way to do it. And still other days... it's the same thing, and I sit back and relax... on cruise control.
Tonight, I was on cruise-control. I've been down this road before so I knew what to do and what to expect. There may be a bump here or there, but for the most part...
A few swipes with the sandpaper to clean off some wood filler I put on the jig just before closing up shop last night... and I was ready to go. Drilled a few holes in the wood jig to lock the piece of aluminum in place. Match-drilled the first piece and started routing.
Being on cruise-control and rushing through it are two different beasts. I never rush through anything. If I don't have time to complete a task I call it a night... or I wait until I can come back to the project to do the task, start to finish. Within the span of two hours I had time to cut the blanks out for the front and rear of the forward pit's control panel and route them to shape. Done ! until the next session. I found that if I tried to squeeze in something extra I'd rush things. That's never a good decision to make.
January 29, 2016 Cutting it close...
actually, more than close.
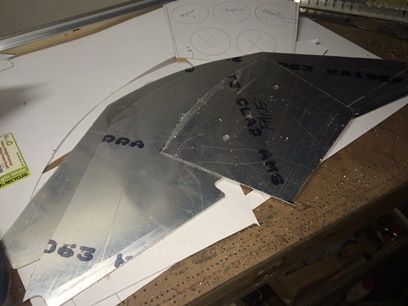
Damn ! so close...
A few hours on the project tonight and I should get quite a bit accomplished. First things first... I cut out a piece of .o63 aluminum so that I could route the face plate for the front cockpit's instrument panel. Traced the shape close to save on aluminum. Cut it even closer... Lined up the marks with a flat-edge for routing and clamped it down hard! But... not hard enough. Went to route it and the router grabbed hold of the plastic protection film and pulled the aluminum along with it in a half-ass kind of way. That half-ass kind of way routed a nice curve INTO the piece making it un-useable. DAMN !
Second one was a whole lot better. I actually match-drilled it like I did the main pieces of the instrument panel and bolted it to the wood "jig" I was using as a straight-edge. Success !
Looked at the clock... and it was 1/4 of seven. It's din-din time. I'll come back to this...
Guess I didn't save any aluminum by cutting it close, eh ?
January 30, 2016 Things weren't...
what I thought they were.
Spent a good portion of Saturday morning looking at what I want on the back pit's instrument panel. I did this awhile back but I did it assuming instruments (the compass in particular... and the circular transciever) were a certain size. Reality check... they weren't what I thought and no matter how I tried to fitting things in the holes I had cut it wasn't going to work.
I know things have to change if I debate whether I should make the change or live with what I have... but I think about it anyways. A re-do of the back cockpit's face plate was in order. All I needed to do was find a piece of .o63 aluminum to make it out of.
I had .o40 and .070 but I just couldn't find any .o63. Checked the .o40 and the Cherry Max rivets I need to use have too deep of a flush head that it wouldn't work. The .o70, in my opinion, is too thick, too heavy. If I had to use that I'd just as well order a piece of .o63. well... With a little bit more searching I found a piece that I could cut the new face plate from.
Down to the basement workshop... to route it to shape. Back to routine here... With it routed I needed to cut a few more holes... set up the drill press; centering bit then 2 1/4inch adjustable circle hole cutter. Don't know if the bit was dull... but it took forever to cut five holes. Took a break for dinner and came back to cut the last 2 1/4inch hole I needed to make which was in the front pit's panel. Decided to give it a good sharpening before making that final hole. Must have worked 'cause it only took about 20 minutes to cut.
January 31, 2016 All aluminums...
aren't made alike.
Sunday morning... up by 5:30AM. The pup has been waking me up at that time... get up, go downstairs... let him out. Hell, I'm up now, might as well put on some coffee and check the biplane forum for what's new. Write down in my blog, yesterday's session...
I put in a few hours on the biplane project before I take Ammo for a run. Still a few more holes to put into these panels; two in the back panel and two in the front panel. All four are 3 1/8inch.
The back panel, the one I'm doing first is 6061 T6. It took me close to two hours to put two holes in it. Grant it... I had one additional practice hole I made before making the two... along with adjusting the cutter for the hole opening.
Came up and took the pup for a run than ran over to my Mother's to do a few things for her...
Back home: back down to the basement workshop to work on the project. Two more holes to make and I'm finished with making holes for right now... Worked out the positoning of the two 3 1/8inch holes on the CAD to make sure that they worked. Grabbed the front pit's panel, a piece of 2024 T3, and headed down to the workshop again. Sharpened the cutters as I always do... set everything up. Clamped the piece into position. Centering bit to make the mark... then chucked the fly cutter and... within a minute I was through the piece. Same with the second one. I didn't realize that there was that much difference between 6061 and 2024 aluminum. DAMN !
I thought it was going to take a few hours to make those holes... I just put a lot of time in my "time bank" for other things to do... and I still have plenty of them to do.
Need to make the front pit's face plate supports out of the "U" channel I have and I think I'll re-make the rear pit's too... since the rear pit is now larger. Grabbed a piece of the "U" channel, made a few marks, and took it over to the band saw to make the rough cuts. From there... to the sander and from there I clamped it onto the table and started filing away. Filed to the lines and checked my work against the face plate. Looks good... Marked the second piece of "U" channel and did the same... Deburred, and they're ready for drilling and riveting.
But... I may want to check a few actual instruments in the piece before riveting it on... to check for clearance.
February 1, 2016 The greats of all joys...
sacrifice.
Long day at work... add to the drive home a stop off at the supermarket. Didn't get home until about 7:30PM. By the time I got started on the biplane it was 8:40PM.
Back down to the basement workshop. Next thing on the instrument panel agenda was to notch the back instrument panel's face supports; the aluminum "U" channels. The ones that I notched for the original panel would work but they don't support the lower overhang that I now have on the new face panel. Need to do it up right...
Orignally I thought, "Why the hell did I buy all of this "U" channel? I only need four small pieces." Well, tonight, after I cut the final two pieces (after this re-make) I'm left with about 10inches of "U" channel. Not enough to do anything with on the instrument panels. Sometimes (most times) things work out that way.
Did the usual... I've been through this process quite a number of times; mark the channel, sand down top and bottom edges on the sanding wheel, then start cutting the notches out with the bandsaw. Finish up with filing and more sanding... Gave me time to think.
Not so random thought...
There were a number of instances where "sacrificing" came up in my life today. (It was even playing on my iPod: "Sacrifice" by Steve Miller) On a lesser scale... It put new meaning into building the biplane. There is a joy into putting time into the build as there would be to sacrifice one's time, money or life for another. It brought to mind the quote I have at the bottom of my first page:
The Man in the Arena
"It is not the critic who counts, not the man who points out how the strong man stumbles, or where the doer of deeds could have done them better. The credit belongs to the man in the arena, whose face is marred by dust and sweat and blood,
who strives valiantly . . . who knows the great enthusiasms, the great devotions, who spends himself in a worthy cause, who at the best knows in the end the triumph of high achievement, and who at the worst, if he fails, at least fails while
daring greatly, so that his place shall never be with those cold and timid souls who have never known neither victory nor defeat."
- Teddy Roosevelt
It's a feeling that is hard to explain. Not a new feeling, but one that was brought closer to light today...
A few photos of what I did tonight.
Click for larger photo.
February 2, 2016 Ground Hog Day...
over and over again.
Back down figuring out how I'll be riveting the pieces to the instrument panels together. While thinking about it I decided to deburr all eight pieces. Started with the face plate for the back pit... a piece of 6061 T6. A little hard to deburr, but took my time I completed it. Next up... the face plate for the front pit. It was easy to cut those holes... should be easy to deburr. Needed to take the plastic film off of it... the one protecting the aluminum. Started taking it off and saw a pretty big scratch along the top, face of the piece. Striping more of the plastic away I saw another loooooong scratch. By the time I took the protective plastic off the front of the small face plate there must have been at least four scratches. WHAT ??? Started deburring and wherever the deburring tool hit (there's an elbow on it) it scratched the surface.
It looks like 2024 T3 is VERY soft. Very disappointing. Something that soft won't be in the cockpit's of my biplane. Kinda put a kabosh on tonight's work.
Tomorrow I'll order up a few sheets of 6061 T6. I'll need to re-do three of the back panels and the face panel for the front cockpit's panel. I know what I'll be doing this weekend.
February 3, 2016 Just the little stuff...
just as important.
Nothing earth shattering... while waiting on the new pieces of 6061 T6 to arrive (this Friday... WOO HOO !!!), I took a close look at the fit of the instruments on the panel VS. the fit of the instruments and the "U" supports. I was gettng ready to drill the holes for the rivets but thought I'd better check this out first.
Stuff like this is stuff I want to push through. Like... it's not part of the build, while actually, it's just as much a part of the build as knocking out large piece.
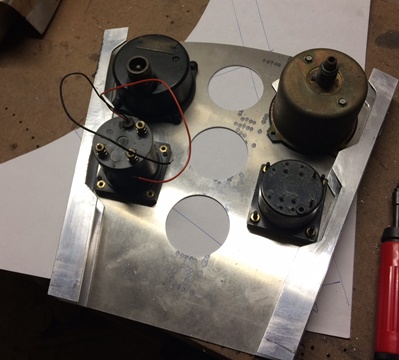
Two hours of more notching and the instruments have plenty of room...
Not the actual instruments I'm using.
Just test instruments.