Mantua, New Jersey
Original Site:
September 2004
E-mail: usav8or@yahoo.com
Building the Skybolt
aka Radial Engined Skybolt..
February 20, 2016 Just 'cause you have a shaved head...
doesn't mean you're bald.
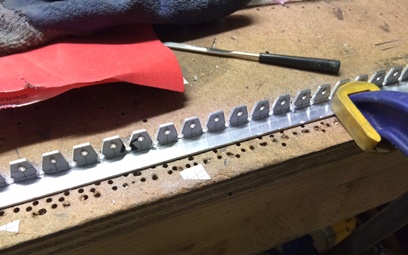
Just grinding away at more "L" flanges. Getting enought linear feet of it drilled, and some notched, for the badk "walls" of both instrument panel "boxes".
oh... Don't get me wrong, I'm enjoying doing this. It's just... not write-worthy. There's no "WOW" in reading about me getting more "L" flanges ready for riveting onto the instrument panel.
Although... just now thinking, I thought of a WOW...
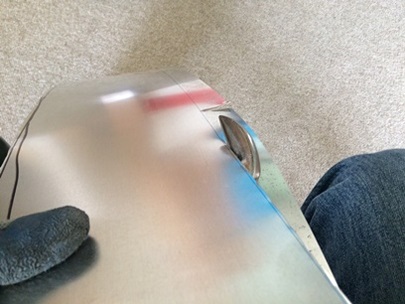
Sidebar: I drilled a few too many holes (three to be exact; one on the front and two on the back) instrument panels. I've put A LOT of work into these before it happen. It's like Whisky Tango Foxtrot !? What do I do with these holes ? 'cause I ain't throwing these pieces in the recycle bin...
I'm thinking maybe a rivet, but you would still see it. Then... maybe bondo, but hell, it could easily fall out. So... I threw it out to the guys on the biplane forum.
Got back quite a few responses. Started liking the rivet idea. Then, someone took that idea to the next step. Use an "AN426A" rivet which is annealed soft. Counter-sink so that part of the head is above the face of the panel... and shave that off. You won't see a thing. BRILLIANT ! Now all I need to do is find a rivet shaver !
Anyway... back to the "now" stuff... finished what I had to finish in a little under 2hours. Next up... measuring, fitting and cutting to size, then match-drilling into place.
February 21, 22 and so forth, 2016 Not Enough time...
apparently, the least of my time restraints...
Eeesh cabeesh !!
No time to keep up with the Blog is bull crapoloa... I've mentioned it recently... but it seems like I'm vomiting up the same stuff on here over and over again. These ain't little tasks I'm doing so the associated tasks are sometimes... repeated.
Case in point... I'm back to drilling and notching and cutting and fitting up more "L" flanges to the instrument panel. So... I'm back to writing about the same stuff again. Although, I did make a "Hey Hey... Boo Boo" with one of the "L" flanges I had already cut and drilled. Notching out where it makes a slight bend with the top-angled edge of the back pit's instrument panel's back side... the relief hole I made, I made too close to the end. So... there would be an extra hole compared to the one on the other side that you won't see and... we'll, I'll know it's there. haha Yeah... I'll know it's there and nobody else would know for the better (but would it really be for the better ?). Guess what I did ? Yup... chalked it up to a practice piece and made another one.
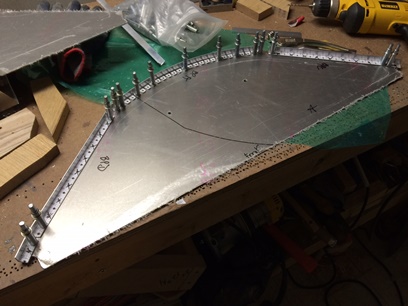
So... the one back wall is match-drilled with both "L" flanges and the other one, I still need to do. After that... need to check to make sure that these "L" brackets don't interfer with the instruments. Then... I need route out some of the aluminum from the back panels to liten things up ? Actually... may not do that due to it being seen from the front pit ?
These still need trimming...
February 23 - 26, 2016:
Out of commission... I got hit with something hard that has put me out for a few days. The first day I didn't even think of moving. The second day... I wanted to move but my body was saying "nooooooooooooo".
What I had must have been pretty bad... I didn't even think about going out to the project to work on it. THAT's the real sad part of it all !
February 28, 2016 Not Enough time...
apparently, the least of my time restraints...
Backatit again... finally !
A week down-time. eeeeeeeeeeeeeeeeeeeesh... Glad to be, close to, back up to speed again. Whatever I had, came out of nowhere !
Left off with the drilling of the holes for teh anchor nut plates. Think I finished the ones for the back pit's instrument panel so I started on the front pit's instrument panel. I know the rotine; align and glue on patterns, centering drill bit follow by a standard drill bit. Deburr as I go along.
Two point four hours and I have them finished.
March 1 - 5, 2016 Getting more time...
just not using it...
It's kinda wacked... out of it for a few days and just getting back into it. Sure, I've worked on the biplane, but it's only been piece-meal; work for a 1/2hour get to doing something else... come back to it, repeat. Sad part about it is I didn't even feel like writing in this journal. So my notes are brief at best.
I have an erase-board that I keep track of the hours and I'll put a brief discription of what I did during that session... and that it what I have to go off of.
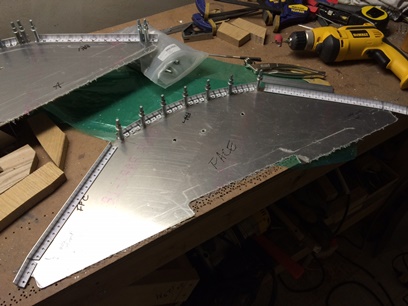
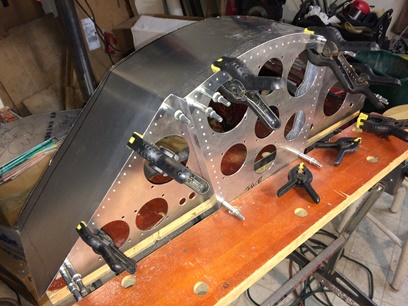
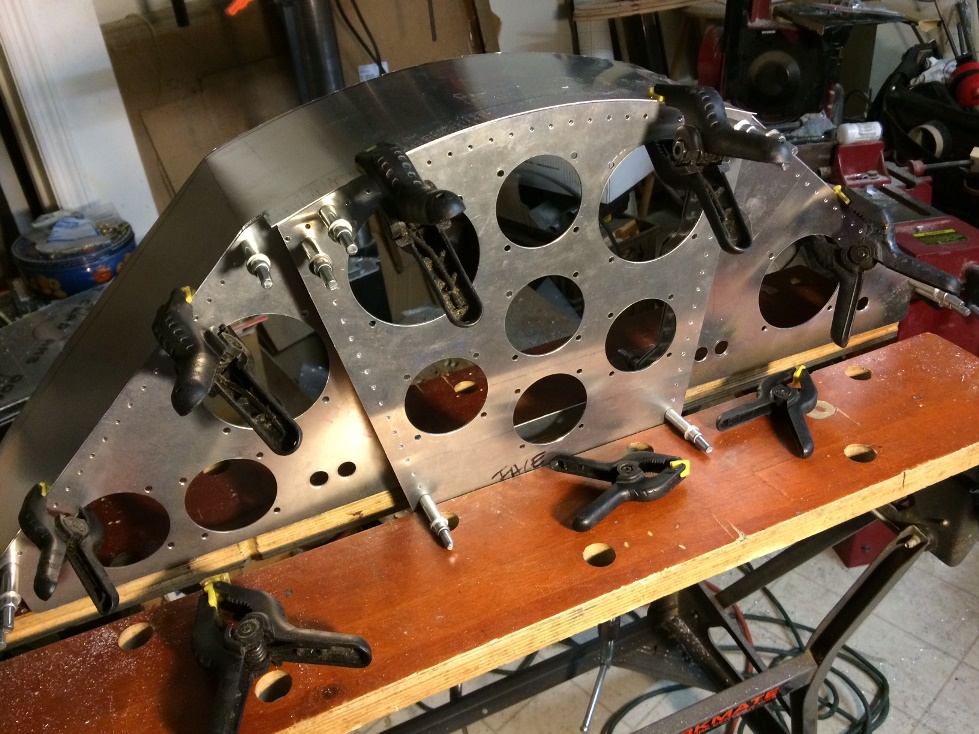
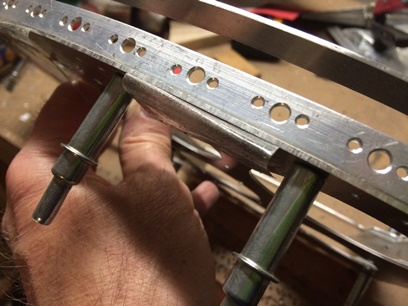
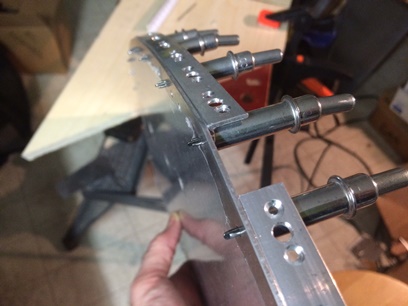
What I did accomplish over the brief amount of time that I worked on it for the past two weeks was... I managed to fit and drill all of the anchor nut plate holes and do a trial fit of the top shell on the rear instrument panel. And... it's looking pretty good. It acutally looks like my vision...
March 6 - 10, 2016 I should have hesitated...
just a little bit longer...
Thinking and thinking... and thinking... I wanted to make sure that the screws in the instrument panel aligned... were straight... basically look nice when completed.
What I was doing I knew wouldn't be dead-on what I was looking for. I thought... thought... and.. thought some more. Couldn't think of what I wanted to think of. Ya know what I mean ??? I knew there was a better way of doing what I wanted to do... I just wasn't thinking of it. So... I pressed on.
In pressing on I knew that I would eventually come to the answer that I was looking for. And, so it was. I went about my half-ass way of getting the holes in the flanges marked on the instrument panel cover. And, I knew it was half-ass. And, I knew I wouldn't be keeping this half-ass piece. But, it was a neccessary part of the thinking process. After drilling four holes the half-ass way I remembered the Tony B. had some type of alignment jig he made so that you could transfer the holes in an existing panel to an over-lay panel for perfect alignment. The Blue Book had what I needed. Showed me how to make it... but, it looked simple enough that I could probably buy one from some place pretty cheap. Had to buy an ass-load of anchor nuts and bolt from ACS so... that was the first place I looked. After a little searching, I found what I was looking for !
With the solution... not in hand, but on its way to me... I chalked the first one up to learning... or should I say, waiting for the answer ???
I've now cut the blanks for both the front and back pit instrument panel covers. I'm ready to get movin' and finish up on these bad boys; Still a lot of work to do on them...
March 11, 2016:
Friday night... put another hour on the project. Took both blanks and filed them to the lines. Waiting on the hardware and alignment tools to move forward on these. Should have them by Monday.
March 21, 2016 This is gonna...
take a while.
I've had the parts and pieces that I've needed to get back on the instrument panels for a few days now... just been thinking about how I'm going to approach it. Or... possibly, hesitation ?
Needed to re-make those two, rear sway-wire brackets so... I haven't been a complete piece of stagnet flesh. And, I just remembered, they need the top .o71 piece bent, welded and match-drilled before they are completed. Just might finish that this weekend.
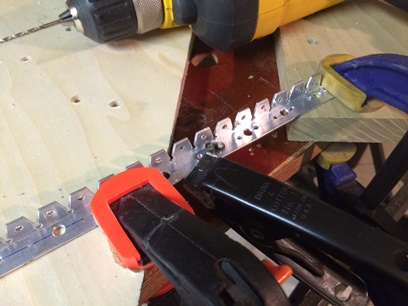
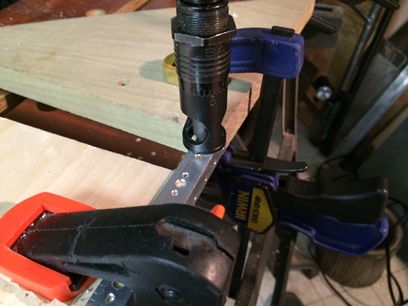
Holes for the rivets... I've been there before. The holes for the screws have been drilled some time ago. Need to insert bolt. Screw to anchor nut plate. Clamp nut plate to piece to keep from moving. Drill the first hole. Insert rivet. Drill second hole. Deburr holes. Finished first set of holes. Repeat and then keep repeating... twice as many holes as I made for the bolts. YIKES !
Got one strip of holes completed tonight.
There has got to be a better way of clamping...
March 22, -3, -4, 2016 Building biplanes...
building concepts...
More rivet hole drilling over the past few days... two more flanges left to do.
I've got it down to what works best for me. The repetitive nature of some parts of the biplane build allow my mind to wander... think... about other things... everything.
A big part of that thinking is working through other parts of the build. And still other times... I reflect on my life; choices I've made. An occasional burst of inspiration (that I really need to write down) that could help solve something-or-other, somtimes wondering if the universe looks like our dna from a distance so far off that we don't see it like that... and, if the furthest we can see is back in time... can those back in time see us as well).
And, so, as I think... I build.
March 25, 2016 Still looking at...
all them holes...
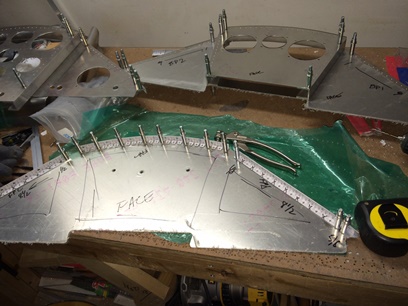
hey... finished match-drilling all those rivet holes and moved on to countersinking all those rivet holes.
Figured out one thing today... make sure that you seat the countersink tool in the hole before countersinking it. That will make sure that it is as near centered as you can get it... making nice centered countersinks. This would make sense... but it wasn't stirring in my frontal lobe to begin with. After that concept was arrived at... pretty damn near every hole was as close to perfect as it could get.
All this was more repetition; just like the match-drilling holes over the past few days. Managed to counter sink all the holes on one instrument panel. All of rivet holes on the other one tomorrow...
March 26, 2016 Too many holes ?
We'll see...
I'm finsihed with counter-sinking all those holes, but, hey... I may not need to use all those holes. I think all these holes I've made are over-kill and I ain't gonna use all of them just 'cause I made all of them.
I should be able to get a nice looking enclosure using a bolt every 2inches instead of every inch. If I can... think of the weight I'll be saving in bolts and anchor nut plates that I won't be using on it. And all those extra holes... let's call them lightening holes. A little less weight never hurt anyone. AND... you won't be seein' them 'cause they'll be covered up.
Based on the assumption that every 2inches will work... next time I go to make an instrument panel like this, I'll mark the spacing at every 2inches. whatever...