Mantua, New Jersey
Original Site:
September 2004
E-mail: usav8or@yahoo.com
Making the mount...
April 19 - 30, 2021 Bending and grinding...
and what it's all about.
More time put on Big Ass Bird's motor mounts...
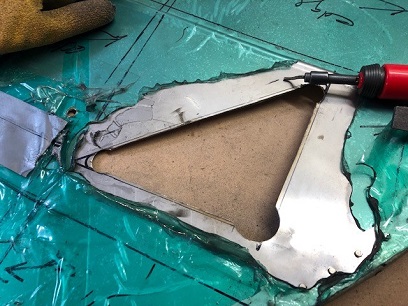
Making the final bends on the 3-piece mounts; a few of the outer pieces need a few bends, and then all the bends on the center pieces. Each of the center pieces have two bends.
Finished up the outer pieces and made the first bend on a center piece. The fit was SO good, that the wing slipped right over the base of the area it was bent over. TOO GOOD... there was som excess material on that side wing and it bent the vertical on the center piece back from being vertical. I grabbed my Dremel tool and cut the excess out between the two... thus making a gap, not too large, but larger than I had wanted.
With that information in hand, I went back and filed down the bottoms of all the side wings so that I wouldn't have that issue with the rest of them. And... in doing so, I wouldn't need to spend an excessive amount of time perfecting my Dremel Tooling Skills.
okay... all bends have been made, so I decided to cut the existing motor mount brackets off before beginning the welding of these brackets. Not a fun job going back and destroying the brackets that I took so long to make... But then... a nice feeling knowing that I am close to welding the new ones back in their place.
A good feeling knowing that I'm close to where I was with the build back in August. YIKES!
I started the build thinking as long as you follow the plans, and instructions, nothing would go "south". I'd be finished in 2500 hours or so... I, as you can see, didn't find that to be true. I've had a learning curve on many of the smaller biplane projects I've taken on. And, I've taken it ALL on. Don't let "good enough" be good enough... strive for that EXCELLENCE that we all have. There is a minimum standard set by the aircraft building industry... achieve at least that... and above, if that is your EXCELLENCE.
May 1 - 8, 2021 Heavy Metal...
and we're not talking about Rock and Roll.
Busy work??? Not so busy as far as moving forward... I'm thinking. More of the filing going on this past week... filing off of the excess weld joint from when I cut off all four of the motor mount brackets...
Thursday, and I think I'm finally to the point with the fuselage that I can weld on the new brackets. But first... I need to weld those puppies together.
Spent most of Saturday cleaning up the areas of the workshop, both the garage and the basement. Oh... they aren't spick and span clean... I've basically cleared the benches where work is to be done. Also a bulk of that cleaning up time was just going through stuff I had sitting on shelves in the garage that I hadn't looked at in years. Tossed most of it... next week I'll wonder why I just through that away 'cause I need it now for a project around the house. Anyways... I'll do a bit more cleaning next week. But not nearly as much, so I can spend more time on Big Ass Bird.
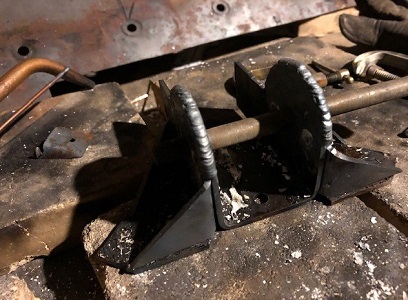
Before beginning welding up of the motor mount brakets I thought it wise to practice on a few thick pieces of 4130... so I grabbed a few sets of the "test" brackets pieces I made... inserted a 3/8inch bolt through all three pieces, clamped them together and started heating them up. Used an AW205 tip on the Smith Welding Rig to do the job.. Worked out nice... I think I'll do another test piece today before the actual pieces are worked on.
May 9 - 15, 2021 Number 205...
BINGO!
Moving right along with the welding. A LOT of welding to be done on these four sets of mounting brackets!
I read an earlier post in the blog about wishing that the #205 torch tip was working correctly... from the first time I welded these puppies up in 2016. The 207 WAY TOO much heat, and the 203 taking forever to heat things up. Started working the metal with the 203... but ordered a new 205.
The AW203 worked great for welding the curved sections of the motor mounts... then the 205 arrived and BA-BAM! Picked up a new oxygen tank and... Sweet music!
I'm almost there... just about finished welding the brackets competely together. Another welding session and they'll be done... then I'll be welding them onto base plates so that I can then weld them onto the fuselage.
Just starting... AGAIN
Almost ready for the fuselage!
May 16 - 22, 2021 Bigger mounts...
need bigger openings.
Finsihed up welding the three-piece motor mounts together. Now I need to weld them to the mounting plates before welding them to the fuselage.
Flipped the fuselage so that it was sitting up... re-mounted the firewall and did a test fit of the mounts. As I thought, the holes in the firewall need to be enlarged slightly (I had made a change to the mounts when making the second set).
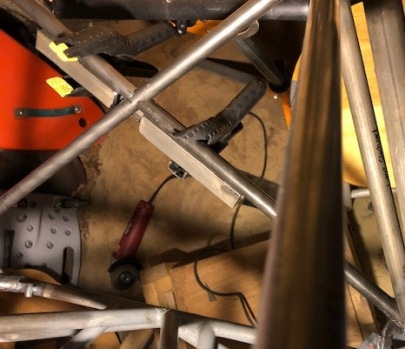
I spent the rest of the week using my angle grinder to grind down the sides of the existing openings to enlarge them. Now to test again on the fuselage to make sure things fit before welding the mounts to the mounting plates. I've decided to add angled tubes to the firewall so that the angled side of the mounting plate can be welded to a piece of the structure instead of just "hanging" out there.
Enlarged the mount openings in the firewall.
Enlarged hole - still needs cleaning up.
May 23 - June 18, 2021 Whoooooa...
Hold on partner!
Lets not put the cart before the horse...
I need to get these puppies on here first before REALLY screwing around with the openings. Yes, they need to be larger, but exactly where do they need to be larger... is the first question to be answered.
And thus I start my foray into answering that question. With the new motor mount brackets I've decided to add the diagonal cross-tube that was shown on the UC-78 drawings. Last time I had decided that the .090 plate that the brackets are mounted to would be sufficient (they aren't like that on the original drawings... only the bracket is welded to the tubing). But, for the slight weight gain, I have the "wrap" of the tube like the original, thus giving it even more strength, I'm assuming.
Before doing anything I took the pattern I used for locating the four openings in the firewall so that I could again use it for figuring out the adjusted holes for the newer brackets.
The next thing was to see where these angled tubes need to be... I took one of the mounting plates, made the marks and began notching the tubes. They upper angled tubes needed to be in two pieces (to be nothed into the angled tubes on Station Zero). Welded these puppies up and am now ready to weld the brackets onto the mounting plates...
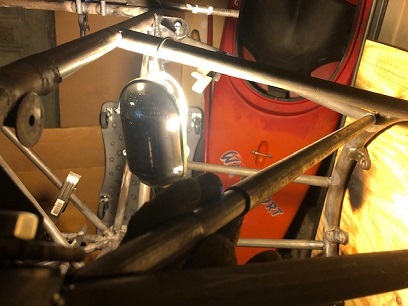
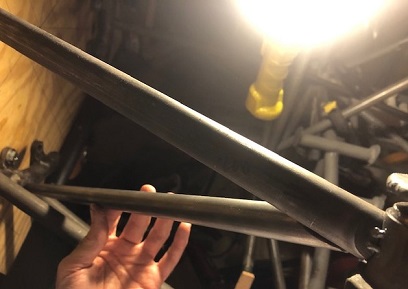
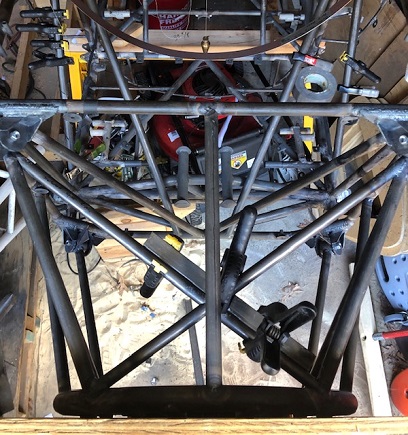
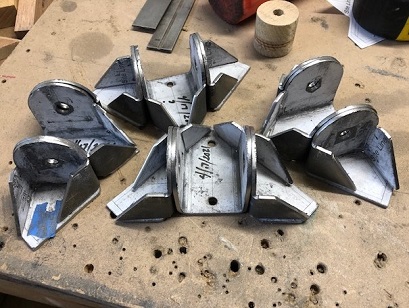
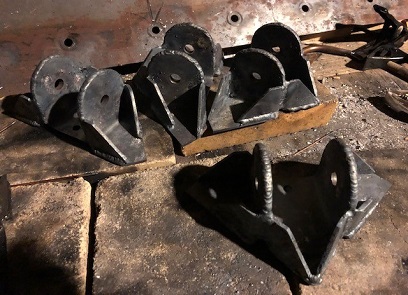
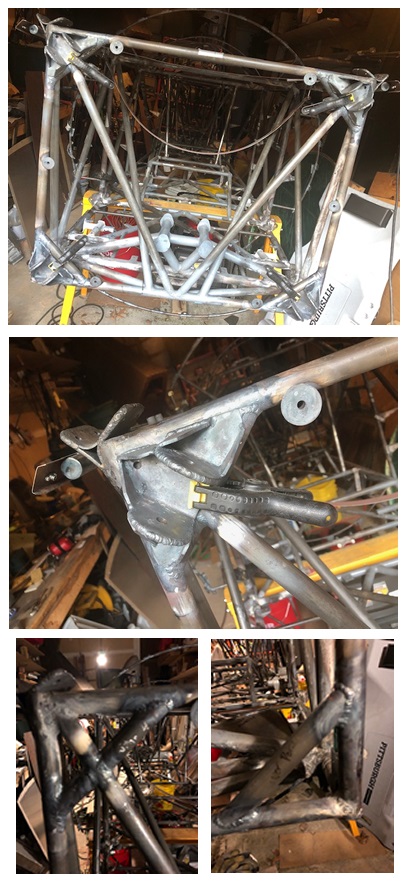
Group photo below... showing the motor mount brackets (without mounting plates) clamped in place, a single motor mount, starboard upper tubes, port lower tube.
May 19 - June 25, 2021 Sit back. Relax.
Work on the airplane.
Image from National Science and Media Museum. Taken from flickr. No known copyright. They are happy for people to share it... just no high quality reproductions.
“The oxen are slow, but the earth is patient.” What a great quote from the movie "High Road to China".
Ohhhhh... I enjoy the journey, but there's nothing like almost getting there on a HUGE project!
(knock on wood) I'm just about to the point of where I was before all of this re-working the motor mount brackets. What a joy it is re-making these complex pieces. Not once, or twice... but probably three or four times. Halfway through the process of making them I'd discover a better way.
I'm JUST about ready to weld these puppies onto the fuselage. The last one has been welded up (bracket to mounting plate), and I have just a few misc. things to do before welding them on.
With bigger projects (time-wise) of the biplane like this... I find myself wanting to "rush" the process sometimes. At those moments I need to just sit back and relax, 'cause when I'm working on the airplane... I have nothing to do, no goal, other than work on the airplane. That Zen part of the process... what we need to do in every phase of our lives.
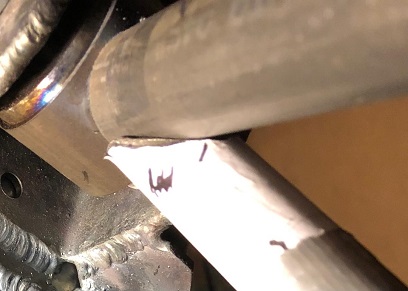
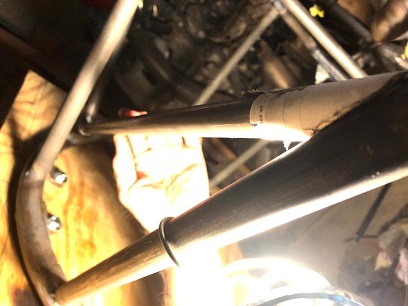
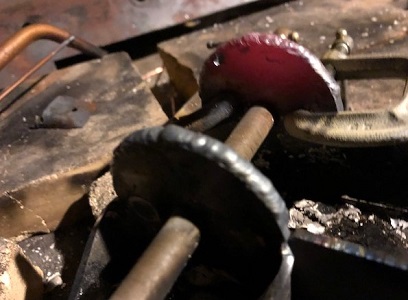
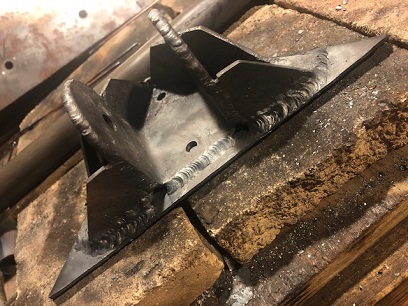
Dimes
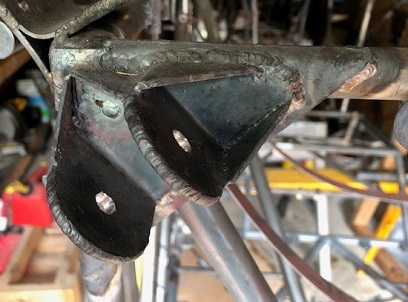
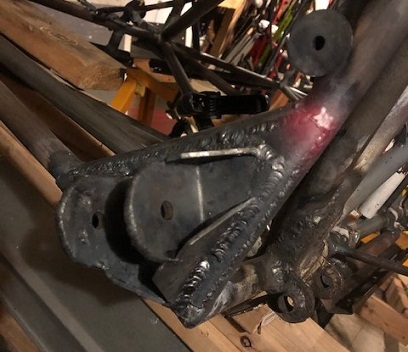
One of the brackets/mounting plates finished.
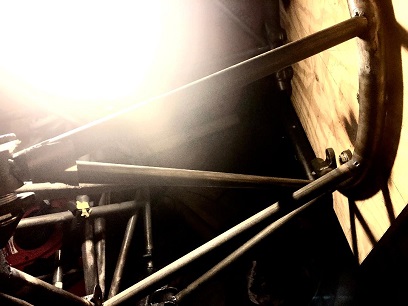
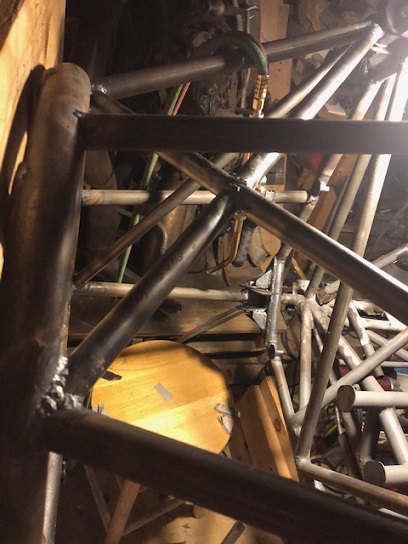
Two brackets/plates clamped to the fuselage.
June 26 - July 4 2021 Sitting back...
reflecting on the past year.
Wow... WOW! I was just here... back in September of 2020. Ready to make the engine mount... but at that time, finding out that I had drilled 1/4inch holes instead of 3/8inch holes. Wow... WOW!
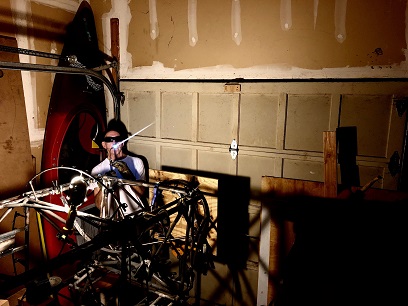
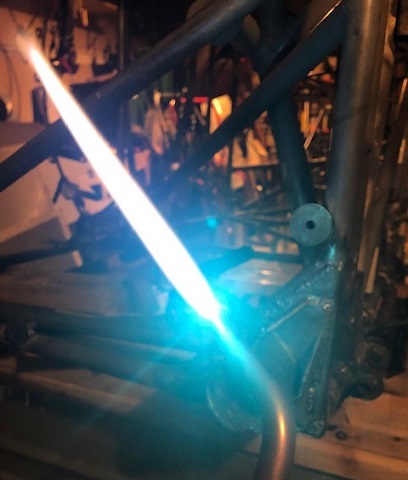
This week was spent welding the brackets onto the fuselage... welding, flipping the fuselage... welding... flipping the fuselage... enjoying the process the entire time. Fun running those golden puddles for long periods of time... playing the flame to keep the puddle just right for welding.
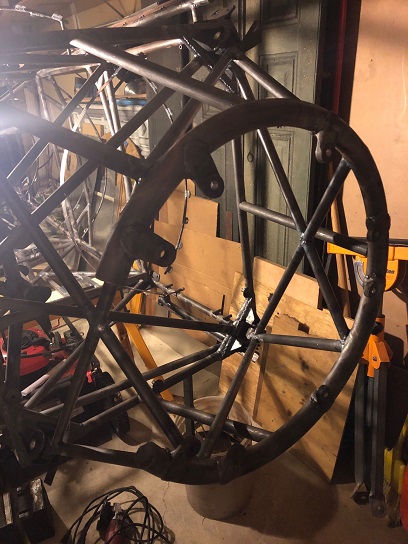
Friday, July 2nd, I started planning out how to support/hold the engine ring in place 16 1/2inches (center of tube at Station Zero to center of engine ring tube). Figured I would mount it to a thick piece of plywood and jig that into position so that it would be square to the fuselage. Threw the question out the group on the biplane forum and one of the guys made posted photos showing a set-up similar to what I was thinking.
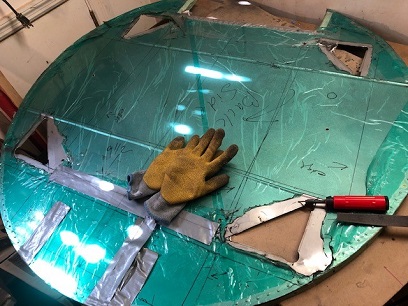
And thus... the building of the jig commenced! Cut the 3/4inch ply a little over sized. Made marks for aligning the ring on the ply... and now ready to drill a few holes to attach the ring to the ply. NOTE: The engine bolt holes on the ring are 25/64th... just a 64th larger than 3/8th. I'll be drilling the 25//64th holes for mounting the ring to the plywood.
by the way... a friendly reminder, if we aren't in this building of airplanes for the sake of the build, something like this FOPAH would have pushed this project back to the corner last August where it would sit until forever, never being completed. I'm here for the building AND the flying...
July
6 - 15, 2021 Plum bobs...
and laser levels...
About
11 months later than I thought I'd be starting the whole engine
mount build... but better late than not to have started on
it again at all. It was a BIG mental challenge to make those
3-piece mounting brackets AGAIN. Wow... WOW!!!
You never really realize how much of a challenge you can take
on when you need to go back and re-do, re-build something that
you thought you'd never need to do again. WOW!
Now that I've worked through the re-making of the engine mount brackets... it's time to tackle the making of the engine mount. FINALLY!!!
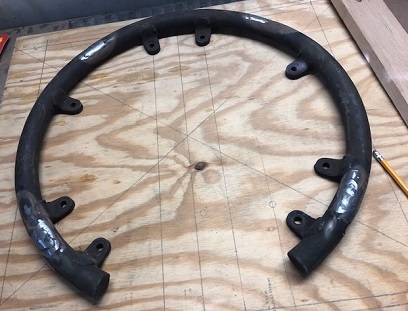
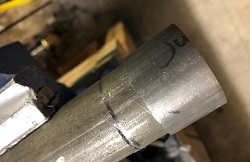
Pulled the engine ring out from hiding and the first thing to do is clean it up. Tried using MEK on it... then sanding it, and neither really worked that well. So, I pulled out the wire wheel brush and attached it to my DeWalt hand drill... and had at it. Took close to two and a half hours to completely clean it up. And it's looking mighty fine. I put a nice coat of navel jelly on it afterwards to keep it from rusting.
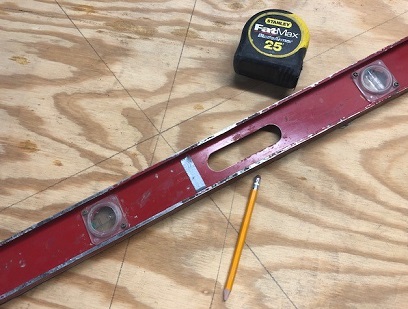
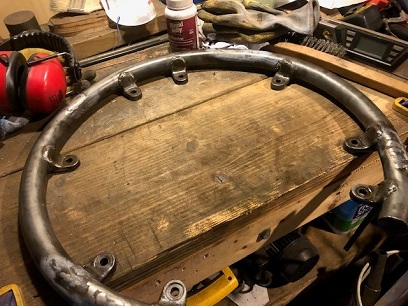
Somewhere between all of this I took a 3/4" thick piece of plywood and drew out a mounting pattern to mount the engine ring to hold it in place. Drew a set of crosshairs on it so that I could level it and center it on the fuselage. Drilled the holes for mounting the ring... took the jig and mounted it in a tripod thing-a-ma-jig that holds large pieces of wood in position at any angle. THEN took two days to make sure that it was 16 and a half inches, center tube to center tube, from Station Zero to the engine ring, and centered... before starting the process of cutting and notching tubes to hold that ring in the right position so that when I begin to notch and fit and weld the tubing for the actual engine mount it will actually be in the correct location and not just some illusion I had before accidentally kicking that thing-a-ma-jig out of position without realizing it. (whew!)
At this very moment I'm cutting and notching the jigging tubing to hold the ring in the correct position. oh... forgot to mention that I reamed out the wood jig bushings to be used in place of the rubber bushings, for centering the sleeves on the mounting brackets.
A few photos...
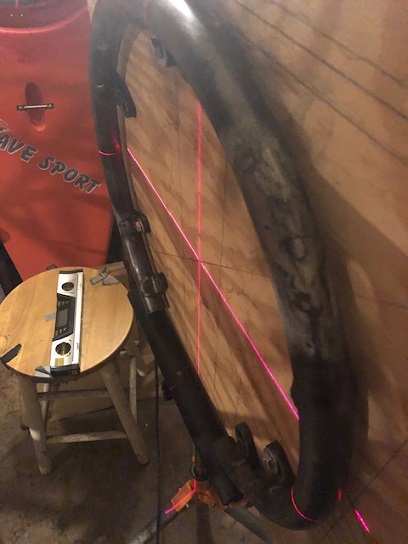
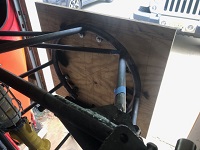
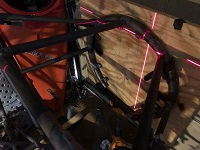
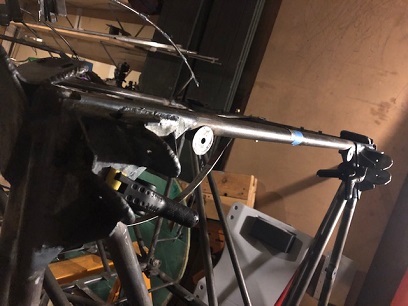
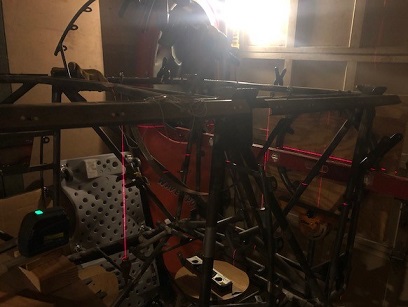
Laser level used to center ring on fuselage. You're
seeing the laser light hitting two drop-lines, and
the crosshairs on the ring jig.
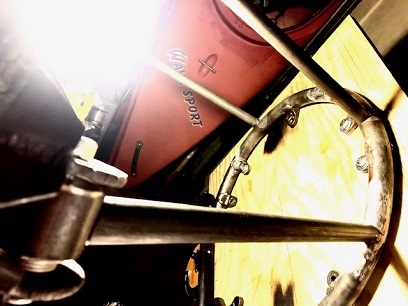
The ring cleaned up nicely.
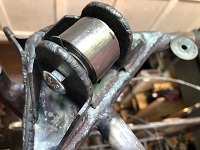
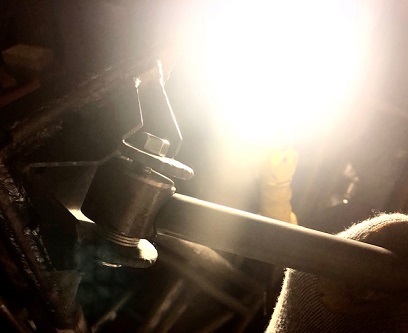
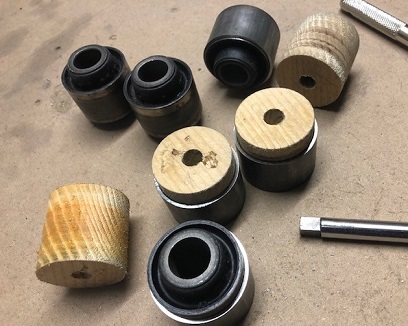
Rubber bushings, wood bushings, and metal sleeves.
July
16 - 31, 2021 Me thinks... wood plus intense heat...
Me thinks maybe a fire...
Got to thinking about these wood bushings I have sitting on the table in front of me. Nut such a good idea for holding the engine mount sleeves in place while putting a flame with intense heat on the metal tubing it's holding... Ya think?
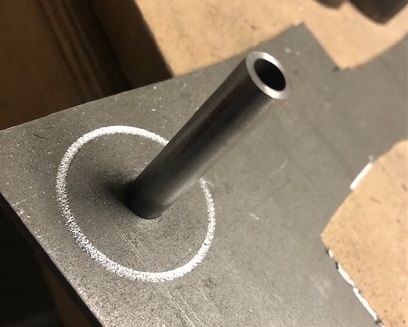
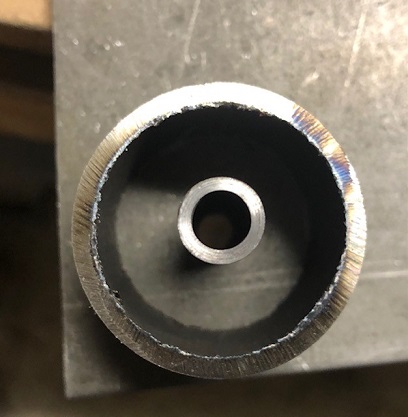
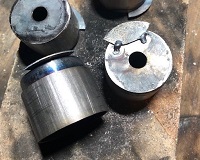
Actually... I've been thinking long and hard about them since I first thought of doing it. Never thought it was a good idea... they'd catch fire and burn away before I could do anything more than MAYBE tack a few tubes to the sleeve. A lot of ideas flowed after the initial thought of wood... and I finally ended up with the idea of making metal bushings that would slide inside of the sleeves. I'd make them like a barrel using a tube that would fit just inside the ID of the sleeve then weld caps on both ends and then drill a 3/8inch hole in both caps so that I could bolt them into the engine mount brackets.
Thought I wouldn't find a tube lying around that would be the right size and either spend hours looking for something not there, or just wait a few days for a new one to arrive at the front door... but the second tube I picked up fit perfectly inside the sleeve tube; ID was slightly larger than the OD on the other. Beautiful!
I set about finding the tools to make it happen. Located the correct size hole saw cutter and proceeded to cut out all eight caps. Cut the lengths of tube out too... and used the table top grinder to grind them to size.
The next day... thought about drilling the holes and how I would go about that once the caps were welded on and decided to re-cut the caps and drill the 3/8inch holes in them before they were fully cut to shape with the hole saw cutter... then all I would need to do is make a simple jig to hold them into place when I weld the first side... then the second side. A whole lot easier than trying to square up the metal bushing on the drill press to drill both hole in the center of each cap... me thinks.
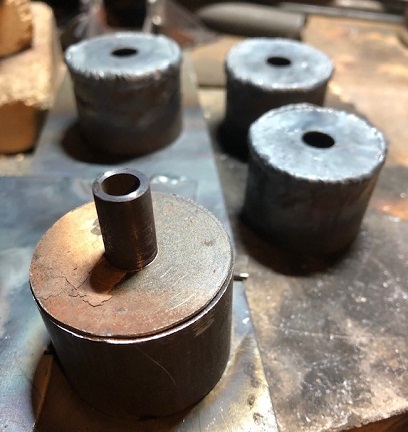
It turned out to be just slightly easier. The hole saw cutter decided to crap out on me (lost its sharpness) just after cutting the first one so I could only score the shape of the cap on the metal then I had to cut each one out on the band saw then grind them close to size. Needed to make a simple jig to hold the cap in place as I spun it around to get it to the correct diameter and to make sure that it was as close to perfect circle, as possible, with the 3/8inch hole centered.
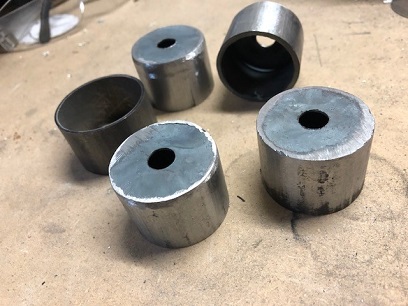
With the caps now close to perfect I took the cut lengths of tubes over to the table top sander to make sure the ends were all squared up. Follow that up with a simple jig to hold the cap in place while I weld it to the tube... then flip it and have it center the second cap in position so that I could easily weld it into place. All four pieces are welded together as of right now... two caps to one tube. Procedure was to place tube into position over centering tube. Slide first cap into position... tack then weld complete. Grind down the excess weld on sides and end. Flip tube... slide onto 3/8inch center tube. Slide second cap into position. Tack then weld... then grind off excess weld. I'm just about done... all I need to do is grind down the second side cap's excess weld on all four pieces.
Centering jig.
I'm enjoying the heck out of this process of making jigs to make parts for the airplane. The challenge of how to make a part and then moving forward with your ideas... your creation! (It's ALIVE!!! alluding to the Frankenstein movie)
Next up... getting to the fun part of making the actual engine mount.
August
1-21, 2021 Nothing more.
Nothing less.
YES! YESYESYESYESYES!!!!! All this preperation... and the journey has started! Reflecting back on this past 1/2 month, August 1st to 21st, it's been an encredible feeling to be cutting and notching the tubes for the engine mount. Wow... WOW!
hey!
Thinking...
I'm putting a lot more time on the build than I am in updating the blog. Seems like I'd be pretty much writing the same thing over and over again if I updated it daily... the project of the engine mount is a large one. Each step just a repeat of what I've done on other parts of the biplane; leveling of the fuselage, prepping of tubing, cutting, notching... E. T. C.
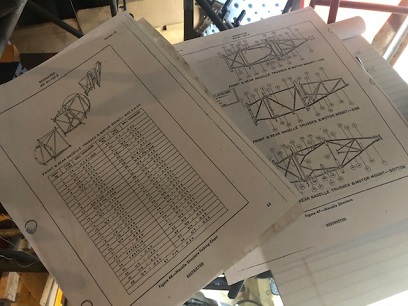
UC-78 drawings... for engine mount.
It's all good...
The past twenty-one days I've been steadily moving forward on the engine mount. Prepped the engine ring for receiving the tubing. Finished making the metal bushings for holding the engine mount sleeves in place. And have finally started cutting, notching and fitting the tubing for the actual mount.
Below are a few photos of the tabs that I welded onto the metal bushing to keep the sleeves in a certain location between the ears of the engine mount brackets.
Like anything... I try to do it mindfully. I'm present. I'm there thinking about and consentrating on what is in front of me. It's all about notching and fitting that tube "today." I constantly nip notch fit... seeing the piece from every angle. Focus... the only purpose in being here "today" is to move forward with the project, to accomplish what I can in the time I'm workig on it. Nothing more. Nothing less.
The first three tubes I notched and fitted were for the jigging support for the engine ring... tubing running from the firewall to the ring. I then worked on the four tubes that ran from the sleeves to the engine ring, the four outside tubes, top and bottom. Learning from the past many notched tubes, if I had a mirror image of one tube for another, I could make a pattern from the first to easily and quickly notch the second. And so I did for the upper, and then the lower tubes. The first of the two sets took me close to two hours to notch and fit. The mirror image would only take approximatly 1/2 hour to grind to size using the pattern I made.
I'm using the original UC-78 engine mount as a reference... and should have checked it closer before notching the back "spanner" tubes. (These are the tubes that hold the entire back-end of the mount in place... to keep from moving.) I cut and notched the upper and lower tube to fit up to the outside tubes not realizing that I need to fit them to the upper and lower cross tubes. I lost two hours. Nothing more. A little bit more practice of notching tubing, eh?
For the upper and lower cross I ordered 3/4inch x .049 tubing for the upper lower and vertical tubing... all new stuff. I didn't want to use the crappy pieces I had laying around, and it was only two pieces of the six I needed. For the few extra dollars I'd be making the engine mount with all new tubing... and it's just as much ($41.00) to ship six and it was for two. YIKES!
While waiting for these to arrive... this coming Thursday, I decided to make use of my time in advancing the engine mount by using the existing 3/4inch tubing I had. The notching of the four tubes to the engine mount is a little complex. I wanted to make sure that both ends were notched as close as possible... a nice tight joint. I didn't want to go through a pile of "practice" pieces by notching each end of the same piece. I decided to take a piece of 3/4inch tubing... cut and insert the 5/8inch tubing into each of the 3/4inch pieces. This would allow me to notch and fit the first end, and then notch and fit the second end without worrying about alignment with the first end. Once I finished notching the second end I slid both tubes on the 5/8inch tube and turned each to fit their respective side and Wa La! perfect fitting tube. I'll tape the 3/4inch tubes in position on the 5/8inch tube, make my pattern and notch and fit the second of each set. Wa La!
Over the next few days I'll make patterns for the other cross tubes... I'll be ready for when the new 3/4inch tubes arrive on Thursday.
August
22 - September 1, 2021 Old dogs...
always learning...
I was able to extract html file with the missing blog entry from the thumbdrive(scanned my Memorex thumbdrive and cleaned it up). And here it is...
More progress on the engine mount! Slow... but sure, as the saying goes.
I like the way I've decided to figure out the notching on the engine mount. The 7/8inch tubes I did the conventional way, but as mentioned above I used a few 3/4inch cut-off pieces to fit the notch, and then I slide them along a 5/8inch tube that is inserted into the two 3/4inch notched pieces. I can take my time notching each of the two notches individually without worrying about the reationship between the two on that same tube. When the time comes to notch the actual tube, I slide the two 3/4inch notched tubes on the 5/8inch tube to fit, tape in position and mark. Measure cut the tube I'll be notching, then mark a straight line the length so that I can line up the paper patterns for each of the notches on the tube I'm cutting. Am I making sense?
I practically have a perfect fit each time. With just a little tweaking I have a nice beautiful tight fit.
So far I have three pieces cut doing it this way; both angled-down pieces, and one top cross piece. Easy. Peasy.
An old dog... can learn new tricks.
First down tube.
First down tube notched.
Second down tube fitted up.
First top, cross tube notched and fitted.
September 30, 2021 Technology... Love it...
Hate it...
Something got a little screwy with my thumb drive... a new one at THAT! Some of the html files got corrupted, along with a few other files.
Bummer... I'm going to need to figure out how to recreate those entries. Also... something screwy with my work computer and me uploading files to the site from it. This computer I have at home, although only five years old (only... hahah. Thats pretty ancient, eh?) is slow as molasses. Takes forever to turn it on and open each program. I digress...
I've been hard at work welding these tubes up for the engine mount... Tonight I welded the two-piece top cross tube. Made a quick jig the other night to keep them aligned with each other... since they were split by a solid cross tube. Taking my time welding these puppies up. Taking my time like I have done with all of them. Nice. Solid. Welds.
I'm pretty ticked off at this computer. It is so stinkin' sloooooow. Unbelievable!!! I'm done for writing right now... Here's a photo of the work on the engine mount as of today.
October 3, 2021 OLD Technology...
LOVE IT!
Typing this out on my ancient... Toshiba "Satellite" laptop that weighs a ton! Has WindowsXP on it and is 100 times faster than that pig of a Dell laptop. Pretty funny... 20 year old technology is so much faster.
A little back-story on the laptop. I was going through three laptops that I had just sitting in the closet... to clean them up to dispose of them. Of the three... I only had the password for this one. When I turned it on it immediately opened up and asked for my passwor... and then proceeded to work at lighting speed. The Dell I bought five years ago would take several minutes (5 or more minutes) to open up and then was agonizingly slow... 10 minutes or more to open the first program. I don't even have that much loaded onto it. Crazy...
Anyway... work on Big Ass Bird continues. I have contined to tack on and partically weld the upper and lower 2-piece cross tubes. That jig I made works perfect! Took all of five mintues to grind out the area where the tube I was clamping to would nest...
Overhead 2-piece partially welded
Lower tube notched and clamped in alignment jig
October 4 - 9, 2021 For Love...
of the Game.
I appoach the build each time like a player on a ball team... giving myself a mental high-five and pep talk before I open the door to my work shop. Each session on BIG Ass Bird is a game played between knowns and unknowns. My skill as a player comes into play each time I play the game. (funny... it's the end of baseball season and I'm making anologies to it)
"Clear the mechanism." as Billy Chaple would say...
You win the game by playing "small ball"... singles and doubles... bringing in those run, one-by-one. Then a few triples... a few home runs, and the occasional Grand Slam! Winning each game so that you can compete in the series at the end of the season.
Today's game... it's a hot one out there... heating the tubing around one cluster and then only welding part of the cluster. Move on to the next one. (hitting those singles...) I'm not sure if I explained this before, but I'm doing this to keep the mount from twisting, or should I say, twisting too much.
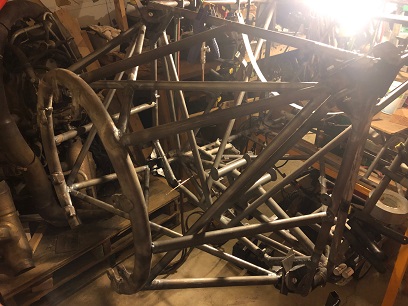
Most of the engine mount welded up now... so with the fitting up of the last main piece... and tacking on of it, and doing some partial welds on that, and partial welds to some additional clusters, I released the beast from its wooden jig. (A triple...) I did this so that I could easily get at some of the weld clusters that were blocked by the plywood jig.
Another game won... time to prepare for tomorrow's game.
Play Ball!
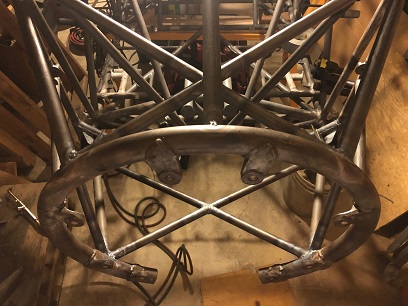
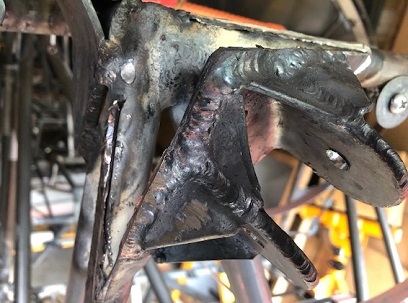
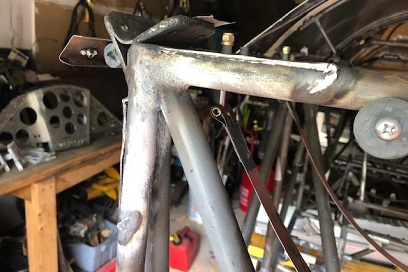
Beast... released from jig!
Fuselage on side... ready for more welding.
by the way... "For Love of the Game" with Kevin Costner... GREAT baseball movie!


 About
11 months later than I thought I'd be starting the whole engine
mount build... but better late than not to have started on
it again at all. It was a BIG mental challenge to make those
3-piece mounting brackets AGAIN. Wow... WOW!!!
About
11 months later than I thought I'd be starting the whole engine
mount build... but better late than not to have started on
it again at all. It was a BIG mental challenge to make those
3-piece mounting brackets AGAIN. Wow... WOW!!!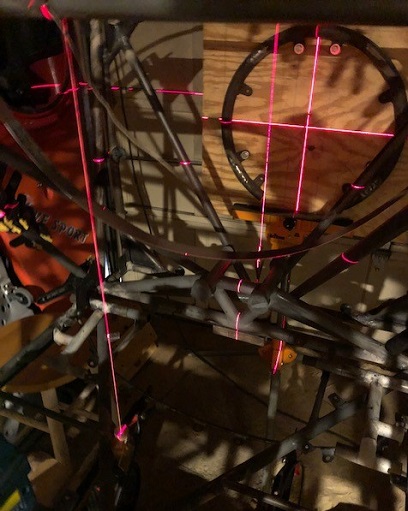
 Thought I wouldn't find a tube lying around that would be the right size and either spend hours looking for something not there, or just wait a few days for a new one to arrive at the front door... but the second tube I picked up fit perfectly inside the sleeve tube; ID was slightly larger than the OD on the other. Beautiful!